Kenwood TH-K20 Operation Manual
Kenwood TH-K20 Manual
 |
View all Kenwood TH-K20 manuals
Add to My Manuals
Save this manual to your list of manuals |
Kenwood TH-K20 manual content summary:
- Kenwood TH-K20 | Operation Manual - Page 1
INSTRUCTION MANUAL 144 MHz FM TRANSCEIVER TH-K20A TH-K20E 430 MHz FM TRANSCEIVER TH-K40A TH-K40E NOTIFICATION This equipment complies with the essential requirements of Directive 2014/53/EU. Restrictions This equipment requires a licence and is intended for use in - Kenwood TH-K20 | Operation Manual - Page 2
KENWOOD FM transceiver. KENWOOD always provides Amateur Radio products which surprise and excite serious hobbyists. This transceiver is no exception. KENWOOD this Manual The writing conventions described below have been followed to simplify instructions and avoid unnecessary repetition. Instruction - Kenwood TH-K20 | Operation Manual - Page 3
are expressly approved in the instruction manual. The user could lose following measures: • Reorient or relocate the receiving antenna. • Increase the separation between the equipment and ion battery recycling in your area, call (toll free) 1-800-8-BATTERY (1-800-822-8837). KENWOOD's involvement - Kenwood TH-K20 | Operation Manual - Page 4
from the antenna covering. Transmitting at such a time may result in a high-frequency burn. • If an abnormal odor or smoke is detected coming from the transceiver, switch the transceiver power off immediately, remove the battery pack from the transceiver, and contact your KENWOOD dealer. • Use - Kenwood TH-K20 | Operation Manual - Page 5
• Danger of explosion if the battery is incorrectly replaced; replace only with the same type. • When operating the transceiver in areas where the air is dry, it is easy to build up an electric charge (static electricity). When using an earphone accessory in such conditions, it is possible for the - Kenwood TH-K20 | Operation Manual - Page 6
water as soon as possible, without rubbing your eyes. Go to the hospital immediately. If left untreated, it may cause eye-problems. • Do not charge the battery for longer than the specified time! If the battery pack has not finished charging even after the regulated time has passed, stop it. The - Kenwood TH-K20 | Operation Manual - Page 7
CONTENTS PREPARATION...1 Supplied Accessories 1 Installing the Antenna 1 Installing the Battery Pack 2 Installing the Belt Clip 2 Charging the Battery Pack 3 Connecting to the PC 5 GETTING ACQUAINTED 6 Panel...6 Display...8 BASIC OPERATION 10 Switching the Power On/Off 10 Adjusting the - Kenwood TH-K20 | Operation Manual - Page 8
FUNCTIONS 40 Manual Dialing Battery Saver 47 APO (Auto Power Off 48 Narrow Band FM Battery Type 53 WEATHER ALERT (TH-K20A K TYPE ONLY 54 Weather Alert On/ Off 54 Weather Channel 54 Weather Channel Scan 54 APPENDIX...55 OPTIONAL ACCESSORIES 55 MAINTENANCE 55 TROUBLESHOOTING 56 TRANSCEIVER - Kenwood TH-K20 | Operation Manual - Page 9
PREPARATION SUPPLIED ACCESSORIES After carefully unpacking the transceiver, identify the items listed in the table below. We recommend you keep the box and packaging for shipping. Item Antenna Li-ion battery pack Battery charger Belt clip Warranty card Instruction manual Comments KNB-63L with AC - Kenwood TH-K20 | Operation Manual - Page 10
BELT CLIP If desired, you can install the supplied belt clip to the transceiver. 1 Remove the battery pack, as described above. 2 To install the belt clip, align the guides of the belt clip with the grooves on the rear of the battery pack, then slide the belt clip into place until the lock lever - Kenwood TH-K20 | Operation Manual - Page 11
5 When charging is completed, the indicator flashing green. Remove the battery pack or the transceiver from the charging slot. • When the charger will not be used may remain unlit. To resolve this problem, reinsert the battery pack after cleaning the battery pack contacts and the charger terminals. - Kenwood TH-K20 | Operation Manual - Page 12
from the charger and wait until it reaches a normal temperature before charging it again. Battery Life Before you operate the transceiver outside, using a battery pack, it is important to know how long the battery pack will last. The operating times listed in the table below are measured under the - Kenwood TH-K20 | Operation Manual - Page 13
) Note: Refer to the KVC-22 instruction manual for how to connect the charger to transceiver to a PC. Plug the Speaker/ Microphone connector to the SP/MIC jack and the DB-9 connector to one of the COM (serial) ports on your PC. To PC PG-4Y To download the MCP-5A software, go to: https://www.kenwood - Kenwood TH-K20 | Operation Manual - Page 14
GETTING ACQUAINTED PANEL Microphone Speaker PWR/VOL control Turn clockwise to switch the transceiver ON. To switch the transceiver OFF, turn counterclockwise until a click sounds. Rotate to adjust the volume level. TX-RX LED Lights red while transmitting and green while receiving a signal. ENC - Kenwood TH-K20 | Operation Manual - Page 15
Keypad Use the keypad to perform the following operations. Additionally, you can use the 10-key keypad for direct frequency entry and manually transmitting DTMF tones. Key name [F] A Press Operation [KEY] To enter MHz tuning mode. To turn the Function ON. [F] - [KEY] To turn the Function OFF. - Kenwood TH-K20 | Operation Manual - Page 16
Also, attach an optional PG-4Y PC interface cable to this jack, to connect the transceiver to a PC {page 5}. DISPLAY Indicator 8 Description Appears while using Medium output power. Weather Alert is ON. Blinks when receiving a signal. (TH-K20A K type only) Appears when the Reverse function is ON. - Kenwood TH-K20 | Operation Manual - Page 17
set to minus. Appears when the Shift function is set to -7.6 MHz. (TH-K40E (E type) only) Displays the operating frequency, setting information, etc. while in Narrow FM mode. Appears while in Function mode. Performs as an S meter when receiving a signal and displays the battery power remaining while - Kenwood TH-K20 | Operation Manual - Page 18
ON. • The power on message momentarily appears on the display. Turn the PWR/VOL control counterclockwise to switch the transceiver OFF. ADJUSTING THE VOLUME Rotate the PWR/VOL control to adjust the volume. Clockwise increases the volume and counterclockwise decreases it. • If you are not - Kenwood TH-K20 | Operation Manual - Page 19
Mode and return to normal VFO Mode. 4 Continue adjusting the frequency as necessary, using the ENC control. TRANSMITTING/ RECEIVING 1 To transmit, hold the transceiver approximately 5 cm (2 inches) from your mouth, then press and hold [PTT] and speak into the microphone in your normal tone of voice - Kenwood TH-K20 | Operation Manual - Page 20
step size. ◆ If you rotate the ENC control while entering the frequency, the transceiver clears the entry. SELECTING AN OUTPUT POWER Selecting a lower transmit power is the best way to reduce battery consumption, if communication is still reliable. Press [LOW] to toggle between high, medium - Kenwood TH-K20 | Operation Manual - Page 21
capacity when you transmit in low power. To check the remaining capacity: • The bar-graph shows the remaining battery capacity. : High battery power : ˢ : ˢ : Low battery power or no display : Recharge or replace the batteries. Note: You may not be able to transmit at high power if the - Kenwood TH-K20 | Operation Manual - Page 22
cannot be locked: [F], [PTT], [LAMP], [MONI], [SQL], PWR/VOL control and microphone PF key. 2 Press [F] (1s) to unlock the keys. Note: ◆ You cannot perform the Transceiver Reset while the Lock function is ON. ◆ You can select the lock type from Menu No. 3. 14 - Kenwood TH-K20 | Operation Manual - Page 23
familiar with the Menu system, you will appreciate its versatility. You can customize the various timings, settings and programming functions on this transceiver to meet your needs without using many controls and switches. MENU ACCESS 1 Press [MENU]. • A brief explanation of the Menu and the Menu - Kenwood TH-K20 | Operation Manual - Page 24
type KEY/ FRQ/ KEY.FRQ KEY.FRQ 4 SAVE Battery saver OFF/ 0.2/ 0.4/ 0.6/ 0.8/ 1.0/ 2.0/ 3.0/ 4.0/ 5.0 1.0 (sec) (sec) 5 APO Automatic Power- OFF/ 30/ 60/ 90/ 120/ OFF 180 (min) 30 (min) TH-K20A/E: 6 P.VFO Programmable VFO 136 ~ 173 MHz TH-K40A/E: It differs 400 ~ 469 MHz between the - Kenwood TH-K20 | Operation Manual - Page 25
MEDIUM 23 PF KEY Panel PF key 1750/ WX/ N.FM/ PR.SCAN/ M.DISP It differs between the model and VFO 25 PF 2 Microphone PF 2 key SHIFT/ REV/ 1750/ WX/ N.FM/ PR.SCAN/ MR M.DISP/ SQL/ LOW/ 26 PF 3 Microphone PF 3 Hz TX hold OFF/ ON OFF 34 BATT Battery type LI-ION/ ALKALI LI-ION 35* WX - Kenwood TH-K20 | Operation Manual - Page 26
MEMORY CHANNELS In Memory channels, you can store frequencies and related data that you often use. Then you need not reprogram the data every time. You can quickly recall a programmed channel by simple operation. A total of 200 Memory channels are available. SIMPLEX & REPEATER OR ODD-SPLIT MEMORY - Kenwood TH-K20 | Operation Manual - Page 27
Parameter Simplex & Repeater Odd-split Narrow FM Yes Yes Beat shift Yes Yes * Program Scan Memory and the Priority channel cannot be stored as ON or OFF for Memory channel lockout. STORING - Kenwood TH-K20 | Operation Manual - Page 28
STORING ODD-SPLIT REPEATER FREQUENCIES Some repeaters use a receive/transmit frequency pair with a non-standard offset. If you store two separate frequencies in a memory channel, you can operate on those repeaters without programming the offset frequency and direction. 1 Store the desired receiving - Kenwood TH-K20 | Operation Manual - Page 29
Note: ◆ You cannot recall an empty memory channel. An error beep sounds. ◆ You cannot recall the Program Scan memory channels (L0/U0 ~ L2/U2) or Priority Channel (Pr) using the numeric keypad. ◆ When recalling an odd-split memory channel, " " and " " appear on the display. Press [REV] (Reverse - Kenwood TH-K20 | Operation Manual - Page 30
[MONI]. CLEARING A MEMORY CHANNEL To clear the data from an individual memory channel: 1 Recall the memory channel you want to clear. 2 Turn the transceiver OFF 3 Press [MR] + Power ON. • A confirmation message appears. 4 Press [MR] to clear the channel data. • The contents of the memory channel are - Kenwood TH-K20 | Operation Manual - Page 31
instantly, no matter the frequency on which you are operating the transceiver. For instance, you may use the Call Channel as an Scan will be useful. The default Call Channel frequency is 144.000 MHz (TH-K20A/E)/ 430.000 MHz (TH-K40A/E). Note: Unlike memory channels 0 to 199, the Call Channel cannot - Kenwood TH-K20 | Operation Manual - Page 32
(L0/U0 ~ L9/U9) and the Priority channel (Pr), the Memory Channel Lockout information is not copied. CHANNEL DISPLAY MODE While in this mode, the transceiver displays only memory channel numbers (or Memory names if they have been stored) instead of frequencies. Press [PTT] + [MR] + Power ON. • The - Kenwood TH-K20 | Operation Manual - Page 33
Note: ◆ To enter the Channel Display Mode, you must have at least one memory channel that contains the data. ◆ If the memory channel contains the Memory name data, the Memory name is displayed in place of the "CH" characters. ◆ You cannot enter Channel Display mode while Key Lock is ON. While in the - Kenwood TH-K20 | Operation Manual - Page 34
all the frequencies available for the 2 m band. When the current VFO receiving frequency is outside the Program Scan frequency range {page 27}, the transceiver scans the entire frequency range available for the current VFO. 1 Press [VFO]. 2 Rotate the ENC control to select the frequency outside of - Kenwood TH-K20 | Operation Manual - Page 35
[MONI], [LAMP], [F], [SQL], [F] (1s), or [F] - [LAMP]. Note: ◆ If you press [MONI], Program Scan temporarily pauses. Release [MONI] to resume scanning. ◆ The transceiver stops scanning when it detects a signal. ◆ If more than 2 Program Scan channel pairs are stored and the frequency range among the - Kenwood TH-K20 | Operation Manual - Page 36
other frequencies. In this case, use the Priority Scan function. Priority Scan checks the activities of the Priority Channel every 3 seconds. If the transceiver detects a signal on the Priority Channel, it recalls the frequency. Note: If you do not operate any control or key for 3 seconds after - Kenwood TH-K20 | Operation Manual - Page 37
, the Priority Channel is recalled only when the programmed tone/ code matches. ◆ Press and hold [MONI] to pause Priority Scan when the transceiver is not displaying the Priority Channel. Release [MONI] to resume Priority Scan. ◆ If you clear the Priority Channel, Priority Scan stops. ◆ You - Kenwood TH-K20 | Operation Manual - Page 38
can choose one of the following modes. The default is Time-operated mode. TO Time Operated mode CO Carrier Operated mode SEEK Seek mode The transceiver remains on a busy frequency or Memory channel for approximately 5 seconds, and then continues to scan even if the signal is still present. The - Kenwood TH-K20 | Operation Manual - Page 39
time you press [SHIFT], the offset direction changes as follows: Simplex operation (no offset Simplex operation (no offset) • If you are using a TH-K40E (E type) model, the offset direction changes as follows: Simplex operation (no offset 7.6 MHz) ➡ Simplex operation (no offset) If the offset - Kenwood TH-K20 | Operation Manual - Page 40
SELECTING AN OFFSET FREQUENCY To access a repeater which requires an odd-split frequency pair, change the offset frequency from the default which is used by most repeaters. 1 Enter Menu mode and access Menu No. 7 (OFFSET). 2 Rotate the ENC control to select the appropriate offset frequency value. • - Kenwood TH-K20 | Operation Manual - Page 41
tone function is On. 2 Press [T.SEL] (1s) to run the Tone Frequency ID scan. • Scan starts and "T.SCAN" appears on the display. • While the transceiver is receiving a signal during Tone Frequency Scan, the signal is emitted from the speaker. • When the tone frequency is identified, a beep sounds and - Kenwood TH-K20 | Operation Manual - Page 42
-K20A/ TH-K40A M type and TH-K40E (E type) model to "ON", the ARO function will not operate. REVERSE FUNCTION After setting a separate receive and transmit frequency, you can exchange these frequencies using the Reverse function. This allows you to manually check the strength of signals you receive - Kenwood TH-K20 | Operation Manual - Page 43
a 1750 Hz tone. It is also possible to program [1750] on the front panel as a [PF] key for transmitting a 1750 Hz tone. Note: The transceiver continuously transmits a 1750 Hz tone until you release the [PF] key (1750). Some repeaters in Europe must receive continuous signals for a certain period of - Kenwood TH-K20 | Operation Manual - Page 44
frequency selection, press [PTT]. 4 Press any key other than [MONI], [LAMP], or [PTT] to set the selected frequency. 5 When you are called: The transceiver squelch opens only when the selected CTCSS tone is received. When you make a call: Press and hold [PTT], then speak into the microphone. 36 - Kenwood TH-K20 | Operation Manual - Page 45
CTCSS Frequency Scan This function scans through all CTCSS frequencies to identify the incoming CTCSS frequency on a received signal. You can use this function to find which CTCSS frequency is used by your group. 1 Press [TONE] 2 times to turn the CTCSS function ON. • Each time you press [TONE], the - Kenwood TH-K20 | Operation Manual - Page 46
DCS code selection, press [PTT]. 4 Press any key other than [MONI], [LAMP], or [PTT] to set the selected frequency. 5 When you are called: The transceiver squelch opens only when the selected DCS code is received. When you make a call: Press and hold [PTT], then speak into the microphone. DCS Code - Kenwood TH-K20 | Operation Manual - Page 47
CROSS TONE You can set separate signaling types by TX and RX for when you access a repeater that uses different encode/ decode signaling. 1 Press [TONE] 4 times to activate the Cross Tone function. • Each time you press [TONE], the selection changes as follows: Tone ( ) ➡ CTCSS ( ) ➡ DCS ( ) ➡ Cross - Kenwood TH-K20 | Operation Manual - Page 48
DTMF FUNCTIONS This transceiver provides you with 16 dedicated DTMF memory channels. You can store a DTMF code (16 digits max.) in each of these channels to recall later for speed dialing. MANUAL DIALING The numeric keypad functions as a DTMF keypad; the 12 keys found on a touchtone phone plus 4 - Kenwood TH-K20 | Operation Manual - Page 49
to the left or right by pressing [VFO] or [MR]. • Press [CALL] to delete the character at the current cursor position. • On the transceiver display, DTMF code " " is represented by "E" and "#" is represented by "F". • When a space is entered, it becomes a "Pause" code. 5 Press [F] to select the DTMF - Kenwood TH-K20 | Operation Manual - Page 50
DTMF TX HOLD This function causes the transceiver to remain in transmit mode for 2 seconds after you release each key. Therefore, you can release [PTT] while sending DTMF tones through manual dialing. 1 Enter Menu mode and access Menu No. 30 (DT.HOLD), then press [F]. 2 Rotate the ENC control to - Kenwood TH-K20 | Operation Manual - Page 51
AUXILIARY FUNCTIONS PROGRAMMABLE VFO If you want to limit the operating frequencies within a certain range, program the lower and upper frequency limits to the programmable VFO parameters. For example, if you select 144 MHz for the lower limit and 145 MHz for the upper limit, the tunable range will - Kenwood TH-K20 | Operation Manual - Page 52
set the selected frequency step size. Note: If you change to a frequency step size that does not match the current operating frequency, the transceiver automatically adjusts the frequency to match the new frequency step size. TONE ALERT Tone Alert provides an audible alarm when signals are received - Kenwood TH-K20 | Operation Manual - Page 53
Alert is ON, APO does not turn the power OFF. ◆ If you switch the transceiver OFF while the " " icon is blinking, the transceiver does not back up the elapsed time. ◆ When Tone Alert is ON, you can use exit Menu mode. Note: If the Power ON Message is deleted, "TH-K20" or "TH-K40" is displayed. 45 - Kenwood TH-K20 | Operation Manual - Page 54
the setting. 3 Press [MENU] or [PTT] to exit Menu mode. The transceiver generates the following warning beeps even if the beep function is turned OFF. • APO them and "KEY.FRQ" locks both the keys and the frequencies. • Manual DTMF and Autodial can still be performed while either lock is active. 1 - Kenwood TH-K20 | Operation Manual - Page 55
. PWR/VOL control PTT MONI F SQL LAMP BATTERY SAVER The Battery Saver extends the operating time of the transceiver. It automatically activates when the squelch is closed and no key is pressed for more than 10 seconds. To reduce battery consumption, this function shuts the receiver circuit OFF - Kenwood TH-K20 | Operation Manual - Page 56
time when no keys are pressed and no controls are adjusted. ◆ The APO warning beep sounds and "APO" appears 1 minute before the transceiver turns OFF. NARROW BAND FM OPERATION The transceiver operates in normal FM deviation (±5 kHz) mode for both transmitting and receiving. You can also operate the - Kenwood TH-K20 | Operation Manual - Page 57
status can be stored to each Memory channel. VOX (VOICE-OPERATED TRANSMIT) VOX eliminates the necessity of manually switching to Transmit mode each time you want to transmit. The transceiver automatically switches to Transmit mode when the VOX circuitry senses that you have begun speaking into the - Kenwood TH-K20 | Operation Manual - Page 58
If transmitting does not begin, readjust the VOX Gain so that the transceiver transmits while you are speaking. To readjust the gain, press and hold regardless of the setting in Menu No. 17. VOX Delay Time If the transceiver returns to receive mode too quickly after you stop speaking, the end of your - Kenwood TH-K20 | Operation Manual - Page 59
] (if 1750 Hz is programmed) to transmit a 1750 Hz tone, the VOX Delay Time is not reflected. ◆ If the DCS function is ON, the transceiver remains in Transmit mode for the duration set by the VOX Delay Time. It then sends a Turn-Off Code to close the receiving party's squelch - Kenwood TH-K20 | Operation Manual - Page 60
from transmitting, or to eliminate accidentally transmitting while carrying the transceiver. 1 Enter Menu mode and access Menu No. 21 ( 1750/ WX / N.FM/ PR.SCAN (Priority scan). Default setting: TH-K20A K type: WX, TH-K20A/ TH-K40A M type: M.DISP TH-K20E/ TH-K40E (E type): - Kenwood TH-K20 | Operation Manual - Page 61
SHIFT/ REV/ 1750/ WX / N.FM/ PR.SCAN (Priority scan)/ M.DISP (Memory display type BATTERY TYPE Set the battery type to match the type of batteries you are using in the transceiver. If the battery type is not set properly, the battery indicator will not display the correct battery - Kenwood TH-K20 | Operation Manual - Page 62
WEATHER ALERT (TH-K20A K TYPE ONLY) Weather Alert is available only in the USA and Canada. When activated, this function will check for a received NOAA 1050 Hz tone. When - Kenwood TH-K20 | Operation Manual - Page 63
KENWOOD service center. Include a full description of the problem(s) experienced. Include your telephone number along with your name and address in case the service technician needs to contact you. If available, also include your fax number and e-mail address. Do not return accessory items - Kenwood TH-K20 | Operation Manual - Page 64
. TROUBLESHOOTING The problems described in this table are commonly encountered operational malfunctions and are usually not caused by circuit failure. Problem Solution Nothing appears on the display when the transceiver is switched ON, or the display is blinking ON and OFF. The battery pack - Kenwood TH-K20 | Operation Manual - Page 65
Problem battery pack voltage is too low to transmit. Change or replace the battery transceiver. These symptoms are not malfunctions. Receiving Signals In Cities: When you receive signals in cities, the receiver's entire antenna Beat Frequencies cannot be eliminated. TH-K20A/E: 152.69375/ 152.695/ 152 - Kenwood TH-K20 | Operation Manual - Page 66
type: "PA.RST" (Partial Reset) or "FL.RST" (Full Reset). 5 Press [F]. • "SURE ?" appears. 6 Press [F] again to reset the transceiver. Note: When the lock function is on, you cannot reset the transceiver using Key operation. Menu Operation 1 Enter Menu mode and access Menu No. 99 (RESET), then press - Kenwood TH-K20 | Operation Manual - Page 67
) TX & RX Operation Frequency range TX (MHz) RX Mode Antenna impedance Operating temperature range Operating Voltage Frequency stability Dimensions W x H x D (projections not included) Weight TH-K20A/E TH-K40A/E 144 ~ 148 (K/M) 144 ~ 146 (E) 430 ~ 440 136 - Kenwood TH-K20 | Operation Manual - Page 68
© 2019
-
 1
1 -
 2
2 -
 3
3 -
 4
4 -
 5
5 -
 6
6 -
 7
7 -
8
-
9
-
10
-
11
-
12
-
13
-
14
-
15
-
16
-
17
-
18
-
19
-
20
-
21
-
22
-
23
-
24
-
25
-
26
-
27
-
28
-
29
-
30
-
31
-
32
-
33
-
34
-
35
-
36
-
37
-
38
-
39
-
40
-
41
-
42
-
43
-
44
-
45
-
46
-
47
-
48
-
49
-
50
-
51
-
52
-
53
-
54
-
55
-
56
-
57
-
58
-
59
-
60
-
61
-
62
-
63
-
64
-
65
-
66
-
67
-
68
 |
 |
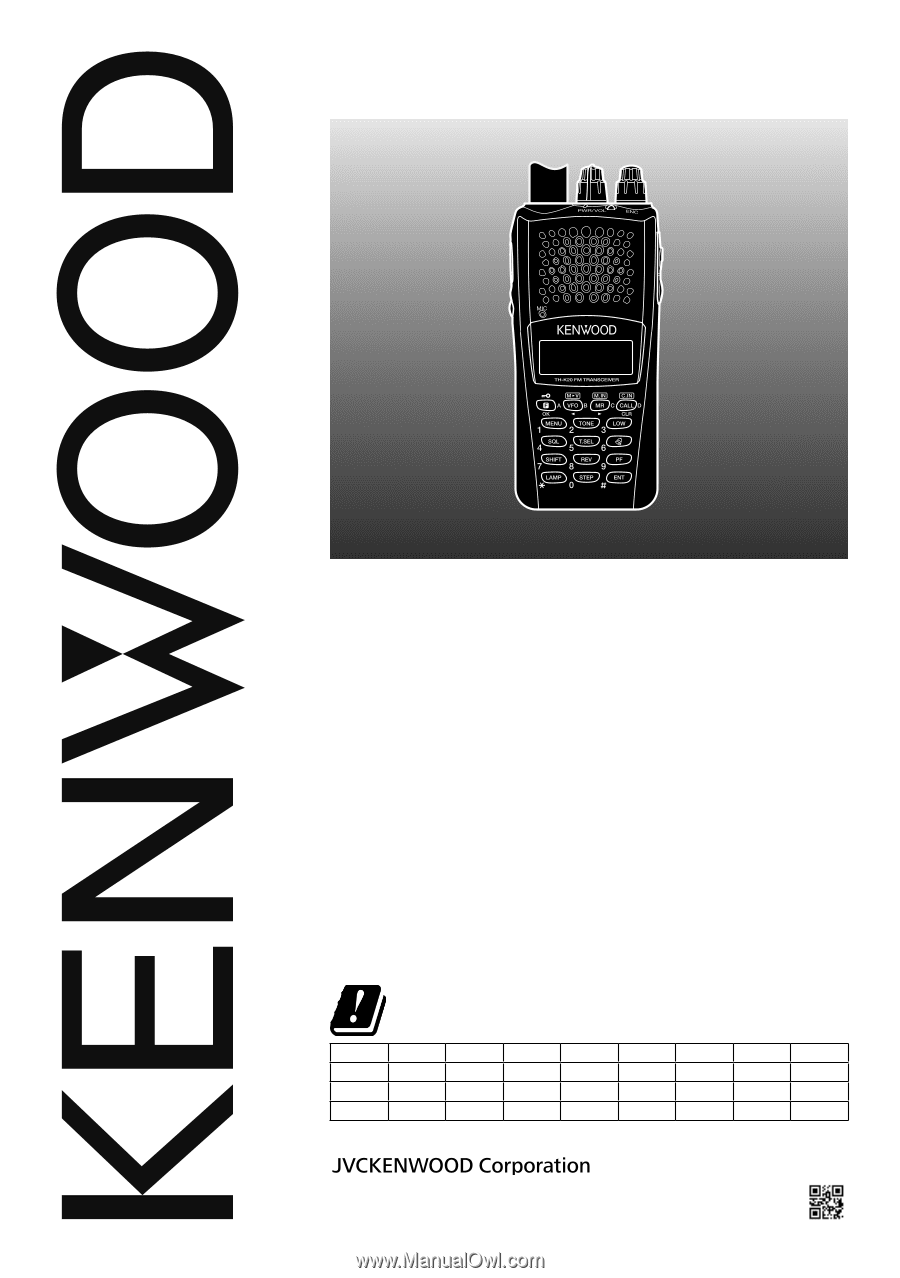
INSTRUCTION MANUAL
TH-K40A
TH-K40E
430 MHz FM TRANSCEIVER
NOTIFICATION
This equipment complies with the essential requirements of
Directive 2014/53/EU.
Restrictions
This equipment requires a licence and is intended for use in the
countries as below.
AT
BE
DK
FI
FR
DE
GR
IS
IE
IT
LI
LU
NL
NO
PT
ES
SE
CH
GB
CY
CZ
EE
HU
LV
LT
MT
PL
SK
SI
BG
RO
HR
TR
ISO3166
144 MHz FM TRANSCEIVER
TH-K20A
TH-K20E
B62-2365-20 (K, E, M)