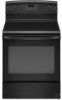
KitchenAid KERS205TBL Use and Care Guide
KitchenAid KERS205TBL - ARCHITECTII - Electric Range Manual
 |
UPC - 883049134147
View all KitchenAid KERS205TBL manuals
Add to My Manuals
Save this manual to your list of manuals |
KitchenAid KERS205TBL manual content summary:
- KitchenAid KERS205TBL | Use and Care Guide - Page 1
ELECTRIC RANGE ARCHITECT® SERIES II Use & Care Guide For questions about features, operation/performance, parts, accessories or service, call: 1-800-422-1230 or visit our website at www.kitchenaid.com In Canada, call for assistance, installation and service, call: 1-800-807-6777 or visit our website - KitchenAid KERS205TBL | Use and Care Guide - Page 2
15 Drying 16 Thaw and Serve 17 More Options 18 Favorites 20 RANGE CARE 21 Self-Cleaning Cycle 21 General Cleaning 22 Oven Light 23 Appliance Outlets 23 Oven Door 24 Storage Drawer 24 TROUBLESHOOTING 25 ASSISTANCE OR SERVICE 26 In the U.S.A 26 Accessories 26 In Canada 26 WARRANTY 27 - KitchenAid KERS205TBL | Use and Care Guide - Page 3
to follow these instructions can result in death or serious burns to children and adults. Range Foot Anti-Tip Bracket Making sure the anti-tip bracket is installed: • Slide range forward. • Look for the anti-tip bracket securely attached to floor or wall. • Slide range back so rear range foot is - KitchenAid KERS205TBL | Use and Care Guide - Page 4
RANGE FORWARD, LOOK FOR ANTI-TIP BRACKET SECURELY ATTACHED TO FLOOR OR WALL, AND SLIDE RANGE BACK SO REAR RANGE range. ■ User Servicing - Do not repair or replace any part of the range unless specifically recommended in the manual. All other servicing Other surfaces of the appliance may become hot - KitchenAid KERS205TBL | Use and Care Guide - Page 5
COOKTOP USE This manual covers several different models. The range you have purchased may have some and LO. Push in and turn to the desired heat setting. Use the following chart as a guide when setting heat levels. SETTING RECOMMENDED USE Double and Triple Elements ■ Large diameter cookware. ■ - KitchenAid KERS205TBL | Use and Care Guide - Page 6
Double and Triple Elements (on some models) The Double and Triple elements offer flexibility depending on the size of the cookware. Single size can be used in the same way as a regular element. The double and triple sizes combine the single, dual, and outer element and is recommended for larger - KitchenAid KERS205TBL | Use and Care Guide - Page 7
melt, such as plastic or aluminum foil, to touch any part of the entire cooktop. ■ To avoid damage to the Use the following chart as a guide for cookware material characteristics. COOKWARE Ceramic or Ceramic glass ■ Follow manufacturer's instructions. ■ Heats slowly, but unevenly. ■ - KitchenAid KERS205TBL | Use and Care Guide - Page 8
desired function. Hold down the pad a few seconds, or until the desired function appears in the display. Oven Display When power is supplied to the range or after a power interruption, "12:00" and "POWER LOSS" will be displayed. Press CANCEL to clear "POWER LOSS." When the oven is in use, the - KitchenAid KERS205TBL | Use and Care Guide - Page 9
Activating and Canceling the Clock/Day of Week Display: 1. Press SETUP. 2. Select CLOCK using the left Quickset pad. 3. Press the right Quickset pad to scroll until DISABLE is displayed. 4. Select DISABLE using the left Quickset pad. 5. Select TIME using the left Quickset pad. 6. Select ON or OFF - KitchenAid KERS205TBL | Use and Care Guide - Page 10
and can either be set to come on automatically or can be set manually as desired. Only Bake or Cook/Hold Bake will operate when the oven must be programmed during this 90-minute period before AUTO Sabbath Mode is active. MANUAL sets the oven to Sabbath Mode for 72 hours. "SABBATH" and "SABBATH - KitchenAid KERS205TBL | Use and Care Guide - Page 11
to exit. Press any pad to "wake up" the display. Service This area of the oven control displays the KitchenAid Customer Service toll-free phone number. 1. Press SETUP. 2. Use right Quickset pad to scroll to SERVICE. 3. Select SERVICE using the left Quickset pad to display the number. 4. Press SETUP - KitchenAid KERS205TBL | Use and Care Guide - Page 12
meat thermometer is not supplied with this appliance. Follow manufacturer's directions for using a ■ Crisp crusts ■ Follow manufacturer's instructions. Ovenproof glassware, ceramic glass or then lift out. Use the following illustration and chart as a guide. 7 6 5 4 3 2 1 FOOD RACK POSITION(S) - KitchenAid KERS205TBL | Use and Care Guide - Page 13
bakeware and oven walls. Use the following chart as a guide. NUMBER OF POSITION ON RACK PAN(S) 1 Center of be ordered. See "Assistance or Service" section to order. Ask for Part Number 4396923. ■ For proper draining browning to be slightly lighter if the range is installed on a 208-volt circuit. - KitchenAid KERS205TBL | Use and Care Guide - Page 14
of meats and poultry. Use the meat thermometer according to the manufacturer's instructions. Convect Bake (on some models) Convect Bake can be used to space between the cookware and the sides of the oven. Allow the range to preheat before placing food in the oven. During convection baking preheat, - KitchenAid KERS205TBL | Use and Care Guide - Page 15
Convect Roast (on some models) WARNING Food Poisoning Hazard Do not let food sit in oven more than one hour before or after cooking. Doing so can result in food poisoning or sickness. Convection Roast can be used to roast meat and poultry, and vegetables. To Convect Roast: Before convection roasting - KitchenAid KERS205TBL | Use and Care Guide - Page 16
the drying process. 2. Place the magnetic door spacer Part Number 8010P146-60 over the plunger switch. The spacer to room temperature before testing for doneness. DRYING GUIDE CHART ■ The length of drying times vary due your local agricultural department service for additional information FOOD - KitchenAid KERS205TBL | Use and Care Guide - Page 17
FOOD VARIETIES BEST FOR DRYING PREPARATION APPROX. DRY TEST FOR DONENESS TIME AT 140°F AT MINIMUM DRY TIME (60°C) [HOURS]** Pineapple Fresh or canned Wash peel and remove thorny eyes. Slice lengthwise and remove the small core. Cut crosswise into ½" (12.0 mm) slices. Canned: 14 to 18 Fresh: - KitchenAid KERS205TBL | Use and Care Guide - Page 18
THAW AND SERVE CHART FROZEN ITEMS* THAW-SERVE TIME** Whole Pies and Cakes Pies: Lemon meringue, cream, pecan, chocolate, sweet potato, French silk Cakes: Vanilla, chocolate, coconut, and three-layer cakes, pound cake, Boston cream pie 1. Remove frozen food from outer carton and wrapping. 2. - KitchenAid KERS205TBL | Use and Care Guide - Page 19
To Set Delay Convect: (on some models) 1. Press MORE OPTIONS. 2. Use the right Quickset pad to scroll to DELAY. 3. Select DELAY using the left Quickset pad. 4. Select Delay time using Quickset pads or the number pads. 5. Use the right Quickset pad to scroll to CONVECT. 6. Select CONVECT using the - KitchenAid KERS205TBL | Use and Care Guide - Page 20
WARNING Favorites To Create a New Favorite Recipe: 1. Press FAVORITES. Food Poisoning Hazard Do not let food sit in oven more than one hour before or after cooking. Doing so can result in food poisoning or sickness. 2. Use the right Quickset pad to scroll to CREATE NEW. 3. Select CREATE NEW using - KitchenAid KERS205TBL | Use and Care Guide - Page 21
RANGE CARE WARNING Self-Cleaning Cycle (on some models) The Self-Cleaning cycle the Self-Cleaning cycle. Keep children away from oven during Self-Cleaning cycle. Failure to follow these instructions can result in burns. IMPORTANT: The health of some birds is extremely sensitive to the fumes given - KitchenAid KERS205TBL | Use and Care Guide - Page 22
and cooktop are cool. Always follow label instructions on cleaning products. Soap, water and tomato, should be cleaned as soon as the entire range is cool. These spills may affect the finish. . ■ KitchenAid® Stainless Steel Cleaner and Polish (sample included): See "Assistance or Service" section to - KitchenAid KERS205TBL | Use and Care Guide - Page 23
. If this happens, a light coating of vegetable oil applied to the rack guides will help them slide. ■ Steel-wool pad STORAGE DRAWER OR WARMING DRAWER ( turning clockwise. 5. Plug in range or reconnect power. Appliance Outlets (on some models) The 120-volt appliance outlets located on the control - KitchenAid KERS205TBL | Use and Care Guide - Page 24
Door For normal range use, it is not suggested to remove the oven door. However, if removal is necessary, make sure the oven is off and cool. Then, follow these instructions. The oven into the rails in the range. 2. Support the front of the drawer and gently push in until the drawer is closed. 24 - KitchenAid KERS205TBL | Use and Care Guide - Page 25
TROUBLESHOOTING Try the solutions suggested here first in order to avoid the cost of an unnecessary service call. Nothing will operate ■ Has a household fuse blown, or has a circuit breaker tripped? Replace the fuse or reset the circuit breaker. If the problem continues, call an electrician. - KitchenAid KERS205TBL | Use and Care Guide - Page 26
calling for assistance or service, please check "Troubleshooting." It may save you the cost of a service call. If you still need help, follow the instructions below. When calling, please know the purchase date and the complete model and serial number of your appliance. This information will help - KitchenAid KERS205TBL | Use and Care Guide - Page 27
service under this limited warranty. SECOND THROUGH FIFTH YEAR LIMITED WARRANTY ON CERTAIN COMPONENT PARTS In the second through fifth years from the date of purchase, when this appliance is operated and maintained according to instructions attached to or furnished with the product, KitchenAid - KitchenAid KERS205TBL | Use and Care Guide - Page 28
together for future reference. You must provide proof of purchase or installation date for in-warranty service. Write down the following information about your major appliance to better help you obtain assistance or service if you ever need it. You will need to know your complete model number and - KitchenAid KERS205TBL | Use and Care Guide - Page 29
Notes 29 - KitchenAid KERS205TBL | Use and Care Guide - Page 30
et vous disent comment réduire le risque de blessure et ce qui peut se produire en cas de non-respect des instructions. La bride antibasculement Dans les conditions de service normales, la cuisinière ne bascule pas. Elle peut cependant basculer si une force ou un poids excessif est appliqué sur - KitchenAid KERS205TBL | Use and Care Guide - Page 31
IMPORTANTES INSTRUCTIONS DE SÉCURITÉ AVERTISSEMENT : Pour réduire le risque d'incendie, de choc ne doivent pas être laissés seuls ou sans surveillance dans la pièce où la cuisinière est en service. Ne jamais laisser les enfants s'asseoir ou se tenir sur une partie quelconque de la cuisinière. ■ - KitchenAid KERS205TBL | Use and Care Guide - Page 32
IMPORTANTES INSTRUCTIONS DE SÉCURITÉ ■ Nettoyer la table de cuisson avec prudence - Si une éponge ou un chiffon mouillé est utilisé pour essuyer les renversements du four et les surfaces près de ces ouvertures, les portes du four, et les hublots des portes du four. CONSERVEZ CES INSTRUCTIONS 32 - KitchenAid KERS205TBL | Use and Care Guide - Page 33
I. Témoin lumineux "Element On" (élément en service) J. Repère de l'élément de surface Commandes la cuisson est terminée. Le non-respect de cette instruction peut causer un décès ou un incendie. Les chaleur désiré. Utiliser le tableau suivant comme guide lors du réglage des niveaux de chaleur. - KitchenAid KERS205TBL | Use and Care Guide - Page 34
avant ou après la cuisson. Le non-respect de cette instruction peut causer un empoisonnement alimentaire ou une maladie. Utiliser l'élément celui-ci est allumé. Cependant, le témoin indiquant "Element On" (élément en service) s'allume lorsque l'élément de maintien au chaud est utilisé. Le témoin " - KitchenAid KERS205TBL | Use and Care Guide - Page 35
■ Pour éviter d'endommager la table de cuisson, ne pas utiliser de pellicule de plastique pour couvrir les aliments car le plastique risque de fondre. ■ Utiliser des mitaines de four ou des poignées pour retirer les aliments. Utilisation : 1. Pour mettre en marche, appuyer sur WARM ZONE (zone de - KitchenAid KERS205TBL | Use and Care Guide - Page 36
comme guide pour les très rapidement et uniformément. Terre cuite ■ Suivre les instructions du fabricant. ■ Utiliser des réglages de température basse fond plat. ■ Pour plus de renseignements, communiquez avec votre service local d'agriculture. Les compagnies qui fabriquent des produits pour la - KitchenAid KERS205TBL | Use and Care Guide - Page 37
TABLEAU DE COMMANDE ÉLECTRONIQUE DU FOUR EF G H I J D C B A QP M O N ML K A. Préchauffage rapide (sur certains modèles) B. Convection (sur certains modèles) C. Cuisson au gril D. Cuisson au four E. Réglage marche/arrêt F. Favoris marche/arrêt G. Minuterie 1 H. Afficheur du four I. - KitchenAid KERS205TBL | Use and Care Guide - Page 38
Pour régler l'horloge sur un format de 12 ou 24 heures : L'horloge peut être réglée pour afficher l'heure selon un format de 12 heures ou de 24 heures. 1. Appuyer sur SETUP (réglage). 2. Sélectionner HORLOGE à l'aide de la touche de réglage rapide de gauche. 3. Utiliser la touche de réglage rapide - KitchenAid KERS205TBL | Use and Care Guide - Page 39
Lampe du four La lampe du four s'allume automatiquement à l'ouverture de la porte. Lorsque la porte du four est fermée, appuyer sur la touche OVEN LIGHT (lampe du four) pour allumer ou éteindre la lampe. Un signal sonore retentit à chaque pression sur la touche de la lampe du four. Si la lampe du - KitchenAid KERS205TBL | Use and Care Guide - Page 40
d'empoisonnement alimentaire Ne pas laisser des aliments dans un four plus d'une heure avant ou après la cuisson. Le non-respect de cette instruction peut causer un empoisonnement alimentaire ou une maladie. 1. Appuyer sur SETUP (réglage). 2. Appuyer sur la touche de réglage rapide de droite pour - KitchenAid KERS205TBL | Use and Care Guide - Page 41
Cette zone de la commande du four affiche le numéro de téléphone sans frais du Service à la clientèle de KitchenAid. 1. Appuyer sur SETUP (réglage). 2. Utiliser la touche de réglage rapide de droite pour faire défiler les options jusqu'à ENTRETIEN. 3. Sélectionner ENTRETIEN à l'aide de la touche - KitchenAid KERS205TBL | Use and Care Guide - Page 42
dans la recette. Se servir du tableau suivant comme guide. USTENSILES DE CUISSON/RÉSULTATS RECOMMANDATIONS Acier inoxydable ■ Peut égal Plats en grès/Pierre de cuisson ■ Croûtes croustillantes ■ Suivre les instructions du fabricant. Plats en verre, vitrocéramique ou céramique allant au four - KitchenAid KERS205TBL | Use and Care Guide - Page 43
la butée d'arrêt, soulever le rebord avant et la tirer pour la sortir du four. Se servir de l'illustration et du tableau suivants comme guide. 7 6 5 4 3 2 1 ALIMENT POSITION(S) DE LA GRILLE Faire griller du pain ou des aliments peu épais 7 et sans matières grasses. La majorité des cuissons au - KitchenAid KERS205TBL | Use and Care Guide - Page 44
ues pour laisser s'écouler les jus et éviter les éclaboussures et la fumée. Il est possible de commander une lèchefrite. Voir la section "Assistance ou service" pour commander. Demander la pièce n° 4396923. ■ Pour un écoulement approprié, ne pas couvrir la grille de papier d'aluminium. Le fond de la - KitchenAid KERS205TBL | Use and Care Guide - Page 45
thermomètre à viande pour déterminer le degré de cuisson des viandes et de la volaille. Pour l'utilisation du thermomètre à viande, suivre les instructions du fabricant. Cuisson au four par convection (sur certains modèles) La cuisson par convection au four peut être utilisée pour cuire des aliments - KitchenAid KERS205TBL | Use and Care Guide - Page 46
4. Sélectionner ROTISS CONVECT à l'aide de la touche de réglage rapide de gauche. 5. Sélectionner la température du four à l'aide des touches de réglage rapide. OU Entrer la température désirée à l'aide des touches numériques. La température peut être réglée entre 170°F et 550°F (77°C et 288°C). 6. - KitchenAid KERS205TBL | Use and Care Guide - Page 47
séchage. A. Cale d'espacement magnétique de la porte Suivre le tableau du Guide de séchage pour les durées de séchage. Vérifier les aliments aux aliments refroidir à la température ambiante avant de tester la cuisson. TABLEAU DU GUIDE DE SÉCHAGE ■ Les durées de séchage varient en fonction de la - KitchenAid KERS205TBL | Use and Care Guide - Page 48
ALIMENT VARIÉTÉS SE PRÊTANT PRÉPARATION LE MIEUX AU SÉCHAGE DURÉE DE SÉCHAGE APPROX. À 140°F (60°C) [HEURES]** VÉRIFIER LA CUISSON À LA DURÉE DE SÉCHAGE MINIMUM Cerises Lambert, Royal Ann, Napoléon, Van ou Bing Laver et retirer les queues. Couper 18 à 24 en deux et retirer les noyaux. - KitchenAid KERS205TBL | Use and Care Guide - Page 49
avant ou après la cuisson. Le non-respect de cette instruction peut causer un empoisonnement alimentaire ou une maladie. Utiliser la fonction les aliments surgelés qui nécessitent d'être décongelés, sans cuisson, avant le service. IMPORTANT : Cette caractéristique n'est pas conçue pour la décong - KitchenAid KERS205TBL | Use and Care Guide - Page 50
d'empoisonnement alimentaire Ne pas laisser des aliments dans un four plus d'une heure avant ou après la cuisson. Le non-respect de cette instruction peut causer un empoisonnement alimentaire ou une maladie. Réglage de la cuisson par convection différée (sur certains modèles) : 1. Appuyer sur MORE - KitchenAid KERS205TBL | Use and Care Guide - Page 51
Maintien au chaud IMPORTANT : Les aliments doivent être à la température de service avant d'être placés dans le four chaud. Les aliments peuvent être gardés avant ou après la cuisson. Le non-respect de cette instruction peut causer un empoisonnement alimentaire ou une maladie. La fonction Favorites - KitchenAid KERS205TBL | Use and Care Guide - Page 52
Pour créer une nouvelle recette favorite : 1. Appuyer sur FAVORITES. 2. Appuyer sur la touche de réglage rapide de droite pour faire défiler les options jusqu'à CREER NOUVEAU. 3. Sélectionner CREER NOUVEAU à l'aide de la touche de réglage rapide de gauche. 4. Entrer le nom à l'aide des touches. Apr - KitchenAid KERS205TBL | Use and Care Guide - Page 53
four au cours du programme d'autonettoyage. Le non-respect de ces instructions peut causer des brûlures. IMPORTANT : La santé de certains des touches de réglage rapide. Les touches de réglage rapide sont situées de part et d'autre de l'afficheur du tableau de commande. 4. Régler au niveau de salet - KitchenAid KERS205TBL | Use and Care Guide - Page 54
que le four et la table de cuisson sont froids. Toujours suivre les instructions sur les étiquettes des produits de nettoyage. Du savon, de l'eau et ■ Nettoyant et poli pour acier inoxydable KitchenAid® (échantillon inclus) : Voir la section "Assistance ou service" pour placer une commande. ■ Dé - KitchenAid KERS205TBL | Use and Care Guide - Page 55
Souillure cuite ■ Crème à polir et grattoir pour table de cuisson : Frotter la crème sur la souillure avec un essuie-tout humide. Tenir le grattoir aussi à plat que possible sur la surface et gratter. Répéter pour les taches tenaces. Polir toute la table de cuisson avec la crème et un essuie-tout. - KitchenAid KERS205TBL | Use and Care Guide - Page 56
la porte du four pour une utilisation normale. Toutefois, si la dépose est nécessaire, s'assurer que le four est éteint et froid. Puis, suivre ces instructions. La porte du four est lourde. Dépose : 1. Ouvrir la porte du four complètement. 2. Abaisser le verrou de charnière vers soi de chaque - KitchenAid KERS205TBL | Use and Care Guide - Page 57
suggérées ici afin d'éviter le coût d'une visite de service non nécessaire. Rien ne fonctionne Le four ne fonctionne pas ■ La cuisinière est-elle d'aplomb? Régler l'aplomb de la cuisinière. Voir les Instructions d'installation. La porte du four ne s'ouvre pas ■ Un programme d'autonettoyage est-il - KitchenAid KERS205TBL | Use and Care Guide - Page 58
vous faire économiser le coût d'une visite de service. Si vous avez encore besoin d'aide, suivez les instructions ci-dessous. Lors d'un appel, veuillez connaître service. Les techniciens de service désignés par KitchenAid Canada sont formés pour remplir la garantie des produits et fournir un service - KitchenAid KERS205TBL | Use and Care Guide - Page 59
situé dans une région éloignée où un service d'entretien KitchenAid autorisé n'est pas disponible. 9. La dépose et la réinstallation de votre gros appareil si celui-ci est installé dans un endroit inaccessible ou n'est pas installé conformément aux instructions d'installation fournies. 10. Les gros - KitchenAid KERS205TBL | Use and Care Guide - Page 60
de votre gros appareil ménager pour mieux vous aider à obtenir assistance ou service en cas de besoin. Vous devrez connaître le numéro de modèle KitchenAid, U.S.A., KitchenAid Canada licensee in Canada ® Marque déposée/TM Marque de commerce de KitchenAid, U.S.A., Emploi sous licence par KitchenAid
-
 1
1 -
 2
2 -
 3
3 -
 4
4 -
 5
5 -
 6
6 -
 7
7 -
8
-
9
-
10
-
11
-
12
-
13
-
14
-
15
-
16
-
17
-
18
-
19
-
20
-
21
-
22
-
23
-
24
-
25
-
26
-
27
-
28
-
29
-
30
-
31
-
32
-
33
-
34
-
35
-
36
-
37
-
38
-
39
-
40
-
41
-
42
-
43
-
44
-
45
-
46
-
47
-
48
-
49
-
50
-
51
-
52
-
53
-
54
-
55
-
56
-
57
-
58
-
59
-
60
 |
 |

Models/Modèles
KERS205
YKERS205
W10168033B
ELECTRIC RANGE
ARCHITECT
®
SERIES II
Use & Care Guide
For questions about features, operation/performance, parts, accessories or service, call:
1-800-422-1230
or visit our website at
www.kitchenaid.com
In Canada, call for assistance, installation and service, call:
1-800-807-6777
or visit our website at
www.KitchenAid.ca
CUISINIÈRE ÉLECTRIQUE
ARCHITECT
®
, SÉRIE II
Guide d’utilisation et d’entretien
Au Canada, pour assistance, installation ou service composez le
1-800-807-6777
ou visitez notre site Web à...
www.KitchenAid.ca
Table of Contents/Table des matières
.............................................................................
2