KitchenAid KESS908SPW Installation Guide
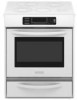
KitchenAid KESS908SPW - 30 Inch Slide-In Electric Range Manual
 |
View all KitchenAid KESS908SPW manuals
Add to My Manuals
Save this manual to your list of manuals |
KitchenAid KESS908SPW manual content summary:
- KitchenAid KESS908SPW | Installation Guide - Page 1
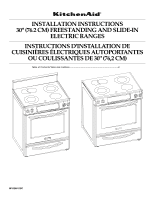
INSTALLATION INSTRUCTIONS 30" (76.2 CM) FREESTANDING AND SLIDE-IN ELECTRIC RANGES INSTRUCTIONS D'INSTALLATION DE CUISINIÈRES ÉLECTRIQUES AUTOPORTANTES OU COULISSANTES DE 30" (76,2 CM) Table of Contents/Table des matières 2 W10246119C - KitchenAid KESS908SPW | Installation Guide - Page 2
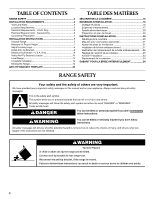
TABLE OF CONTENTS RANGE SAFETY 2 INSTALLATION REQUIREMENTS 3 Tools and Parts 3 Location Requirements 3 Electrical Requirements - U.S.A. Only 5 Electrical Requirements - Canada Only 6 Countertop Preparation 7 INSTALLATION INSTRUCTIONS 7 Unpack Range 7 Measure for Proper Height 7 Adjust - KitchenAid KESS908SPW | Installation Guide - Page 3
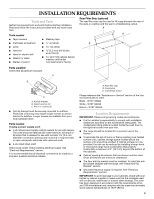
It is the installer's responsibility to comply with installation clearances specified on the model/serial rating plate. The model/serial rating plate is located inside the oven door on the right-hand side oven door trim. ■ The range should be located for convenient use in the kitchen. ■ To eliminate - KitchenAid KESS908SPW | Installation Guide - Page 4
, HUD Part 280). When such standard is not applicable, use the Standard for Manufactured Home Installations, ANSI A225.1/NFPA 501A or follow local codes. In Canada, the installation of this range must conform with the current standards CAN/CSA-A240-latest edition, or local codes. Product Dimensions - KitchenAid KESS908SPW | Installation Guide - Page 5
the ground path is adequate and wire gauge is in accordance with local codes. Electrical Connection To properly install your range, you must determine the type of electrical connection you will be using and follow the instructions provided for it here. Do not use an extension cord. Be sure that - KitchenAid KESS908SPW | Installation Guide - Page 6
ordinances. A copy of the above code standards can be obtained from: Canadian Standards Association 178 Rexdale Blvd. Toronto, ON M9W 1R3 CANADA ■ Check with a qualified electrical installer if you are not sure the range is properly grounded. Range Rating* Specified Rating of Power Supply Cord Kit - KitchenAid KESS908SPW | Installation Guide - Page 7
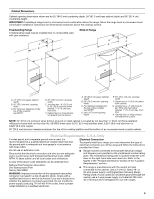
than 30" (76.2 cm), adjust the ³⁄₈" (1.0 cm) dimension. Countertop must be level. Place level on countertop, first side to side, then front to back. If countertop is not level, range will not be level. Range must be level for satisfactory baking conditions. INSTALLATION INSTRUCTIONS Unpack Range - KitchenAid KESS908SPW | Installation Guide - Page 8
rear leveling leg prior to anti-tip bracket installation. Tip Over Hazard A child or adult can tip the range and be killed. Connect anti-tip bracket to rear range foot. Reconnect the anti-tip bracket, if the range is moved. Failure to follow these instructions can result in death or serious burns - KitchenAid KESS908SPW | Installation Guide - Page 9
from your local hardware store. 10. Continue installing your range using the following installation instructions. Power Supply Cord Electrical Connection - U.S.A. Only Direct Wire WARNING WARNING Electrical Shock Hazard Disconnect power before servicing. Use a new 40 amp power supply cord - KitchenAid KESS908SPW | Installation Guide - Page 10
following instructions for your type of electrical connection: 4-wire (recommended) 3-wire (if 4-wire is not available) Electrical Connection Options If your home has: And you will be Go to Section: connecting to: 4-wire receptacle (NEMA type 14-50R) A UL listed, 250-volt minimum, 40-amp, range - KitchenAid KESS908SPW | Installation Guide - Page 11
connection: Power Supply Cord Use this method for: ■ New branch-circuit installations (1996 NEC) ■ Mobile homes ■ Recreational vehicles ■ In an area where local codes prohibit grounding through the neutral. 1. Cut out and remove part of the metal ground strap (B). 5. Use ³⁄₈" nut driver to connect - KitchenAid KESS908SPW | Installation Guide - Page 12
-32 hex nuts. 1. Cut out and remove part of the metal ground strap (B). A E A a power cord rated at 250 volts Installation: Copper or Aluminum Wire This range may be connected directly to the fuse disconnect or circuit breaker box. Depending on your electrical Torque Specifications chart. A - KitchenAid KESS908SPW | Installation Guide - Page 13
Wire Use this method only if local codes permit connecting ground conductor to neutral range. Allow enough slack to easily attach the wiring to the terminal block. A. Terminal lug B. Setscrew C. Line 2 (red) wire D. Bare (green) ground wire E. Line 1 (black) wire Bare Wire Torque Specifications - KitchenAid KESS908SPW | Installation Guide - Page 14
Use and Care Guide for specific instruction on range operation. If range does not operate, check the following: ■ Household fuse is intact and tight; or circuit breaker has not tripped. ■ Range is plugged into an outlet. ■ Electrical supply is connected. ■ See the "Troubleshooting" section in the - KitchenAid KESS908SPW | Installation Guide - Page 15
bracket is installed: ■ Look for the anti-tip bracket securely attached to floor. ■ Slide range back so rear range foot is under anti-tip bracket. 6. Check that range is level. For direct-wired ranges: WARNING Electrical Shock Hazard Disconnect power before servicing. Replace all parts and panels - KitchenAid KESS908SPW | Installation Guide - Page 16
ère. Joindre de nouveau la bride antibasculement si la cuisinière est déplacée. Le non-respect de ces instructions peut causer un décès ou des brûlures graves aux enfants et aux adultes. EXIGENCES D'INSTALLATION Outillage et pièces Rassembler les outils et pièces nécessaires avant de commencer - KitchenAid KESS908SPW | Installation Guide - Page 17
"Assistance ou service" du Guide d'utilisation et Part 280). Lorsque cette norme n'est pas applicable, l'installation doit satisfaire aux critères de la norme Standard for Manufactured Home Installations, ANSI A225.1/NFPA 501A ou respecter les dispositions des codes locaux. Au Canada, l'installation - KitchenAid KESS908SPW | Installation Guide - Page 18
abaissés* E. 30" (76,2 cm) F. 27¹⁄₄" (69,2 cm) : Longueur maximale de la poignée au support à l' installation entre des placards de 24" (61 cm) avec plan de travail de 25" (63,5 cm), l'avant de la porte du four sera en saillie de 1" (2,5 cm) au-delà de la base des placards de 24" (61,0 cm). A. 30 - KitchenAid KESS908SPW | Installation Guide - Page 19
installation d'une hotte ou d'un ensemble hotte/micro-ondes au-dessus de la cuisinière, suivre les instructions fournies avec la hotte ou l'ensemble hotte/microondes concernant les dimensions ]), ou cuivre (0,020" [0,5 mm]). Distance de séparation de 30" (76,2 cm) ou plus entre le dessus de la table - KitchenAid KESS908SPW | Installation Guide - Page 20
service finale de la cuisinière. 30" (76,2 cm) 30 ¾" (78,1 cm) ³⁄₈" (1,0 cm) Si la largeur de l'espace disponible pour le plan de travail est de plus de 30" (76,2 cm), ajuster la dimension aplomb pour produire une performance satisfaisante. INSTRUCTIONS D'INSTALLATION Déballage de la cuisinière - KitchenAid KESS908SPW | Installation Guide - Page 21
cuisinière repose sur sa partie postérieure ou est supportée par 2 pieds en position verticale. REMARQUE : arrière avant l'installation de la bride antibasculement. Installation de la bride antibasculement re est déplacée. Le non-respect de ces instructions peut causer un décès ou des brûlures graves - KitchenAid KESS908SPW | Installation Guide - Page 22
le gabarit du sol. 10. Poursuivre l'installation de la cuisinière en utilisant les instructions d'installation suivantes. Vérification de l'emplacement de du sol. Enfoncer les chevilles en plastique dans les trous à l'aide d'un marteau. 6. Aligner les trous de la bride antibasculement avec les - KitchenAid KESS908SPW | Installation Guide - Page 23
l'installation 1. Vérifier que toutes les pièces ont été installées. S'il reste une pièce, étudier en détail les étapes du processus d'installation ûleurs de surface et le four. Consulter le Guide d'utilisation et d'entretien pour des instructions spécifiques sur le fonctionnement de la cuisinière - KitchenAid KESS908SPW | Installation Guide - Page 24
l'aide d' bride antibasculement est installée : Risque de placée. Le non-respect de ces instructions peut causer un décès ou des KitchenAid, U.S.A., KitchenAid Canada licensee in Canada ® Marque déposée/TM Marque de commerce de KitchenAid, U.S.A., Emploi sous licence par KitchenAid Canada au Canada
-
 1
1 -
 2
2 -
 3
3 -
 4
4 -
 5
5 -
 6
6 -
 7
7 -
8
-
9
-
10
-
11
-
12
-
13
-
14
-
15
-
16
-
17
-
18
-
19
-
20
-
21
-
22
-
23
-
24
 |
 |
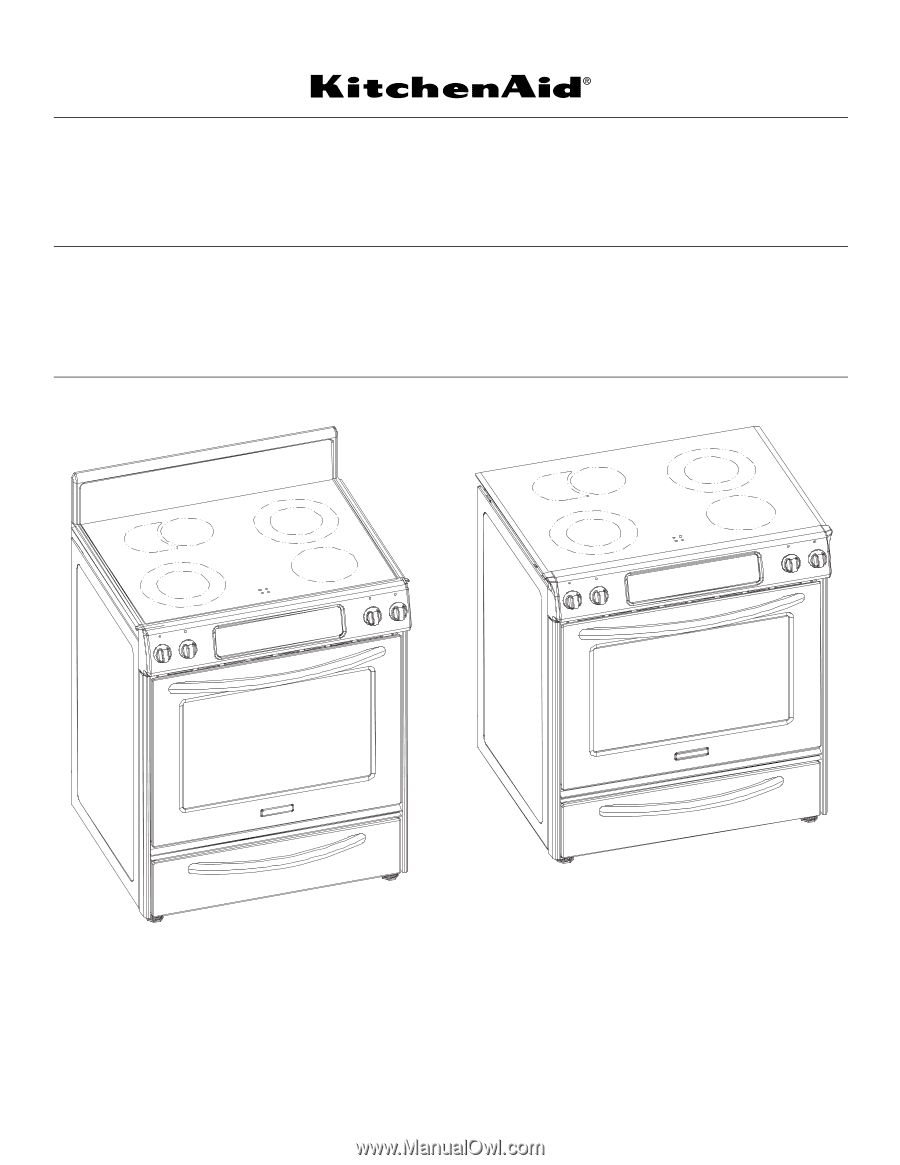
INSTALLATION INSTRUCTIONS
30" (76.2 CM) FREESTANDING AND SLIDE-IN
ELECTRIC RANGES
INSTRUCTIONS D'INSTALLATION DE
CUISINIÈRES ÉLECTRIQUES AUTOPORTANTES
OU COULISSANTES DE 30" (76,2 CM)
Table of Contents/Table des matières
.............................................................................
2
W10246119C