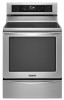
KitchenAid KIRS608BSS Use & Care Guide
KitchenAid KIRS608BSS Manual
 |
View all KitchenAid KIRS608BSS manuals
Add to My Manuals
Save this manual to your list of manuals |
KitchenAid KIRS608BSS manual content summary:
- KitchenAid KIRS608BSS | Use & Care Guide - Page 1
RANGE USER INSTRUCTIONS THANK YOU for purchasing this high-quality product. If you should experience a problem not covered in TROUBLESHOOTING, please visit our website at www.kitchenaid.com for additional information. If you still need assistance, call us at 1-800-422-1230. You will need your model - KitchenAid KIRS608BSS | Use & Care Guide - Page 2
RANGE SAFETY Your safety and the safety of others are very important. We have provided many important safety messages in this manual and on floor or wall. • Slide range back so rear range foot is under anti-tip bracket. • See installation instructions for details. State of California Proposition - KitchenAid KIRS608BSS | Use & Care Guide - Page 3
Proper Apparel - Loose-fitting or hanging garments should never be worn while using the range. ■ User Servicing - Do not repair or replace any part of the range unless specifically recommended in the manual. All other servicing should be referred to a qualified technician. ■ Storage in or on the - KitchenAid KIRS608BSS | Use & Care Guide - Page 4
before using the cooktop. FEATURE GUIDE This manual covers several models. Your model may have some or all of the items listed. Refer to this manual or the Frequently Asked Questions (FAQs) section of our website at www.kitchenaid.com for more detailed instructions. WARNING Food Poisoning Hazard - KitchenAid KIRS608BSS | Use & Care Guide - Page 5
FEATURE PROOF Proofing bread KEEP WARM Hold warm DELAY START Delayed start INSTRUCTIONS 1. Press BAKE. 2. Press the number keypads to set pressing 1 - high (500°F [261°C]), 2 - medium (450°F [234°C]) or 3 - low (400°F [204°C]). 3. Press START and allow the oven to preheat for 5 minutes. 4. - KitchenAid KIRS608BSS | Use & Care Guide - Page 6
FEATURE INSTRUCTIONS OFF Warming drawer (on some models) 1. Press WARMING DRAWER ON to select the Warming Drawer function at the Low setting. 2. To select a keeping the cooking surface cooler than with a traditional element. Induction cooking does not lose as much heat as traditional forms because - KitchenAid KIRS608BSS | Use & Care Guide - Page 7
Induction Use the following chart as a guide when setting heat levels. Some of sear food. MEDIUM ■ Maintain a slow boil. ■ Fry or sauté foods. ■ Cook soups, sauces and gravies. LOW ■ Stew or steam food. SIMMER ■ Simmer (range control will display "FEATURE NOT AVAILABLE." To Lock/Unlock Control - KitchenAid KIRS608BSS | Use & Care Guide - Page 8
sickness. The Keep Warm function is available on all the surface cooking elements, has the "+" pad five times for SIMMER at the Low setting and six times for SIMMER at the High Part Number 31605 contains all of the items needed to clean and condition your ceramic glass cooktop. Refer to the "Range - KitchenAid KIRS608BSS | Use & Care Guide - Page 9
range has induction cooktop elements. Pan size, induction cooking. Ferromagnetic materials include: ■ Enameled steel ■ Cast iron ■ Stainless steel designed for induction an induction cooktop, induction induction cooktop. See the "Cookware" section to check if the canner will work on the induction models - KitchenAid KIRS608BSS | Use & Care Guide - Page 10
Function has been entered ■ Reminder (on some models), repeating each minute after the end-of-cycle of day. Details of all of the feature changes are explained in the following sections Volume Sets the pitch of the tone to either high or low. 1. Press OPTIONS until "SOUND VOLUME" is displayed. 2. - KitchenAid KIRS608BSS | Use & Care Guide - Page 11
continue with Step 3. 1. Press the number keypad as instructed by the scrolling text to select the new temperature. return to regular baking or press OFF to turn off the range. Aluminum Foil IMPORTANT: To avoid permanent damage to the oven guide. 7 6 5 4 3 2 1 ■ Make sure racks are level. 11 - KitchenAid KIRS608BSS | Use & Care Guide - Page 12
and the following table. Flat Rack Position* Type of Food 7 Broiling/searing meats, hamburgers, steaks 6 Broiled meats, poultry, fish 3 or 4 positions 2, 4 and 6. NOTE: The roll-out rack, which is available on some models, sits midway between adjacent rack positions. When used for 3-rack baking - KitchenAid KIRS608BSS | Use & Care Guide - Page 13
Position To Insert Roll-Out Rack 1. Angle the front of the rack assembly up and insert the rack frame into the "V" cutout in the rack guides of the oven cavity. A B A. Rack frame B. Sliding rack NOTE: To fully extend the roll-out rack, pull the sliding rack forward, and continue pulling until - KitchenAid KIRS608BSS | Use & Care Guide - Page 14
range models, the fan and convection element may run while preheating and may be cycled on and off for short intervals during Bake to provide the best results. This feature . This feature enables three-rack baking in your range. Use the following Convect Options chart as a guide. Convect Options - KitchenAid KIRS608BSS | Use & Care Guide - Page 15
and for the first and second rise. Rapid Proof (on some models) operates at a slightly higher temperature than Standard Proof, and it can greased bowl and cover loosely with wax paper, coated with shortening. Place on rack guide 2 and close the oven door. NOTE: If the temperature of the oven is - KitchenAid KIRS608BSS | Use & Care Guide - Page 16
1. Press WARMING DRAWER ON to select the Warming Drawer function at the Low setting. Doing so can result in food poisoning or sickness. The Warming : 1. Press WARMING DRAWER SLOW COOK to select the Slow Cook function at the Low setting. Do not let food sit for more than one hour before or after - KitchenAid KIRS608BSS | Use & Care Guide - Page 17
new cleaning technology is a low-heat, odorfree alternative to traditional the oven interior. NOTES: ■ The range should be level to ensure that cycle for stubborn soils. ■ affresh® Kitchen and Appliance Cleaner and affresh® Cooktop Cleaner may be obtained by ordering Part Number W10423113RP. See the - KitchenAid KIRS608BSS | Use & Care Guide - Page 18
the entire range is cool. These spills may affect the finish. Cleaning Method: ■ Glass cleaner, mild liquid cleaner or nonabrasive scrubbing pad: Gently clean around the model and serial number plate because scrubbing may remove numbers. ■ affresh® Kitchen and Appliance Cleaner Part Number W10355010 - KitchenAid KIRS608BSS | Use & Care Guide - Page 19
. See "Cooktop Controls" in the "Cooktop Use" section. Level the range. See the Installation Instructions. See "Electronic Oven Controls" section. See "Cook Time" section. See the control lock keypad feature in the "Feature Guide" section. Demo Mode will deactivate all heating elements. See "Demo - KitchenAid KIRS608BSS | Use & Care Guide - Page 20
PROBLEM the control panel. The power voltage is too low or too high. The surface cooking area service. See the cover for contact information. Tap water was used in the Clean cycle. Range is not level. Range the Clean cycle. Level the range. See the Installation Instructions. To remove deposits, use - KitchenAid KIRS608BSS | Use & Care Guide - Page 21
you can visit our website at www.kitchenaid.com/cookingaccessories. Cooktop Care Kit (ceramic glass models) (includes cleaner, protectant, scraper, and applicator pads) Order Part Number 31605 Cooktop Protectant (ceramic glass models) Order Part Number 31463A affresh® Stainless Steel Cleaning Wipes - KitchenAid KIRS608BSS | Use & Care Guide - Page 22
where service by an authorized KitchenAid servicer is not available. 9. The removal and reinstallation of your major appliance if it is installed in an inaccessible location or is not installed in accordance with published installation instructions. 10. Major appliances with original model/serial - KitchenAid KIRS608BSS | Use & Care Guide - Page 23
to the Internet and you need assistance using your product or you would like to schedule service, you may contact KitchenAid at the number below. Have your complete model number ready. You can find your model number and serial number on the label, located on the oven frame behind the top right - KitchenAid KIRS608BSS | Use & Care Guide - Page 24
W10524726A SP PN W10524734A ®/™ ©2012 All rights reserved. 7/12 Printed in U.S.A.
-
 1
1 -
 2
2 -
 3
3 -
 4
4 -
 5
5 -
 6
6 -
 7
7 -
8
-
9
-
10
-
11
-
12
-
13
-
14
-
15
-
16
-
17
-
18
-
19
-
20
-
21
-
22
-
23
-
24
 |
 |

THANK YOU for purchasing this high-quality product. If you should experience a problem not covered in TROUBLESHOOTING,
please visit our website at
www.kitchenaid.com
for additional information. If you still need assistance, call us at 1-800-422-1230.
You will need your model and serial number, located on the oven frame behind the top right side of the oven door.
Para obtener acceso a “Instrucciones para el usuario de la estufa eléctrica” en español, o para obtener información adicional acerca
de su producto, visite:
www.kitchenaid.com
Deberá tener a mano el número de modelo y de serie, que están ubicados en el marco del horno, detrás del lado derecho superior
de la puerta del horno.
ELECTRIC RANGE
USER INSTRUCTIONS
Table of Contents
RANGE SAFETY
.......................................................................................
2
The Anti-Tip Bracket
.............................................................................
2
FEATURE GUIDE
.....................................................................................
4
COOKTOP USE
........................................................................................
6
Cookware
..............................................................................................
9
Home Canning
......................................................................................
9
OVEN USE
..............................................................................................
10
Electronic Oven Controls
....................................................................
10
Sabbath Mode
....................................................................................
11
Aluminum Foil
......................................................................................
11
Positioning Racks and Bakeware
.......................................................
11
Split Oven Rack (on some models)
....................................................
12
Roll-Out Rack
......................................................................................
13
Oven Vent
............................................................................................
13
Baking and Roasting
...........................................................................
14
Broiling
................................................................................................
14
Convection Cooking
...........................................................................
14
EasyConvect
™
Conversion
..................................................................
15
Proofing Bread
....................................................................................
15
Cook Time
...........................................................................................
15
Warming Drawer
.................................................................................
16
Slow Cook
...........................................................................................
16
RANGE CARE
.........................................................................................
17
Clean Cycle
.........................................................................................
17
General Cleaning
.................................................................................
18
Oven Light
...........................................................................................
18
TROUBLESHOOTING
............................................................................
19
ACCESSORIES
......................................................................................
21
WARRANTY
............................................................................................
22
W10524726A