KitchenAid KVUB400GSS Installation Guide
KitchenAid KVUB400GSS Manual
 |
View all KitchenAid KVUB400GSS manuals
Add to My Manuals
Save this manual to your list of manuals |
KitchenAid KVUB400GSS manual content summary:
- KitchenAid KVUB400GSS | Installation Guide - Page 1
INSTALLATION INSTRUCTIONS 600 CFM AND 1200 CFM IN-LINE BLOWERS FOR RANGE HOODS INSTRUCTIONS D'INSTALLATION VENTILATEURS EN LIGNE AVEC DÉBIT DE 600 PI³ ET 1200 PI³ POUR HOTTES D'ÉVACUATION Table of Contents/Table des matières IN-LINE BLOWER SAFETY 1 INSTALLATION REQUIREMENTS 3 Tools and Parts 3 - KitchenAid KVUB400GSS | Installation Guide - Page 2
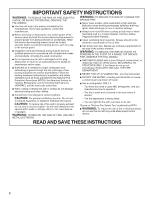
such as a tag, to the service panel. ■ Installation work and electrical wiring must be NFPA), the American Society for Heating, Refrigeration and Air Conditioning Engineers (ASHRAE), fan or filter. ■ Use proper pan size. Always use cookware appropriate for the size of the surface element. WARNING: TO - KitchenAid KVUB400GSS | Installation Guide - Page 3
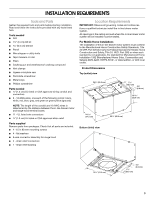
ceiling and wall where the in-line blower motor system will be installed must be sealed. For Mobile Home Installations The installation of this in-line blower motor system must conform to the Manufactured Home Construction Safety Standards, Title 24 CFR, Part 328 (formerly the Federal Standard for - KitchenAid KVUB400GSS | Installation Guide - Page 4
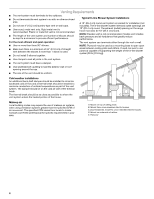
install 2 elbows together. Typical In-line Blower System Installations A 10" (25.4 cm) round vent system is needed for installation (not included). The in-line blower sure to use plywood capable of supporting the weight of the in-line blower system (50 lb [22.6 CFM of air movement. The specified CFM - KitchenAid KVUB400GSS | Installation Guide - Page 5
codes and ordinances. Ensure that the electrical installation is adequate and in conformance with National or CSA Standards C22.1-94, Canadian Electrical Code, Part 1 and C22.2 No. 0-M91 (latest edition) rating of the appliance as specified on the model/serial rating plate. The model/serial plate is - KitchenAid KVUB400GSS | Installation Guide - Page 6
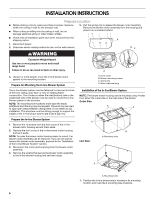
open areas between ceiling joists or roof rafters to aid installation. This structure must be strong enough to support the weight of the in-line blower system (50 lb [22.6 kg] min). Installation of the In-line Blower System NOTE: The blower motor housing can be mounted using 4 holes from either - KitchenAid KVUB400GSS | Installation Guide - Page 7
terminal boxes in the in-line blower housing and range hood (see the range hood installation instructions). Remove the terminal box covers blower system and seal all joints with clamps. Make Electrical Connection WARNING Electrical Shock Hazard Disconnect power before servicing. Replace all parts - KitchenAid KVUB400GSS | Installation Guide - Page 8
and secure it with 10 mounting screws. Electrical Connection Inside Range Hood Between In-line Blower System and Range Hood 1. With the range hood mounted (see the range hood installation instructions), locate the wiring cable connector inside the range hood. 2. Connect the 6-wire connector assembly - KitchenAid KVUB400GSS | Installation Guide - Page 9
line of appliances. ■ Installation information. ■ Use and maintenance procedures. ■ Accessory and repair parts sales. ■ Specialized customer assistance (Spanish speaking, hearing impaired, limited vision, etc.). ■ Referrals to local dealers, repair parts distributors and service companies. Whirlpool - KitchenAid KVUB400GSS | Installation Guide - Page 10
where service by an authorized Whirlpool servicer is not available. 10. The removal and reinstallation of your major appliance if it is installed in an inaccessible location or is not installed in accordance with published installation instructions. 11. Major appliances with original model/serial - KitchenAid KVUB400GSS | Installation Guide - Page 11
: DANGER Risque possible de décès ou de blessure grave si vous ne suivez pas immédiatement les instructions. AVERTISSEMENT Risque possible de décès ou de blessure grave si vous ne suivez pas les instructions. Tous les messages de sécurité vous diront quel est le danger potentiel et vous disent - KitchenAid KVUB400GSS | Installation Guide - Page 12
RE : CORPORELS, RESPECTER LES INSTRUCTIONS SUIVANTES : ■ Ne jamais alimentation. ■ Tout travail d'installation ou câblage électrique doit ou le retourner à un centre de service agréé pour examen et/ou réparation et l'American Society for Heating, Refrigeration and Air Conditioning Engineers (ASHRAE - KitchenAid KVUB400GSS | Installation Guide - Page 13
outils et composants nécessaires avant d'entreprendre l'installation. Lire et observer les instructions fournies avec chacun des outils de la Home Installation 1982 (Manufactured Home Sites, Communities and Setups) ANSI A225.1/NFPA 501A*, ou des codes et règlements locaux. Dimensions du - KitchenAid KVUB400GSS | Installation Guide - Page 14
pas terminer le circuit d'évacuation dans un grenier ou dans un autre espace clos. Installations typiques d'un système de ventilation en ligne ■ Ne pas utiliser une bouche Dans un tel cas, veiller à utiliser du contreplaqué capable de supporter le poids du système de ventilation en ligne (50 lb [ - KitchenAid KVUB400GSS | Installation Guide - Page 15
tous les codes et règlements en vigueur. Vérifier que l'installation électrique a été correctement effectuée et qu'elle est conforme ■ Si le domicile est équipé d'un câblage en aluminium, suivre les instructions suivantes : 1. Connecter une section de câble en cuivre massif aux conducteurs en queue - KitchenAid KVUB400GSS | Installation Guide - Page 16
ou plus de personnes pour déplacer et installer la hotte de la cuisinière. Le non-respect de cette instruction peut causer une blessure au dos ou ou des chevrons (toit) pour faciliter l'installation. Cette structure doit être suffisamment solide pour supporter le poids du système de ventilation en - KitchenAid KVUB400GSS | Installation Guide - Page 17
(3,2 cm) à cet emplacement. 4. Localiser les boîtiers de raccordement électrique dans le logement du ventilateur en ligne et la hotte (voir les instructions d'installation de la hotte). Retirer le couvercle des boîtiers de raccordement et mettre de côté les couvercles et les vis. B A A. Boîtier de - KitchenAid KVUB400GSS | Installation Guide - Page 18
électrique au niveau de la hotte, entre le circuit de ventilation en ligne et la hotte. 1. La hotte étant montée (voir les instructions d'installation de la hotte), rechercher le connecteur du câble à l'intérieur. 2. Raccorder le connecteur à 6 fils, fourni avec le système de ventilation en - KitchenAid KVUB400GSS | Installation Guide - Page 19
aux marchands locaux, aux distributeurs de pièces de rechange et aux compagnies de service. Les techniciens de service désignés par Whirlpool Canada LP sont formés pour remplir la garantie des produits et fournir un service après la garantie, partout au Canada. Pour plus d'assistance Si vous avez - KitchenAid KVUB400GSS | Installation Guide - Page 20
une région éloignée où un service d'entretien Whirlpool autorisé n'est pas disponible. 10. La dépose et la réinstallation de votre gros appareil si celui-ci est installé dans un endroit inaccessible ou n'est pas installé conformément aux instructions d'installation fournies. 11. Les gros appareils
-
 1
1 -
 2
2 -
 3
3 -
 4
4 -
 5
5 -
 6
6 -
 7
7 -
8
-
9
-
10
-
11
-
12
-
13
-
14
-
15
-
16
-
17
-
18
-
19
-
20
 |
 |
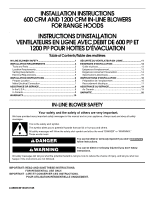
INSTALLATION INSTRUCTIONS
600 CFM AND 1200 CFM IN-LINE BLOWERS
FOR RANGE HOODS
INSTRUCTIONS D'INSTALLATION
VENTILATEURS EN LIGNE AVEC DÉBIT DE 600 PI³ ET
1200 PI³ POUR HOTTES D’ÉVACUATION
IN-LINE BLOWER SAFETY
Table of Contents/Table des matières
IN-LINE BLOWER SAFETY
............................................................
1
INSTALLATION REQUIREMENTS
................................................
3
Tools and Parts
............................................................................
3
Location Requirements
................................................................
3
Venting Requirements
..................................................................
4
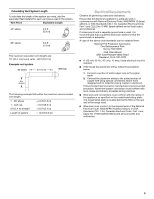
Electrical Requirements
...............................................................
5
INSTALLATION INSTRUCTIONS
..................................................
6
Prepare Location
..........................................................................
6
Make Electrical Connection
.........................................................
7
ASSISTANCE OR SERVICE
...........................................................
9
In the U.S.A
...................................................................................
9
In Canada
.....................................................................................
9
WARRANTY
...................................................................................
10
SÉCURITÉ DU VENTILATEUR EN LIGNE
..............................
11
EXIGENCES D’INSTALLATION
...............................................
13
Outils et pièces
.......................................................................
13
Exigences d’emplacement
.....................................................
13
Exigences concernant l’évacuation
.......................................
14
Spécifications électriques
......................................................
15
INSTRUCTIONS D’INSTALLATION
........................................
16
Préparation de l’emplacement
...............................................
16
Raccordement électrique
.......................................................
17
ASSISTANCE OU SERVICE
.....................................................
19
Au Canada
..............................................................................
19
GARANTIE
.................................................................................
20
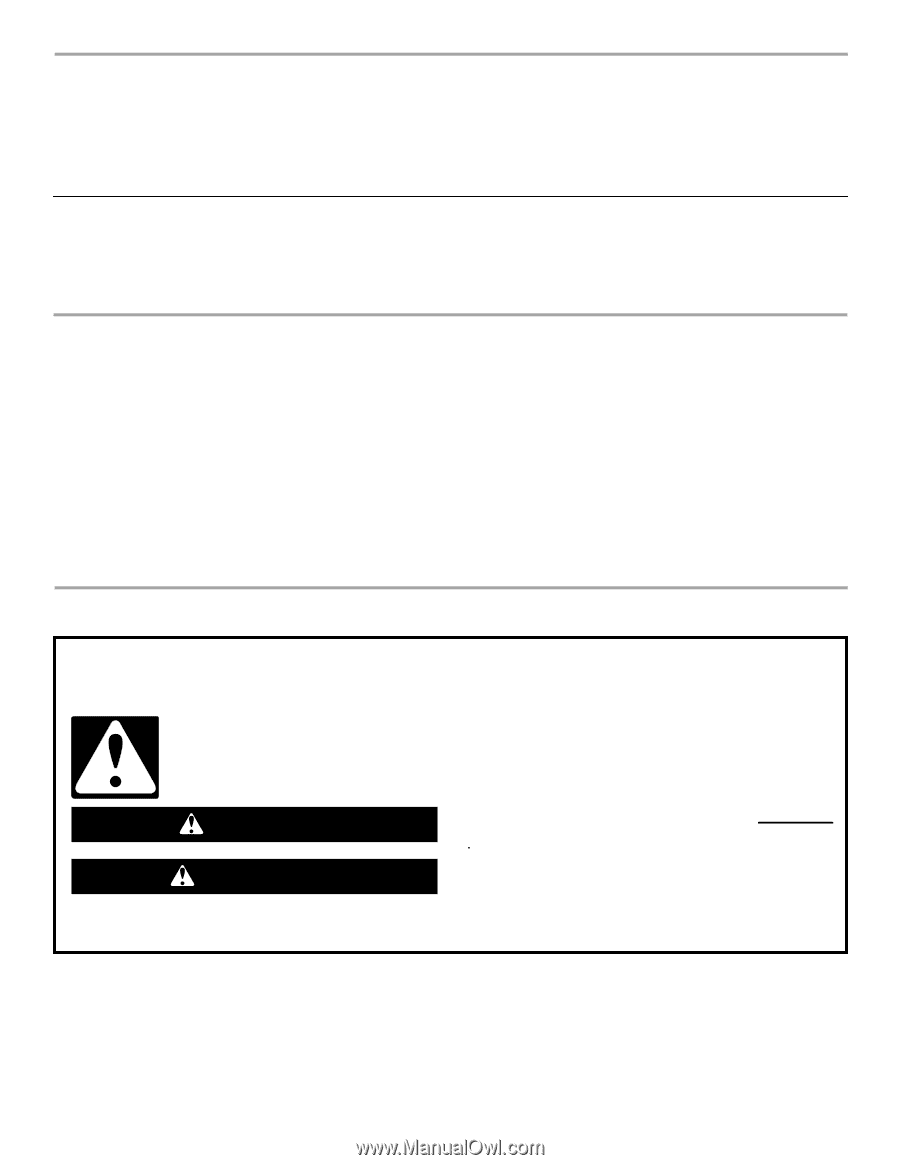
You can be killed or seriously injured if you don't immediately
You
can be killed or seriously injured if you don't follow
All safety messages will tell you what the potential hazard is, tell you how to reduce the chance of injury, and tell you what can
happen if the instructions are not followed.
Your safety and the safety of others are very important.
We have provided many important safety messages in this manual and on your appliance. Always read and obey all safety
messages.
This is the safety alert symbol.
This symbol alerts you to potential hazards that can kill or hurt you and others.
All safety messages will follow the safety alert symbol and either the word “DANGER” or “WARNING.”
These words mean:
follow instructions.
instructions.
DANGER
WARNING
IMPORTANT: READ AND SAVE THESE INSTRUCTIONS.
FOR RESIDENTIAL USE ONLY.
IMPORTANT : LIRE ET CONSERVER CES INSTRUCTIONS.
POUR UTILISATION RÉSIDENTIELLE UNIQUEMENT.
LI3ZDB/W10331013B