KitchenAid KXW2330YSS Installation Guide
KitchenAid KXW2330YSS Manual
 |
View all KitchenAid KXW2330YSS manuals
Add to My Manuals
Save this manual to your list of manuals |
KitchenAid KXW2330YSS manual content summary:
- KitchenAid KXW2330YSS | Installation Guide - Page 1
(76.2 CM) AND 36" (91.4 CM) SLIDE-OUT RANGE HOOD Installation Instructions and Use & Care Guide HOTTE D'ASPIRATION AVEC MODULE DE COMMANDE EXTRACTIBLE DE 30" (76,2 CM) ET 36" (91,4 CM) Instructions d'installation et Guide d'utilisation et d'entretien Table of Contents/Table des matières 2 IMPORTANT - KitchenAid KXW2330YSS | Installation Guide - Page 2
INSTRUCTIONS 7 Prepare Location 7 Install Range Hood 9 Electrical Connection 11 Connect the Vent System 11 RANGE HOOD USE 12 Controls 12 Display 12 RANGE HOOD CARE 13 Cleaning 13 Replacing the Halogen Bulb 13 WIRING DIAGRAM 14 ASSISTANCE OR SERVICE 15 In the U.S.A 15 In Canada - KitchenAid KXW2330YSS | Installation Guide - Page 3
service panel. ■ Installation A RANGE TOP low or medium settings. ■ Always turn hood ON when cooking at high heat or when flambeing food (i.e. Crepes Suzette, Cherries Jubilee, Peppercorn Beef Flambé). ■ Clean ventilating fans frequently. Grease should not be allowed to accumulate on fan or filter - KitchenAid KXW2330YSS | Installation Guide - Page 4
"Prepare Location" section. Recirculation Kit Part Number W10356918 is available from your dealer or an authorized parts distributor. All openings in ceiling and wall where range hood will be installed must be sealed. For Mobile Home Installations The installation of this range hood must conform to - KitchenAid KXW2330YSS | Installation Guide - Page 5
cabinet to cooking surface 12" (30.5 cm) cabinet depth 36" (91.4 cm) base cabinet height 15" (38.1 cm) min. upper cabinet height Venting Requirements (vented models only) ■ Vent system must terminate to the outside, except for nonvented (recirculating) installations. ■ Do not terminate the vent - KitchenAid KXW2330YSS | Installation Guide - Page 6
to the outside, the range hood can be used in the non-vented (recirculating) version, using a charcoal filter. Recirculation Kit Part Number W10356918 is available from the dealer or an authorized parts distributor. Damper installation is not required. A A B B C D F D F E E A. 6" (15 - KitchenAid KXW2330YSS | Installation Guide - Page 7
Standards C22. 1-94, Canadian Electrical Code, Part 1 and C22.2 No. 0-M91 (latest edition) and all local codes and ordinances. INSTALLATION INSTRUCTIONS Prepare Location ■ It is recommended that the vent system be installed before the range hood is installed. ■ Before making cutouts, make sure - KitchenAid KXW2330YSS | Installation Guide - Page 8
following the instructions for your type of installation. Venting Outside recirculating) Installation Through the Soffit/Cabinet Measure and mark a round vent opening in the soffit using the method shown for venting through the wall. Measure and mark the centerline on the soffit above the range hood - KitchenAid KXW2330YSS | Installation Guide - Page 9
For non-vented (recirculating) installations, charcoal filters are necessary. See the "Range Hood Care" section for instructions on installing charcoal filters. The Recirculation Kit Part Number W10356918 must be used. 6. Install the vent system according to the method needed. Use caulking to seal - KitchenAid KXW2330YSS | Installation Guide - Page 10
to back. 10. Adjust the adjusting screws so the hood is level from front to back. Repeat this procedure on the other side. 11. Drill 2 3 mm) pilot holes and install 2 - 4.5 x 16 mm wood screws to secure the front of the range hood to the cabinet bottom. A A A. Spring release handle A. 4.5 x 16 mm - KitchenAid KXW2330YSS | Installation Guide - Page 11
the operation of the range hood fan and light. 5. Push the range hood screen back in. Non-Vented (recirculating) Installations 1. Connect the vent system to the range hood vent opening. Seal the connection with clamps. 2. Install charcoal filters. See the "Range Hood Care" section. 3. Replace metal - KitchenAid KXW2330YSS | Installation Guide - Page 12
last setting selected. Timer Control Display Grease Filter Saturation Alarm After 30 hours of fan operation, the display will show "F" when the fan is active. When this icon shows in the display, the installed grease filters should be washed. See the "Range Hood Care" section. ■ To reset the grease - KitchenAid KXW2330YSS | Installation Guide - Page 13
cleaning the range hood. Exterior Surfaces Clean the range hood with a mild detergent and soft cloth. To avoid damage to the exterior surface, do not use abrasive cleansers or steel-wool pads To Install Charcoal Filter 1. For non-vented (recirculating installations), fit the charcoal filter on the - KitchenAid KXW2330YSS | Installation Guide - Page 14
EMC Filter 1 Primary Transformer Secondary WIRING DIAGRAM SEL0015013 Motor Characteristics Power BK L1 Neutral W W BK Y/G Speed Motor Resistance (Ohms) 1 BU/W 45.1 Min. M 2 BU/R 37.7 3 BU/GY 30.3 4 BU/BK 20.8 Max. Room Temp. 73.4˚ F (23˚ C) BR BR Y Y Y/G Y/G W W R R GY - KitchenAid KXW2330YSS | Installation Guide - Page 15
: Customer eXperience Centre KitchenAid Canada 200 - 6750 Century Ave. Mississauga, Ontario L5N 0B7 Please include a daytime phone number in your correspondence. Accessories Recirculation Kit (for non-vented installations only) Order Part Number W10356918 Replacement Charcoal Filters (for non-vented - KitchenAid KXW2330YSS | Installation Guide - Page 16
where service by an authorized KitchenAid servicer is not available. 9. The removal and reinstallation of your major appliance if it is installed in an inaccessible location or is not installed in accordance with published installation instructions. 10. Major appliances with original model/serial - KitchenAid KXW2330YSS | Installation Guide - Page 17
: DANGER Risque possible de décès ou de blessure grave si vous ne suivez pas immédiatement les instructions. AVERTISSEMENT Risque possible de décès ou de blessure grave si vous ne suivez pas les instructions. Tous les messages de sécurité vous diront quel est le danger potentiel et vous disent - KitchenAid KXW2330YSS | Installation Guide - Page 18
D'INCENDIE, CHOC ÉLECTRIQUE OU DOMMAGES CORPORELS, RESPECTER LES INSTRUCTIONS SUIVANTES : ■ Utiliser cet appareil uniquement dans les applications accumuler sur les surfaces du ventilateur ou des filtres. ■ Tout travail d'installation ou câblage électrique doit être réalisé par une personne qualifi - KitchenAid KXW2330YSS | Installation Guide - Page 19
numéro W10369160. Comprend : Instructions d'installation et Guide d'utilisation et d'entretien 2 supports de nivellement inférieurs 2 supports de nivellement supérieurs Deux èce numéro W10356918. Voir la section "Assistance ou service" pour commander. Pièces facultatives éventuellement nécessaires : - KitchenAid KXW2330YSS | Installation Guide - Page 20
du placard Hauteur minimale de placard 15" (38,1 cm) Largeur de l'ouverture de placard 30" (76,2 cm) ou 36" (91,4 cm) min. Distance suggérée du bas du coudés, si on doit en utiliser plus d'un. ■ Ne pas installer 2 coudes successifs. ■ Le circuit d'évacuation doit comporter un clapet anti - KitchenAid KXW2330YSS | Installation Guide - Page 21
Cette hotte a été configurée à l'usine pour la décharge à travers le toit ou à travers le mur. Le système de décharge requis pour l'installation n'est pas fourni. Un circuit d'évacuation avec conduit circulaire de 6" (15,2 cm) est recommandé. Décharge à travers le toit Évacuation par le mur - KitchenAid KXW2330YSS | Installation Guide - Page 22
les codes et règlements en vigueur. Vérifier que l'installation électrique a été correctement effectuée et qu'elle est fusible. ■ Si le domicile est équipé d'un câblage en aluminium, suivre les instructions suivantes : 1. Connecter une section de câble en cuivre massif aux conducteurs en queue de - KitchenAid KXW2330YSS | Installation Guide - Page 23
le fond du placard forme une cavité au-dessus d'un cadre de support, on devra installer des tringles d'appui en bois à droite et à gauche de l'ouverture 5. Terminer la préparation du placard conformément aux instructions, selon le type d'installation. Décharge à l'extérieur, à travers le toit - KitchenAid KXW2330YSS | Installation Guide - Page 24
à charbon est nécessaire. Voir la section "Entretien de la hotte" pour des instructions sur l'installation de filtres á charbon. On doit utiliser l'ensemble de recyclage pièce numéro W10356918. 6. Installer le circuit d'évacuation selon la méthode requise. Utiliser un calfeutrant pour assurer - KitchenAid KXW2330YSS | Installation Guide - Page 25
plus de personnes pour déplacer et installer la hotte de la cuisinière. Le non-respect de cette instruction peut causer une blessure au dos d'environ ¹⁄₄" (0,6 cm) entre les têtes des vis et la hotte pour installer les supports en les faisant glisser. A A. Vis T10 TORX® 10. Placer le clapet - KitchenAid KXW2330YSS | Installation Guide - Page 26
8. Installer 2 vis de réglage de 5 x 18 mm. A B A. Support supé Support inférieur C. L'encoche de support 26 Risque de choc électrique Déconnecter la source de courant électrique avant l'entretien. Replacer pièces et panneaux avant de faire la remise en marche. Le non-respect de ces instructions - KitchenAid KXW2330YSS | Installation Guide - Page 27
la boîte de la borne. Le non-respect de ces instructions peut causer un décès, un incendie ou un choc électrique. 4. de la hotte de cuisinière en place. Installation sans décharge à l'extérieur (recyclage) de rechange, voir la section "Assistance ou service". D E A. Serre-câble (homologation UL ou - KitchenAid KXW2330YSS | Installation Guide - Page 28
30 heures de fonctionnement du ventilateur, l'affichage indique "F" lorsque le ventilateur est activé. Lorsque cette icône apparaît sur l'affichage, les filtres à graisse install , appuyer sur FAN (ventilateur) pendant 3 secondes. "C" disparaît de l'affichage. Accessoire de recirculation du filtre à - KitchenAid KXW2330YSS | Installation Guide - Page 29
graisse en suivant les instructions suivantes. Réinstaller le filtre à graisse avant emboîter. A. Supports métalliques B. Filtre à charbon C. Filtre à graisse métallique 3. Réinstaller le filtre dans de rechange, voir la section "Assistance ou service". On peut nettoyer et réactiver le filtre - KitchenAid KXW2330YSS | Installation Guide - Page 30
Neutre BL BL JA/VE N N N GRIS R BL JA JA BU N BL JA/VE Vitesse Résistance moteur (Ohms) 1 BU/BL 45,1 Min. M 2 BU/R 37,7 3 BU/GRIS 30,3 4 BU/N 20,8 Max. Temp. ambiante 73,4˚ F (23˚ C) MAR JA JA/VE BL R GRIS N BU MAR JA JA/VE BL R GRIS N BU JA JA JA JA - KitchenAid KXW2330YSS | Installation Guide - Page 31
la pièce numéro W10356918 Filtres à charbon de rechange (pour installations sans décharge à l'extérieur uniquement) Commander la pièce numéro pièces de rechange et aux compagnies de service. Les techniciens de service désignés par KitchenAid Canada sont formés pour remplir la garantie des produits - KitchenAid KXW2330YSS | Installation Guide - Page 32
une région éloignée où un service d'entretien KitchenAid autorisé n'est pas disponible. 9. La dépose et la réinstallation de votre gros appareil si celui-ci est installé dans un endroit inaccessible ou n'est pas installé conformément aux instructions d'installation fournies. 10. Les gros appareils
-
 1
1 -
 2
2 -
 3
3 -
 4
4 -
 5
5 -
 6
6 -
 7
7 -
8
-
9
-
10
-
11
-
12
-
13
-
14
-
15
-
16
-
17
-
18
-
19
-
20
-
21
-
22
-
23
-
24
-
25
-
26
-
27
-
28
-
29
-
30
-
31
-
32
 |
 |

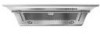
30" (76.2 CM) AND 36" (91.4 CM)
SLIDE-OUT RANGE HOOD
Installation Instructions and Use & Care Guide
HOTTE D'ASPIRATION AVEC MODULE DE
COMMANDE EXTRACTIBLE DE 30" (76,2 CM)
ET 36" (91,4 CM)
Instructions d’installation et Guide d’utilisation et d’entretien
Table of Contents/Table des matières
.............................................................................
2
IMPORTANT: READ AND SAVE THESE INSTRUCTIONS.
FOR RESIDENTIAL USE ONLY.
IMPORTANT : LIRE ET CONSERVER CES INSTRUCTIONS.
POUR UTILISATION RÉSIDENTIELLE UNIQUEMENT.
W10342488A