KitchenAid UXL6036YSS Use & Care Guide
KitchenAid UXL6036YSS Manual
 |
View all KitchenAid UXL6036YSS manuals
Add to My Manuals
Save this manual to your list of manuals |
KitchenAid UXL6036YSS manual content summary:
- KitchenAid UXL6036YSS | Use & Care Guide - Page 1
ca HOTTE DE CUISINIÈRE CONFIGURÉE EN ÎLOT À MONTAGE MURAL 30" (76,2 CM) ET 36" (91,4 CM) Instructions d'installation et Guide d'utilisation et d'entretien Au Canada, pour assistance, installation ou service composez le 1-800-807-6777 ou visitez notre site web à... www.KitchenAid.ca Table of Contents - KitchenAid UXL6036YSS | Use & Care Guide - Page 2
24 SCHÉMA DE CÂBLAGE 25 ASSISTANCE OU SERVICE 26 Au Canada 26 Accessoires 26 GARANTIE 27 have provided many important safety messages in this manual and on your appliance. Always read and follow instructions. WARNING You can be killed or seriously injured if you don't follow instructions. All - KitchenAid UXL6036YSS | Use & Care Guide - Page 3
INSTRUCTIONS WARNING: TO REDUCE THE RISK OF FIRE, ELECTRIC SHOCK, OR INJURY TO PERSONS, OBSERVE THE FOLLOWING: ■ Use this unit only in the manner intended by the manufacturer. If you have questions, contact the manufacturer. ■ Before servicing or cleaning the unit, switch power off at service - KitchenAid UXL6036YSS | Use & Care Guide - Page 4
. Read and follow the instructions provided with any tools listed only. See "Assistance or Service" section to order. ■ back draft dampers installed ■ Metal grease filter(s) ■ Vent cover support bracket ■ Mounting template ■ 2-piece vent cover ■ 2 on the model/serial rating plate. The model/serial - KitchenAid UXL6036YSS | Use & Care Guide - Page 5
dealer or an authorized parts distributor. The chimney extension replaces the upper chimney shipped with the range hood. Venting Requirements (vented models only) ■ Vent system must terminate to the outdoors, except for nonvented (recirculating) installations. ■ Do not terminate the vent system in - KitchenAid UXL6036YSS | Use & Care Guide - Page 6
deflector). To order, see the "Assistance or Service" section. Roof Venting Wall Venting Non-vented (recirculating as specified on the model/serial rating plate. The model/serial plate is and all local codes and ordinances. INSTALLATION INSTRUCTIONS Prepare Location ■ It is recommended that - KitchenAid UXL6036YSS | Use & Care Guide - Page 7
to the wall. IMPORTANT: All canopy mounting screws must be installed into wood. If there is no wood to screw into, additional wall framing supports may be required. Remove the template. 9. Drill 4.8 mm) pilot holes at all locations where screws are being installed into wood. 10. Install 2 - 5 x 45 - KitchenAid UXL6036YSS | Use & Care Guide - Page 8
with vent clamps. Make Electrical Connection WARNING A. Vent cover bracket B. 2.9 x 6.5 mm screws C. Deflector Electrical Shock Hazard Disconnect power before servicing. Replace all parts and panels before operating. Failure to do so can result in death or electrical shock. 1. Disconnect power - KitchenAid UXL6036YSS | Use & Care Guide - Page 9
4. Run home power supply wiring through ¹⁄₂" strain relief into terminal box. E D C B A A. UL listed wire connectors B. White wires C. Black wires D. Green (or bare) wire connected to yellow-green wires E. Home power supply 5. Use UL listed wire connectors and connect white wires (B) together. 6. - KitchenAid UXL6036YSS | Use & Care Guide - Page 10
RANGE HOOD USE The range hood is designed to remove smoke, cooking vapors and odors from the cooktop area. For best results, start the hood before cooking and allow it to operate several minutes after the cooking is complete to clear all smoke and odors from the kitchen. The hood controls are - KitchenAid UXL6036YSS | Use & Care Guide - Page 11
the hood and grease filters frequently according to the following instructions. Replace grease filters before operating hood. 4. Bend spring lights do not operate, make sure the lamps are inserted correctly before calling service. 1. Disconnect power. 2. Use a flat-blade screwdriver and gently pry - KitchenAid UXL6036YSS | Use & Care Guide - Page 12
Y/G BK BK Y/G W W Junction box L GND N EMI Filter BR BR WIRING DIAGRAM W W Y Y R R 1 234 56 GY GY BK BK BK (Line) 1 BU (Neutral) 2 Y (Lamp) 3 W (Speed 1) 4 R (Speed 2) 5 GY (Speed 3) 6 Motor resistance (Ohms) BU/R 37.7 BU/GY 30.3 BU/BK 28.8 (max) BU/W 45.1 (min) Room temp. - KitchenAid UXL6036YSS | Use & Care Guide - Page 13
When calling for assistance or service, please know the purchase date and the complete model and serial number of your factory specified replacement parts in your area, call us or your nearest designated service center. In the U.S.A. Call the KitchenAid Customer eXperience Center toll free: 1- - KitchenAid UXL6036YSS | Use & Care Guide - Page 14
dealer to determine if another warranty applies. If you need service, first see the "Troubleshooting" section of the Use & Care Guide. After checking "Troubleshooting," you may find additional help by checking the "Assistance or Service" section or by calling KitchenAid. In the U.S.A., call 1-800 - KitchenAid UXL6036YSS | Use & Care Guide - Page 15
: DANGER Risque possible de décès ou de blessure grave si vous ne suivez pas immédiatement les instructions. AVERTISSEMENT Risque possible de décès ou de blessure grave si vous ne suivez pas les instructions. Tous les messages de sécurité vous diront quel est le danger potentiel et vous disent - KitchenAid UXL6036YSS | Use & Care Guide - Page 16
FEU DE GRAISSE SUR LA CUISINIÈRE : CORPORELS, RESPECTER LES INSTRUCTIONS SUIVANTES : ■ Ne jamais laisser un élément de surface fonctionner fiche est endommagé(e). Jeter le ventilateur ou le retourner à un centre de service agréé pour examen et/ou réparation. DOMMAGES CORPORELS APRÈS LE DÉ - KitchenAid UXL6036YSS | Use & Care Guide - Page 17
Lire et observer les instructions fournies avec chacun des outils ) uniquement. Voir la section "Assistance ou service" pour commander. ■ Conduit d'évacuation métallique anti-reflux installés ■ Filtre(s) à graisse métallique ■ Bride de support du cache-conduit ■ Gabarit de montage ■ Cache-conduit - 2 - KitchenAid UXL6036YSS | Use & Care Guide - Page 18
Dimensions du placard 7¹⁄₄" (18,4 cm) 6⁵⁄₈" (16,8 cm) 2" (5,1 cm) min. 6" (15,2 cm) min.* 7³⁄₈" (18,8 cm) Point d'entrée du circuit d'évacuation et du câble d'alimentation électrique 15" (38,1 cm) Placard adjacent 30" (76,2 cm) ou 36" (91,4 cm) Placard adjacent Distance "X" entre le bas de - KitchenAid UXL6036YSS | Use & Care Guide - Page 19
et d'un déflecteur). Pour commander, voir la section "Assistance ou service". Décharge à travers le toit Décharge à travers le mur Si le domicile est équipé d'un câblage en aluminium, suivre les instructions suivantes : 1. Connecter une section de câble en cuivre massif aux conducteurs - KitchenAid UXL6036YSS | Use & Care Guide - Page 20
et installer la hotte de la cuisinière. Le non-respect de cette instruction peut causer une blessure au dos ou d'autre blessure. 4. À l'aide B. Axe central sur le mur C. Bride de support du cache-conduit D. Vis de 5 x 45 mm 4. Fixer la bride de support du cache-conduit au mur. Achever la préparation - KitchenAid UXL6036YSS | Use & Care Guide - Page 21
Installation de la hotte 1. À deux personnes au moins, suspendre la hotte aux 2 vis de montage, à travers les encoches de montage à l'arrière de la hotte. A Installations sans décharge à l'extérieur (recyclage) uniquement : 1. Assembler le déflecteur d'air sur la bride du cache-conduit à l'aide des - KitchenAid UXL6036YSS | Use & Care Guide - Page 22
panneaux avant de faire la remise en marche. Le non-respect de ces instructions peut causer un décès ou un choc électrique. 1. Déconnecter la source à la terre dans la boîte de la borne. Le non-respect de ces instructions peut causer un décès ou un choc électrique. 7. À l'aide des connecteurs de - KitchenAid UXL6036YSS | Use & Care Guide - Page 23
Achever l'installation 1. Pour les installations sans décharge à l'extérieur (recyclage) uniquement, installer les filtres à charbon sur la grille du logement du ventilateur. Voir la section "Entretien de la hotte". 2. Installer les filtres métalliques. Voir la section "Entretien de la hotte". 3. - KitchenAid UXL6036YSS | Use & Care Guide - Page 24
ENTRETIEN DE LA HOTTE Nettoyage IMPORTANT : Nettoyer fréquemment la hotte et les filtres à graisse en suivant les instructions suivantes. Réinstaller les filtres à graisse avant de faire fonctionner la hotte. Surfaces externes : 3. Placer le filtre à charbon dans la partie supérieure du filtre mé - KitchenAid UXL6036YSS | Use & Care Guide - Page 25
JA/VE N BL N JA/VE BL Boîtier de connexion L Terre NEU Filtre EMI SCHÉMA DE CÂBLAGE MAR BL JA R GRIS N MAR BL JA R GRIS N 1 234 56 N (Line) 1 BU (Neutre) 2 JA (Lampe) 3 BL (Vitesse 1) 4 R (Vitesse 2) 5 GRIS (Vitesse 3) 6 Résistance moteur (Ohms) BU/R 37,7 BU/GRIS 30,3 BU/N 28,8 (max) - KitchenAid UXL6036YSS | Use & Care Guide - Page 26
de chaque nouvel appareil. Pour localiser les pièces spécifiées par l'usine, dans votre région, nous appeler ou téléphoner au centre de service désigné le plus proche. Pour plus d'assistance Si vous avez besoin de plus d'assistance, vous pouvez soumettre par écrit toute question ou préoccupation - KitchenAid UXL6036YSS | Use & Care Guide - Page 27
ce gros appareil ménager est utilisé et entretenu conformément aux instructions jointes à ou fournies avec le produit, la marque KitchenAid de Whirlpool garantie s'applique. Si vous avez besoin de service, voir d'abord la section "Dépannage" du Guide d'utilisation et d'entretien. Après avoir vérifi - KitchenAid UXL6036YSS | Use & Care Guide - Page 28
W10322991C 12/11 © 2011. All rights reserved. ® Registered Trademark/TM Trademark of KitchenAid, U.S.A., KitchenAid Canada licensee in Canada Printed in Mexico Tous droits réservés. ® Marque déposée/TM Marque de commerce de KitchenAid, U.S.A., Emploi sous licence par KitchenAid Canada au
-
 1
1 -
 2
2 -
 3
3 -
 4
4 -
 5
5 -
 6
6 -
 7
7 -
8
-
9
-
10
-
11
-
12
-
13
-
14
-
15
-
16
-
17
-
18
-
19
-
20
-
21
-
22
-
23
-
24
-
25
-
26
-
27
-
28
 |
 |

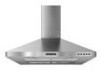
30" (76.2 CM) AND 36" (91.4 CM) WALL-MOUNT
CANOPY RANGE HOOD
Installation Instructions and Use & Care Guide
For questions about features, operation/performance, parts, accessories or service, call:
1-800-422-1230
In Canada, for assistance, installation and service, call:
1-800-807-6777
or visit our website at...
www.kitchenaid.com
or
www.KitchenAid.ca
HOTTE DE CUISINIÈRE CONFIGURÉE
EN ÎLOT À MONTAGE MURAL
30" (76,2 CM) ET 36" (91,4 CM)
Instructions d’installation et Guide d’utilisation et d’entretien
Au Canada, pour assistance, installation ou service composez le
1-800-807-6777
ou visitez notre site web à...
www.KitchenAid.ca
Table of Contents/Table des matières
.............................................................................
2
IMPORTANT: READ AND SAVE THESE INSTRUCTIONS.
FOR RESIDENTIAL USE ONLY.
IMPORTANT : LIRE ET CONSERVER CES INSTRUCTIONS.
POUR UTILISATION RÉSIDENTIELLE UNIQUEMENT.
LI3Y7C/W10322991C