Kodak I620 Installation Guide
Kodak I620 - Document Scanner Manual
 |
UPC - 000055515498
View all Kodak I620 manuals
Add to My Manuals
Save this manual to your list of manuals |
Kodak I620 manual content summary:
- Kodak I620 | Installation Guide - Page 1
software a. Insert the Kodak i600 Series Scanner Installation CD in the CD-ROM drive. The installation program starts automatically. b. Install the TWAIN Data Source, ISIS Driver and the Kodak Scan Validation Tool. c. When installation is complete, shut down your computer. 3 Install FireWire
-
 1
1
 |
 |
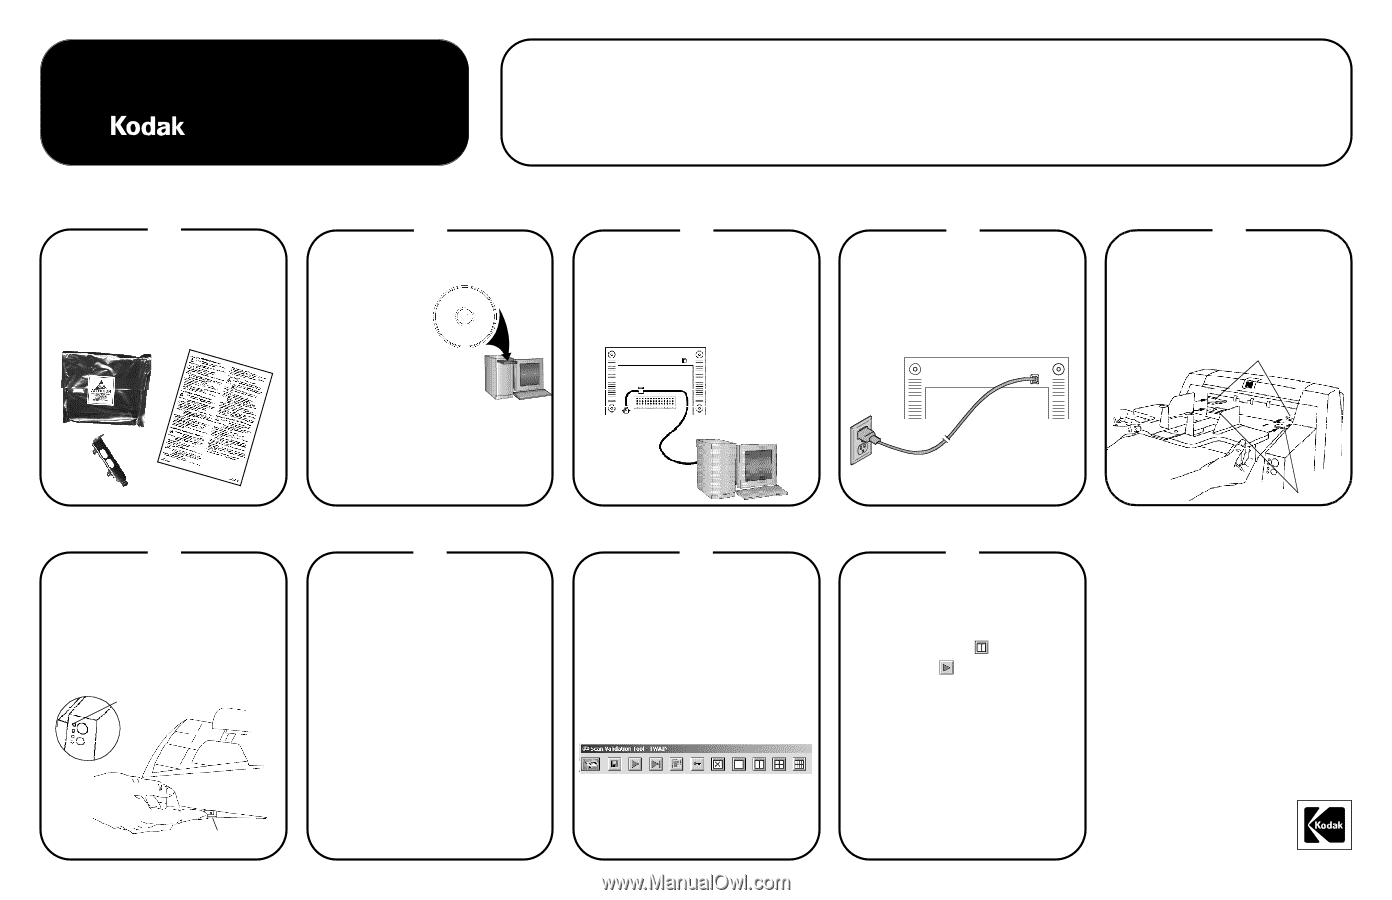
Package Contents
1
Installation Guide
for
i600 Series Scanners
2
Install software
a.
Insert the
Kodak
i600 Series Scanner
Installation CD in
the CD-ROM drive.
The installation
program starts
automatically.
b.
Install the TWAIN Data
Source, ISIS Driver and the
Kodak Scan Validation Tool.
c.
When installation is complete, shut down
your computer.
3
Install FireWire cable
CAUTION:
DO NOT FORCE THE CONNECTOR.
Plug the end of the cable with the right angle
into the scanner, being sure that the cable is
aligned correctly.
4
Install power cord
Select the power cord for your scanner that
matches your electrical requirement.
5
Install output tray
a.
Insert the output tray into one of the two
positions as shown below.
b.
Adjust side and front guides to match the
size of the documents you will be scanning.
6
Turn on power
a.
Power up the scanner.
b.
Power up and login to your PC using an
account with Administrative privileges.
Wait until the scanner beeps before
initiating scanning.
Install FireWire card
IMPORTANT:
Turn the computer off and
unplug the power cord to avoid
static discharge.
•
Power cord bundle
•
Ink cartridge and blotter strips
•
Tires and Pre-separation pads
• Cleaning supplies
• FireWire package
• Calibration targets
• Output tray
•
Exit deflector
•
Warranty/Registration box:
– Paper path cleaner
– User’s Guide
– Installation CD
– Brightness and Contrast Control CD
– Brightness and Contrast Control Reference Guide
– Quick Tips Guide
www.kodak.com/go/docimaging
Power light
Power switch
Top position
Bottom position
NOTE: Additional instructions for the steps below can be found in the User’s Guide and other supporting documentation.
EASTMAN KODAK COMPANY
343 State Street
Rochester, NY 14650
U.S.A.
©Eastman Kodak Company, 2003.
TM: Kodak
Printed in U.S.A.
A-61507
CAT No. 123 0010
9E3958
Scanner will be
recognized by the
software
Your operating software will now auto-detect
the scanner.
Depending on the computer operating system
you are using, you may see dialog boxes which
show this step. Follow the instructions,
selecting the defaults, as prompted by the
dialog boxes.
Set up a test scan
a.
Place a document to scan in the input tray.
b. Select
Start > Programs > Kodak >
Document Imaging > Scan Validation Tool.
The Scan Validation Tool dialog box will
be displayed.
c. Select
TWAIN
(or
ISIS
) for the Driver Types
and
Kodak Scanner i600
as the driver. The
Scan Validation Tool dialog box is
displayed.
NOTE:
If this dialog box is not displayed, a
message box may be displayed. Follow
the steps indicated in the message
box.
Scanning an image/
verification
a.
If the image viewer window is not open,
click one of the View
buttons.
b.
Click the Start
button. The scanned
document will be displayed in the image
viewer window.
•
If the document is scanned correctly,
the installation and verification of your
scanner is complete.
Congratulations!
You may now install the third-party
scanning application software you
intend to use with your scanner.
•
If the document did not scan correctly,
refer to the Image Processing Guide on
your CD for more information.
7
9
8