Konica Minolta SL1000 Microfiche SL1000 User Guide
Konica Minolta SL1000 Microfiche Manual
 |
View all Konica Minolta SL1000 Microfiche manuals
Add to My Manuals
Save this manual to your list of manuals |
Konica Minolta SL1000 Microfiche manual content summary:
- Konica Minolta SL1000 Microfiche | SL1000 User Guide - Page 1
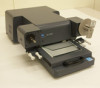
SL1000 Digital Film Scanner User's Guide - Konica Minolta SL1000 Microfiche | SL1000 User Guide - Page 2
International ENERGY STAR® Compliance Statement The purpose of the International ENERGY STAR® Program is to promote the development and popularization of energy-efficient office equipment. - Konica Minolta SL1000 Microfiche | SL1000 User Guide - Page 3
utility of this device, all operators should carefully read and follow the instructions in this manual. Please keep this manual in a handy place near the machine. Make sure you observe all of the precautions listed in this manual. * Please NOTE that some parts of the contents of this section may - Konica Minolta SL1000 Microfiche | SL1000 User Guide - Page 4
plug that is specified in POWER CORD INSTRUCTION. Failure to use this cord could result in a multiple outlet adapter to connect any other appliances or machines. Use of a power outlet for more than the marked outlet, and then call your authorized service representative. ● Do not use an extension - Konica Minolta SL1000 Microfiche | SL1000 User Guide - Page 5
smoke, or unusual odor or noise. Immediately turn OFF the Power Switch, unplug the power cord from the power outlet, and then call your authorized service representative. If you keep on using it as is, a fire or electrical shock could result. ● Do not keep using this product, if this product has - Konica Minolta SL1000 Microfiche | SL1000 User Guide - Page 6
The socket-outlet shall be installed near the machine and shall be easily accessible as the power plug hold it by the locations specified in the User's Guide or other documents. If the unit falls it may present. Failure to do so may shorten the service life of the product, cause damage or decrease - Konica Minolta SL1000 Microfiche | SL1000 User Guide - Page 7
INFORMATIONS DE SÉCURITÉ Cette section contient des instructions détaillées sur l'utilisation et l'entretien de cette machine. Pour obtenir un rendement optimal de cette machine, il est imperative que toutes les personnes l'utilisant lisent attentivement et observent scrupuleusement les consignes de - Konica Minolta SL1000 Microfiche | SL1000 User Guide - Page 8
veillez à vous procurer uniquement un cordon avec fiches conformes aux INSTRUCTIONS POUR LE CORDON D'ALIMENTATION. Le non-respect de cette consigne Utilisez le cordon d'alimentation contenu dans l'emballage uniquement avec cette machine; ne l'utilisez JAMAIS avec aucun autre appareil. Le non-respect - Konica Minolta SL1000 Microfiche | SL1000 User Guide - Page 9
INFORMATIONS DE SÉCURITÉ WARNING Ne posez jamais de vase ou tout autre récipient contenant de l'eau, ainsi que de petits objets métalliques tels que des trombones sur l'appareil. Si le récipient venait à être renversé ou des objets métalliques venaient à tomber dans l'appareil, cela risquerait de - Konica Minolta SL1000 Microfiche | SL1000 User Guide - Page 10
INFORMATIONS DE SÉCURITÉ CAUTION Ne posez aucun objet à proximité de la prise de courant alimentant le cordon car cela risquerait de gêner l'accès au cordon et son retrait en cas d'urgence. Veillez à ce que la prise de courant alimentant l'appareil se trouve à proximité de ce dernier et soit facile - Konica Minolta SL1000 Microfiche | SL1000 User Guide - Page 11
Please follow the instructions given in this manual when operating the system and do not touch any part of the system the manual does not cover. NEVER attempt to disassemble or rebuild the system. The contents of this manual are subject to change without notice. No part of this manual may be quoted - Konica Minolta SL1000 Microfiche | SL1000 User Guide - Page 12
Digital Film Scanner "SL1000" (herein after referred to as "the Scanner"). This User's Guide includes precautions for installation/operation of the Scanner, a system outline, an explanation of the Driver software, operation procedures for the Scanner, troubleshooting with the instruction manual, may - Konica Minolta SL1000 Microfiche | SL1000 User Guide - Page 13
Canada Users) This Class A digital apparatus complies with Canadian ICES-003 We declare under our sole responsibility that the Scanner and options to which this declaration relates is /AT are registered trademarks of International Business Machines Corporation. Microsoft, Windows, Windows Vista and - Konica Minolta SL1000 Microfiche | SL1000 User Guide - Page 14
functions and part names of the Scanner Chapter 3 Application "SL-Touch for SL1000" Describes the application "SL-Touch for SL1000". Chapter 4 Operation Describes operation precautions and procedures, and settings for each function. Chapter 5 Troubleshooting Describes error and warning messages that - Konica Minolta SL1000 Microfiche | SL1000 User Guide - Page 15
Scanner 1-6 Chapter 2 Overview 2-1 1 Features 2-2 2 Part Identification and Functions 2-3 2.1 Main Unit 2-3 2.2 Roll Film Carrier (Option 2-4 Chapter 3 Application "SL-Touch for SL1000 3-1 1 SL-Touch for SL1000 Up 3-13 2.2 Application Shutdown 3-14 3 SCAN Mode Screen 3-15 3.1 Toolbar 3-17 - Konica Minolta SL1000 Microfiche | SL1000 User Guide - Page 16
Chapter 5 Troubleshooting 5-1 1 Problems with the Scanner 5-2 2 Troubleshooting 5-3 2.1 Flashing display of the Indicator Lamp 5-3 2.2 Attention display on the Personal Computer Screen 5-3 2.3 Errors shown on the Personal Computer Screen 5-4 3 Trouble when scanning an image 5-6 4 Trouble when - Konica Minolta SL1000 Microfiche | SL1000 User Guide - Page 17
Chapter 1 Precautions for Installation & Operation - Konica Minolta SL1000 Microfiche | SL1000 User Guide - Page 18
SL1000 User's Guide 1 Precautions for Installation 1.1 Installation Environment Install the Scanner in a location, which meets Cord can be unplugged immediately if necessary. NEVER connect any other appliances or machines by means of a multiple socket to the outlet being used for the unit. - Konica Minolta SL1000 Microfiche | SL1000 User Guide - Page 19
Chapter 1 Precautions for Installation & Operation 1.4 Space Requirements Secure the recommended space shown in the figure below to ensure easy operation and maintenance of the Scanner. [Standard: Fiche Carrier Model] 1-3 - Konica Minolta SL1000 Microfiche | SL1000 User Guide - Page 20
SL1000 User's Guide [Motorized Roll Film Carrier /Manual Roll Film Carrier Model] 1-4 - Konica Minolta SL1000 Microfiche | SL1000 User Guide - Page 21
to turn the Power Switch OFF, unplug the Power Cord, and call your authorized dealer for appropriate action when the Scanner becomes excessively hot or produces abnormal noise. 2.3 Precautions when operating the Personal Computer Refer to the Operation Manual provided for the Personal Computer. 1-5 - Konica Minolta SL1000 Microfiche | SL1000 User Guide - Page 22
SL1000 User's Guide 2.4 Moving the Scanner When moving the Scanner, observe the following: When carrying the Scanner, hold as shown in the below figure. Be careful not to hurt your back. When moving the Scanner, be sure to disconnect the Power Cord and the USB Cable. When transporting the - Konica Minolta SL1000 Microfiche | SL1000 User Guide - Page 23
Chapter 2 Overview - Konica Minolta SL1000 Microfiche | SL1000 User Guide - Page 24
SL1000 User's Guide 1 Features This Scanner is digital screen-less Scanner that has developed for the microfilm editing to the digital image for a high-speed scanning. There are the following features. ◆ The machine with 360dpi (A4 L or Letter L conversion). *L = landscape ◆ The color image of - Konica Minolta SL1000 Microfiche | SL1000 User Guide - Page 25
8. Power Cord Socket: 9. Security Slot: 10. Power Cord: 11. USB Cable: Scanner condition is shown. Film is set to desired position. Film held in place. To position is fine-tuned, and the Fiche Carrier is moved. Turns the Scanner ON/OFF. Connect the USB Cable that is supplied with the equipment. - Konica Minolta SL1000 Microfiche | SL1000 User Guide - Page 26
SL1000 User's Guide 2.2 Roll Film Carrier (Option) 1 3 2 1. Reel Shaft: 2. Take-Up Reel: 3. Guide Roller: 3 Roll Film is inserted. Roll Film is wound. The Roll Film is guided. 2-4 - Konica Minolta SL1000 Microfiche | SL1000 User Guide - Page 27
Chapter 3 Application "SL-Touch for SL1000" - Konica Minolta SL1000 Microfiche | SL1000 User Guide - Page 28
SL1000'. 1.1 Trademark Acknowledgments IBM and IBM PC/AT are registered trademarks of International Business Machines minimum system requirements for the computer connected to the Scanner to install the Driver. The operator should be must be supported by the multi-touch function of Windows 7. 3-2 - Konica Minolta SL1000 Microfiche | SL1000 User Guide - Page 29
1.3 Installation the Application Software and the Driver Software NOTE ! Must install "SL-Touch for SL1000" before connecting the Scanner. When the Scanner is connected before "SL-Touch for SL1000" is installed, "Found New Hardware Wizard" is displayed. In this case, please end the wizard clicking - Konica Minolta SL1000 Microfiche | SL1000 User Guide - Page 30
SL1000 User's Guide 2 When the installation screen appears, Click "Install SL-Touch for SL1000" to begin the installation. 3 If the "User Account Control" screen appears, click the "Yes" button. NOTE ! This screen may not be displayed, depending on the settings of the computer. 3-4 - Konica Minolta SL1000 Microfiche | SL1000 User Guide - Page 31
Chapter 3 SL-Touch for SL1000 4 When the installation screen of "Microsoft .NET Framework 4.0 Client" and "Microsoft SQL CE3.5 SP2" is displayed, click screen is not displayed. 5 When the "Welcome to the InstallShield Wizard for SL-Touch for SL1000" screen appears, click the "Next" button. 3-5 - Konica Minolta SL1000 Microfiche | SL1000 User Guide - Page 32
SL1000 User's Guide 6 When the License Agreement" screen appears, confirm the following messages and click the "Yes" button. 7 Click the "Install" button. 8 When the "Windows Security" screen appears, click "Install this driver software anyway". 3-6 - Konica Minolta SL1000 Microfiche | SL1000 User Guide - Page 33
according to the following procedures. 10 Connect the Scanner to the Personal Computer with the USB cable. 11 Turn the Power Switch of the Scanner ON. 12 "Installing device driver software" appears. 13 When "SL1000 Digital Film Scanner Device driver software installed successfully" is displayed - Konica Minolta SL1000 Microfiche | SL1000 User Guide - Page 34
SL1000 User's Guide 1.4 Update the Application Software and the Driver Software The SL-Touch for SL1000 application is updated Run launcher.exe". 2 When the installation screen appears, click "Install SL-Touch for SL1000" to begin the installation. 3 If the "User Account Control" screen appears, - Konica Minolta SL1000 Microfiche | SL1000 User Guide - Page 35
the CD-ROM from the Personal Computer. IMPORTANT ! When the SL-Touch for SL1000 application is updated, the device driver is deleted once. Therefore, please install the device to the following procedures. 8 Connect the Scanner to the Personal Computer with the USB cable. 9 Turn the Power Switch - Konica Minolta SL1000 Microfiche | SL1000 User Guide - Page 36
SL1000 User's Guide 10 "Installing device driver software" appears. 11 When "SL1000 Digital Film Scanner Device driver software installed successfully" is displayed, the driver was installed successfully. 3-10 - Konica Minolta SL1000 Microfiche | SL1000 User Guide - Page 37
differ slightly depending on the Windows Version. 1 Confirm the Power Switch of the Scanner is turned OFF. 2 From "Start" menu, choose "Control panel". Click "uninstall a program". 3 Select "SL-Touch for SL1000" and then click the "Uninstall" button. 4 When the following window appears, Click "Yes - Konica Minolta SL1000 Microfiche | SL1000 User Guide - Page 38
SL1000 User's Guide 5 When the "Uninstall Complete" screen appears, click the "Finish" button. 6 Restart the Personal Computer. 3-12 - Konica Minolta SL1000 Microfiche | SL1000 User Guide - Page 39
Personal Computer with a USB Cable, and turn ON the Power Switch of the Scanner. 3 Select the button "Start" "All programs" "SL-Touch" "SL-Touch". 4 The application starts in the SCAN Mode after the main screen of "SL-Touch for SL1000" is displayed. NOTE ! It takes time to start to read the - Konica Minolta SL1000 Microfiche | SL1000 User Guide - Page 40
SL1000 User's Guide 2.2 Application Shutdown It is possible to shutdown the application bar) until "Shutdown Application" is displayed. Click OK and the application will shutdown. SCAN Mode:Normal Screen SCAN Mode:Full Screen VIEW Mode:Normal Screen VIE Mode:Full Screen Shutdown Screen Presses - Konica Minolta SL1000 Microfiche | SL1000 User Guide - Page 41
SL1000 3 SCAN Mode Screen The image is displayed on the application screen. This mode enables you to read the image and set various functions. Listed below is an explanation of the functions that can be set in SCAN Mode. 4 1 2 5 3 1. Scan output printer is application and the Scanner are operated - Konica Minolta SL1000 Microfiche | SL1000 User Guide - Page 42
SL1000 User's Guide 4. Help Button The Help file is displayed The Help file is also displayed when the "F1" key on the keyboard is pressed. 5. Roll Film Carrier The Motorized Roll Film Carrier (Option) is operated. 5.1 RollFilmCarrier 3-16 - Konica Minolta SL1000 Microfiche | SL1000 User Guide - Page 43
Rotate CCW Rotate CW Horizontal Flip Chapter 3 SL-Touch for SL1000 It changes from the SCAN Mode to the VIEW Mode. The Film Selection screen is displayed this case, adjust it manually. The polarity of the film ("Positive film" or "Negative film") is selected. The Scanner performs the zoom operation - Konica Minolta SL1000 Microfiche | SL1000 User Guide - Page 44
SL1000 User's Guide Deskew CCW Deskew CW Scan to File The image is counterclockwise and Manual Switch is used to scan the microfilm. In this case, you can toggle between "Scan to File" or "Scan to Print" in the "Preferences" menu. Scan to Print The image is scanned, and it outputs to the printer - Konica Minolta SL1000 Microfiche | SL1000 User Guide - Page 45
3 SL-Touch for SL1000 The displayed image is continuously magnified. The magnification amount is displayed in the scan window (upper right) while the shape and the density of the image. In this case, it adjusts manually. Cropping Mode The Cropping Mode ("Normal Mode" or "Custom Mode") is changed - Konica Minolta SL1000 Microfiche | SL1000 User Guide - Page 46
SL1000 User's Guide Multiple SCAN Multiple SEARCH Auto Exposure The continuous scanning screen of the Roll Film is displayed. (The Motorized Roll Film Carrier of the option must be installed.) 5.1 Multiple SCAN ". Step Focus Focus is adjusted manually. Auto Deskew The inclination of the - Konica Minolta SL1000 Microfiche | SL1000 User Guide - Page 47
pan window also follows when the image in the scan window is dragged and moved. Output Setting Preferences When the scan is output, the scan size and the resolution, etc. are variously set. 3.5 Output Setting The application and the Scanner are variously set (Power Saving, etc.). It is necessary - Konica Minolta SL1000 Microfiche | SL1000 User Guide - Page 48
SL1000 User's Guide 3.2 Film Selection The type of the film is selected and the setting (display color and zoom magnification, etc.) that is appropriate for the film is - Konica Minolta SL1000 Microfiche | SL1000 User Guide - Page 49
Chapter 3 SL-Touch for SL1000 The proper zoom magnification is set to the Micro Fiche Film: When the negative film is used, the reversing display (Conversion: the black from the transparency, white from the black) and the scanning are selected. Positive Film: When the positive film is used, - Konica Minolta SL1000 Microfiche | SL1000 User Guide - Page 50
SL1000 User's Guide 7. Horizontal Flip Images are flipped to the right and left.. NOTE ! When the Roll Film is selected, the initial value of "Horizontal Flip" is "ON" 8. - Konica Minolta SL1000 Microfiche | SL1000 User Guide - Page 51
Chapter 3 SL-Touch for SL1000 3.3 Image Adjustment The display and the image quality when scanning are adjusted. The adjusted value is in real time reflected in the displayed image. "Standard Mode" and "Advance Mode" can respectively be set by switching - Konica Minolta SL1000 Microfiche | SL1000 User Guide - Page 52
SL1000 User's Guide 2. Adjustment Area The adjustable range of "Brightness" and "Contrast" is The adjusted image returns to the initial when "Image rotation" and "Skew correction" are executed, and the scan image of the film is changed. The selection range frame is not changed at the zoom. Please - Konica Minolta SL1000 Microfiche | SL1000 User Guide - Page 53
4. Contrast 5. Sharpness Chapter 3 SL-Touch for SL1000 The contrast of the image is adjusted. High The contrast of the image is increased. Low The contrast of the image is decreased. NOTE ! The - Konica Minolta SL1000 Microfiche | SL1000 User Guide - Page 54
SL1000 User's Guide Advance Mode When the reading color is "Color" or "Monochrome binary", the following items can be set. Image Type: Color Image Type: B/W (Manual) 6 7 8 9 6. Hue 7. Saturation 8. Lightness The hue of the color image is adjusted. The saturation of the color image is adjusted - Konica Minolta SL1000 Microfiche | SL1000 User Guide - Page 55
3.4 Lamp Illuminance The illuminance of the exposure lamp are set. 1 Chapter 3 SL-Touch for SL1000 1. Lamp Illuminance Quantities of light of the exposure lamp are set. The exposure lamp is lightened. The image lightens for the positive film. The image - Konica Minolta SL1000 Microfiche | SL1000 User Guide - Page 56
SL1000 User's Guide 3.5 Output Setting The scan setting, the output setting and printer setting when "Scan to File" and "Scan to Print" are executed are set. 1 3 4 5 2 11 6 12 7 13 14 15 8 9 16 17 10 18 1. Batch - Title 2. Batch - NOTE 3. Delete Register, set scan settings and - Konica Minolta SL1000 Microfiche | SL1000 User Guide - Page 57
SL-Touch for SL1000 The input batch is preserved. When "Save" is clicked after "Batch title" is input, the batch is preserved. The following setting is preserved in the batch. Orientation, Size, Resolution, Image Type, Edit, Save in, File name, File number, Format, Compression, Printer Name, Fit to - Konica Minolta SL1000 Microfiche | SL1000 User Guide - Page 58
User's Guide 9. Image Type 10. Edit 11. Save In The mode of the output image (Color and Binary) is set. When Film "Color Film" is selected: Only the Color (24bit) can be selected. When film "Monochrome Film" is selected: It can be selected according to 4 selections (Gray Scale (8bit), B/W (Manual - Konica Minolta SL1000 Microfiche | SL1000 User Guide - Page 59
Chapter 3 SL-Touch for SL1000 NOTE ! The the batch. Only the file newly scanned is registered in the batch. number (four digits)". NOTE ! When the file name is not set, file number (four digits) becomes and "Convert multi-page" are used for conversion. A Searchable PDF file cannot be saved - Konica Minolta SL1000 Microfiche | SL1000 User Guide - Page 60
SL1000 User's Guide 16. Printer Name The output printer is selected. 17. Fit to printable area When the image is output, the image is magnified or reduced based on of paper size the size - Konica Minolta SL1000 Microfiche | SL1000 User Guide - Page 61
for SL1000 3.6 Preferences The Application and the Scanner Settings are saved. It is necessary to input the password to display the screen in the environmental setting. NOTE ! The password of default is "0000". To initialize the password when the password was forgotten, contact the Servicing - Konica Minolta SL1000 Microfiche | SL1000 User Guide - Page 62
image is displayed" is "ON". For Scan to File Scan to Print 4. White Balance 5. Color Correction 6. ICC Profile 7. Auto Contrast 8. Digital GEM 9. Custom Setting 10. E-Mail Setting 11. Manual Switch 12. Put the Scanner to Sleep 13. Turn OFF the Scanner The correction of the white balance is set - Konica Minolta SL1000 Microfiche | SL1000 User Guide - Page 63
Show Property Chapter 3 SL-Touch for SL1000 Change to the "Full Screen Mode displayed at the right of the scan window by the sidebar. SCAN Mode VIEW Mode 17. Launch Film Password Change The device is adjusted in this area. Only Service Technicians can use this mode. The setting is saved, and - Konica Minolta SL1000 Microfiche | SL1000 User Guide - Page 64
SL1000 User's Guide 3.7 Custom Setting "Film Setting" and "Toolbar Setting" for each custom profile can be saved as a custom registration. Film Setting 1 2 3 4 5 6 7 8 9 10 1. Custom profile Displays the custom - Konica Minolta SL1000 Microfiche | SL1000 User Guide - Page 65
3. Save 4. Show Roll Film Carrier 5. Zoom 6. Film Polarity 7. Film Color 8. Horizontal Flip 9. Rotate 10. OK 11. Cancel Chapter 3 SL-Touch for SL1000 Deletes registered custom profile. When deleted "Custom Profile" is selected, and "Delete" is clicked, the custom profile is deleted. NOTE ! The - Konica Minolta SL1000 Microfiche | SL1000 User Guide - Page 66
SL1000 User's Guide Toolbar Setting 8 9 10 1 2 3 4 5 6 7 11 1. Non-display button 2. Toolbar 3. Add 4. Remove 5. Move Up 6. Move Down The buttons not displayed on the toolbar is displayed in the - Konica Minolta SL1000 Microfiche | SL1000 User Guide - Page 67
Chapter 3 SL-Touch for SL1000 7. Reset 8. Show Text of Icons 9. Show Output Setting Button 10. Show E-Mail Button 11. Auto Correction The button displayed in the toolbar is reset in - Konica Minolta SL1000 Microfiche | SL1000 User Guide - Page 68
SL1000 User's Guide 3.8 Password Change The password to display "Preferences" screen can be changed. 1 2 1. Old password 2. New password The password set now is input. NOTE ! The default password is "0000". The new password is input. The password can set only 4 digit numeral. 3-42 - Konica Minolta SL1000 Microfiche | SL1000 User Guide - Page 69
3.9 E-Mail Setting 1 2 3 4 5 6 7 14 15 Chapter 3 SL-Touch for SL1000 8 9 10 11 12 13 16 E-Mail TX (SMTP) The transmission of the E-Mail is set. 1. SMTP server Sets the SMTP server address. 2. Port Number Sets - Konica Minolta SL1000 Microfiche | SL1000 User Guide - Page 70
SL1000 User's Guide E-Mail RX (POP) When "POP Before SMTP" is "ON", E-mail reception is enabled. 8. POP Before SMTP Sets POP Before SMTP (enable/disable). NOTE ! POP Before - Konica Minolta SL1000 Microfiche | SL1000 User Guide - Page 71
Chapter 3 SL-Touch for SL1000 4 VIEW Mode Screen The image file preserved in the SCAN Mode is displayed and it can be edited. NOTE ! It is possible to display only with the batch file preserved with the connected Scanner. 4 1 2 3 1. Thumbnail The image preserved in the batch that is currently - Konica Minolta SL1000 Microfiche | SL1000 User Guide - Page 72
SL1000 User's Guide 2. View Window 3. Toolbar 4.Help Button The image selected from the Thumbnail is displayed. When the VIEW Mode is started, the final scanned image is displayed in the SCAN Mode. NOTE ! When the touch panel is used, the image can be switched back and forth by the flick - Konica Minolta SL1000 Microfiche | SL1000 User Guide - Page 73
Mode Open Chapter 3 SL-Touch for SL1000 It changes to the SCAN Mode. NOTE ! When the Scanner is not connected, it does not change to the SCAN Mode. The registered batch is opened. Save Print The edited image is overwritten and preserved. NOTE ! It cannot save by an another name or file - Konica Minolta SL1000 Microfiche | SL1000 User Guide - Page 74
SL1000 User's Guide E-Mail Delete File The scanned file is transmitted via E-mail. 4.5 E-Mail The scanned file is deleted. 4.6 Delete File 3-48 - Konica Minolta SL1000 Microfiche | SL1000 User Guide - Page 75
Chapter 3 SL-Touch for SL1000 4.2 Image Adjustment The image quality of the image being displayed now can be adjusted. 1 2 3 4 1. Histogram 2. Adjustment Area Distribution and the Mean Value of the Histogram - Konica Minolta SL1000 Microfiche | SL1000 User Guide - Page 76
SL1000 User's Guide 3. Brightness 4. Contrast The brightness of the image is adjusted. The contrast of the image is adjusted. NOTE ! The proper image density can be obtained by adjusting "Brightness" and "Contrast" to distribute the Histogram in the whole area. 3-50 - Konica Minolta SL1000 Microfiche | SL1000 User Guide - Page 77
Chapter 3 SL-Touch for SL1000 4.3 Convert multi-page The selected image is converted from the image preserved in the batch into the multi page file. NOTE ! OCR conversion is only supported in English for "Searchable PDF" functions. Other languages are not supported. It may take several - Konica Minolta SL1000 Microfiche | SL1000 User Guide - Page 78
SL1000 User's Guide 6. Add All 7. Add 8. Delete 9. Move Up 10. Move Down 11. Delete original file time required is based on the amount of text and the quality of the text within the scanned file when the "Searchable PDF" file format is selected and OCR is executed. The screen of the Convert multi- - Konica Minolta SL1000 Microfiche | SL1000 User Guide - Page 79
3 SL-Touch for SL1000 4.4 OCR The file is selected from PDF file where the batch was preserved, OCR is executed, and it converts it into PDF file for the OCR retrieval. NOTE ! OCR conversion is only supported in English for "Searchable PDF" functions. Other languages are not supported The OCR - Konica Minolta SL1000 Microfiche | SL1000 User Guide - Page 80
SL1000 User's Guide 10. Export 11. Close The OCR conversion begins. The "Cancel" button appears while executing the OCR conversion. When the Cancel button is clicked, the execution of the OCR conversion is canceled. NOTE ! When the OCR conversion is executed, it overwrites to the original file. - Konica Minolta SL1000 Microfiche | SL1000 User Guide - Page 81
Chapter 3 SL-Touch for SL1000 4.5 E-Mail The selected file is transmitted as an E-mail among files preserved by the batch. E-Mail 4 . SL-Touch, year (4 digits A.D.), the month (2 digits), day (2 digits), hour (2 digits for 24 hours), and minute (2 digits) and seconds (2 digits) The file (file in - Konica Minolta SL1000 Microfiche | SL1000 User Guide - Page 82
SL1000 User's Guide 8. Message: 9. Total File Size 10. Send 11. Close Input the Message. The accumulated size of all files selected for transmission via E-mail is displayed. Sends the E-mail. NOTE ! When a problem is encountered with an E-mail transmission, an error message is displayed. The E- - Konica Minolta SL1000 Microfiche | SL1000 User Guide - Page 83
Edit E-mail address is registered and edited. 1 2 Chapter 3 SL-Touch for SL1000 1. Name 2. E-Mail Address 3. OK 4. Cancel 3 4 Inputs the address name. Inputs the E-mail address. Registers the edited name and address. Cancels the selection and close the window. 3-57 - Konica Minolta SL1000 Microfiche | SL1000 User Guide - Page 84
SL1000 User's Guide 4.6 Delete File Operation that enables you to delete files. 1 1. Object File 2. Delete 3. Cancel 2 3 The file (file in the batch) selected for the deletion is displayed - Konica Minolta SL1000 Microfiche | SL1000 User Guide - Page 85
Chapter 3 SL-Touch for SL1000 5 Roll Film Carrier When the option "Motorized Roll Film Carrier" is utilized, it can be operated from "Roll Film Carrier" screen of the application. 5.1 Roll - Konica Minolta SL1000 Microfiche | SL1000 User Guide - Page 86
SL1000 User's Guide Film Feeding The film feeding is continued in the forward direction (FWD Direction) while pressing "FWD", and stops when "FWD" is released. slow fast Film - Konica Minolta SL1000 Microfiche | SL1000 User Guide - Page 87
3 SL-Touch for SL1000 5.2 Multiple SCAN The frame (image) on the Roll Film is automatically detected, and the scan image is preserved in the file. 1 2 3 4 5 6 7 1. Film Operating Direction 2. Edit When continuously scanning, the film operating direction is set. When continuous scan is executed - Konica Minolta SL1000 Microfiche | SL1000 User Guide - Page 88
SL1000 User's Guide 5. Film Position 6. SCAN The position of the film stop is adjusted. NOTE ! The stop position of "Multiple SEARCH", "Previous", and "Next" changes when the film position setting is altered. The film position can be adjusted while continuously scanning. The continuous - Konica Minolta SL1000 Microfiche | SL1000 User Guide - Page 89
Chapter 3 SL-Touch for SL1000 5.3 Multiple SERACH The frame (image) on the Roll Film is automatically detected, and it displays on position of the film stop is adjusted. NOTE ! The stop position of "Multiple SCAN", "Previous", and "Next" changes when the film position setting is altered. The - Konica Minolta SL1000 Microfiche | SL1000 User Guide - Page 90
SL1000 User's Guide 6. SEARCH The continuous searching begins. The screen size is reduced and only "Counter" display and "Film Position" adjustment can be operated while continuously retrieving. In - Konica Minolta SL1000 Microfiche | SL1000 User Guide - Page 91
Chapter 4 Operation - Konica Minolta SL1000 Microfiche | SL1000 User Guide - Page 92
SL1000 User's Guide 1 Precautions for Operation 1.1 Main Unit The following sections require special attention when operating the Scanner. Roll Film Carrier (Option) The following sections require special attention when operating the Scanner. Do not put anything on top of the Unit. Do not put items - Konica Minolta SL1000 Microfiche | SL1000 User Guide - Page 93
Position). Power Switch NOTE ! When the USB Cable that connects this machine with the computer is not securely connected, scanner image data cannot be read. 2.2 Turning OFF the Power Switch 1 Quit the application (SL-Touch for SL1000). 2 Press the Power Switch to the OFF ("O" Position). Power Switch - Konica Minolta SL1000 Microfiche | SL1000 User Guide - Page 94
SL1000 User's Guide 2.3 Power Saving Features The Exposure Lamp goes OFF, and the Indicator Lamp flashes when the Scanner has not been used for a determined amount of time, and it enters the Sleep Mode. To return it to the Stand-by Condition, press any button of the application. This machine shuts - Konica Minolta SL1000 Microfiche | SL1000 User Guide - Page 95
Chapter 4 Operation 3 Operating the Fiche Film 3.1 Film Selection 1 "Film Selection" screen is opened by "SCAN Mode", and the type of the fiche film is selected. 3.2 Film Insertion 1 Take hold of the Carrier Handle and pull it forward fully, then the - Konica Minolta SL1000 Microfiche | SL1000 User Guide - Page 96
SL1000 User's Guide 3 Position the Fiche Film on the Fiche Glass as shown on the figure below. Fiche Film Fiche Film Setting 4 Place hands to both sides of the grips of the Fiche Carrier and fine-tune the image position. Left Grip Right Grip 4-6 - Konica Minolta SL1000 Microfiche | SL1000 User Guide - Page 97
Chapter 4 Operation 4 Operating the Roll Film (When optional Roll Film Carrier is installed) 4.1 Film Selection 1 From Scan Mode please open the Film Selection Screen. Select the film and "Show Roll Film Carrier" is turned "ON". You can select "35 mm Roll Film", " - Konica Minolta SL1000 Microfiche | SL1000 User Guide - Page 98
SL1000 User's Guide 4.2 Selecting the Film Width 16 mm/35 mm 1 Pull out the front part of the Guide Roller, then reverse the directions of the roller and insert again. 2 Change the position of other Guide Rollers in the same manner (4 pieces in total). NOTE ! All of the directions of the Guide - Konica Minolta SL1000 Microfiche | SL1000 User Guide - Page 99
Chapter 4 Operation 4.3 Loading the Roll Film Motorized Roll Film Carrier 1 Mount the Roll Film onto the Reel Shaft and unwind the Leading Edge of the Film. NOTE ! Be sure to set the film so that its winding direction is clockwise. The film will not be correctly rewound if the open reel Roll Film - Konica Minolta SL1000 Microfiche | SL1000 User Guide - Page 100
SL1000 User's Guide 3 Insert the Leading Edge of the Film between the Fiche Glasses. NOTE ! Route the film referring to the figure below. 4 Insert the Leading Edge of - Konica Minolta SL1000 Microfiche | SL1000 User Guide - Page 101
Manual Roll Film Carrier 1 Remove the knob from the Reel Shaft. Knob Chapter 4 Operation 2 Mount the Roll Film onto the Reel Shaft and unwind the Leading - Konica Minolta SL1000 Microfiche | SL1000 User Guide - Page 102
SL1000 User's Guide 3 Insert the knob in the Reel Shaft. Knob NOTE ! When the knob is inserted, D hole is inserted into the D shape position of the Reel Shaft. D - Konica Minolta SL1000 Microfiche | SL1000 User Guide - Page 103
Chapter 4 Operation 4.4 Feeding the Film Motorized Roll Film Carrier 1 Press the following keys of "Roll Film Carrier" screen to operate the film. It is locked when a key is double-clicked, and it keeps feeding the film at the same speed. The film feeding stops when "Stop" is clicked at the lock - Konica Minolta SL1000 Microfiche | SL1000 User Guide - Page 104
SL1000 User's Guide Manual Roll Film Carrier 1 When the forwarding or the rewinding knob is turned, the film is advanced or reversed. NOTE ! The knob can be operated when the handle of the Carrier Table is pulled out to maximum, which opens the Fiche Glass for film high-speed feeding. 4-14 - Konica Minolta SL1000 Microfiche | SL1000 User Guide - Page 105
Fiche Glass is not open completely, "Rewinding" cannot be operated. When the film is finished being rewound, the motor will stop automatically after a few seconds. Manual Roll Film Carrier 1 Grasp the Carrier Handle and pull it gently out as far as it will go. This causes the Fiche Glass to swing - Konica Minolta SL1000 Microfiche | SL1000 User Guide - Page 106
SL1000 User's Guide 4.6 Operation of the A-Type Cartridge Adaptor (Option) When the 16 mm Cartridge Film (type: ANSI) is used. 1 Mount the 16mm Film Cartridge (type: ANSI) onto - Konica Minolta SL1000 Microfiche | SL1000 User Guide - Page 107
Chapter 4 Operation When the 16 mm/35 mm Roll Film (Open-Reel) is used. 16 mm/35 mm Roll Film (Open-Reel) can be used with the A-Type Cartridge Adaptor installed. 1 Mount the 16 mm or 35 mm Film (Open-Reel) onto the Reel Shaft in the figure below and unwind the Leading Edge of the Film. 2 Insert the - Konica Minolta SL1000 Microfiche | SL1000 User Guide - Page 108
SL1000 User's Guide 4.7 Operation of the M-Type Cartridge Adaptor (Option) When the M-Type Cartridge Film is used. 1 Insert the Axis of the Attachment A into the hole of the - Konica Minolta SL1000 Microfiche | SL1000 User Guide - Page 109
3 Unwind the Leading Edge of the film in M-Type Cartridge. Chapter 4 Operation 4 Mount the M-Type Cartridge onto the Bracket so that the film position of Leading Edge is the lower direction and the hole side of the cartridge housing is the back direction. NOTE ! Be sure to insert the Hook of the - Konica Minolta SL1000 Microfiche | SL1000 User Guide - Page 110
SL1000 User's Guide 5 Insert the Leading Edge of the film between the Fiche Glasses. NOTE ! Route the film referring to the figure below. 6 Insert the Leading Edge of - Konica Minolta SL1000 Microfiche | SL1000 User Guide - Page 111
Chapter 4 Operation When the 16 mm/35 mm Roll Film (Open-Reel) is used. 1 Insert the Axis of the Attachment B into the hole of the Drive Shaft. Drive Shaft Axis Attachment B 2 Insert 2 Pins of the Attachment B in the Notches of the Drive Shaft. NOTE ! The position of Pins is adjusted so that - Konica Minolta SL1000 Microfiche | SL1000 User Guide - Page 112
SL1000 User's Guide 3 Insert the 16 mm/35 mm Open Reel. 16 mm/35 mm Open Reel 4 Insert the Leading Edge of the film between the Fiche Glasses - Konica Minolta SL1000 Microfiche | SL1000 User Guide - Page 113
Chapter 5 Troubleshooting - Konica Minolta SL1000 Microfiche | SL1000 User Guide - Page 114
SL1000 User's Guide 1 Problems with the Scanner When any error occurs in the Scanner, an error message appears on the screen of the Personal Computer, the Indicator Lamp flashes and scanning stops. In this case, turn the Power Switch OFF and then back ON. Restart the Personal Computer. If the same - Konica Minolta SL1000 Microfiche | SL1000 User Guide - Page 115
5 Troubleshooting 2 Troubleshooting 2.1 service. Please contact an Authorized Dealer for Service. 2.2 Attention display on the Personal Computer Screen Information or Warning message Action SL-Touch Cannot find the Scanner. ・ Confirm the USB Cable Connection is properly connected for the SCAN - Konica Minolta SL1000 Microfiche | SL1000 User Guide - Page 116
SL1000 User's Guide Information or Warning message SL-Touch Save In refers to location that is shown on the Personal Computer Screen Error message Action SL-Touch Error Cannot find the Scanner. Connect the Scanner to the PC, install the driver, then boot up the software. ・Start the application - Konica Minolta SL1000 Microfiche | SL1000 User Guide - Page 117
SL-Touch Error Failed to read the HotPixel Data. The "Shading" adjustment must be completed. ・It is necessary to adjust the Scanner ・Please contact the Authorized Dealer for Service, and explain the detail of the error and condition. SL-Touch Error Failed to read the White Balance Data. The "White - Konica Minolta SL1000 Microfiche | SL1000 User Guide - Page 118
SL1000 User's Guide 3 Trouble when scanning an image Trouble content The Scanner does not start. Action • Is it connected properly? Check if the USB Cable connected securely between the Scanner and the Personal Computer. When a problem cannot be solved even after the troubleshooting described - Konica Minolta SL1000 Microfiche | SL1000 User Guide - Page 119
Chapter 6 Maintenance - Konica Minolta SL1000 Microfiche | SL1000 User Guide - Page 120
SL1000 User's Guide 1 Maintenance The following daily checks and cleaning are required to ensure the best possible performance and utmost safety for the Scanner. 1.1 Daily checks 1 Any of the following conditions could damage the Scanner or other electrical equipment. Move the Scanner immediately - Konica Minolta SL1000 Microfiche | SL1000 User Guide - Page 121
a soft cloth. 2 Remove the dust with the air blower or the brush. Guide Roller It might not be able to wind up the film when dirt adheres in the guide roller. Guide Roller Inside of Guide Roller 1 Clean the inside of the guide roller with the cotton pad etc. NOTE ! "Cleaning kit for the camera - Konica Minolta SL1000 Microfiche | SL1000 User Guide - Page 122
SL1000 User's Guide 6-4 - Konica Minolta SL1000 Microfiche | SL1000 User Guide - Page 123
Chapter 7 Product Specifications - Konica Minolta SL1000 Microfiche | SL1000 User Guide - Page 124
SL1000 User's Guide 1 Major Specifications Type Digital Film Scanner Image Sensor Area Type Color CCD Sensor (14.22 Mega pixels) Light Source White LED for color Lens Magnification Optical Zoom : 6.8 - 54x Optical Zoom + Electrical Zoom : 6.8 - 105x Focus Adjustment Auto or Manual - Konica Minolta SL1000 Microfiche | SL1000 User Guide - Page 125
North America: UL/CSA, FCC Class A Europe : CE (CB, EN Class B), LED Regulation North America: Energy Star Europe: ErP Directive Motorized Roll Film Carrier Kit Manual Roll Film Carrier Kit A-Type Cartridge Adaptor Kit M-Type Cartridge Adaptor Kit - Konica Minolta SL1000 Microfiche | SL1000 User Guide - Page 126
Company Name, address, telephone number, department name, floor number, machine location, etc. 2. Model name, serial number, condition or system(s) indication(s) on the display. Etc. For your reference purpose. Model Name SL1000 Serial No. Serial No. Attached Accessories Serial No. Serial No - Konica Minolta SL1000 Microfiche | SL1000 User Guide - Page 127
- Konica Minolta SL1000 Microfiche | SL1000 User Guide - Page 128
2012.08 Copyright 2012 KYOKKO SEIKO CO., LTD. The information contained in this manual is subject to change without notice to incorporate improvements made on the product or products the manual covers. Manufactured For Konica Minolta by Kyokko Seiko 100 Williams Drive Ramsey, NJ 07446 7170-7002-04
-
 1
1 -
 2
2 -
 3
3 -
 4
4 -
 5
5 -
 6
6 -
 7
7 -
8
-
9
-
10
-
11
-
12
-
13
-
14
-
15
-
16
-
17
-
18
-
19
-
20
-
21
-
22
-
23
-
24
-
25
-
26
-
27
-
28
-
29
-
30
-
31
-
32
-
33
-
34
-
35
-
36
-
37
-
38
-
39
-
40
-
41
-
42
-
43
-
44
-
45
-
46
-
47
-
48
-
49
-
50
-
51
-
52
-
53
-
54
-
55
-
56
-
57
-
58
-
59
-
60
-
61
-
62
-
63
-
64
-
65
-
66
-
67
-
68
-
69
-
70
-
71
-
72
-
73
-
74
-
75
-
76
-
77
-
78
-
79
-
80
-
81
-
82
-
83
-
84
-
85
-
86
-
87
-
88
-
89
-
90
-
91
-
92
-
93
-
94
-
95
-
96
-
97
-
98
-
99
-
100
-
101
-
102
-
103
-
104
-
105
-
106
-
107
-
108
-
109
-
110
-
111
-
112
-
113
-
114
-
115
-
116
-
117
-
118
-
119
-
120
-
121
-
122
-
123
-
124
-
125
-
126
-
127
-
128
 |
 |

SL1000 Digital Film Scanner
User’s Guide