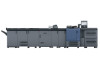
Konica Minolta bizhub PRESS C1070/1070P bizhub PRESS C1060/C1070/C1070P/PRO C1
Konica Minolta bizhub PRESS C1070/1070P Manual
 |
View all Konica Minolta bizhub PRESS C1070/1070P manuals
Add to My Manuals
Save this manual to your list of manuals |
Konica Minolta bizhub PRESS C1070/1070P manual content summary:
- Konica Minolta bizhub PRESS C1070/1070P | bizhub PRESS C1060/C1070/C1070P/PRO C1 - Page 1
When RU-509 is not installed - Konica Minolta bizhub PRESS C1070/1070P | bizhub PRESS C1060/C1070/C1070P/PRO C1 - Page 2
Notations and symbols used in this manual CAUTION This symbol indicates that negligence of the instructions may lead to mishandling that may panel, of a part, of an option, or of User's Guide. This guide describes product names and system configurations as follows. Product name bizhub PRESS - Konica Minolta bizhub PRESS C1070/1070P | bizhub PRESS C1060/C1070/C1070P/PRO C1 - Page 3
instructions in the related user's guides are observed, - Legal restrictions on copying or printing (refer to instruction booklet "Safety Information") are observed, - Inspection and maintenance instructions and troubleshooting described in user's guides. Everyone who uses this system - Konica Minolta bizhub PRESS C1070/1070P | bizhub PRESS C1060/C1070/C1070P/PRO C1 - Page 4
for each job 2-2 Adjustment timing 2-2 Adjustment order 2-2 Contents of both sides adjustment items 2-3 Fine adjustment of the paper feed tray side guide (PF-707/PF-602m 2-3 Front side adjustment 2-6 Gap adjustment (Back side adjustment 2-12 Back side fine adjustment 2-18 3 IMAGE QUALITY - Konica Minolta bizhub PRESS C1070/1070P | bizhub PRESS C1060/C1070/C1070P/PRO C1 - Page 5
bizhub PRESS C1070/C1070P/C1060 bizhub PRO C1060L Density Balance Adjustment (for FD-5BT 3-17 Added procedures of Density Balance Adjustment (Registration of color measurement data using a USB memory 3-25 Maximum Density Adjustment (for i1Pro/i1Pro2/ES-1000/ES-2000 3-27 Maximum Density - Konica Minolta bizhub PRESS C1070/1070P | bizhub PRESS C1060/C1070/C1070P/PRO C1 - Page 6
1 DAILY CARE About daily care To reproduce stable output by this machine, be sure to clean the machine before output. )Cleaning timing Check the cleaning section every day before you activate the power of the machine. Clean the cleaning section when the cleaning section is dirty. Cleaning section - Konica Minolta bizhub PRESS C1070/1070P | bizhub PRESS C1060/C1070/C1070P/PRO C1 - Page 7
bizhub PRESS C1070/C1070P/C1060 bizhub PRO C1060L Cleaning the duplex section CAUTION Be sure to check the cleaning section before you activate the power of the main body. If you activate the power with closed the door of the main body, the inside of the fusing unit becomes hot. Therefore, you - Konica Minolta bizhub PRESS C1070/1070P | bizhub PRESS C1060/C1070/C1070P/PRO C1 - Page 8
4 Hold the lever [M1], and pull out the duplex section. 5 Deactivate the sub power switch, then deactivate the main power switch. 6 Wipe off the dirt at the upper side of the duplex section with a hydro-wipe (nonwoven fabric without fluff). NOTICE - Do not use alcohol when you clean the upper side - Konica Minolta bizhub PRESS C1070/1070P | bizhub PRESS C1060/C1070/C1070P/PRO C1 - Page 9
7 Open the cover [M3]. bizhub PRESS C1070/C1070P/C1060 bizhub PRO C1060L 8 Moisten the cleaning pad with isopropyl alcohol, and clean the paper path of the registration unit. 9 Moisten the cleaning pad with isopropyl alcohol, and clean the roller of the registration unit. 1 10 Close the cover [M3 - Konica Minolta bizhub PRESS C1070/1070P | bizhub PRESS C1060/C1070/C1070P/PRO C1 - Page 10
Cleaning the paper feed roller and the pick-up roller (Main body tray/PF-602m/LU-202) 1 Pull out the tray 1. 2 Open the cover. 3 Moisten the cleaning pad with isopropyl alcohol, and clean the paper feed roller and the pick-up roller. 4 Return the cover to the original position. 5 Push the tray 1 - Konica Minolta bizhub PRESS C1070/1070P | bizhub PRESS C1060/C1070/C1070P/PRO C1 - Page 11
7 When MB-506 is installed, clean the pick-up roller in the same way. bizhub PRESS C1070/C1070P/C1060 bizhub PRO C1060L 8 When PF-602m is installed, clean the paper feed roller and the pick-up roller in the same way. NOTICE When you pull out the PF-602m tray, activate the main power switch and the - Konica Minolta bizhub PRESS C1070/1070P | bizhub PRESS C1060/C1070/C1070P/PRO C1 - Page 12
brand, a new paper weight, or a new paper size )Adjustment order Order 1 2 3 Adjustment item Fine adjustment of the paper feed tray side guide (PF-707/PF-602m) Front side adjustment Gap adjustment (Back side adjustment) Reference P.2-3 P.2-6 P.2-12 Reference For details of each adjustment item - Konica Minolta bizhub PRESS C1070/1070P | bizhub PRESS C1060/C1070/C1070P/PRO C1 - Page 13
the job (before the adjustment flow for each job). )Adjustment order Order 1 2 3 Adjustment item Fine adjustment of the paper feed tray side guide (PF-707/PF-602m) Front side adjustment * Gap adjustment (Back side adjustment) * Reference P.2-3 P.2-6 P.2-12 * Registering the paper profile is not - Konica Minolta bizhub PRESS C1070/1070P | bizhub PRESS C1060/C1070/C1070P/PRO C1 - Page 14
Front side adjustment (Page 2-6) - Gap adjustment (Back side adjustment) (Page 2-12) - Back side fine adjustment (Page 2-18) )Fine adjustment of the paper feed tray side guide (PF-707/PF-602m) 1 Pull out the tray to load paper into. NOTICE Trays can be pulled out only when this machine is turned on - Konica Minolta bizhub PRESS C1070/1070P | bizhub PRESS C1060/C1070/C1070P/PRO C1 - Page 15
the position of the top edges of the side guide plates. Move top edges of the side guide plates to align them to the paper, then turn the side guide fixing 2 knobs clockwise to fix the guides. NOTICE - Avoid making the space between the side guide plates too wide or too narrow for the paper - Konica Minolta bizhub PRESS C1070/1070P | bizhub PRESS C1060/C1070/C1070P/PRO C1 - Page 16
goes down. For PF-602m, slide the fixing knob to the front side. 11 Load the remaining paper into the tray, then press the rear guide plate against the paper. NOTICE - Be careful not to load paper above the , mark that indicates the height limit on the side - Konica Minolta bizhub PRESS C1070/1070P | bizhub PRESS C1060/C1070/C1070P/PRO C1 - Page 17
)Front side adjustment 1 Press [Paper Setting] on the [MACHINE] screen. bizhub PRESS C1070/C1070P/C1060 bizhub PRO C1060L 2 Press the tray with the target paper loaded. 3 Press [Recall]. 2 2-6 - Konica Minolta bizhub PRESS C1070/1070P | bizhub PRESS C1060/C1070/C1070P/PRO C1 - Page 18
4 Select the paper profile of the same paper brand (paper profile name), "Paper size", "Type of paper" and "Paper weight" as the paper that you want to adjust. Then, select [OK]. When there is no paper profile to select, select [Cancel]. Tips When the paper profile has a different "Paper size" or " - Konica Minolta bizhub PRESS C1070/1070P | bizhub PRESS C1060/C1070/C1070P/PRO C1 - Page 19
8 Press [Print Mode]. bizhub PRESS C1070/C1070P/C1060 bizhub PRO C1060L 9 When the [PRINT MODE] screen is displayed, press Start on the control panel. A test chart is printed out. NOTICE Output about 3 sheets. 10 Press [Exit Print Mode]. 2 2-8 - Konica Minolta bizhub PRESS C1070/1070P | bizhub PRESS C1060/C1070/C1070P/PRO C1 - Page 20
11 Check the length of [2], [4], [6], and [8] of the charts that are output as the second and third sheet. Write down the measured lengths so that you do not forget them. [5] [1] When the length of [2], [4], [6], and [8] is within the following range, press [Close] and go to step 15. When the - Konica Minolta bizhub PRESS C1070/1070P | bizhub PRESS C1060/C1070/C1070P/PRO C1 - Page 21
bizhub PRESS C1070/C1070P/C1060 bizhub PRO C1060L 14 Output the front side adjustment chart again, and check the length of [2], [4], [6], and [8] of the charts that are output as the second and third sheet. Repeat from step 11 to step 14 until the length of [2], [4], [6], and [8] are within the - Konica Minolta bizhub PRESS C1070/1070P | bizhub PRESS C1060/C1070/C1070P/PRO C1 - Page 22
18 Enter the paper profile name and press [OK]. Enter the paper brand name in paper profile name. 19 Check that the paper profile has been registered and press [Close]. 20 Press [Close] to exit the registration. 2-11 - Konica Minolta bizhub PRESS C1070/1070P | bizhub PRESS C1060/C1070/C1070P/PRO C1 - Page 23
bizhub PRESS C1070/C1070P/C1060 bizhub PRO C1060L )Gap adjustment (Back side adjustment) NOTICE The Gap Adjustment is a simple method to adjust only the zoom ratio and image position of the back side. To also adjust it on the front side, carry out "Front Side Adjustment" (Page 2-6) . 1 Press [Paper - Konica Minolta bizhub PRESS C1070/1070P | bizhub PRESS C1060/C1070/C1070P/PRO C1 - Page 24
4 Select the paper profile of the same paper brand (paper profile name), "Paper size", "Type of paper" and "Paper weight" as the paper that you want to adjust. Then, select [OK]. NOTICE When there is no paper profile to select, conduct "Front Side Adjustment" (Page 2-6). Tips When the paper profile - Konica Minolta bizhub PRESS C1070/1070P | bizhub PRESS C1060/C1070/C1070P/PRO C1 - Page 25
8 When the [PRINT MODE] screen is displayed, press Start on the control panel. A test chart is printed out. NOTICE Output about 3 sheets. 9 Press [Exit Print Mode]. bizhub PRESS C1070/C1070P/C1060 bizhub PRO C1060L 10 Measure the back side image difference at each point from [a] to [d] that is - Konica Minolta bizhub PRESS C1070/1070P | bizhub PRESS C1060/C1070/C1070P/PRO C1 - Page 26
11 Press [a] to [d] of each point, and enter the adjustment value using the keypad, [,], or [+] on the screen. 12 When entry processing is completed, press [Adjustment Start]. The input adjustment value is reflected to the "Zoom" value and the "Image Shift" value at the [Back] screen. When [User - Konica Minolta bizhub PRESS C1070/1070P | bizhub PRESS C1060/C1070/C1070P/PRO C1 - Page 27
15 Press [Exit Print Mode]. bizhub PRESS C1070/C1070P/C1060 bizhub PRO C1060L 16 Press [OK] to exit the adjustment. Tips Perform the following steps only when the gap adjustment is performed for a new paper brand, a new paper weight, or a new paper size. 17 Press [Register]. 18 Press the No. to - Konica Minolta bizhub PRESS C1070/1070P | bizhub PRESS C1060/C1070/C1070P/PRO C1 - Page 28
19 Press [OK]. 20 Check that the paper profile has been registered and press [Close]. 21 Press [Close] to exit the registration. 2-17 - Konica Minolta bizhub PRESS C1070/1070P | bizhub PRESS C1060/C1070/C1070P/PRO C1 - Page 29
bizhub PRESS C1070/C1070P/C1060 bizhub PRO C1060L )Back side fine adjustment This adjustment is useful when the magnification of the back side image and the image position are adjusted according to the output result of the actual job data. 1 Output about 3 sheets of the actual job data that you use - Konica Minolta bizhub PRESS C1070/1070P | bizhub PRESS C1060/C1070/C1070P/PRO C1 - Page 30
5 Press [Back]. 6 Check the back side magnification difference from the back side images that are output as the second and third sheet among the output jobs in step 1. Pile the output jobs so that the front side of one sheet faces up, and the back side of another sheet faces up. Compare the image - Konica Minolta bizhub PRESS C1070/1070P | bizhub PRESS C1060/C1070/C1070P/PRO C1 - Page 31
bizhub PRESS C1070/C1070P/C1060 bizhub PRO C1060L 8 Output about 3 sheets of the same job data that you output in step 1 from the same tray. 9 Check the magnification difference of the back side of the paper that are output as the second and third sheet. Repeat from step 6 to step 8 until all - Konica Minolta bizhub PRESS C1070/1070P | bizhub PRESS C1060/C1070/C1070P/PRO C1 - Page 32
13 Check the position difference of the back side among the back side images of the + second and third output that were output after the magnification adjustment is completed. The black line in the figure shows the back side, - + and the blue dashed line shows the other side (front side). - Konica Minolta bizhub PRESS C1070/1070P | bizhub PRESS C1060/C1070/C1070P/PRO C1 - Page 33
bizhub PRESS C1070/C1070P/C1060 bizhub PRO C1060L 3 IMAGE QUALITY ADJUSTMENT 3.1 Image quality adjustment for Image Controller IC-602 About Quality Adjustment To maintain stable color quality against a change in ambient temperature or humidity, a change of this machine conditions, or a change of - Konica Minolta bizhub PRESS C1070/1070P | bizhub PRESS C1060/C1070/C1070P/PRO C1 - Page 34
Regular adjustment flow (High accuracy) )Adjustment timing For customers that require a high accuracy color reproduction, conduct the process 30 minutes after you activate the power every day. For other cases, conduct the process in the following cases. - Before you output a job that the color is - Konica Minolta bizhub PRESS C1070/1070P | bizhub PRESS C1060/C1070/C1070P/PRO C1 - Page 35
Color Centro is "Exact Color". When you want to change to "G7 Calibration", contact your service representative. When you want to return "G7 Calibration" to "Exact Color", also contact your service representative. Reference For details of each adjustment item, refer to "Contents of the image quality - Konica Minolta bizhub PRESS C1070/1070P | bizhub PRESS C1060/C1070/C1070P/PRO C1 - Page 36
Color Centro is "Exact Color". When you want to change to "G7 Calibration", contact your service representative. When you want to return "G7 Calibration" to "Exact Color", also contact your service representative. Reference For details of each adjustment item, refer to "Contents of the image quality - Konica Minolta bizhub PRESS C1070/1070P | bizhub PRESS C1060/C1070/C1070P/PRO C1 - Page 37
bizhub PRESS C1070/C1070P/C1060 bizhub PRO C1060L Contents of the image quality adjustment items This section describes the contents of the following 10 adjustment items. - Change setting of Custom Screen (Page 3-5) - Gamma Automatic Adjustment (Page 3-7) - Density Balance Adjustment (for i1Pro/ - Konica Minolta bizhub PRESS C1070/1070P | bizhub PRESS C1060/C1070/C1070P/PRO C1 - Page 38
3 Press [System Setting] on the [Administrator Setting Menu] screen, and then press [Expert Adjustment], [Quality Adjustment], and [Custom Screen] in sequence. 4 Press the screen to be assigned to each screen type: [Screen 1], [Screen 2], and [Stochastic]. After setting, press [OK]. NOTICE [Dot190] - Konica Minolta bizhub PRESS C1070/1070P | bizhub PRESS C1060/C1070/C1070P/PRO C1 - Page 39
)Gamma Automatic Adjustment 1 On the touch panel of the main body, press [Adjustment] on the [MACHINE] screen. bizhub PRESS C1070/C1070P/C1060 bizhub PRO C1060L 2 Press [Execute Adjust Operation] on the [Adjustment Menu] screen. 3 Press [Gamma Automatic Adj.] and press [OK]. 3 4 Press [Exit [ - Konica Minolta bizhub PRESS C1070/1070P | bizhub PRESS C1060/C1070/C1070P/PRO C1 - Page 40
the following Web site. After installing the tool, restart the computer. ProfileMaker 5 v5.0.10: http://www.xrite.com/product_overview.aspx?ID=757&Action=Support 1 On the touch panel of the main body, press [Adjustment] on the [MACHINE] screen. 2 Press [Density Balance Adjustment] on the [Adjustment - Konica Minolta bizhub PRESS C1070/1070P | bizhub PRESS C1060/C1070/C1070P/PRO C1 - Page 41
4 Select the desired chart type from "Measure Spectrophotometer-2", and press [Print Mode]. [Type2] is recommended. bizhub PRESS C1070/C1070P/C1060 bizhub PRO C1060L 5 Press [Quality Adj.]. 6 Press [Screen Pattern] and select the screen that is changed at "Change setting of Custom Screen" in the - Konica Minolta bizhub PRESS C1070/1070P | bizhub PRESS C1060/C1070/C1070P/PRO C1 - Page 42
8 Press Start on the control panel. The color chart is output for measurement using the spectrophotometer. 9 Press [Exit PrintMode]. 10 Press [Return], and return to the [Density Balance Adjustment Menu] screen. 11 On the computer where the X-rite Measure tool. l has been installed, select [Start] - - Konica Minolta bizhub PRESS C1070/1070P | bizhub PRESS C1060/C1070/C1070P/PRO C1 - Page 43
13 Connect the instrument to the computer. From the menu, click [Configuring]. bizhub PRESS C1070/C1070P/C1060 bizhub PRO C1060L 14 In [Instrument], select [Eye-One Pro]. When [OK] is displayed, close the screen. 15 From the menu, click [Measuring]. 3 3-11 - Konica Minolta bizhub PRESS C1070/1070P | bizhub PRESS C1060/C1070/C1070P/PRO C1 - Page 44
16 From [Test Chart], select [Custom]. 17 Specify [Columns] and [Rows], and click [OK]. - When the chart type is "Type 1": [Columns] = 6, [Rows] = 5 - When the chart type is "Type 2": [Columns] = 6, [Rows] = 13 18 Click [Start]. 19 When the following message is displayed, horizontally place the - Konica Minolta bizhub PRESS C1070/1070P | bizhub PRESS C1060/C1070/C1070P/PRO C1 - Page 45
bizhub PRESS C1070/C1070P/C1060 bizhub PRO C1060L 20 Stack 10 sheets of blank paper whose type is the same as that of the paper where chart has been printed, and place the printed chart on top of it. 21 When the following screen is displayed, place the spectrophotometer on the patch at the top in - Konica Minolta bizhub PRESS C1070/1070P | bizhub PRESS C1060/C1070/C1070P/PRO C1 - Page 46
24 From the [File] menu, select [Save As]. NOTICE If you use [Export Lab], an error occurs when registering the color adjustment data. When saving the data, always use [Save As]. 25 Specify the destination to save. Specify USB memory or the computer connected to the machine via the network. - Konica Minolta bizhub PRESS C1070/1070P | bizhub PRESS C1060/C1070/C1070P/PRO C1 - Page 47
29 Click [Machine Manager Setting], and enter the administrator ID and password. Tips Contact your machine administrator for the administrator ID and the password. bizhub PRESS C1070/C1070P/C1060 bizhub PRO C1060L 30 Click on [Color Measuring data Input]. 31 Enter the file name for colorimetric - Konica Minolta bizhub PRESS C1070/1070P | bizhub PRESS C1060/C1070/C1070P/PRO C1 - Page 48
34 Select any one row in the list of 10 profiles, and press [Archived Data]. NOTICE - No more than 10 pieces of data can be registered, however, the data can be overwritten. If desired, select the data to be overwritten. - The colorimetric data can be synthesized and registered. To synthesize data, - Konica Minolta bizhub PRESS C1070/1070P | bizhub PRESS C1060/C1070/C1070P/PRO C1 - Page 49
. Install the Color Care measure in advance. To use Color Care measure, you need to acquire a license key. For details, refer to the user's guide that comes with Color Care measure. 1 On the touch panel of the main body, press [Adjustment] on the [MACHINE] screen. 2 Press [Density Balance Adjustment - Konica Minolta bizhub PRESS C1070/1070P | bizhub PRESS C1060/C1070/C1070P/PRO C1 - Page 50
4 Select the [Type3] of "Measure Spectrophotometer-3", and press [Print Mode]. 5 Press [Quality Adj.]. 6 Press [Screen Pattern] and select the screen that is changed at "Change setting of Custom Screen" in the adjustment items (screen for Density balance adjustment) . Tips [Stochastic] is - Konica Minolta bizhub PRESS C1070/1070P | bizhub PRESS C1060/C1070/C1070P/PRO C1 - Page 51
8 Press Start on the control panel. The color chart is output for measurement using the spectrophotometer. bizhub PRESS C1070/C1070P/C1060 bizhub PRO C1060L 9 Press [Exit PrintMode]. 10 Press [Return], and return to the [Density Balance Adjustment Menu] screen. 3 11 On the computer where the - Konica Minolta bizhub PRESS C1070/1070P | bizhub PRESS C1060/C1070/C1070P/PRO C1 - Page 52
13 Click [Color Care - Job 0 - C1070 C1100 - density balance]. Then, click [FD5bt Denbal Type 2sr - 13×6], and click [OK]. If the number of the color patch is 13 x 7, select [FD5bt - Denbal Type 2sr - 13x7]. 14 When the following message appears, place the FD-5BT on the white calibration plate, and - Konica Minolta bizhub PRESS C1070/1070P | bizhub PRESS C1060/C1070/C1070P/PRO C1 - Page 53
side button. Slide FD-5BT to the bottom side, then release the side button. - For details about how to use FD-5BT, refer to the manual supplied with the spectrophotometer. bizhub PRESS C1070/C1070P/C1060 bizhub PRO C1060L 18 Likewise, measure the rest of the rows. Click the alphabet of the - Konica Minolta bizhub PRESS C1070/1070P | bizhub PRESS C1060/C1070/C1070P/PRO C1 - Page 54
20 Click [Density Balance...]. 21 Enter the 14-digit identification number that is printed to the chart in [Print ID]. Example: 4025513011E66C 22 Enter a filename in [Addendum]. 23 Save the measurement data to the USB memory or the machine. Destination to save USB Memory Computer on the network - Konica Minolta bizhub PRESS C1070/1070P | bizhub PRESS C1060/C1070/C1070P/PRO C1 - Page 55
24 Click [Printer], and click [+]. Tips If you have added the machine as the destination to save, select the machine from [Printer]. bizhub PRESS C1070/C1070P/C1060 bizhub PRO C1060L 25 Enter the information of the machine, and click [Add]. - [Name]: Any name - [Password]: Administrator password - - Konica Minolta bizhub PRESS C1070/1070P | bizhub PRESS C1060/C1070/C1070P/PRO C1 - Page 56
29 Select any one row in the list of 10 profiles, and press [Archived Data]. NOTICE - No more than 10 pieces of data can be registered, however, the data can be overwritten. If desired, select the data to be overwritten. - The colorimetric data can be synthesized and registered. To synthesize data, - Konica Minolta bizhub PRESS C1070/1070P | bizhub PRESS C1060/C1070/C1070P/PRO C1 - Page 57
bizhub PRESS C1070/C1070P/C1060 bizhub PRO C1060L )Added procedures of Density Balance Adjustment (Registration of color measurement data using a USB memory) 1 Press [Density Balance Data Reg/Del] on the [Density Balance Adjustment Menu] screen to display the [Density Balance Adj. 2 Select any one - Konica Minolta bizhub PRESS C1070/1070P | bizhub PRESS C1060/C1070/C1070P/PRO C1 - Page 58
Tips With a row of the existing data selected in step 2, a confirmation dialog is displayed. To synthesize the selected data with the new data, press [Combination]. If conditions for screen type, paper type, or weight do not correspond to each other, [Combination] dims. 5 When the following screen - Konica Minolta bizhub PRESS C1070/1070P | bizhub PRESS C1060/C1070/C1070P/PRO C1 - Page 59
restart the computer. ColorPort v2.0.5: http://www.xrite.com/product_overview.aspx?Action=support&ID=719 1 Place the paper for the maximum density management that has been decided in consultation with the service representative. 2 Output the job data that includes the maximum density patch (density - Konica Minolta bizhub PRESS C1070/1070P | bizhub PRESS C1060/C1070/C1070P/PRO C1 - Page 60
6 Select [New] on [Patch Set]. 7 Enter any name for the patch set in [Name]. 8 Click [+] until [Total Patches] reaches the number of patches on the job that was output in step 2. 9 Click [Save]. 3-28 - Konica Minolta bizhub PRESS C1070/1070P | bizhub PRESS C1060/C1070/C1070P/PRO C1 - Page 61
10 Click [Save Target...] and save the target to any directory. NOTICE Select TIFF for [Files of Type]. bizhub PRESS C1070/C1070P/C1060 bizhub PRO C1060L 11 Click [Measure Target]. 12 Select the target that you created on [Target]. Check that [i1Pro] is shown in [Measurement Device] and " - Konica Minolta bizhub PRESS C1070/1070P | bizhub PRESS C1060/C1070/C1070P/PRO C1 - Page 62
14 Select [Spot] on [Measurement Mode], and click [Calibrate]. 15 When the following message is displayed, horizontally place the spectrophotometer on the calibration dock and click [Calibrate]. 16 Click [Close]. 17 Stack 10 sheets of blank paper for the maximum density management, and place the job - Konica Minolta bizhub PRESS C1070/1070P | bizhub PRESS C1060/C1070/C1070P/PRO C1 - Page 63
19 Continue the measurement of the maximum density patch with each color in the order of C, M, Y. bizhub PRESS C1070/C1070P/C1060 bizhub PRO C1060L 20 When the measurement completes, click [Save Data]. 21 Select [CSV] in [Format]. 3 3-31 - Konica Minolta bizhub PRESS C1070/1070P | bizhub PRESS C1060/C1070/C1070P/PRO C1 - Page 64
22 Uncheck all the checkboxes of [Measurement Device] and [Colorimetric]. 23 Check [VCMY] of [Density] and select [T] for [Status]. 24 Click [Save] and save the data in any location. 25 Open the saved CSV file in Excel. 3-32 - Konica Minolta bizhub PRESS C1070/1070P | bizhub PRESS C1060/C1070/C1070P/PRO C1 - Page 65
26 Insert lines according to the number of patches. Example: When there are five patches for each color (20 patches in total), insert one line in every five lines. bizhub PRESS C1070/C1070P/C1060 bizhub PRO C1060L 27 Calculate the average value of the maximum density for black by using some of the - Konica Minolta bizhub PRESS C1070/1070P | bizhub PRESS C1060/C1070/C1070P/PRO C1 - Page 66
29 Compare the calculated average with the maximum density target value that the service representative has informed. When two values are same or close, end the adjustment. When two values are extremely different, perform the following adjustment. Acceptable target - Konica Minolta bizhub PRESS C1070/1070P | bizhub PRESS C1060/C1070/C1070P/PRO C1 - Page 67
32 Change the adjustment value according to the comparative result of the calculated value and the maximum density target value. Tips The change value of density differs according to the paper. Reference: The change value of density for POD gloss coat 128g/m2 · Y: '0.006/step · M: '0.01/step · C: - Konica Minolta bizhub PRESS C1070/1070P | bizhub PRESS C1060/C1070/C1070P/PRO C1 - Page 68
representative. 1 Place the paper for the maximum density management that has been decided in consultation with the service representative. 2 Output the job data that includes the maximum density patch (density: 255) of Y, M, C, and K from the tray that the sheet for the maximum density - Konica Minolta bizhub PRESS C1070/1070P | bizhub PRESS C1060/C1070/C1070P/PRO C1 - Page 69
. White Ref. Density Status Density Filter Configurations M2 (UV Cut) Absolute T Auto Tips For details about how to use FD-5BT, refer to the manual supplied with the spectrophotometer. 9 Press the return button and the menu screen is displayed. 10 Move the cursor to [Calibration] on the 3 menu - Konica Minolta bizhub PRESS C1070/1070P | bizhub PRESS C1060/C1070/C1070P/PRO C1 - Page 70
11 Press the FD-5BT on the white calibration plate. Press the FD-5BT until "Calibrating..." disappears. 12 Press the return button twice, and the menu screen is displayed. 13 Stack 10 sheets of blank paper for the maximum density management, and place the job that is output in step 2 on top of it. - Konica Minolta bizhub PRESS C1070/1070P | bizhub PRESS C1060/C1070/C1070P/PRO C1 - Page 71
and Y each. bizhub PRESS C1070/C1070P/C1060 bizhub PRO C1060L 18 Compare the calculated average with the maximum density target value that the service representative has informed. When two values are same or close, end the adjustment. When two values are extremely different, perform the following - Konica Minolta bizhub PRESS C1070/1070P | bizhub PRESS C1060/C1070/C1070P/PRO C1 - Page 72
21 Change the adjustment value according to the comparative result of the calculated value and the maximum density target value. Tips The change value of density differs according to the paper. Reference: The change value of density for POD gloss coat 128g/m2 · Y: '0.006/step · M: '0.01/step · C: - Konica Minolta bizhub PRESS C1070/1070P | bizhub PRESS C1060/C1070/C1070P/PRO C1 - Page 73
bizhub PRESS C1070/C1070P/C1060 bizhub PRO C1060L )IC-602 Controller Calibration (for i1Pro/i1Pro2/ES-1000/ES-2000, or FD-5BT) NOTICE Color Centro is a Java application. If Java applications are blocked by a firewall, permit network connections for the Java applications. • To log on, you need the IP - Konica Minolta bizhub PRESS C1070/1070P | bizhub PRESS C1060/C1070/C1070P/PRO C1 - Page 74
6 Click [Settings] in [1. Paper Type / Screen Settings]. 7 Set the [Paper Type] and [Screen Settings] on the [Paper Type/Screen Settings] screen and click [OK]. Example: Set the [Paper Type] to [Coated GL], and the [Screen Setting] to [Screen 1] (default). 8 Click [Start Calibration]. 9 Click [Print - Konica Minolta bizhub PRESS C1070/1070P | bizhub PRESS C1060/C1070/C1070P/PRO C1 - Page 75
10 On the [Print Chart] screen, set the [Copies] and [Paper Tray]. After setting, click [Print]. bizhub PRESS C1070/C1070P/C1060 bizhub PRO C1060L 11 Click [Start]. 12 When the following message is displayed, horizontally place the spectrophotometer on the calibration dock and click [OK]. For FD- - Konica Minolta bizhub PRESS C1070/1070P | bizhub PRESS C1060/C1070/C1070P/PRO C1 - Page 76
the spectrophotometer to the opposite side, then release the side button. - For details about how to use i1Pro/i1Pro2 or FD-5BT, refer to the manual supplied with the spectrophotometer. Tips For FD-5BT, use the FD-5BT after you release the lock lever of the target mask and remove the - Konica Minolta bizhub PRESS C1070/1070P | bizhub PRESS C1060/C1070/C1070P/PRO C1 - Page 77
18 When the following message is displayed, click [OK]. bizhub PRESS C1070/C1070P/C1060 bizhub PRO C1060L 19 The CMYK Density curve is shown in the [Calibration Manager] screen. Click the checkbox next to each color to change the appearance in the graph. Tips You can check the calibration - Konica Minolta bizhub PRESS C1070/1070P | bizhub PRESS C1060/C1070/C1070P/PRO C1 - Page 78
)Exact Color (for i1Pro/i1Pro2/ES-1000/ES-2000, or FD-5BT) 1 On the [Calibration Manager] screen, click [Execute Wizard of Exact Color] under [3. Exact Color]. 2 On the [Operation steps] screen, click [Next]. 3 Click [Print]. Print the color chart that is to be measured using the instrument. 4 On - Konica Minolta bizhub PRESS C1070/1070P | bizhub PRESS C1060/C1070/C1070P/PRO C1 - Page 79
5 Click [Start]. bizhub PRESS C1070/C1070P/C1060 bizhub PRO C1060L 6 When the following message is displayed, place the instrument flat on the calibration dock and click [OK]. For FD-5BT, click [OK] while you press down the FD-5BT. 7 Stack 10 sheets of blank paper whose type is the same as that - Konica Minolta bizhub PRESS C1070/1070P | bizhub PRESS C1060/C1070/C1070P/PRO C1 - Page 80
the spectrophotometer to the opposite side, then release the side button. - For details about how to use i1Pro/i1Pro2 or FD-5BT, refer to the manual supplied with the spectrophotometer. Tips For FD-5BT, use the FD-5BT after you release the lock lever of the target mask and remove the - Konica Minolta bizhub PRESS C1070/1070P | bizhub PRESS C1060/C1070/C1070P/PRO C1 - Page 81
12 Click [Next] and perform the rest of the measurement by following the instructions on the screen. Perform the rest of the measurement with the same procedures, in order of "2. The 1st enhancement of a correction table (FB1)", "3. The 2nd - Konica Minolta bizhub PRESS C1070/1070P | bizhub PRESS C1060/C1070/C1070P/PRO C1 - Page 82
Color is configured as default. You can use only either Exact Color or G7 calibration. To switch to G7 calibration, contact your service representative. 1 On the [Calibration Manager] screen, click [Start G7 Calibration] under [3. G7 Calibration]. 2 Click [Print]. Print the color chart that is to - Konica Minolta bizhub PRESS C1070/1070P | bizhub PRESS C1060/C1070/C1070P/PRO C1 - Page 83
4 Click [Start]. bizhub PRESS C1070/C1070P/C1060 bizhub PRO C1060L 5 When the following message is displayed, place the instrument flat on the calibration dock and click [OK]. For FD-5BT, click [OK] while you press down the FD-5BT. 6 Stack 10 sheets of blank paper whose type is the same as that - Konica Minolta bizhub PRESS C1070/1070P | bizhub PRESS C1060/C1070/C1070P/PRO C1 - Page 84
the spectrophotometer to the opposite side, then release the side button. - For details about how to use i1Pro/i1Pro2 or FD-5BT, refer to the manual supplied with the spectrophotometer. Tips For FD-5BT, use the FD-5BT after you release the lock lever of the target mask and remove the - Konica Minolta bizhub PRESS C1070/1070P | bizhub PRESS C1060/C1070/C1070P/PRO C1 - Page 85
12 On the [Calibration Manager] screen, click [Accuracy Measurement] under [3. G7 Calibration]. bizhub PRESS C1070/C1070P/C1060 bizhub PRO C1060L 13 Click [Print]. Print the color chart that is to be measured using the instrument. 14 Click [Start]. 15 Measure the chart using the instrument. After - Konica Minolta bizhub PRESS C1070/1070P | bizhub PRESS C1060/C1070/C1070P/PRO C1 - Page 86
Tips - The measurement results (Gray Step) are displayed on [Calibration Manager] screen. - When [Report Print] is clicked, the measurement results for G7 calibration is printed. 3-54 - Konica Minolta bizhub PRESS C1070/1070P | bizhub PRESS C1060/C1070/C1070P/PRO C1 - Page 87
bizhub PRESS C1070/C1070P/C1060 bizhub PRO C1060L 3.2 Image quality adjustment for Image Controller IC-308/IC-415 About Quality Adjustment To maintain stable color quality against a change in ambient temperature or humidity, a change of this machine conditions, or a change of the color tone due - Konica Minolta bizhub PRESS C1070/1070P | bizhub PRESS C1060/C1070/C1070P/PRO C1 - Page 88
Regular adjustment flow (High accuracy) )Adjustment timing For customers that require a high accuracy color reproduction, conduct the process 30 minutes after you activate the power every day. For other cases, conduct the process in the following cases. - Before you output a job that the color is - Konica Minolta bizhub PRESS C1070/1070P | bizhub PRESS C1060/C1070/C1070P/PRO C1 - Page 89
bizhub PRESS C1070/C1070P/C1060 bizhub PRO C1060L Adjustment flow when changing the screen )Adjustment timing - When you change the setting of custom screen )Adjustment order Order 1 2 3 4 Adjustment item Change setting of Custom Screen Gamma Automatic Adjustment Density Balance Adjustment * ( - Konica Minolta bizhub PRESS C1070/1070P | bizhub PRESS C1060/C1070/C1070P/PRO C1 - Page 90
Contents of the image quality adjustment items This section describes the contents of the following 6 adjustment items. - Change setting of Custom Screen (Page 3-58) - Gamma Automatic Adjustment (Page 3-60) - Density Balance Adjustment (for i1Pro/i1Pro2/ES-1000/ES-2000) (Page 3-61) - Added - Konica Minolta bizhub PRESS C1070/1070P | bizhub PRESS C1060/C1070/C1070P/PRO C1 - Page 91
4 Press the screen to be assigned to each screen type: [Screen 1], [Screen 2], and [Stochastic]. After setting, press [OK]. NOTICE [Dot190] is recommended as the configuration for [Screen 1]. bizhub PRESS C1070/C1070P/C1060 bizhub PRO C1060L 3 3-59 - Konica Minolta bizhub PRESS C1070/1070P | bizhub PRESS C1060/C1070/C1070P/PRO C1 - Page 92
)Gamma Automatic Adjustment 1 On the touch panel of the main body, press [Adjustment] on the [MACHINE] screen. 2 Press [Execute Adjust Operation] on the [Adjustment Menu] screen. 3 Press [Gamma Automatic Adj.] and press [OK]. 4 Press [Exit [ADJUSTMENT]]. Wait for the display "Now adjusting" to - Konica Minolta bizhub PRESS C1070/1070P | bizhub PRESS C1060/C1070/C1070P/PRO C1 - Page 93
the following Web site. After installing the tool, restart the computer. ProfileMaker 5 v5.0.10: http://www.xrite.com/product_overview.aspx?ID=757&Action=Support 1 On the touch panel of the main body, press [Adjustment] on the [MACHINE] screen. 2 Press [Density Balance Adjustment] on the [Adjustment - Konica Minolta bizhub PRESS C1070/1070P | bizhub PRESS C1060/C1070/C1070P/PRO C1 - Page 94
4 Select the desired chart type from "Measure Spectrophotometer-2", and press [Print Mode]. [Type2] is recommended. 5 Press [Quality Adj.]. 6 Press [Screen Pattern] and select the screen that is changed at "Change setting of Custom Screen" in the adjustment items (screen for Density balance - Konica Minolta bizhub PRESS C1070/1070P | bizhub PRESS C1060/C1070/C1070P/PRO C1 - Page 95
8 Press Start on the control panel. The color chart is output for measurement using the spectrophotometer. bizhub PRESS C1070/C1070P/C1060 bizhub PRO C1060L 9 Press [Exit PrintMode]. 10 Press [Return], and return to the [Density Balance Adjustment Menu] screen. 11 On the computer where the X- - Konica Minolta bizhub PRESS C1070/1070P | bizhub PRESS C1060/C1070/C1070P/PRO C1 - Page 96
13 Connect the instrument to the computer. From the menu, click [Configuring]. 14 In [Instrument], select [Eye-One Pro]. When [OK] is displayed, close the screen. 15 From the menu, click [Measuring]. 3-64 - Konica Minolta bizhub PRESS C1070/1070P | bizhub PRESS C1060/C1070/C1070P/PRO C1 - Page 97
16 From [Test Chart], select [Custom]. bizhub PRESS C1070/C1070P/C1060 bizhub PRO C1060L 17 Specify [Columns] and [Rows], and click [OK]. - When the chart type is "Type 1": [Columns] = 6, [Rows] = 5 - When the chart type is "Type 2": [Columns] = 6, [Rows] = 13 18 Click [Start]. 19 When the - Konica Minolta bizhub PRESS C1070/1070P | bizhub PRESS C1060/C1070/C1070P/PRO C1 - Page 98
20 Stack 10 sheets of blank paper whose type is the same as that of the paper where chart has been printed, and place the printed chart on top of it. 21 When the following screen is displayed, place the spectrophotometer on the patch at the top in the upper left, and press the button for the - Konica Minolta bizhub PRESS C1070/1070P | bizhub PRESS C1060/C1070/C1070P/PRO C1 - Page 99
24 From the [File] menu, select [Save As]. NOTICE If you use [Export Lab], an error occurs when registering the color adjustment data. When saving the data, always use [Save As]. bizhub PRESS C1070/C1070P/C1060 bizhub PRO C1060L 25 Specify the destination to save. Specify USB memory or the - Konica Minolta bizhub PRESS C1070/1070P | bizhub PRESS C1060/C1070/C1070P/PRO C1 - Page 100
29 Click [Machine Manager Setting], and enter the administrator ID and password. Tips Contact your machine administrator for the administrator ID and the password. 30 Click on [Color Measuring data Input]. 31 Enter the file name for colorimetric data into [File Name], click [Browse] on the side of - Konica Minolta bizhub PRESS C1070/1070P | bizhub PRESS C1060/C1070/C1070P/PRO C1 - Page 101
34 Select any one row in the list of 10 profiles, and press [Archived Data]. NOTICE - No more than 10 pieces of data can be registered, however, the data can be overwritten. If desired, select the data to be overwritten. - The colorimetric data can be synthesized and registered. To synthesize data, - Konica Minolta bizhub PRESS C1070/1070P | bizhub PRESS C1060/C1070/C1070P/PRO C1 - Page 102
)Added procedures of Density Balance Adjustment (Registration of color measurement data using a USB memory) 1 Press [Density Balance Data Reg/Del] on the [Density Balance Adjustment Menu] screen to display the [Density Balance Adj. Data Register / Del]. 2 Select any one row in the list of 10 - Konica Minolta bizhub PRESS C1070/1070P | bizhub PRESS C1060/C1070/C1070P/PRO C1 - Page 103
Tips With a row of the existing data selected in step 2, a confirmation dialog is displayed. To synthesize the selected data with the new data, press [Combination]. If conditions for screen type, paper type, or weight do not correspond to each other, [Combination] dims. bizhub PRESS C1070/C1070P/ - Konica Minolta bizhub PRESS C1070/1070P | bizhub PRESS C1060/C1070/C1070P/PRO C1 - Page 104
restart the computer. ColorPort v2.0.5: http://www.xrite.com/product_overview.aspx?Action=support&ID=719 1 Place the paper for the maximum density management that has been decided in consultation with the service representative. 2 Output the job data that includes the maximum density patch (density - Konica Minolta bizhub PRESS C1070/1070P | bizhub PRESS C1060/C1070/C1070P/PRO C1 - Page 105
6 Select [New] on [Patch Set]. bizhub PRESS C1070/C1070P/C1060 bizhub PRO C1060L 7 Enter any name for the patch set in [Name]. 8 Click [+] until [Total Patches] reaches the number of patches on the job that was output in step 2. 9 Click [Save]. 3 3-73 - Konica Minolta bizhub PRESS C1070/1070P | bizhub PRESS C1060/C1070/C1070P/PRO C1 - Page 106
10 Click [Save Target...] and save the target to any directory. NOTICE Select TIFF for [Files of Type]. 11 Click [Measure Target]. 12 Select the target that you created on [Target]. Check that [i1Pro] is shown in [Measurement Device] and "Connected" is shown. 13 Click the information button on [ - Konica Minolta bizhub PRESS C1070/1070P | bizhub PRESS C1060/C1070/C1070P/PRO C1 - Page 107
14 Select [Spot] on [Measurement Mode], and click [Calibrate]. bizhub PRESS C1070/C1070P/C1060 bizhub PRO C1060L 15 When the following message is displayed, horizontally place the spectrophotometer on the calibration dock and click [Calibrate]. 16 Click [Close]. 17 Stack 10 sheets of blank paper - Konica Minolta bizhub PRESS C1070/1070P | bizhub PRESS C1060/C1070/C1070P/PRO C1 - Page 108
19 Continue the measurement of the maximum density patch with each color in the order of C, M, Y. 20 When the measurement completes, click [Save Data]. 21 Select [CSV] in [Format]. 3-76 - Konica Minolta bizhub PRESS C1070/1070P | bizhub PRESS C1060/C1070/C1070P/PRO C1 - Page 109
22 Uncheck all the checkboxes of [Measurement Device] and [Colorimetric]. bizhub PRESS C1070/C1070P/C1060 bizhub PRO C1060L 23 Check [VCMY] of [Density] and select [T] for [Status]. 24 Click [Save] and save the data in any location. 25 Open the saved CSV file in Excel. 3 3-77 - Konica Minolta bizhub PRESS C1070/1070P | bizhub PRESS C1060/C1070/C1070P/PRO C1 - Page 110
26 Insert lines according to the number of patches. Example: When there are five patches for each color (20 patches in total), insert one line in every five lines. 27 Calculate the average value of the maximum density for black by using some of the values in row A, according to the patch numbers. - Konica Minolta bizhub PRESS C1070/1070P | bizhub PRESS C1060/C1070/C1070P/PRO C1 - Page 111
bizhub PRESS C1070/C1070P/C1060 bizhub PRO C1060L 29 Compare the calculated average with the maximum density target value that the service representative has informed. When two values are same or close, end the adjustment. When two values are extremely different, perform the following adjustment. - Konica Minolta bizhub PRESS C1070/1070P | bizhub PRESS C1060/C1070/C1070P/PRO C1 - Page 112
32 Change the adjustment value according to the comparative result of the calculated value and the maximum density target value. Tips The change value of density differs according to the paper. Reference: The change value of density for POD gloss coat 128g/m2 · Y: '0.006/step · M: '0.01/step · C: - Konica Minolta bizhub PRESS C1070/1070P | bizhub PRESS C1060/C1070/C1070P/PRO C1 - Page 113
Spectrometer ES-1000/ES-2000 to your computer. For details about how to use EFI Spectrometer ES-1000/ES-2000, refer to the manual supplied with the spectrophotometer. 2 Open the Start menu, and then click [All Programs] - [Fiery] - [Fiery Command WorkStation 5]. 3 Select a Fiery Color Server to be - Konica Minolta bizhub PRESS C1070/1070P | bizhub PRESS C1060/C1070/C1070P/PRO C1 - Page 114
7 Click [Job Center] - [Calibrate] in sequence. Calibrator starts. 8 Select the printing preferences for calibration. Example: Configure the [Calibrate] to [Coated (128gm2)], the [Paper source] to [Tray 5 (3 tray PFU)], and the [Measurement method] to [EFI ES2000]. 9 Click [Continue]. A chart is - Konica Minolta bizhub PRESS C1070/1070P | bizhub PRESS C1060/C1070/C1070P/PRO C1 - Page 115
and place the printed chart on top of it. 13 Follow the instructions on the measurement window to measure color strips in sequence. - Hold down about how to use EFI Spectrometer ES-1000/ES-2000, refer to the manual supplied with the spectrophotometer. 14 In the same way, measure all colors. When - Konica Minolta bizhub PRESS C1070/1070P | bizhub PRESS C1060/C1070/C1070P/PRO C1 - Page 116
16 Click [Apply & Close]. The calibrated measurement values are applied. 3-84 - Konica Minolta bizhub PRESS C1070/1070P | bizhub PRESS C1060/C1070/C1070P/PRO C1 - Page 117
© 2015 2015. 4
-
 1
1 -
 2
2 -
 3
3 -
 4
4 -
 5
5 -
 6
6 -
 7
7 -
8
-
9
-
10
-
11
-
12
-
13
-
14
-
15
-
16
-
17
-
18
-
19
-
20
-
21
-
22
-
23
-
24
-
25
-
26
-
27
-
28
-
29
-
30
-
31
-
32
-
33
-
34
-
35
-
36
-
37
-
38
-
39
-
40
-
41
-
42
-
43
-
44
-
45
-
46
-
47
-
48
-
49
-
50
-
51
-
52
-
53
-
54
-
55
-
56
-
57
-
58
-
59
-
60
-
61
-
62
-
63
-
64
-
65
-
66
-
67
-
68
-
69
-
70
-
71
-
72
-
73
-
74
-
75
-
76
-
77
-
78
-
79
-
80
-
81
-
82
-
83
-
84
-
85
-
86
-
87
-
88
-
89
-
90
-
91
-
92
-
93
-
94
-
95
-
96
-
97
-
98
-
99
-
100
-
101
-
102
-
103
-
104
-
105
-
106
-
107
-
108
-
109
-
110
-
111
-
112
-
113
-
114
-
115
-
116
-
117
 |
 |
When RU-509 is not installed