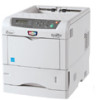
Kyocera 1102HJ2U10 Operation Guide
Kyocera 1102HJ2U10 Manual
 |
View all Kyocera 1102HJ2U10 manuals
Add to My Manuals
Save this manual to your list of manuals |
Kyocera 1102HJ2U10 manual content summary:
- Kyocera 1102HJ2U10 | Operation Guide - Page 1
EP C170N EP C220N EP C270N Advanced Operation Guide - Kyocera 1102HJ2U10 | Operation Guide - Page 2
- Kyocera 1102HJ2U10 | Operation Guide - Page 3
4-3 USB Interface 4-5 Serial Interface (EP C270N only 4-6 RS-232C Protocol (EP C270N only 4-7 RS-232C Cable Connection (EP C270N only 4-10 Glossary Index ADVANCED OPERATION GUIDE i - Kyocera 1102HJ2U10 | Operation Guide - Page 4
Contents ii ADVANCED OPERATION GUIDE - Kyocera 1102HJ2U10 | Operation Guide - Page 5
Introduction This guide has the following chapters: • 1 Handling Paper Explains how choose, handle and load paper. • 2 Using the Operator Panel the possible connections between the printer and your computer. • Glossary A Glossary of terms used is provided here. ADVANCED OPERATION GUIDE iii - Kyocera 1102HJ2U10 | Operation Guide - Page 6
Introduction Conventions This manual uses the following conventions: Convention Italic Typeface Bracket Bold Text Typeface Notes Important Caution Warning Description Example possibility of personal injury. WARNING: High voltage is present in the charger section. iv ADVANCED OPERATION GUIDE - Kyocera 1102HJ2U10 | Operation Guide - Page 7
1 Handling Paper This chapter contains explanations on the following topics: • General Guidelines 1-2 • Selecting the Right Paper 1-4 • Paper Type 1-12 • Loading Paper 1-13 ADVANCED OPERATION GUIDE 1-1 - Kyocera 1102HJ2U10 | Operation Guide - Page 8
increase the productivity of your office by ensuring efficient, trouble-free printing and reducing wear and tear on the machine use, the less risk there will be of paper jams and other problems, and the higher the level of quality your printed output will reflect ±0.2° 1-2 ADVANCED OPERATION GUIDE - Kyocera 1102HJ2U10 | Operation Guide - Page 9
use with the printer for optimum performance. Size Letter, Legal A4 Product Weight Hammermill LASER PRINT 90 g/m² (24 lb) NEUSIEDLER COLOR COPY 90 g/m² ADVANCED OPERATION GUIDE 1-3 - Kyocera 1102HJ2U10 | Operation Guide - Page 10
× 210mm Envelope C5 162 × 229mm ISO B5 176 × 250mm JIS B5 Executive 182 × 257mm 7-1/4 × 10-1/2 inches Oficio II Folio 8-1/2 × 13 inches 210 × 330mm 1-4 ADVANCED OPERATION GUIDE - Kyocera 1102HJ2U10 | Operation Guide - Page 11
the product. Uneven weight of paper, namely uneven paper thickness may cause multiple-sheet feeding or print quality problems such as blurring because of poor toner fusing. The recommended basis weight is between 60 and 105 g/m² ( (g/m²) 60 64 75 80 81 90 100 105 120 ADVANCED OPERATION GUIDE 1-5 - Kyocera 1102HJ2U10 | Operation Guide - Page 12
multiple feeds, and faint printing, the paper you are using may be too thin. If you are having problems with paper jams and blurred printing the paper may be too thick. The correct thickness is 0.086 to 0. (long grain) or parallel to the width (short grain). Short 1-6 ADVANCED OPERATION GUIDE - Kyocera 1102HJ2U10 | Operation Guide - Page 13
to malfunction in various ways. A quality paper supplier should take considerable care to ensure that these problems do not occur. Packaging: Paper should be packed in a sturdy carton to protect it from , postcards, or thick paper, feed the paper from the MP Tray. ADVANCED OPERATION GUIDE 1-7 - Kyocera 1102HJ2U10 | Operation Guide - Page 14
special paper vary considerably, special paper is more likely than white bond paper to give trouble during printing. No liability will be assumed if moisture and so forth given off during adhesive- backed label paper is particularly likely to give printing problems. 1-8 ADVANCED OPERATION GUIDE - Kyocera 1102HJ2U10 | Operation Guide - Page 15
the individual labels. Labels with spaces in between are liable to peel off, causing serious paper jam problems. Some label paper is manufactured with an extra margin of top sheet around the edge. Do not remove rub the edges with, for example, a ruler to smooth them. ADVANCED OPERATION GUIDE 1-9 - Kyocera 1102HJ2U10 | Operation Guide - Page 16
used in the paper must be able to withstand the heat of fusing during the printing process (up to 200°C or 392°F). 1-10 ADVANCED OPERATION GUIDE - Kyocera 1102HJ2U10 | Operation Guide - Page 17
Paper Specifications, on page 12. NOTE: Before purchasing recycled paper, test a sample on the machine and check that the printing quality is satisfactory. ADVANCED OPERATION GUIDE 1-11 - Kyocera 1102HJ2U10 | Operation Guide - Page 18
the user. Up to eight types of user settings may be defined. For details on Creating Custom Paper Type on page 2-70. 1-12 ADVANCED OPERATION GUIDE - Kyocera 1102HJ2U10 | Operation Guide - Page 19
. 2 Pull the paper cassette all the way out of the printer. Paper Cassette 3 Push the bottom plate down until it locks. Bottom Plate ADVANCED OPERATION GUIDE 1-13 - Kyocera 1102HJ2U10 | Operation Guide - Page 20
the paper size must be set into the printer on the operator panel. See Setting the Cassette Paper Size on page 2-63. 1-14 ADVANCED OPERATION GUIDE - Kyocera 1102HJ2U10 | Operation Guide - Page 21
slide the paper stopper to the desired paper size. When using non-standard size paper, move the paper guides and paper stopper all the way out, insert the paper, then adjust the paper guides and paper stopper to the size of the paper. Adjust them so that they are in light contact - Kyocera 1102HJ2U10 | Operation Guide - Page 22
Paper 7 Slide the paper into the paper cassette. NOTE: Do not load more paper than will fit under the load limits on the paper guides. The paper cassette will hold approximately 500 sheets of 80g/m² (21 lb.) paper with a thickness of 0.11mm. Load Limit Load Limit 1-16 ADVANCED OPERATION - Kyocera 1102HJ2U10 | Operation Guide - Page 23
cassette to indicate the remaining paper supply. When paper is exhausted, the pointer will go down to the level of (empty). Paper Gauge ADVANCED OPERATION GUIDE 1-17 - Kyocera 1102HJ2U10 | Operation Guide - Page 24
Handling Paper Loading Paper into the MP (Multi-Purpose) Tray 1 Fan the media (paper/transparencies), then tap it on a level surface to avoid media jams or skewed printing. 2 Pull the MP tray towards you until it stops. MP Tray 3 Pull out the subtray. Subtray 1-18 ADVANCED OPERATION GUIDE - Kyocera 1102HJ2U10 | Operation Guide - Page 25
load Legal size paper. (U.S.A. only) Support Wire 5 Adjust the position of the paper guides on the MP tray. Standard paper sizes are marked on the MP tray. For standard paper sizes, slide the guides to the position marked correspondingly. Paper Guide Paper Guide ADVANCED OPERATION GUIDE 1-19 - Kyocera 1102HJ2U10 | Operation Guide - Page 26
Handling Paper 6 Align the paper with the paper guides and insert as far as it will go. Load Limit Load Limit NOTE: Do not load more paper than will fit under the MP tray paper size on the printer's operator panel. Refer to Setting MP Tray Paper Size on page 2-61. 1-20 ADVANCED OPERATION GUIDE - Kyocera 1102HJ2U10 | Operation Guide - Page 27
Quality 2-49 • Operating the Storage Device 2-51 • Paper Handling 2-60 • Selecting Monochrome or Color Printing 2-74 • Reading Life Counters 2-75 • Other Modes 2-77 ADVANCED OPERATION GUIDE 2-1 - Kyocera 1102HJ2U10 | Operation Guide - Page 28
supplied with the printer. The chapter describes the operator panel in detail, including its menus and the procedures for changing various printer settings. 2-2 ADVANCED OPERATION GUIDE - Kyocera 1102HJ2U10 | Operation Guide - Page 29
, the ten messages listed below which are displayed during normal operation. • Error codes, when the printer requires the operator's attention; as explained in the Operation Guide. ADVANCED OPERATION - Kyocera 1102HJ2U10 | Operation Guide - Page 30
being performed automatically as you powered on the printer. You can also execute this function manually on the operator panel. For details, see Color Calibration on page 2-90. The after a waiting period. Error codes See the Troubleshooting section in the Operation Guide. 2-4 ADVANCED OPERATION - Kyocera 1102HJ2U10 | Operation Guide - Page 31
) A6 ISO A6 (105 × 148mm)† B5 JIS B5 (182 × 257mm) B6 JIS B6 (128 × 182mm)† LT Letter (8-1/2 × 11 inches) LG Legal (8-1/2 × 14 inches) ADVANCED OPERATION GUIDE 2-5 - Kyocera 1102HJ2U10 | Operation Guide - Page 32
This indicator shows the paper type defined for the current paper casette. The paper type can be manually defined using the operator panel. For more information, see Paper Handling on page 2-60. The quality paper for color printing CUSTOM 1 (to 8) Custom 1 (to 8) 2-6 ADVANCED OPERATION GUIDE - Kyocera 1102HJ2U10 | Operation Guide - Page 33
. Flashing. Indicates that the printer requires maintenance or is warming up. On. Indicates the occurrence of a problem or an error. For details, see the Troubleshooting section in the Operation Guide. The operator panel keys are used to configure the printer operation. Note that certain keys have - Kyocera 1102HJ2U10 | Operation Guide - Page 34
when the paper jam message has appeared on the message display. A help message will then appear to facilitate jam clearing in the location. 2-8 ADVANCED OPERATION GUIDE - Kyocera 1102HJ2U10 | Operation Guide - Page 35
menu is the setting menu for administration under the Account Management System and is normally not used. Press [MENU] to return to Ready. ADVANCED OPERATION GUIDE 2-9 - Kyocera 1102HJ2U10 | Operation Guide - Page 36
(option network interface) 2 Press [OK] ([ENTER]). Cancelling data appears on the message display and printing stops after the current page is printed. 2-10 ADVANCED OPERATION GUIDE - Kyocera 1102HJ2U10 | Operation Guide - Page 37
displayed after the menu. Paper Handling > Indicates that there is a sub-menu Press Z to move to the sub-menu or Y to go back. ADVANCED OPERATION GUIDE 2-11 - Kyocera 1102HJ2U10 | Operation Guide - Page 38
the value or selections set. Cancelling Menu Selection If you press [MENU] when a menu is selected, the message display returns to Ready. 2-12 ADVANCED OPERATION GUIDE - Kyocera 1102HJ2U10 | Operation Guide - Page 39
Road Map The menu map is the hierarchy diagram of the menu selection system of the printer. The menu map is useful as a reference to guide yourself through the menu selection system. Printing a Menu Map The printer prints a full list of the menu selection system - Menu Map. Note that menus shown - Kyocera 1102HJ2U10 | Operation Guide - Page 40
Using the Operator Panel Menu Map Sample MENU MAP 2-14 ADVANCED OPERATION GUIDE - Kyocera 1102HJ2U10 | Operation Guide - Page 41
for most basic printer configurations. You may be required to produce a status page when requesting service to the printer. Printing a Status Page You can check the printer's current status, including full description, see Understanding the Status Page on page 2-16. ADVANCED OPERATION GUIDE 2-15 - Kyocera 1102HJ2U10 | Operation Guide - Page 42
various printer settings for hardware-related items: - MP tray paper size and type - Paper cassette size and type - Buzzer control - Host buffer size ADVANCED OPERATION GUIDE - Kyocera 1102HJ2U10 | Operation Guide - Page 43
Log. Error information is cleared when the printer is powered off. The error log information is intended for service use. 9 Consumable Status This item shows the approximate level of remaining toner. When the value is 100 for all interfaces installed in the printer. ADVANCED OPERATION GUIDE 2-17 - Kyocera 1102HJ2U10 | Operation Guide - Page 44
Depends on the hard disk capacity Yes (if necessary) Stored Stored †. Jobs in excess will cause the earlier ones to be deleted. 2-18 ADVANCED OPERATION GUIDE - Kyocera 1102HJ2U10 | Operation Guide - Page 45
from the printer operator panel. To print a job as a quick copy job, see KX Printer Drivers Operation Guide. The default number of print jobs that can be stored on the hard disk is 32. This value can name Harold is assigned at printing using the printer driver. ADVANCED OPERATION GUIDE 2-19 - Kyocera 1102HJ2U10 | Operation Guide - Page 46
number of copies when resuming printing from the operator panel. When the printer is turned off, all stored jobs will be deleted. 2-20 ADVANCED OPERATION GUIDE - Kyocera 1102HJ2U10 | Operation Guide - Page 47
panel to print a stored job. Print data will be stored in the hard disk after printing. See KX Printer Drivers Operation Guide for the driver settings. Releasing a Private/Stored Job 1 Press [MENU]. 2 Press U or V repeatedly until e-MPS > appears. e-MPS > 3 Press Z. 4 Press U or V repeatedly - Kyocera 1102HJ2U10 | Operation Guide - Page 48
installed on the computer. The KM-NET for Clients is provided on the CD-ROM. For details, refer to the KM-NET for Clients Operation Guide. 2-22 ADVANCED OPERATION - Kyocera 1102HJ2U10 | Operation Guide - Page 49
prints a Code Job list as shown below. Retrieving Jobs from Virtual Mailbox (VMB) 1 Press [MENU]. 2 Press U or V repeatedly until e-MPS > appears. e-MPS > 3 Press Z. ADVANCED OPERATION GUIDE 2-23 - Kyocera 1102HJ2U10 | Operation Guide - Page 50
. e-MPS > 3 Press Z. 4 Press U or V repeatedly until >List of VMB appears. >List of VMB 5 Press [OK] ([ENTER]). A question mark (?) appears. >List of VMB ? 2-24 ADVANCED OPERATION GUIDE - Kyocera 1102HJ2U10 | Operation Guide - Page 51
default is 32. 1 Press [MENU]. 2 Press U or V repeatedly until e-MPS > appears. e-MPS > 3 Press Z. 4 Press U or V repeatedly until >e-MPS Configuration > appears. 5 Press Z. >e-MPS > Configuration ADVANCED OPERATION GUIDE 2-25 - Kyocera 1102HJ2U10 | Operation Guide - Page 52
8 Press U or V to increase or decrease, respectively, the value at the blinking cursor. Use Z and Y to move the cursor right and left. 2-26 ADVANCED OPERATION GUIDE - Kyocera 1102HJ2U10 | Operation Guide - Page 53
disk space, rounded off in units of 50MB. For example, if the total hard disk space is 10GB, the default size is 1550MB. ADVANCED OPERATION GUIDE 2-27 - Kyocera 1102HJ2U10 | Operation Guide - Page 54
the cursor right and left. 9 When the desired size is displayed, press [OK] ([ENTER]). 10 Press [MENU] to exit the menu selection. 2-28 ADVANCED OPERATION GUIDE - Kyocera 1102HJ2U10 | Operation Guide - Page 55
the interface. Changing Parallel Interface Mode (EP C270N only) The parallel interface supports a bi-directional/high-speed mode according to IEEE standards. Normally, this interface ] ([ENTER]). A blinking question mark >Parallel I/F (?) appears. ? Nibble (high) ADVANCED OPERATION GUIDE 2-29 - Kyocera 1102HJ2U10 | Operation Guide - Page 56
until Serial appears. Interface ? Serial 5 Press [OK] ([ENTER]) again. 6 Press Z. One of the following serial parameters is indicated (Baud rate for example). 2-30 ADVANCED OPERATION GUIDE - Kyocera 1102HJ2U10 | Operation Guide - Page 57
. NOTE: Some computers may not be able to handle a baud rate of 115200 bps. If you set the baud rate to 115200 and encounter communication problems, select a lower baud rate. ADVANCED OPERATION GUIDE 2-31 - Kyocera 1102HJ2U10 | Operation Guide - Page 58
Using the Operator Panel Changing Network Interface Parameters This printer supports TCP/IP, NetWare and Appletalk protocols. In addition, you can install the optional U or V repeatedly until Network appears. Interface > ? Network 5 Press [OK] ([ENTER]) again. 2-32 ADVANCED OPERATION GUIDE - Kyocera 1102HJ2U10 | Operation Guide - Page 59
to the printer and should be obtained from your network administrator. 1 Activate TCP/IP protocol in the manner described above. >TCP/IP > On ADVANCED OPERATION GUIDE 2-33 - Kyocera 1102HJ2U10 | Operation Guide - Page 60
, and the gateway address have been properly set. To print a network status page, see Printing a Network Interface Status Page on page 2-35. 2-34 ADVANCED OPERATION GUIDE - Kyocera 1102HJ2U10 | Operation Guide - Page 61
status page may not be possible with the optional network interface card. For details, see the manual for the network interface. 1 Press [MENU]. 2 Press [OK] ([ENTER]) repeatedly until or V to select On. >Network Status Page ? On 8 Press [OK] ([ENTER]) again. ADVANCED OPERATION GUIDE 2-35 - Kyocera 1102HJ2U10 | Operation Guide - Page 62
Using the Operator Panel 9 Press [MENU]. The display returns to Ready. The printer prints a network status page as an example shown in the following illustration. 2-36 ADVANCED OPERATION GUIDE - Kyocera 1102HJ2U10 | Operation Guide - Page 63
KPDL emulation. The default is Off - the printer does not print KPDL errors. 1 Press [MENU]. 2 Press U or V repeatedly until Emulation > appears. Emulation > PCL 6 ADVANCED OPERATION GUIDE 2-37 - Kyocera 1102HJ2U10 | Operation Guide - Page 64
is displayed and press Z. The display changes. If Internal is not displayed, press [OK] ([ENTER]), then press U or V until it appears. >> I000 2-38 ADVANCED OPERATION GUIDE - Kyocera 1102HJ2U10 | Operation Guide - Page 65
U or V repeatedly until >>Courier appears. If you are selecting the thickness >>Courier of the Letter Gothic font, choose >> Regular Letter Gothic here instead. ADVANCED OPERATION GUIDE 2-39 - Kyocera 1102HJ2U10 | Operation Guide - Page 66
move the cursor right and left. 8 When the desired size is displayed, press [OK] ([ENTER]). 9 Press [MENU]. The display returns to Ready. 2-40 ADVANCED OPERATION GUIDE - Kyocera 1102HJ2U10 | Operation Guide - Page 67
code sets vary depending on the current font. (The default is IBM PC-8.) 1 Press [MENU]. 2 Press U or V repeatedly until Font > appears. Font > 3 Press Z. ADVANCED OPERATION GUIDE 2-41 - Kyocera 1102HJ2U10 | Operation Guide - Page 68
of fonts with a sample and font ID (number) for each of them. Sample lists of fonts are shown in the following illustration. 2-42 ADVANCED OPERATION GUIDE - Kyocera 1102HJ2U10 | Operation Guide - Page 69
Scalable/Bitmap Password Selection [FSET] Font ID Internal Scalable and Bitmapped Fonts List PRESCRIBE Font Name Scalable/Bitmap Password Selection [FSET] Font ID ADVANCED OPERATION GUIDE 2-43 - Kyocera 1102HJ2U10 | Operation Guide - Page 70
[MENU]. The display returns to Ready. Print Orientation You can select portrait (upright) or landscape (sideways) page orientation. Portrait Orientation Landscape Orientation A A 2-44 ADVANCED OPERATION GUIDE - Kyocera 1102HJ2U10 | Operation Guide - Page 71
. Page set > 3 Press Z. 4 Press U or V repeatedly until >Page Protect appears. >Page Protect On 5 Press [OK] ([ENTER]). A blinking question mark (?) appears. >Page Protect ? On ADVANCED OPERATION GUIDE 2-45 - Kyocera 1102HJ2U10 | Operation Guide - Page 72
Press [OK] ([ENTER]). 8 Press [MENU]. The display returns to Ready. Linefeed (LF) Action This procedure instructs the printer what to do when it receives a linefeed code (0AH). • LF only: Linefeed is performed ( ENTER]). 8 Press [MENU]. The display returns to Ready. 2-46 ADVANCED OPERATION GUIDE - Kyocera 1102HJ2U10 | Operation Guide - Page 73
Using the Operator Panel Carriage-Return (CR) Action This procedure instructs the printer what to do when it receives a carriagereturn code (0DH). • CR only: A carriage-return [MENU]. Press U or V repeatedly until Page set > appears. Page Set > 3 Press Z. ADVANCED OPERATION GUIDE 2-47 - Kyocera 1102HJ2U10 | Operation Guide - Page 74
question mark (?) appears. >Wide A4 ? Off 6 Select On or Off using U or V. 7 Press [OK] ([ENTER]). 8 Press [MENU]. The display returns to Ready. 2-48 ADVANCED OPERATION GUIDE - Kyocera 1102HJ2U10 | Operation Guide - Page 75
(?) appears. >Tone ? Normal 5 Press U or V to change to Fine. 6 Press [OK] ([ENTER]) to finalize the selection. 7 Press [MENU]. The display returns to Ready. ADVANCED OPERATION GUIDE 2-49 - Kyocera 1102HJ2U10 | Operation Guide - Page 76
6 Press U or V to change from Low to High. 7 Press [OK] ([ENTER]) to finalize the selection. 8 Press [MENU]. The display returns to Ready. 2-50 ADVANCED OPERATION GUIDE - Kyocera 1102HJ2U10 | Operation Guide - Page 77
Using the Operator Panel Operating the Storage Device The printer supports three types of storage device; memory card, optional hard disk, and V repeatedly until >Read Fonts appears. >Read Fonts 5 Press [OK] ([ENTER]). A question mark (?) appears. >Read Fonts ? ADVANCED OPERATION GUIDE 2-51 - Kyocera 1102HJ2U10 | Operation Guide - Page 78
U or V to display the desired data name. 7 Press [OK] ([ENTER]). Processing appears and the reading of data from the memory card starts. 2-52 ADVANCED OPERATION GUIDE - Kyocera 1102HJ2U10 | Operation Guide - Page 79
changes to Waiting. 8 Check that the message display has changed to Waiting, then press [GO]. This writes the file to the memory card and instructs the printer to automatically print out a memory card write information page as shown below. The file is written onto the memory card given a destination - Kyocera 1102HJ2U10 | Operation Guide - Page 80
items: Item Description Partition Type Type of data written (currently only type 2 is supported). Partition Name The destination name of data written to the card. Write Partition Length Press U or V repeatedly until Memory Card > appears. Memory Card > 3 Press Z. ADVANCED OPERATION GUIDE - Kyocera 1102HJ2U10 | Operation Guide - Page 81
until >Format appears. >Format 5 Press [OK] ([ENTER]). A question mark (?) appears. >Format ? 6 Press [OK] ([ENTER]). Processing appears and formatting of the memory card starts. ADVANCED OPERATION GUIDE 2-55 - Kyocera 1102HJ2U10 | Operation Guide - Page 82
.) 1 Press [MENU]. 2 Press U or V repeatedly until Memory Card > appears. Memory Card > 3 Press Z. 4 Press U or V repeatedly until >List of Partitions appears. >List of Partitions ADVANCED OPERATION GUIDE - Kyocera 1102HJ2U10 | Operation Guide - Page 83
Hard Disk Installing the optional hard disk into the printer allows you to perform the following operations on the hard disk. • Reading data ADVANCED OPERATION GUIDE 2-57 - Kyocera 1102HJ2U10 | Operation Guide - Page 84
to the corresponding file will be DataH001 (for the 1st file), DataH002 (for the 2nd file), DataH003 (for the 3rd file), etc. 2-58 ADVANCED OPERATION GUIDE - Kyocera 1102HJ2U10 | Operation Guide - Page 85
returns to Ready. Turn the printer off and then on again. The selected RAM disk size is activated after the printer is restarted. ADVANCED OPERATION GUIDE 2-59 - Kyocera 1102HJ2U10 | Operation Guide - Page 86
U or V to change Cassette to First. 7 Press [OK] ([ENTER]). The MP tray mode is changed. 8 To exit the menu selection, press [MENU]. 2-60 ADVANCED OPERATION GUIDE - Kyocera 1102HJ2U10 | Operation Guide - Page 87
Legal Custom Hagaki OufukuHagaki Oficio II Statement Folio Youkei 2 Youkei 4 16K Env. Monarch Envelope #10 Envelope #9 Envelope #6 Envelope DL Envelope C5 A6 B6 ADVANCED OPERATION GUIDE 2-61 - Kyocera 1102HJ2U10 | Operation Guide - Page 88
message display toggles through the following paper types: Plain Transparency Preprinted Labels Bond Recycled Vellum Rough Letterhead Color Prepunched Envelope Cardstock Coated 2-62 ADVANCED OPERATION GUIDE - Kyocera 1102HJ2U10 | Operation Guide - Page 89
desired paper size. The message display toggles through the following paper sizes: Custom Oficio II Folio 16K Envelope C5 A5 B5 ISO B5 ADVANCED OPERATION GUIDE 2-63 - Kyocera 1102HJ2U10 | Operation Guide - Page 90
Y Dimension as shown in the figure. Y Dimension 210 to 356mm (8.27 to 14.02 inches) 148 to 216mm (5.83 to 8.5 inches) X Dimension 2-64 ADVANCED OPERATION GUIDE - Kyocera 1102HJ2U10 | Operation Guide - Page 91
9 To print using the custom size set above, define the same custom size on the printer driver. For details, see KX Printer Drivers Operation Guide. Setting the Cassette Paper Type By setting a paper type (plain, recycled, etc.) for the paper cassette, you can automatically select the paper in the - Kyocera 1102HJ2U10 | Operation Guide - Page 92
. ? Cassette 1 6 Press U or V to display the desired paper feed source. The message display toggles through the following paper feed sources, depending on 2-66 ADVANCED OPERATION GUIDE - Kyocera 1102HJ2U10 | Operation Guide - Page 93
edge; and short-edge binding, in which they are joined together along their short edge. In selecting a binding type, you must also consider ADVANCED OPERATION GUIDE 2-67 - Kyocera 1102HJ2U10 | Operation Guide - Page 94
7 When the desired binding mode is displayed, press [OK] ([ENTER]). The binding mode is set. 8 To exit the menu selection, press [MENU]. 2-68 ADVANCED OPERATION GUIDE - Kyocera 1102HJ2U10 | Operation Guide - Page 95
? Off 6 Press U or V to change Off to On. 7 Press [OK] ([ENTER]). The overriding mode is set. 8 To exit the menu selection, press [MENU]. ADVANCED OPERATION GUIDE 2-69 - Kyocera 1102HJ2U10 | Operation Guide - Page 96
Rough Letterhead Color Prepunched Envelope Cardstock Coated Thick High quality 7 When the paper type to be customized is displayed, press [OK] ([ENTER]). 2-70 ADVANCED OPERATION GUIDE - Kyocera 1102HJ2U10 | Operation Guide - Page 97
printing as follows. The default setting is Enable. 1 Display the custom paper type (see Creating Custom Paper Type on page 2-70) and press Z. ADVANCED OPERATION GUIDE 2-71 - Kyocera 1102HJ2U10 | Operation Guide - Page 98
panel allows you to select either the face-down tray or the face-up tray option for the output stack. 1 Press [MENU]. 2-72 ADVANCED OPERATION GUIDE - Kyocera 1102HJ2U10 | Operation Guide - Page 99
FaceDn 6 Press U or V select output stack - Top tray FaceDn or Rear tray FaceUp. 7 When the desired output stack is displayed, press [OK] ([ENTER]). ADVANCED OPERATION GUIDE 2-73 - Kyocera 1102HJ2U10 | Operation Guide - Page 100
Monochrome. 5 When the desired color mode is displayed, press [OK] ([ENTER]). Color mode is changed. 6 To exit the menu selection, press [MENU]. 2-74 ADVANCED OPERATION GUIDE - Kyocera 1102HJ2U10 | Operation Guide - Page 101
you replace the toner container before Replace toner is displayed, you must manually reset the toner counter as explained below. Note that if you reset the replace the toner containers, see the Maintenance section of the Operation Guide. 2 Press [MENU]. 3 Press U or V repeatedly until Life - Kyocera 1102HJ2U10 | Operation Guide - Page 102
counter, display >New Toner [C] Installed. 6 Press [OK] ([ENTER]). A question mark (?) appears. >New Toner [C] Installed ? 7 Press [OK] ([ENTER]). The toner counter is reset. 2-76 ADVANCED OPERATION GUIDE - Kyocera 1102HJ2U10 | Operation Guide - Page 103
Clear Setting • Duplex Printing Error Detection Setting • Color Registration • Service Menu (for service technician) • Color Calibration Selecting the Message Language You can select the selection in the following order: English Francais Deutsch Italiano Nederlands ADVANCED OPERATION GUIDE 2-77 - Kyocera 1102HJ2U10 | Operation Guide - Page 104
to conserve power when the printer is not printing, processing, or receiving data. 1 Press [MENU]. 2 Press U or V repeatedly until Others > appears. Others > 2-78 ADVANCED OPERATION GUIDE - Kyocera 1102HJ2U10 | Operation Guide - Page 105
normal operation mode. 1 Press [MENU]. 2 Press U or V repeatedly until Others > appears. Others > 3 Press Z. 4 Press U or V repeatedly until >Sleep Timer > appears. >Sleep Timer > 005min. ADVANCED OPERATION GUIDE 2-79 - Kyocera 1102HJ2U10 | Operation Guide - Page 106
Processing while the data is being received. You can cancel printing of any more dump data by pressing [GO] and then [CANCEL]. 2-80 ADVANCED OPERATION GUIDE - Kyocera 1102HJ2U10 | Operation Guide - Page 107
] ([ENTER]) again. Self test appears while the printer is resetting itself, Self test followed by Please wait and then Ready. Please wait Ready ADVANCED OPERATION GUIDE 2-81 - Kyocera 1102HJ2U10 | Operation Guide - Page 108
. The audio alarm is set to On when leaving the factory. If the alarm is set to Off, it will not sound. 2-82 ADVANCED OPERATION GUIDE - Kyocera 1102HJ2U10 | Operation Guide - Page 109
selection, press [MENU]. EP C270N 1 Press [MENU]. 2 Press U or V repeatedly until Others > appears. Others > 3 Press Z. 4 Press U or V repeatedly until Buzzer appears. >Buzzer On ADVANCED OPERATION GUIDE 2-83 - Kyocera 1102HJ2U10 | Operation Guide - Page 110
. 1 Press [MENU]. 2 Press U or V repeatedly until Others > appears. Others > 3 Press Z 4 Press U or V repeatedly until >Auto Error Clear > appears. >Auto Error > Clear Off 2-84 ADVANCED OPERATION GUIDE - Kyocera 1102HJ2U10 | Operation Guide - Page 111
to print onto a paper size and paper type that cannot be used for duplex printing, the Duplex disabled Press GO error message will ADVANCED OPERATION GUIDE 2-85 - Kyocera 1102HJ2U10 | Operation Guide - Page 112
(?) appears. >>Duplex ? Off 7 Press U or V to change Off to On. >>Duplex ? On 8 Press [OK] ([ENTER]). 9 To exit the menu selection, press [MENU]. 2-86 ADVANCED OPERATION GUIDE - Kyocera 1102HJ2U10 | Operation Guide - Page 113
out. There are left (L), horizontal (H) and right (R) registration charts for each color (cyan, magenta and yellow) included on the color registration correction chart. ADVANCED OPERATION GUIDE 2-87 - Kyocera 1102HJ2U10 | Operation Guide - Page 114
and note the number value listed there. In the example below the value would be -2. (Be careful of plus [+] and minus [-] numbers.) 2-88 ADVANCED OPERATION GUIDE - Kyocera 1102HJ2U10 | Operation Guide - Page 115
settings in the same way. 16 Once you have completed the settings for all 3 colors, press [MENU]. The display returns to Ready. NOTE: If the problem of skewed-color printout still persists even after correcting the color registration, call for service. ADVANCED OPERATION GUIDE 2-89 - Kyocera 1102HJ2U10 | Operation Guide - Page 116
V repeatedly until Others > appears. Others > 3 Press Z. 4 Press U or V repeatedly until >Service > appears. >Service > 5 Press Z. 6 Press U or V repeatedly until >>Print Status Page appears. >>Print Status U or V repeatedly until Others > appears. Others > 2-90 ADVANCED OPERATION GUIDE - Kyocera 1102HJ2U10 | Operation Guide - Page 117
Using the Operator Panel 3 Press Z. 4 Press U or V repeatedly until >Service > appears. >Service > 5 Press Z. 6 Press U or V repeatedly until >>Color Calibration appears. >>Color Calibration 7 To 9 When calibration is finished, the display returns to Ready. ADVANCED OPERATION GUIDE 2-91 - Kyocera 1102HJ2U10 | Operation Guide - Page 118
Using the Operator Panel 2-92 ADVANCED OPERATION GUIDE - Kyocera 1102HJ2U10 | Operation Guide - Page 119
the following topics: • General Information 3-2 • Expansion Memory Modules 3-3 • General Description of Options 3-6 • IB-23 Network Interface Card 3-10 For availability of the options, consult your service technician. ADVANCED OPERATION GUIDE 3-1 - Kyocera 1102HJ2U10 | Operation Guide - Page 120
Information This printer has the following options available to satisfy your printing requirements. For instructions on installing individual options, refer to the documentation included with the option. Some Card IB-23 Serial Interface Board Kit IB-11 (for EP C270N) 3-2 ADVANCED OPERATION GUIDE - Kyocera 1102HJ2U10 | Operation Guide - Page 121
512MB memory modules. (EP C270N) NOTE: The expansion memory should only be installed by your service technician. We shall not be liable for any damages caused by improper installation of expansion memory. edges as shown below to avoid damaging electronic parts. YES NO ADVANCED OPERATION GUIDE 3-3 - Kyocera 1102HJ2U10 | Operation Guide - Page 122
board gently. Main Controller Board 4 Push out the clamps on both ends of the memory socket on the main controller board. Clamp Clamp 3-4 ADVANCED OPERATION GUIDE - Kyocera 1102HJ2U10 | Operation Guide - Page 123
memory To verify that the memory modules are working properly, test them by printing a status page (see Printing a Status Page on page 2-15). ADVANCED OPERATION GUIDE 3-5 - Kyocera 1102HJ2U10 | Operation Guide - Page 124
card can be read from the control panel or automatically when you power on or reset the printer. To manually read data in the memory card, see Using the Memory Card on page 2-51. NOTE: Before inserting a feeder is attached at the bottom of the printer as shown below. 3-6 ADVANCED OPERATION GUIDE - Kyocera 1102HJ2U10 | Operation Guide - Page 125
Options For detailed information on installing the paper feeder, see the manual supplied with the paper feeder. DU-301 Duplex Unit The duplex unit is , and legal sized paper. For detailed information on installing the duplex unit, see the manual supplied with the duplex unit. ADVANCED OPERATION - Kyocera 1102HJ2U10 | Operation Guide - Page 126
-up Output Tray (PT-300/PT-301) If a duplexer has been installed to the printer Face-up Output Tray (PT-300/PT-301) 3-8 ADVANCED OPERATION GUIDE - Kyocera 1102HJ2U10 | Operation Guide - Page 127
using an electric sort function. Also, you can use the e-MPS functions. For details, refer to eMPS on page 2-18. Option Interface Slot ADVANCED OPERATION GUIDE 3-9 - Kyocera 1102HJ2U10 | Operation Guide - Page 128
Interface Card Along with the standard for the network interface on the printer, the network interface card supports TCP/IP, IPX/SPX, NetBEUI and Appletalk protocols, so that the printer can be used on network card IB-23 Network connections 10Base-T/100Base-TX 3-10 ADVANCED OPERATION GUIDE - Kyocera 1102HJ2U10 | Operation Guide - Page 129
C270N only 4-3 • USB Interface 4-5 • Serial Interface (EP C270N only 4-6 • RS-232C Protocol (EP C270N only 4-7 • RS-232C Cable Connection (EP C270N only 4-10 ADVANCED OPERATION GUIDE 4-1 - Kyocera 1102HJ2U10 | Operation Guide - Page 130
, connector specifications, and voltage levels. This chapter explains the following topics: • Parallel Interface (EP C270N only) • USB Interface • Serial Interface (EP C270N only) 4-2 ADVANCED OPERATION GUIDE - Kyocera 1102HJ2U10 | Operation Guide - Page 131
Data 7 [8] signal lines. These eight signals form one byte of data sent from host computer to printer. Data 7 [8] is the most significant bit. ADVANCED OPERATION GUIDE 4-3 - Kyocera 1102HJ2U10 | Operation Guide - Page 132
active. ††.The Paper Empty, Online, and Error signals work only after you have enabled them using the O2 parameter of the FRPO command. 4-4 ADVANCED OPERATION GUIDE - Kyocera 1102HJ2U10 | Operation Guide - Page 133
Computer Interface USB Interface This printer supports the Hi-Speed USB. USB (Universal Serial Bus) interface specifications and interface signals are Shell Signal Vbus DD+ GND - Description Power supply (+5 V) Data transmission Data transmission Signal ground Shield ADVANCED OPERATION GUIDE 4-5 - Kyocera 1102HJ2U10 | Operation Guide - Page 134
voltage level of SPACE is 3 to 15 volts. The voltage level of MARK is -3 to -15 volts. Voltages between -3 and 3 volts are undefined. 4-6 ADVANCED OPERATION GUIDE - Kyocera 1102HJ2U10 | Operation Guide - Page 135
96 (9600 baud). H2: Number of data bits 7 or 8. The factory setting is 8. H3: Number of stop bits 1 or 2. The factory setting is 1. ADVANCED OPERATION GUIDE 4-7 - Kyocera 1102HJ2U10 | Operation Guide - Page 136
is 10KB. When S5 is 1, the increment is 100KB. When S5 is 2, the increment is 1024KB. The factory setting is 12 (1200KB, S5=1). 4-8 ADVANCED OPERATION GUIDE - Kyocera 1102HJ2U10 | Operation Guide - Page 137
while Ready or Waiting error not handled error handled XON sent every 3-5 seconds D0=0 (default) D0=1 XON not sent D0=10 D0=11 ADVANCED OPERATION GUIDE 4-9 - Kyocera 1102HJ2U10 | Operation Guide - Page 138
selected COM port. Click on the Port Settings tab and set the port properties. 6 After setting the properties, click the OK button. 4-10 ADVANCED OPERATION GUIDE - Kyocera 1102HJ2U10 | Operation Guide - Page 139
OK button. The software settings made using the above procedures are temporary. On most computers, permanent settings must be made with DIP switches. ADVANCED OPERATION GUIDE 4-11 - Kyocera 1102HJ2U10 | Operation Guide - Page 140
Computer Interface 4-12 ADVANCED OPERATION GUIDE - Kyocera 1102HJ2U10 | Operation Guide - Page 141
capacity of this machine. For DIMM that can be used in this machine, contact your service technician. AppleTalk offers file sharing and printer sharing and it also enables you to utilize implementation of the PostScript page description language Level3. ADVANCED OPERATION GUIDE Glossary-1 - Kyocera 1102HJ2U10 | Operation Guide - Page 142
communicate with each other over a network. USB (Universal Serial Bus) An interface standard for low to middle speed serial interfaces. This printer supports Hi-Speed USB. The maximum transfer rate is 480 Mbps and the maximum cable length is 5 meters (16 feet). Glossary-2 ADVANCED OPERATION - Kyocera 1102HJ2U10 | Operation Guide - Page 143
e-MPS changing configuration 2-25 general information 2-18 how to change hard disk spaces 2-25 printing a list of code jobs 2-23 ADVANCED OPERATION GUIDE Emulation appearing on the status page 2-17 KPDL, printing errors 2-37 setting the default using the operator panel 2-37 Envelope 1-10 Error log - Kyocera 1102HJ2U10 | Operation Guide - Page 144
slot 3-6 writing data 2-53 Menu map how to print 2-15 sample 2-13 Menu selection system road map 2-11 Message display ADVANCED OPERATION GUIDE changing the language 2-77 indicators included 2-5 status information 2-3 MP tray defined Glossary-2 first mode, cassette mode 2-60 setting the paper size - Kyocera 1102HJ2U10 | Operation Guide - Page 145
select 2-49 Transparency 1-8 V Virtual mailbox functions 2-19 how to change the maximum space 2-27 printing a list of mailboxes 2-23 retrieving jobs from 2-23 ADVANCED OPERATION GUIDE Index-3 - Kyocera 1102HJ2U10 | Operation Guide - Page 146
ADVANCED OPERATION GUIDE Index-4 - Kyocera 1102HJ2U10 | Operation Guide - Page 147
A1 - Kyocera 1102HJ2U10 | Operation Guide - Page 148
- Kyocera 1102HJ2U10 | Operation Guide - Page 149
- Kyocera 1102HJ2U10 | Operation Guide - Page 150
Rev. 1.0 2007.8
-
 1
1 -
 2
2 -
 3
3 -
 4
4 -
 5
5 -
 6
6 -
 7
7 -
8
-
9
-
10
-
11
-
12
-
13
-
14
-
15
-
16
-
17
-
18
-
19
-
20
-
21
-
22
-
23
-
24
-
25
-
26
-
27
-
28
-
29
-
30
-
31
-
32
-
33
-
34
-
35
-
36
-
37
-
38
-
39
-
40
-
41
-
42
-
43
-
44
-
45
-
46
-
47
-
48
-
49
-
50
-
51
-
52
-
53
-
54
-
55
-
56
-
57
-
58
-
59
-
60
-
61
-
62
-
63
-
64
-
65
-
66
-
67
-
68
-
69
-
70
-
71
-
72
-
73
-
74
-
75
-
76
-
77
-
78
-
79
-
80
-
81
-
82
-
83
-
84
-
85
-
86
-
87
-
88
-
89
-
90
-
91
-
92
-
93
-
94
-
95
-
96
-
97
-
98
-
99
-
100
-
101
-
102
-
103
-
104
-
105
-
106
-
107
-
108
-
109
-
110
-
111
-
112
-
113
-
114
-
115
-
116
-
117
-
118
-
119
-
120
-
121
-
122
-
123
-
124
-
125
-
126
-
127
-
128
-
129
-
130
-
131
-
132
-
133
-
134
-
135
-
136
-
137
-
138
-
139
-
140
-
141
-
142
-
143
-
144
-
145
-
146
-
147
-
148
-
149
-
150
 |
 |
Advanced Operation Guide
EP C170N
EP C220N
EP C270N