Kyocera ECOSYS P2040dw Kyocera Command Center RX User Guide Rev-9.2016.6
Kyocera ECOSYS P2040dw Manual
 |
View all Kyocera ECOSYS P2040dw manuals
Add to My Manuals
Save this manual to your list of manuals |
Kyocera ECOSYS P2040dw manual content summary:
- Kyocera ECOSYS P2040dw | Kyocera Command Center RX User Guide Rev-9.2016.6 - Page 1
Command Center RX User Guide - Kyocera ECOSYS P2040dw | Kyocera Command Center RX User Guide Rev-9.2016.6 - Page 2
guide support the Windows 7 printing environment. Essentially the same operations are used for Microsoft Windows Vista, Windows XP, Windows 8, Windows 8.1, Windows 10, Windows Server 2003, Windows Server 2008, and Windows Server 2012 environments. We cannot be held liable for any problems arising - Kyocera ECOSYS P2040dw | Kyocera Command Center RX User Guide Rev-9.2016.6 - Page 3
Box 15 Job Box Settings 16 5 Address Book 17 Machine Address Book 17 External Address Book Settings 19 One Touch Key 21 6 Device Settings 23 Paper/Feed/Output 23 Original Document 25 Energy Saver/Timer 26 Date/Time 28 System 29 7 Function Settings 32 Common/Job - Kyocera ECOSYS P2040dw | Kyocera Command Center RX User Guide Rev-9.2016.6 - Page 4
Panel 57 8 Network Settings 60 General 60 TCP/IP 60 Protocol 71 Wireless LAN 75 9 Security Settings 79 Device Security 79 Network Security 83 90 ID Card 96 Notification/Report 97 History Settings 99 SNMP 102 System stamp 103 Message Board 105 Reset 106 11 Troubleshooting 108 - Kyocera ECOSYS P2040dw | Kyocera Command Center RX User Guide Rev-9.2016.6 - Page 5
can remotely track paper and toner usages per user 10.1. If the screen "There is a problem with this website's security certificate." is Admin" as the Use Name, and "Admin" as the Password to access all the pages. For initial login, use the predefined Admin as the Use Name, and Admin as the Password - Kyocera ECOSYS P2040dw | Kyocera Command Center RX User Guide Rev-9.2016.6 - Page 6
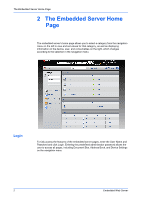
in the navigation menu. Login To fully access the features of the embedded server pages, enter the User Name and Password and click Login. Entering the predefined administrator password allows the user to access all pages, including Document Box, Address Book, and Device Settings on the navigation - Kyocera ECOSYS P2040dw | Kyocera Command Center RX User Guide Rev-9.2016.6 - Page 7
Page Top Bar User Guide To access the any other server page, click Home. Select language The embedded server supports multiple languages. To change the language that the embedded server is refresh] for the safe connection. Refresh Click this circular arrow icon to refresh the embedded server pages any - Kyocera ECOSYS P2040dw | Kyocera Command Center RX User Guide Rev-9.2016.6 - Page 8
that apply to the entire machine, such as Device Defaults (basic, ID information, and capability) as well as optional equipment installed RX This page includes the firmware version and the list of web browsers supported by the embedded server. Job Status This page includes information on all device - Kyocera ECOSYS P2040dw | Kyocera Command Center RX User Guide Rev-9.2016.6 - Page 9
Paper Defaults downloading printer drivers and software: KYOCERA Document Solutions - Download http://www.kyoceradocumentsolutions.com/download/ About KYOCERA Document Solutions For more information about products: KYOCERA Document Solutions Website http://www.kyoceradocumentsolutions.com/ User Guide - Kyocera ECOSYS P2040dw | Kyocera Command Center RX User Guide Rev-9.2016.6 - Page 10
installed and configuring their settings. Network options When the optional network interface kit (IB-50 or IB-51) is attached to the machine, the Paper Shows the size, type, maximum capacity, and the current supply by paper source. Toner Shows the toner supply by color. The status of the waste toner - Kyocera ECOSYS P2040dw | Kyocera Command Center RX User Guide Rev-9.2016.6 - Page 11
, User Login must be turned on. The default user name and password, or the local administrator account when User Login is turned off, is Admin. Local Authentication Users are registered in this device add, delete or configure a network authenticated user, see Authentication on page 90. User Guide 7 - Kyocera ECOSYS P2040dw | Kyocera Command Center RX User Guide Rev-9.2016.6 - Page 12
Login. Note: If a user is registered as an Administrator on the Local User List, click Admin Login. Enter a User Name and Password and click the Login button. For access using a job account ID, My Information, Device Information, Job Status, Document Box, Address Book, and Links are displayed in - Kyocera ECOSYS P2040dw | Kyocera Command Center RX User Guide Rev-9.2016.6 - Page 13
with a FAX kit. The users with a general user account can delete the documents which were created and added in their delete custom boxes as well as working with their contents. Adding a New Custom Box 1. Click Custom Box under Document Box download, E-mail or print documents in the custom box. User - Kyocera ECOSYS P2040dw | Kyocera Command Center RX User Guide Rev-9.2016.6 - Page 14
on its Number or Box Name. If the box is password-protected, enter the password. The documents contained in the custom box are displayed with its move the document to in Destination. If the box is passwordprotected, enter the password. 4. Click Move button. The document is moved to the box. Copying - Kyocera ECOSYS P2040dw | Kyocera Command Center RX User Guide Rev-9.2016.6 - Page 15
document after downloading. For example, you can download a color Download button to begin downloading. Enter the name and destination of the document as you are prompted. Note: If downloading Disable. • If downloading won't complete, date of sending and job ID in Additional Information. These entries - Kyocera ECOSYS P2040dw | Kyocera Command Center RX User Guide Rev-9.2016.6 - Page 16
paper source. 6. Use the Color Selection drop-down list if you want to change the color of the document when it is printed. 7. In Functions, change settings for Duplex, Combine, EcoPrint, and Toner fax boxes as well as working with their contents. Adding a New Fax Box 1. Click Fax Box under Document - Kyocera ECOSYS P2040dw | Kyocera Command Center RX User Guide Rev-9.2016.6 - Page 17
to apply the action. You can select more than one document simultaneously. 4. Select either of Delete, Download, and Print to apply to the document. To perform either of these actions, follow the same procedure 4. Click Delete icon once. If required, enter the password and click OK. User Guide 13 - Kyocera ECOSYS P2040dw | Kyocera Command Center RX User Guide Rev-9.2016.6 - Page 18
edit or delete sub address boxes as well as working with their contents. Adding a New Sub Address Box 1. Click Sub Address Box under Document Box clicking on its Number or Box Name. If the box is password-protected, enter the password. The documents contained in the sub address box are displayed with - Kyocera ECOSYS P2040dw | Kyocera Command Center RX User Guide Rev-9.2016.6 - Page 19
the magnifying glass icon to quickly search the box. 4. Click Delete icon once. If required, enter the password and click OK. Polling Box This page allows you to print or delete documents in polling boxes. Also, in succession. 3. Click Print button. The Basic submenu will open. User Guide 15 - Kyocera ECOSYS P2040dw | Kyocera Command Center RX User Guide Rev-9.2016.6 - Page 20
Document Box 4. You can immediately start to print the documents in the order shown in Selected Files by clicking Print. If you want to change the order of printing, highlight a document and press Top, Up, etc. If you want to omit a document from the list, click Delete icon. 5. Click Print button. - Kyocera ECOSYS P2040dw | Kyocera Command Center RX User Guide Rev-9.2016.6 - Page 21
or groups by choosing Contact or Group on the Type drop-down list. Adding a New Contact 1. Click Machine Address under Address Book on the navigation Login User Name, and Login Password for the contact. When the Test button is pressed, this machine tries to connect to the SMB or FTP server. Guide 17 - Kyocera ECOSYS P2040dw | Kyocera Command Center RX User Guide Rev-9.2016.6 - Page 22
accesses as desired. When the Test button is pressed, this machine tries to connect to the SMB or FTP server. 5. Click Submit button. To cancel, icon. To deselect all, click None icon. 3. Click Delete icon once. Adding a New Group 1. Click Machine Address under Address Book on the navigation menu. - Kyocera ECOSYS P2040dw | Kyocera Command Center RX User Guide Rev-9.2016.6 - Page 23
server. 2. LDAP Port Number: Sets the port number used by LDAP. The default port is 389. 3. Search Timeout: Specifies the timeout in seconds after which a name of the user to access the LDAP server. 5. Login Password: Enter the password of the user to access the LDAP server. 6. Max Search Guide 19 - Kyocera ECOSYS P2040dw | Kyocera Command Center RX User Guide Rev-9.2016.6 - Page 24
the drop-down list. 10.Connection Test: This will test one LDAP Port Number: Sets the port number used by LDAP. The default port is 389. 3. Search Timeout: Specifies the timeout in seconds the user to access the LDAP server. 5. Login Password: Enter the password of the user to access the LDAP server. - Kyocera ECOSYS P2040dw | Kyocera Command Center RX User Guide Rev-9.2016.6 - Page 25
Network Settings. 9. Authentication Type: Select an authentication type from the drop-down list. 10.Connection Test: This will test one transmission for each press, attempting to establish communication with the Key under Address Book on the navigation menu. One Touch Key List opens. User Guide 21 - Kyocera ECOSYS P2040dw | Kyocera Command Center RX User Guide Rev-9.2016.6 - Page 26
Address Book 2. Enter the key number in the Key # windows and click Go to. The Property page appears. 3. Make entries required to modify the Display Name and the Destination. Click Delete to delete the destination. 4. After confirming the settings, click Submit button. Delete One Touch Key 1. Click - Kyocera ECOSYS P2040dw | Kyocera Command Center RX User Guide Rev-9.2016.6 - Page 27
page opens. 2. Select the cassette(s) corresponding to your desired group arrangement. 3. After confirming the settings, click Submit button. Paper Output Settings 1. Click Paper/Feed/Output under Device Settings on the navigation menu. The Paper/ Feed/Output Settings page opens. User Guide 23 - Kyocera ECOSYS P2040dw | Kyocera Command Center RX User Guide Rev-9.2016.6 - Page 28
page opens. 2. You can configure the following settings. Default Paper Source You can select the cassette or MP Tray feed the paper with priority. Paper Selection You can select Auto or Default Paper Source by clicking the drop-down list. Auto Paper Selection You can select Most Suitable Size or - Kyocera ECOSYS P2040dw | Kyocera Command Center RX User Guide Rev-9.2016.6 - Page 29
enter the length (X) and width (Y) of the Custom Paper. Note: Some model type can select On and then specify the paper size. Media Type Settings You can select the paper weight for each media type by clicking the drop- (postcard), only an original placed on a platen can be detected. User Guide 25 - Kyocera ECOSYS P2040dw | Kyocera Command Center RX User Guide Rev-9.2016.6 - Page 30
Note: Some model type can detect all the originals automatically, or select the default size of original placed on the platen. 3. You can select A6 or the length (X) and width (Y) of the Custom Paper. Note: You can enter the length of Custom Paper without selecting On or Off according to the machine - Kyocera ECOSYS P2040dw | Kyocera Command Center RX User Guide Rev-9.2016.6 - Page 31
the time period before the machine reverts to normal mode, after the interrupt copy mode has been engaged. The range is 5 to 495 seconds. User Guide 27 - Kyocera ECOSYS P2040dw | Kyocera Command Center RX User Guide Rev-9.2016.6 - Page 32
Device Settings WSD scan timer This determines the time period before the machine reverts to normal mode, after WSD scan mode has been engaged. The range is 10 to 495 seconds (in 5-second increments). Weekly timer This page allows the following settings: Activate or deactivate this setting. To make - Kyocera ECOSYS P2040dw | Kyocera Command Center RX User Guide Rev-9.2016.6 - Page 33
pattern according to your purpose. Software Keyboard Layout Select an appropriate type of keyboard. USB keyboard type Select an appropriate type of USB keyboard. User Guide 29 - Kyocera ECOSYS P2040dw | Kyocera Command Center RX User Guide Rev-9.2016.6 - Page 34
paper, when A4 is selected for printing but the A4 tray is empty. Measurement Select the unit of measurement for entry. Preset Limit Specify the number of copies limited to print. Default Screen Select the screen to set as the default screen. Default to perform the wireless comminication using NFC. - Kyocera ECOSYS P2040dw | Kyocera Command Center RX User Guide Rev-9.2016.6 - Page 35
in Toner Waste Full Alert Setting that you can specify from 10 to 90. Default Paper Source Displays this item when a large capacity feeder is installed and selected as a default paper source from Default Paper Source of Other Settings in Paper/Feed/Output page. 3. Click Submit button. User Guide - Kyocera ECOSYS P2040dw | Kyocera Command Center RX User Guide Rev-9.2016.6 - Page 36
when the optional Scan Extension kit (A) is activated. High comp. PDF image You can prioritize to ensure smaller file sizes or better quality text representation in high-compression PDF format. 3. Click Submit button. Job Default Settings 1. Click Common/Job Defaults under Function Settings on the - Kyocera ECOSYS P2040dw | Kyocera Command Center RX User Guide Rev-9.2016.6 - Page 37
Default Settings page opens. 2. You can make changes for the following items as required. Original Orientation (Copy) You can select Auto, Top Edge on Top or Top Edge on Left as the original orientation. Note: Auto can be configured when an optional OCR Expansion kit kit manually Paper), downloaded - Kyocera ECOSYS P2040dw | Kyocera Command Center RX User Guide Rev-9.2016.6 - Page 38
changes for the following items as required. EcoPrint Switches EcoPrint On or Off to control toner consumption for saving the printing costs. The default setting is Off. When selecting On, you can select Toner Save Level from 1 (Low) to 5 (High), according to the machine. 34 Embedded Web Server - Kyocera ECOSYS P2040dw | Kyocera Command Center RX User Guide Rev-9.2016.6 - Page 39
Choices include Fit to Paper Size, Image Resolution, Default Settings page opens. 2. You can make changes for the following items as required. Color Selection (Copy) This selects color mode for copying. Auto Color automatically identifies a full color or black and white original. You can manually - Kyocera ECOSYS P2040dw | Kyocera Command Center RX User Guide Rev-9.2016.6 - Page 40
button. File Default Settings 1. Click Common/Job Defaults under Function Settings on the navigation menu. The Common/Job Default Settings page opens Auto Image Rotation (OCR) can be configured when an optional OCR Expansion kit is installed. Color TIFF Compression This allows to select TIFF V6 or - Kyocera ECOSYS P2040dw | Kyocera Command Center RX User Guide Rev-9.2016.6 - Page 41
(Copy) is displayed only when it is downloaded. 3. Click Submit button. Function Default The default settings can be changed in Common/Job Defaults Settings page. This section includes advanced settings for . This item can be displayed when an optional Emulation kit is installed. User Guide 37 - Kyocera ECOSYS P2040dw | Kyocera Command Center RX User Guide Rev-9.2016.6 - Page 42
sources. Fixed does not perform searching in the other paper sources. Form Feed Timeout Adjusts the form feed timeout between 5 and 495 seconds in 5-second increments. A form feed will occur in the absence of data during this time period. The default setting is 30 seconds. Job Name Select the job - Kyocera ECOSYS P2040dw | Kyocera Command Center RX User Guide Rev-9.2016.6 - Page 43
to sign in to Google and claim printer for Google Cloud Print. 3. Enter the account (Gmail address and password) to sign in. 4. Click OK button. The device used for Google Cloud Print is registered. 5. You 2. Available Network: Select the available network for Google Cloud Print. User Guide 39 - Kyocera ECOSYS P2040dw | Kyocera Command Center RX User Guide Rev-9.2016.6 - Page 44
machines which support Gloss Mode. Color Selection Sets Color Mode to Color or Black & White. This is only available for some color machines. KIR Switches KIR smoothing On or Off. EcoPrint Switches EcoPrint On or Off to control toner consumption for saving the printing costs. The default setting is - Kyocera ECOSYS P2040dw | Kyocera Command Center RX User Guide Rev-9.2016.6 - Page 45
Protocol Display whether a SMTP connection is available or not. Configure that SMTP will use (default is 25). Normally, use port default port number for SMTP connections over SSL is 465. The default User Name and Login Password. SMTP Security Displays SMTP connect to the POP3 server. - Kyocera ECOSYS P2040dw | Kyocera Command Center RX User Guide Rev-9.2016.6 - Page 46
example, the default port number for POP3 over SSL is 995. 5. POP3 Server Timeout: Enter the timeout in seconds during which this machine tries to connect to the POP3 server. 6. Login User Name: Enter the login name of the user for the POP3 account. 7. Login Password: Enter the password to log in - Kyocera ECOSYS P2040dw | Kyocera Command Center RX User Guide Rev-9.2016.6 - Page 47
with the POP3 server. When Use APOP is Off, the Login Password is sent using plain ASCII text. When Use APOP is On, the Login Password is encrypted, therefore cannot be read. APOP requires that the POP3 server supports APOP, and has APOP enabled. 9. POP3 Security: Enables or disables POP3 - Kyocera ECOSYS P2040dw | Kyocera Command Center RX User Guide Rev-9.2016.6 - Page 48
allows you to verity the current settings which follow. SMB Display whether an SMB connection is available or not. Set SMB to On on the Protocol Settings page. to Folder Settings page opens. 2. The default settings can be changed in Common/Job Default Settings page. DSM Scan DSM (Distributed Scan - Kyocera ECOSYS P2040dw | Kyocera Command Center RX User Guide Rev-9.2016.6 - Page 49
the server for the network authentication. LDAP Port Number Sets the port number used by LDAP The default port is 389. Search Timeout Specifies the timeout time after which a search on the LDAP server expires Settings on the navigation menu. The FAX/i-FAX Settings page opens. User Guide 45 - Kyocera ECOSYS P2040dw | Kyocera Command Center RX User Guide Rev-9.2016.6 - Page 50
the selected paper size. When Same Size Override is selected, the document will be printed on multiple sheets of paper without reducing Local FAX Number: Specifies your FAX system number. 2. Local FAX ID: Specifies your FAX ID. 3. Speaker Volume: Sets the volume of the internal speaker that allows - Kyocera ECOSYS P2040dw | Kyocera Command Center RX User Guide Rev-9.2016.6 - Page 51
DRD) or Manual. (The telephone connected to IDs and delete the fax IDs specified. Clicking List will display Permit ID List page. Enter the FAX ID to add, then click Submit button. To delete a fax ID from Permit ID List, delete the fax ID from Permit ID List page, then click Submit button. User Guide - Kyocera ECOSYS P2040dw | Kyocera Command Center RX User Guide Rev-9.2016.6 - Page 52
example, the default port number for POP3 over SSL is 995. c) POP3 Server Timeout: Enter the timeout in seconds during which this machine tries to connect to the POP3 server. d) Login User Name: Enter the login name of the user for the POP3 account. e) Login Password: Enter the password to log in - Kyocera ECOSYS P2040dw | Kyocera Command Center RX User Guide Rev-9.2016.6 - Page 53
page. 7. Default Address Book: Default: The default settings can be changed in Common/Job Default use (default is 25). default port number for SMTP connections over SSL is 465. The default Password. 5. POP before SMTP Timeout: Sets the timeout in seconds during which this device tries to connect connect - Kyocera ECOSYS P2040dw | Kyocera Command Center RX User Guide Rev-9.2016.6 - Page 54
. c) POP3 Port Number: Enter the port number that POP3 will use (default is 110). Normally, use port 110, but you can change the port number to the Login Password is encrypted, therefore cannot be read. APOP requires that the POP3 server supports APOP, and has APOP enabled. h) Connection Test: - Kyocera ECOSYS P2040dw | Kyocera Command Center RX User Guide Rev-9.2016.6 - Page 55
Settings on the E-mail Settings page. 4. Function Default: The default settings can be changed in Common/Job Default Settings page. 8. Click Submit button. Send to a folder, Login User Name, and the Login Password. You can confirm the connection status by clicking Test button. You can also edit an - Kyocera ECOSYS P2040dw | Kyocera Command Center RX User Guide Rev-9.2016.6 - Page 56
Function Settings If you use the host name, you must first specify the DNS server information. 52 Embedded Web Server - Kyocera ECOSYS P2040dw | Kyocera Command Center RX User Guide Rev-9.2016.6 - Page 57
allow you identify color for the original document to scan. You can manually select Full Color, Grayscale, or Black & White to forcedly switch as images. Recipients don't need a password to open the document, but they must type the password to accomplish one of these restricted actions Guide 53 - Kyocera ECOSYS P2040dw | Kyocera Command Center RX User Guide Rev-9.2016.6 - Page 58
, and forward faxes from outside of your business area to the business office nearest to the sender's fax number. For models that do not support RX/Forward Requirements, the documents received are forwarded to a forward destination or printed. Enabling RX/Forward Rules To use the RX/Forward Rules - Kyocera ECOSYS P2040dw | Kyocera Command Center RX User Guide Rev-9.2016.6 - Page 59
User Guide Function Settings General Configure the general information on the rule. of the folder. Login User Name: Enter the login user name. Login Password: Enter the login password. Connection Test: ClickTest button to confirm the connection to the folder. 5. FAX: Click FAX button to open the FAX - Kyocera ECOSYS P2040dw | Kyocera Command Center RX User Guide Rev-9.2016.6 - Page 60
i-FAX via server. Connection Mode: Select Simple MNR, or JBIG. Paper Size: Select A4/Letter Password to Open Document: Select On to set the password to open the document, enter the password, and enter the password again for confirmation. Password to Edit/Print Document: Select On to set the password - Kyocera ECOSYS P2040dw | Kyocera Command Center RX User Guide Rev-9.2016.6 - Page 61
1. Click Operation Panel under Function Settings on the navigation menu. The Customize Operation Panel page opens. 2. This section includes the following items for configuration. User Guide 57 - Kyocera ECOSYS P2040dw | Kyocera Command Center RX User Guide Rev-9.2016.6 - Page 62
Send Function, and FAX Function respectively as a default setting instead of Function Key 1 (to an item. Up to 8 items can be added per screen, 40 in total. Click Submit Paper Settings, Wi-Fi Direct, System Menu, Favorites, Help, Program, Accessibility Screen, and Message Board. Note: The supported - Kyocera ECOSYS P2040dw | Kyocera Command Center RX User Guide Rev-9.2016.6 - Page 63
Setup Registration 1. Click Operation Panel under Function Settings on the navigation menu. The Customize Operation Panel page opens. 2. This section includes the following items for configuration. By default, functions. Select an item from the drop-down list. 3. Click Submit button. User Guide 59 - Kyocera ECOSYS P2040dw | Kyocera Command Center RX User Guide Rev-9.2016.6 - Page 64
Network Settings 8 Network Settings General TCP/IP This page is accessible when you have logged in the embedded server with administrator privilege, while network authentication or local authentication is enabled. If needed, make the following settings: See below for detailed information. • - Kyocera ECOSYS P2040dw | Kyocera Command Center RX User Guide Rev-9.2016.6 - Page 65
Settings on the navigation menu. The TCP/IP Settings page opens. 2. Select On to use TCP/IP on the wireless network. 3. Click Submit button. General Settings (Common) 1. Click TCP/IP under Network Settings on the navigation menu Enter the port number for the proxy server (HTTPS). User Guide 61 - Kyocera ECOSYS P2040dw | Kyocera Command Center RX User Guide Rev-9.2016.6 - Page 66
generated by itself. But if the IP address using DHCP server or Manual settings has been decided and becomes a candidate as the result of and the field is grayed out. 3. Click Submit button. IPv4 settings (Wireless Network) 1. Click TCP/IP under Network Settings on the navigation menu. The - Kyocera ECOSYS P2040dw | Kyocera Command Center RX User Guide Rev-9.2016.6 - Page 67
generated by itself. But if the IP address using DHCP server or Manual settings has been decided and becomes a candidate as the result of section includes the following items for configuration. Default Gateway Specifies the IP address of the default gateway. When DHCP/BOOTP is turned On, Guide 63 - Kyocera ECOSYS P2040dw | Kyocera Command Center RX User Guide Rev-9.2016.6 - Page 68
in the Primary and Secondary fields provided. WINS Servers (Primary, Secondary) Specifies the IP addresses of the primary and secondary WINS (Windows Internet Name Service) servers. When DHCP/BOOTP is turned On and Use WINS Server from DHCP is selected, you can select to use the WINS server obtained - Kyocera ECOSYS P2040dw | Kyocera Command Center RX User Guide Rev-9.2016.6 - Page 69
when DHCPv6 (Stateful) is turned Off. 3. Click Submit button. IPv6 Settings (Wireless Network) 1. Click TCP/IP under Network Settings on the navigation menu. The TCP includes the following items for configuration. Default Gateway Specifies the IPv6 address of the default gateway. User Guide 65 - Kyocera ECOSYS P2040dw | Kyocera Command Center RX User Guide Rev-9.2016.6 - Page 70
Network Settings DNS Server (Primary, Secondary) Specifies the IP addresses of the primary and secondary DNS (Domain Name System) servers. When DHCPv6 (Stateful) is turned On and Use DNS Server from DHCP is selected, you can select to use the DNS server obtained via DHCP. When DHCPv6 (Stateful) is - Kyocera ECOSYS P2040dw | Kyocera Command Center RX User Guide Rev-9.2016.6 - Page 71
between 0 and 128. Protocols Specifies the protocol by which an access is granted. The following protocols can be selected. • LPD • FTP • IPP • ThinPrint • HTTP User Guide 67 - Kyocera ECOSYS P2040dw | Kyocera Command Center RX User Guide Rev-9.2016.6 - Page 72
a virtual printer for converting ASCII print data to PostScript data or for adding and/or replacing a character strings (commands) at the beginning or end , SMB (NetBEUI) and RAW. If no port is specified for printing, the default port used will be Logical Printer 1 (LP1), port 9100. 1. Click TCP/IP - Kyocera ECOSYS P2040dw | Kyocera Command Center RX User Guide Rev-9.2016.6 - Page 73
the default policy , IKEv2, and Manual. Encapsulation Mode: Transport the IPSec protocol supported. Tunnel uses the print system is connecting via IPSec. When you will be allowed to connect the print system. the print system is connecting via IPSec. If this the print system is connecting via IPSec. When - Kyocera ECOSYS P2040dw | Kyocera Command Center RX User Guide Rev-9.2016.6 - Page 74
Certificate and Pre-shared Key on Local Side, and Authentication Type, Remote ID Type, Remote ID and Pre-shared Key on Remote Side. 4. Key Exchange (IKE phase1): When using IKE phase1, a secure connection with the other end is established by generating ISAKMP SAs. Configure the following items - Kyocera ECOSYS P2040dw | Kyocera Command Center RX User Guide Rev-9.2016.6 - Page 75
a sequence number is 64-bit extended by IPSec. To execute, select On. 6. Manual: If Key Management Type is set to Manual, configure: Protocol, Hash, Encryption, SPI Format, SPI for Inbound, SPI for Outbound . Typically, this should be 631.(e.g. http://(IP address):631/printers/lp1) User Guide 71 - Kyocera ECOSYS P2040dw | Kyocera Command Center RX User Guide Rev-9.2016.6 - Page 76
A certificate can be added for communication using the the device. Turn this item On and enter Default User Name. 7. Raw: RAW employs another method printing system to retrieve E-mail from a remote server over a TCP/IP connection. To enable the POP3 protocol to retrieve E-mail, turn this item On - Kyocera ECOSYS P2040dw | Kyocera Command Center RX User Guide Rev-9.2016.6 - Page 77
The system administrator can use DSM to manage scan services over organizations which have a large number of users. protocol. 9. eSCL over SSL: A certificate can be added for communication using the eSCL protocol. To enable the error occur such as Add Paper, the printing system automatically Guide 73 - Kyocera ECOSYS P2040dw | Kyocera Command Center RX User Guide Rev-9.2016.6 - Page 78
Settings. This Certificate can be used in common with IPP over SSL and HTTPS. 5. Enhanced WSD: Enhanced WSD is an API to simplify connections to web service enabled devices, such as Printers, Scanners and File Shares. To enable Enhanced WSD, turn this item On. Available Network: Select Wired Network - Kyocera ECOSYS P2040dw | Kyocera Command Center RX User Guide Rev-9.2016.6 - Page 79
encryption. Enter the password. Common Name: This discovery and quality of service diagnostics. To enable the over SSL: A certificate can be added for communication using the REST protocol. Wireless LAN under Network Settings on the navigation menu. The Wireless LAN Settings page opens. User Guide 75 - Kyocera ECOSYS P2040dw | Kyocera Command Center RX User Guide Rev-9.2016.6 - Page 80
includes the following items for configuration. Wi-Fi Select On when you use the wireless LAN communication using Wi-Fi. Network Name (SSID) Enter the SSID (Service Set Identifier) of wireless LAN connects to the device. Network Authentication Select the network authentication method from the drop - Kyocera ECOSYS P2040dw | Kyocera Command Center RX User Guide Rev-9.2016.6 - Page 81
MSCHAPv2) has been selected for encryption. Enter the password. Common Name This protocol is activated when EAP- Click Wireless LAN under Network Settings on the navigation menu. The Wireless LAN 1. Click Wireless LAN under Network Settings on the navigation menu. The Wireless LAN Settings page - Kyocera ECOSYS P2040dw | Kyocera Command Center RX User Guide Rev-9.2016.6 - Page 82
appears. Persistent Group Select On when you use the persistent group. Click Reset button to reset the password for Wi-Fi Direct connection. Note: You can confirm the password on the Configuration page to click Configuration under Device Information on the navigation menu. You can also confirm - Kyocera ECOSYS P2040dw | Kyocera Command Center RX User Guide Rev-9.2016.6 - Page 83
, see the Protocol Settings page under Network Settings. USB Device To block accesses from the devices connected to the USB port, select Block. USB Host To block accesses from the USB host devices, To block accesses from the Option 2 interface, select Block. 3. Click Submit button. User Guide 79 - Kyocera ECOSYS P2040dw | Kyocera Command Center RX User Guide Rev-9.2016.6 - Page 84
settings, in addition to Partial lock 1 limit will be banned. (e.g. stop key use the job cancel) Partial lock 3 or Partial Lock Settings related to paper, in addition to the limit of Partial lock 2 is prohibited. (e.g. Cassette Settings, MP Tray Settings) Off or Unlock All keys are permitted to use - Kyocera ECOSYS P2040dw | Kyocera Command Center RX User Guide Rev-9.2016.6 - Page 85
. Authentication Security Settings This section allows to configure the passwords and user accounts for security. These settings can be Password Policy Settings Sets the password policy. 1. Password Policy: To set the password policy, set this to On and configure the following. 2. Maximum password - Kyocera ECOSYS P2040dw | Kyocera Command Center RX User Guide Rev-9.2016.6 - Page 86
the unusable time. Enter a digit from 0000 to 9999. Data Security Settings This setting appears when an optional Data Security kit is activated. Click Settings button to open the Password page. Enter the password and click OK button to enable the data security function. 82 Embedded Web Server - Kyocera ECOSYS P2040dw | Kyocera Command Center RX User Guide Rev-9.2016.6 - Page 87
This setting appears when an optional Printed Document Guard Kit(B) is activated. Select On to use the Document this determines whether re-entry of a destination for confirmation is required when adding a new destination. To enable, select On. New Destination Entry Determines page. User Guide 83 - Kyocera ECOSYS P2040dw | Kyocera Command Center RX User Guide Rev-9.2016.6 - Page 88
Security Settings Network Security Settings 1. Click Network Security under Security Settings on the navigation menu. The Network Security Settings page opens. 2. This section includes the following items for configuration. SSL SSL is a cryptographic protocol that provides communication security - Kyocera ECOSYS P2040dw | Kyocera Command Center RX User Guide Rev-9.2016.6 - Page 89
machine selects one algorithm to automatically connect to the server. 4. Certificate Verification document boxes cannot be accessed by the TWAIN driver. 3. Click Submit button. Network Access Settings Read and Write Community settings function as passwords to control read and write access to Guide 85 - Kyocera ECOSYS P2040dw | Kyocera Command Center RX User Guide Rev-9.2016.6 - Page 90
web site appears. You can select the following to solve the problem by configuring certificate. • Tempolary solution: Permit every time the you to check the following: Device Certificate 1 is automatically issued by default. The automatically issued certificate has the country code, common name, and - Kyocera ECOSYS P2040dw | Kyocera Command Center RX User Guide Rev-9.2016.6 - Page 91
. 2. To delete a device certificate of Device Certificate 2 (to 5), highlight the certificate and click Delete button. Note: A certificate can be assigned to a protocol or a configuration. User Guide 87 - Kyocera ECOSYS P2040dw | Kyocera Command Center RX User Guide Rev-9.2016.6 - Page 92
behavior of processing a job that has an unknown account ID or has no account ID, from Permit and Reject. 3. If you have set Job Accounting to On in step 2 above, Default Counter Limit and Count by Paper Size are displayed. Note: Only Default Counter Limit is displayed accrding to the machine. 88 - Kyocera ECOSYS P2040dw | Kyocera Command Center RX User Guide Rev-9.2016.6 - Page 93
Default Counter Limit. Enter the initial value for the counter limit, from 1 to 9999999. 5. Configures Count by Paper Size. If needed, make the following settings for Paper 1 to 5: 1. Paper accounts must be added. 1. Click ID Enter the Account ID to the left of the Account ID. To select all items at - Kyocera ECOSYS P2040dw | Kyocera Command Center RX User Guide Rev-9.2016.6 - Page 94
Printed Pages by Function, Printed Pages by Paper Size, or Printed Pages by Layout as needed You can configure the login user name and password from the page. 2. Click Settings button. The drop-down list. Action Settings For processing unknown ID jobs, select either Permit or Reject. To configure - Kyocera ECOSYS P2040dw | Kyocera Command Center RX User Guide Rev-9.2016.6 - Page 95
the server type from the drop-down list. When you use ID Card, select Ext.. Default Domain: Click Domain List button to open the Domain List page. page opens. 5. You can configure settings for Group Property. Group ID Change the group ID as desired. Group Name Change the group name as desired. Access - Kyocera ECOSYS P2040dw | Kyocera Command Center RX User Guide Rev-9.2016.6 - Page 96
Management Settings Copy Restriction (Color) Select Off or Reject Usage as desired. Copy Restriction (Full Color) Select Off or Reject Usage as desired. Print Restriction Select Off or Reject Usage as desired. Print Restriction (Full Color) Select Off or Reject Usage as desired. Duplex Restriction - Kyocera ECOSYS P2040dw | Kyocera Command Center RX User Guide Rev-9.2016.6 - Page 97
Select Off or Reject Usage as desired. 11. Click Submit button, and then Back button. 12. You can configure settings for Unknown User Settings. Unknown ID Job For processing unknown ID jobs, select either Permit or Reject. User Guide 93 - Kyocera ECOSYS P2040dw | Kyocera Command Center RX User Guide Rev-9.2016.6 - Page 98
displayed on the Simple Login Key List. Icon Select the user icon displayed on the Simple Login Key List from the drop-down list. Password Select On or Off. Authentication For Authentication, select one of Local Authentication and Network Authentication from the drop-down list. User When selecting - Kyocera ECOSYS P2040dw | Kyocera Command Center RX User Guide Rev-9.2016.6 - Page 99
User Name Enter the user ID to log in (up to 64 characters). You cannot duplicate a login user name to register. Password Enter the password to log in (up to 64 characters). Confirm Password To confirm the password, enter the same password that was entered in Password. Access Level Select either - Kyocera ECOSYS P2040dw | Kyocera Command Center RX User Guide Rev-9.2016.6 - Page 100
item appears. Select either Destination, Machine Address Book or Externaml Address Book from the drop-down list. Note: If the optional fax kit is not installed, Default Screen (Send) appears. Address Book may appear instead of Machine Address Book according to the machine type. Address Book Type In - Kyocera ECOSYS P2040dw | Kyocera Command Center RX User Guide Rev-9.2016.6 - Page 101
FeliCa as the ID Card Read Type. 4. Configure the FeliCa Settings. System Code 1 Enter the System Code 1 from 0000 to FFFF. Service Code 1 Enter the Service Code 1 from Report. This item is shown only when an optional Fax kit is installed. Outgoing FAX Report Select either On or Off. Guide 97 - Kyocera ECOSYS P2040dw | Kyocera Command Center RX User Guide Rev-9.2016.6 - Page 102
. Attach Image Select either On or Off. 6. You can configure settings for Maintenance Report. Equipment ID Enter the equipment ID. Recipient E-mail Address Enter the E-mail address to receive the maintenance reports. Use a semicolon (;) between multiple addresses. Subject Enter the Subject of the - Kyocera ECOSYS P2040dw | Kyocera Command Center RX User Guide Rev-9.2016.6 - Page 103
drop-down list. For Hourly, select a time from the every Hour drop-down list. Run once now A maintenance report will be sent to a recipient once automatically when clicking Send. 7. Configure Event Reports/Schedule Reports 1 then the addresses should be separated by a semicolon (;). User Guide 99 - Kyocera ECOSYS P2040dw | Kyocera Command Center RX User Guide Rev-9.2016.6 - Page 104
Management Settings Subject Enter the subject for the Job Log History. SSFC Subject Enter the subject for the Job Log History using the ID Card authentication. Auto Sending Determines whether the job log report is sent or not. Select either On or Off. Number of Records Enter the number - Kyocera ECOSYS P2040dw | Kyocera Command Center RX User Guide Rev-9.2016.6 - Page 105
View button. Run once now A Secure Communication Error Log History will be sent to a recipient once automatically when clicking Send button. 6. Click Submit button. User Guide 101 - Kyocera ECOSYS P2040dw | Kyocera Command Center RX User Guide Rev-9.2016.6 - Page 106
Network Settings. To configure SNMP v1/v2, proceed as follows. Read Community Enter the community name for SNMP requests to read a value. The default name is 'public'. After you have changed the setting, you must restart the printing system. Write Community Enter the community name for SNMP requests - Kyocera ECOSYS P2040dw | Kyocera Command Center RX User Guide Rev-9.2016.6 - Page 107
Authentication is set to On. Read Only User Enter User Name and Password of the read-only user. Read/Write User Enter User Name and Password of the read/write user. 4. Click Submit button. System stamp This a print job, proceed as follow. Select On or Off and click Settings button. User Guide 103 - Kyocera ECOSYS P2040dw | Kyocera Command Center RX User Guide Rev-9.2016.6 - Page 108
of the stamp for serial numbering as follows. Add Stamp: You can add Date, User ID, Serial Number, Numbering, and Text 1 or Text 2 to a stamp. To remove a a number of digits to fix from the drop-down list. Numbering Default: Enter the initial value of the serial number. 3. Position Settings: Select - Kyocera ECOSYS P2040dw | Kyocera Command Center RX User Guide Rev-9.2016.6 - Page 109
Stamp Settings page opens. 2. To change the stamp default settings, click Settings button in Default Settings. 1. Text Stamp: Add or delete the text On and click Submit button. To cancel settings, click Back button. Adding a Message List 1. Click Add icon. The New Message - Property Guide 105 - Kyocera ECOSYS P2040dw | Kyocera Command Center RX User Guide Rev-9.2016.6 - Page 110
as needed. Restart Device Clicking Restart Device button restarts the machine. Restart Network Clicking Restart Network button restarts only the related network service of the machine. Note: Some machine products restart the whole network interface integrated in the machine. Reset device to factory - Kyocera ECOSYS P2040dw | Kyocera Command Center RX User Guide Rev-9.2016.6 - Page 111
Management Settings 2. Click Initialize button as needed. The machine is reset to the factory default. User Guide 107 - Kyocera ECOSYS P2040dw | Kyocera Command Center RX User Guide Rev-9.2016.6 - Page 112
Troubleshooting 11 Troubleshooting Consult the table below to find basic solutions for problems server. Is the network cable properly connected? Connect the network cable properly. Are the server with an "http://" URL. Reference Operation Guide Operation Guide - - - IP Filter (IPv4) on page - Kyocera ECOSYS P2040dw | Kyocera Command Center RX User Guide Rev-9.2016.6 - Page 113
Troubleshooting Symptom I can't access the embedded server. Characters do not display properly in the embedded server. I can't access the other pages. I can't perform settings. The settings I made are not finalized. The administrator has forgotten the Admin password. Error or Warning is displayed - Kyocera ECOSYS P2040dw | Kyocera Command Center RX User Guide Rev-9.2016.6 - Page 114
Troubleshooting Symptom Configured settings do not take effective. Check Items Did you click Restart Network button when setting? Corrective Action Click the Restart Network button after configuring the settings. Only the related network service will restart. Reference - 110 Embedded Web Server - Kyocera ECOSYS P2040dw | Kyocera Command Center RX User Guide Rev-9.2016.6 - Page 115
Troubleshooting User Guide 111 - Kyocera ECOSYS P2040dw | Kyocera Command Center RX User Guide Rev-9.2016.6 - Page 116
10, 16/F.,Mita Centre, 552-566, Castle Peak Road Tsuen Wan, New Territories, Hong Kong Phone: +852-3582-4000 Fax: +852-3185-1399 KYOCERA Document Solutions Taiwan Corporation 6F., No.37, Sec. 3, Minquan E. Rd., Zhongshan Dist., Taipei 104, Taiwan R.O.C. Phone: +886-2-2507-6709 Fax: +886-2-2507-8432 - Kyocera ECOSYS P2040dw | Kyocera Command Center RX User Guide Rev-9.2016.6 - Page 117
Lda. Rua do Centro Cultural, 41 (Alvalade) 1700-106 Lisboa, Portugal Phone: +351-21-843-6780 Fax: +351-21-849-3312 KYOCERA Document Solutions South Africa (Pty) Ltd. KYOCERA House, Hertford Office Park, 90 Bekker Road (Cnr. Allandale), Midrand, South Africa Phone: +27-11-540-2600 Fax: +27-11-466 - Kyocera ECOSYS P2040dw | Kyocera Command Center RX User Guide Rev-9.2016.6 - Page 118
Rev. 9 2016.6 CCRXKDEN09
-
 1
1 -
 2
2 -
 3
3 -
 4
4 -
 5
5 -
 6
6 -
 7
7 -
8
-
9
-
10
-
11
-
12
-
13
-
14
-
15
-
16
-
17
-
18
-
19
-
20
-
21
-
22
-
23
-
24
-
25
-
26
-
27
-
28
-
29
-
30
-
31
-
32
-
33
-
34
-
35
-
36
-
37
-
38
-
39
-
40
-
41
-
42
-
43
-
44
-
45
-
46
-
47
-
48
-
49
-
50
-
51
-
52
-
53
-
54
-
55
-
56
-
57
-
58
-
59
-
60
-
61
-
62
-
63
-
64
-
65
-
66
-
67
-
68
-
69
-
70
-
71
-
72
-
73
-
74
-
75
-
76
-
77
-
78
-
79
-
80
-
81
-
82
-
83
-
84
-
85
-
86
-
87
-
88
-
89
-
90
-
91
-
92
-
93
-
94
-
95
-
96
-
97
-
98
-
99
-
100
-
101
-
102
-
103
-
104
-
105
-
106
-
107
-
108
-
109
-
110
-
111
-
112
-
113
-
114
-
115
-
116
-
117
-
118
 |
 |

Command Center RX
User Guide