Kyocera TASKalfa 3010i Fax System (W) Operation Guide Rev-2.2013.1
Kyocera TASKalfa 3010i Manual
 |
View all Kyocera TASKalfa 3010i manuals
Add to My Manuals
Save this manual to your list of manuals |
Kyocera TASKalfa 3010i manual content summary:
- Kyocera TASKalfa 3010i | Fax System (W) Operation Guide Rev-2.2013.1 - Page 1
FAX System(W) OPERATION GUIDE - Kyocera TASKalfa 3010i | Fax System (W) Operation Guide Rev-2.2013.1 - Page 2
- Kyocera TASKalfa 3010i | Fax System (W) Operation Guide Rev-2.2013.1 - Page 3
Guide Please read the Operation Guide before using the facsimile. Keep it close to the facsimile for easy reference. The sections of this handbook and parts of the facsimile marked with symbols are safety warnings meant to protect the user which must be performed. Specifics of the required action are - Kyocera TASKalfa 3010i | Fax System (W) Operation Guide Rev-2.2013.1 - Page 4
ii - Kyocera TASKalfa 3010i | Fax System (W) Operation Guide Rev-2.2013.1 - Page 5
Contents Safety Conventions in This Guide ...i Contents ...iii Safety Information ...vii Introduction ...xiv 1 Part Names and Functions ...1-1 Operation Panel ...1-2 10 Interrupt Send ...4-11 Chain Dial ...4-12 Manual Send ...4-14 Manual Reception ...4-15 Remote Switch Function 4-16 - Kyocera TASKalfa 3010i | Fax System (W) Operation Guide Rev-2.2013.1 - Page 6
the Paper Output 6-45 7 Optional Equipment ...7-1 Internet FAX Kit(A) "Internet FAX Kit 7-2 Expansion Memory ...7-3 Dual FAX ...7-3 8 Internet Faxing ...9-18 Cover Page Registration (Default Settings 9-23 Transmission Control 9-28 10 Troubleshooting ...10-1 Indicators During Sending/ - Kyocera TASKalfa 3010i | Fax System (W) Operation Guide Rev-2.2013.1 - Page 7
Precautions When Turning Power OFF 10-3 Error Messages ...10-4 Troubleshooting ...10-5 11 Appendix ...11-1 Character Entry Method 11-2 Specifications ...11-5 Menu List ...11-6 Received FAX Sizes and Paper Priority (Inch Model 11-11 Received FAX Sizes and Paper Priority (Metric Model 11-13 - Kyocera TASKalfa 3010i | Fax System (W) Operation Guide Rev-2.2013.1 - Page 8
vi - Kyocera TASKalfa 3010i | Fax System (W) Operation Guide Rev-2.2013.1 - Page 9
for easy reference. During use, refer to the Operation Guide for your machine for information regarding the sections listed below. • Cautionary Labels • Installation Precautions • Precautions for Use • Loading Paper • Toner Container and Waste Toner Box Replacement • Clearing Paper Jams • Solving - Kyocera TASKalfa 3010i | Fax System (W) Operation Guide Rev-2.2013.1 - Page 10
this guide. FCC PART 68 REQUIREMENTS 1 This equipment complies with Part 68 that is also compliant. See installation instructions for details. 4 The REN is service. 7 If trouble is experienced with this equipment, please contact the following company for repair and (or) warranty information: KYOCERA - Kyocera TASKalfa 3010i | Fax System (W) Operation Guide Rev-2.2013.1 - Page 11
TTI) on page 6-3.) IMPORTANT SAFETY INSTRUCTIONS When using your telephone equipment, risk of fire, use only No.26 AWG or larger UL listed or CSA certified telecommunication line cord. 1 Do not use batteries indicated in this manual. Do not dispose of batteries in a fire. They may - Kyocera TASKalfa 3010i | Fax System (W) Operation Guide Rev-2.2013.1 - Page 12
utiliser uniquement un cordon de ligne de télécommunication de calibre 26 AWG ou supérieur de la liste UL ou bien certifié CSA. 1 Ne pas utiliser l'appareil près de l'eau, p. CES INSTRUCTIONS CANADIAN IC REQUIREMENTS "This product meets the applicable Industry Canada technical specifications" " - Kyocera TASKalfa 3010i | Fax System (W) Operation Guide Rev-2.2013.1 - Page 13
this declaration relates is in conformity with the following specifications. Limits and methods of measurement for immunity characteristics of Public Switched Telephone Networks (PSTNs) of TE (excluding TE supporting the voice telephony service) in which network addressing, if provided, is by means - Kyocera TASKalfa 3010i | Fax System (W) Operation Guide Rev-2.2013.1 - Page 14
Technical regulations for terminal equipment This terminal equipment complies with • TBR21 • AN 01R00 AN for P • AN 02R01 AN for CH and N • AN 05R01 AN for D, E, GR, P and N • AN 06R00 AN for D, GR and P • AN 07R01 AN for D, E, P and N • AN 09R00 AN for D • AN 10R00 AN for D • AN 11R00 AN for P • - Kyocera TASKalfa 3010i | Fax System (W) Operation Guide Rev-2.2013.1 - Page 15
„Estonia „Finland „France „Germany „Greece „Hungary „Iceland „Ireland „Italy „Latvia „Liechtenstein „Lithuania „Luxembourg „Malta „Norway „Poland „Portugal „Romania „Slovakia „Slovenia „Spain „Sweden „Switzerland „The Netherlands „United Kingdom xiii - Kyocera TASKalfa 3010i | Fax System (W) Operation Guide Rev-2.2013.1 - Page 16
the optional Internet FAX Kit, Expansion Memory and Read the Network FAX Driver Operation Guide in the included DVD (online manual) as well. Chapter 10 - Troubleshooting Explains how to respond to error indications and trouble. Chapter 11 - Appendix Explains character entry and the specifications - Kyocera TASKalfa 3010i | Fax System (W) Operation Guide Rev-2.2013.1 - Page 17
or operations for - reference. NOTE Important Indicates items that are required or prohibited so as to avoid problems. IMPORTANT Description of Operation Procedure In this Operation Guide, the continuous operation of the keys on the touch panel is as follows: Actual procedure Press [FAX - Kyocera TASKalfa 3010i | Fax System (W) Operation Guide Rev-2.2013.1 - Page 18
Originals and Paper Sizes This section explains the notation used in this guide when referring to sizes of originals or paper sizes. As with A4, B5 and Letter, which may be used either in the horizontal or vertical - Kyocera TASKalfa 3010i | Fax System (W) Operation Guide Rev-2.2013.1 - Page 19
1 Part Names and Functions This chapter explains the names of parts when the machine is used as a fax machine after installing the FAX kit. For other parts, refer to the machine's Operation Guide. Operation Panel ...1-2 Machine ...1-3 Document Processor ...1-4 1-1 - Kyocera TASKalfa 3010i | Fax System (W) Operation Guide Rev-2.2013.1 - Page 20
Part Names and Functions > Operation Panel Operation Panel For the names of keys and indicators required when functions other than FAX are used, refer to the machine's Operation Guide settings to their default states. Specifies registered information such as address numbers, user IDs and program - Kyocera TASKalfa 3010i | Fax System (W) Operation Guide Rev-2.2013.1 - Page 21
of parts when the machine is used as a fax machine. For the parts required when functions other than FAX are used, refer to the machine's Operation Guide. this connector. This connector is Port 1. If you install 2 optional FAX Kits (Dual FAX option), you can use Port 2. Connect the modular cord for - Kyocera TASKalfa 3010i | Fax System (W) Operation Guide Rev-2.2013.1 - Page 22
is correctly set. Open this cover when the original jammed in the Document Processor. Adjust these guides according to the original width. Stack the sheet originals on this table. Read originals are ejected onto this table. Hold this handle when opening or closing the Document Processor. 1-4 - Kyocera TASKalfa 3010i | Fax System (W) Operation Guide Rev-2.2013.1 - Page 23
to undertake this preparation if it has already been carried out by a service representative. Quick Setup Wizard (Fax Setup) ...2-2 Fax setup items ...2-2 Fax Contact Registration (i-FAX) ...2-9 Group Registration...2-12 Printing Address List ...2-14 Using One-touch Keys ...2-15 Registering a New - Kyocera TASKalfa 3010i | Fax System (W) Operation Guide Rev-2.2013.1 - Page 24
Preparation Before Use > Quick Setup Wizard (Fax Setup) Quick Setup Wizard (Fax Setup) In quick setup mode, a wizard is used to configure the following settings Be sure to complete the settings before using the fax system. Fax setup items Step 1.Dialing/RX Mode 2.Local FAX Information Setting - Kyocera TASKalfa 3010i | Fax System (W) Operation Guide Rev-2.2013.1 - Page 25
Preparation Before Use > Quick Setup Wizard (Fax Setup) Fax setup procedure 1 Press the [System Menu] key. 2 Press [Quick Setup Wizard], [FAX Setup], and then [Next]. Start the wizard. 3 Select the region and press [OK]. FAX - Quick Setup Wizard 1. Dialing/RX Mode 2. Local FAX Information 3. Sound - Kyocera TASKalfa 3010i | Fax System (W) Operation Guide Rev-2.2013.1 - Page 26
] key. 2 Press [ ], and then [Date/Timer/Energy Saver]. The user authentication screen is displayed. Enter a login user name and password, and press [Login]. The factory default settings for the login user name and password are both 'Admin'. 3 Press [Change] of Time Zone. 4 Select the region and - Kyocera TASKalfa 3010i | Fax System (W) Operation Guide Rev-2.2013.1 - Page 27
Book, refer to the Command Center RX User Guide. Changing the initially displayed address book Set Book Defaults, and then [Change] of Address Book Type. Edit Destination - Address Book Type Select the default address registering several contact registrations as a unit. NOTE To register an i-FAX - Kyocera TASKalfa 3010i | Fax System (W) Operation Guide Rev-2.2013.1 - Page 28
Preparation Before Use > Using the Address Book 3 Press [Change] of Address Number. Address: Name E-mail SMB FTP FAX Address Number Name : Auto : i-FAX Change Change Status Cancel Back Register 02/02/2013 10:10 4 Using [+]/[-] or the numeric keys, enter the custom address number (0001 - Kyocera TASKalfa 3010i | Fax System (W) Operation Guide Rev-2.2013.1 - Page 29
this method to insert a pause before resuming dialing after you dial a specific number. 10Press [Change] of Sub Address. When you do not use ] deletes the character to the left of the cursor. 12Press [Password] and enter the sub address password using the numeric keys. NOTE You can use up to 20 - Kyocera TASKalfa 3010i | Fax System (W) Operation Guide Rev-2.2013.1 - Page 30
, and the default ECM setting is ON. Key TX Start Speed ECM Description To change the transmission start speed, press this key. Select the speed from 33,600 bps, 14,400 bps, and 9,600 bps. ECM (error correction mode) prevents distortion of the fax image by automatically resending any parts of the - Kyocera TASKalfa 3010i | Fax System (W) Operation Guide Rev-2.2013.1 - Page 31
Preparation Before Use > Using the Address Book Contact Registration (i-FAX) Up to 2,000 contacts can be registered. Contact name, i-FAX address, transmission mode and the conditions for the destination machine can be registered for each contact. NOTE For details, refer to Internet Faxing (i-FAX) - Kyocera TASKalfa 3010i | Fax System (W) Operation Guide Rev-2.2013.1 - Page 32
/2013 10:10 10Enter the destination i-FAX address (E-mail address) and press [OK]. Up to 128 characters can be entered. If the other machine supports Direct SMTP, enter the IP address of the other machine. NOTE For details on character entry, refer to Character Entry Method on page 11-2. 11Press - Kyocera TASKalfa 3010i | Fax System (W) Operation Guide Rev-2.2013.1 - Page 33
Preparation Before Use > Using the Address Book 14Specify the destination conditions and press [OK]. Item Description Resolution Specify the resolutions that can be received by the destination fax machine. If you try to send an i-FAX using a prohibited resolution, it is automatically changed to - Kyocera TASKalfa 3010i | Fax System (W) Operation Guide Rev-2.2013.1 - Page 34
Preparation Before Use > Using the Address Book Group Registration You can register several destinations that have been registered to be contacted as a unit. This method is convenient because several destinations can be designated at one time. Up to 500 groups can be registered. NOTE Group - Kyocera TASKalfa 3010i | Fax System (W) Operation Guide Rev-2.2013.1 - Page 35
Preparation Before Use > Using the Address Book 6 Press [Change] of Name. Use the keyboard to enter. Limit: 32 characters Input: 0 characters Backspace 1 2 3 4 5 6 7 8 9 0 ! = ` q w e r t y u i o p [ ] \ a s d f g h j k l ; ' z x c v b n m , . / @ - Kyocera TASKalfa 3010i | Fax System (W) Operation Guide Rev-2.2013.1 - Page 36
the Address Book. You can sort the list in the order of index or address numbers of the destinations. 1 Press the [System Menu] key. 2 Press [ ], [Edit Destination], and then [Next] of List Print. 3 Press [Print] of FAX List (Index) or FAX List (No.). 4 When the printing confirmation screen appears - Kyocera TASKalfa 3010i | Fax System (W) Operation Guide Rev-2.2013.1 - Page 37
Preparation Before Use > Using One-touch Keys Using One-touch Keys With One-touch keys on the [Destination] screen, you can access destinations in the Address Book. Registering a New One-touch Key You can register the destination (contact or group) in the Address Book to a One-touch key. Up to 1, - Kyocera TASKalfa 3010i | Fax System (W) Operation Guide Rev-2.2013.1 - Page 38
Preparation Before Use > Using One-touch Keys Changing/Deleting Registration Contents You can change the destination registered to a One-touch key to another destination, or delete the registration contents of the One-touch key. NOTE When changing the destination information in the Address Book, the - Kyocera TASKalfa 3010i | Fax System (W) Operation Guide Rev-2.2013.1 - Page 39
Cancelling Memory Transmission (while originals are being scanned 3-16 Cancelling Memory Transmission (during communication 3- 22 Dialing the Same Receiving System (Redial) ...3-23 Automatic Redial...3-23 Manual Redial (Recall) ...3-23 Previewing Images...3-24 Quick Setup Screen ...3-26 Functions - Kyocera TASKalfa 3010i | Fax System (W) Operation Guide Rev-2.2013.1 - Page 40
FAX Operation (Basic) > [Enter] key and [Quick No. Search] key [Enter] key and [Quick No. Search] key This section explains how to use the [Enter] key and [Quick No. Search] key on the operation panel. Using the [Enter] ( ) key The [Enter] key works in the same way as keys displayed on the touch - Kyocera TASKalfa 3010i | Fax System (W) Operation Guide Rev-2.2013.1 - Page 41
a 4-digit speed dial number, the operation in step 3 can be omitted. The basic send screen appears and the specified destination appears in the destinations list. 3 If you entered speed dial number between 1 and 3 digits long, press the [Enter] key (or [OK]). The specified destination appears in the - Kyocera TASKalfa 3010i | Fax System (W) Operation Guide Rev-2.2013.1 - Page 42
the home screen. The screen for FAX appears. Select the function. Admin Logout Copy Send FAX Custom Box Job Box Removable Memory FAX Box Internet The default is memory transmission. Memory Transmission After originals are scanned into memory, the communication starts. Scans all originals - Kyocera TASKalfa 3010i | Fax System (W) Operation Guide Rev-2.2013.1 - Page 43
been stored in memory. Every time one page is scanned, you perform an operation to allow continued scanning, and after all the originals have been stored in cannot use direct transmission when the optional Printed Document Guard Kit is installed. Direct Transmission (When originals are placed in - Kyocera TASKalfa 3010i | Fax System (W) Operation Guide Rev-2.2013.1 - Page 44
the transmission method to memory transmission. Placing Originals Place the originals on the glass surface or in the document processor. Refer to the machine's Operation Guide. (5 Working with the Machine > Loading Originals > Placing Originals on the Platen) 3-6 - Kyocera TASKalfa 3010i | Fax System (W) Operation Guide Rev-2.2013.1 - Page 45
Re-enter the same FAX number and press [OK] to complete the entry. For details, refer the machine's Operation Guide. (8 Setup and Registration (System menu) > Send > Entry Check for New Dest.) To continue entering a new to insert a pause before resuming dialing after you dial a specific number. 3-7 - Kyocera TASKalfa 3010i | Fax System (W) Operation Guide Rev-2.2013.1 - Page 46
number of the receiving system using the numeric keys. For details, refer to Manual Send on page 4-14. Dialing methods without using the numeric keys z Using mode) prevents distortion of the fax image by automatically resending any parts of the data that were not correctly sent due to the effects - Kyocera TASKalfa 3010i | Fax System (W) Operation Guide Rev-2.2013.1 - Page 47
(Basic) > Automatic Send Selecting the Density Adjust the density when scanning originals. 1 Press [Color/Image Quality], and then [Density]. screen appears. If you need an image quality suitable for OCR software (applications that convert images into text data), press [On]. Otherwise, press [Off]. 3 - Kyocera TASKalfa 3010i | Fax System (W) Operation Guide Rev-2.2013.1 - Page 48
FAX Operation (Basic) > Automatic Send Selecting the Resolution Select the resolution suitable for sending originals. The default setting is 200 × 100 dpi (Normal). The higher the scan resolution, the clearer the image. However, higher resolution also means longer send times. 1 Press [Image Quality - Kyocera TASKalfa 3010i | Fax System (W) Operation Guide Rev-2.2013.1 - Page 49
11.69" (in 0.01" increments) Metric models Horizontal: 50 to 432 mm (in 1 mm increments), Vertical: 50 to 297 mm (in 1 mm increments) * The input units can be changed in the System menu. Refer to the machine's Operation - Kyocera TASKalfa 3010i | Fax System (W) Operation Guide Rev-2.2013.1 - Page 50
/ Supplies Close 02/02/2013 10:10 2 Press [Sending Jobs]. The list of accepted time, destination, and status are displayed for each job. Status All Job No. Accepted Time Type Destination 438 14:47 0123456789 User Name Log Status InProcess 439 14:50 0123456779 Waiting 1/1 Cancel - Kyocera TASKalfa 3010i | Fax System (W) Operation Guide Rev-2.2013.1 - Page 51
No. Accepted Time Type Destination 438 14:47 0123456789 User Name Log Status InProcess 1/1 Cancel Priority Override Detail panel while originals are being scanned cancels the transmission. Even if transmission is canceled, there is a possibility that pages scanned prior to cancelation were - Kyocera TASKalfa 3010i | Fax System (W) Operation Guide Rev-2.2013.1 - Page 52
required when receiving faxes. NOTE When you are receiving DRD service from a telephone company, change the reception method to [Auto • Auto (TAD) (Refer to 6-11.) • Auto (DRD) (Refer to 6-24.) • Manual (Refer to 4-15.) Checking and Changing the Reception Method 1 Press the [System Menu] key. 2 - Kyocera TASKalfa 3010i | Fax System (W) Operation Guide Rev-2.2013.1 - Page 53
the Status screen. To print the received originals, supply paper or remove jammed paper. NOTE For the Status screen, refer to the machine's Advanced Operation Guide. 2 Received faxes are output to the tray with the printed side facing down. Paper can also be placed in the multi-purpose tray to print - Kyocera TASKalfa 3010i | Fax System (W) Operation Guide Rev-2.2013.1 - Page 54
3-17. Even if transmission is canceled, there is a possibility that pages scanned prior to cancelation were sent to the receiving party. Check with the receiving Job No. Accepted Time Type Destination 438 14:47 0123456789 User Name Log Status InProcess 1/1 Cancel Printing Jobs Status Priority - Kyocera TASKalfa 3010i | Fax System (W) Operation Guide Rev-2.2013.1 - Page 55
0007 9:30 A OFFICE User Name Start Time 12:00 that have been scanned are ejected, and the screen returns to the send default screen. When originals When 2 optional FAX Kits (Dual FAX option) Scanner Ready. Printer Ready. Removable Memory / Format Remove FAX Port 1 Dialing... Line Off Manual - Kyocera TASKalfa 3010i | Fax System (W) Operation Guide Rev-2.2013.1 - Page 56
FAX Operation (Basic) > Canceling Communication Cancelling Polling or Sub Address Bulletin Board Transmissions To cancel a polling or sub address bulletin board transmission, delete the polling transmission original saved in the polling box. For information on how to delete the saved original, refer - Kyocera TASKalfa 3010i | Fax System (W) Operation Guide Rev-2.2013.1 - Page 57
to the Operation Guide for the machine. (8 Setup and Registration (System menu) > Send > Default Screen) 1 10 2 Select the destination from the list. You can select several destinations. The Address Book, refer to the Command Center RX User Guide. Address Book Addr Book Address Book Dest. No - Kyocera TASKalfa 3010i | Fax System (W) Operation Guide Rev-2.2013.1 - Page 58
[OK]. The destination you have selected is registered in the destination list. Enter Destination. OFFICE ABCD Pause Space [email protected] 001/001 , refer to the Operation Guide for the machine. (8 Setup and Registration (System menu) > Edit Destination > Address Book Defaults > Narrow Down) Refine - Kyocera TASKalfa 3010i | Fax System (W) Operation Guide Rev-2.2013.1 - Page 59
FAX Operation (Basic) > Selecting a Destination from the Address Book Changing/Deleting Registration Contents You can change or delete the contents of destinations (contact) or groups. When editing contents 1 Press the [System Menu] key. 2 Press [ ], [Edit Destination] and then [Add/Edit] of Address - Kyocera TASKalfa 3010i | Fax System (W) Operation Guide Rev-2.2013.1 - Page 60
FAX Operation (Basic) > Selecting a Destination by One-touch Key Selecting a Destination by One-touch Key Select a destination by a One-touch key. Destination Pause ABCD Pause Space [email protected] 001/001 Backspace Address Book FAX No. Entry On Hook Direct Chain Detail Delete Recall - Kyocera TASKalfa 3010i | Fax System (W) Operation Guide Rev-2.2013.1 - Page 61
Redial. For details, refer to the Operation Guide for the machine. (8 Setup and Registration immediately while the machine is waiting for redial. Manual Redial (Recall) Use this when the receiving system list. 1 Press [Recall]. The receiving system you dialed is displayed on the destination list - Kyocera TASKalfa 3010i | Fax System (W) Operation Guide Rev-2.2013.1 - Page 62
the desired page number. In multiple-page documents, you can use these buttons to change pages. Status Close 02/02/2013 10:10 The machine scans the original and displays a preview image. Using the Preview Screen When the Preview screen is displayed, you can do the following by moving the finger - Kyocera TASKalfa 3010i | Fax System (W) Operation Guide Rev-2.2013.1 - Page 63
Press [ ] to move through the preview images in the order they were scanned. You cannot change the transmission functions while the preview image is displayed. • when you press the [Start] key. For details, refer to the Operation Guide for the machine. (8 Setup and Registration (System menu) > Send > - Kyocera TASKalfa 3010i | Fax System (W) Operation Guide Rev-2.2013.1 - Page 64
Status 2-sided/Book Original Quick Setup Org./Sending Data Format Continuous Scan Image Quality Original Image Advanced Setup Shortcut 1 Shortcut 2 Shortcut 3 follows. Default Registration 1: Original Size 2: FAX TX Resolution 3: Density 4: 2-sided/Book Original 5: Continuous Scan 6: - Kyocera TASKalfa 3010i | Fax System (W) Operation Guide Rev-2.2013.1 - Page 65
FAX TX Resolution Off Normal 0 Zoom Text+Photo Preview Destination Status 2-sided/Book Original Quick Setup Org./Sending Data Format Continuous Scan Image Quality Original Image Advanced Setup Shortcut 1 Shortcut 2 Shortcut 3 Shortcut 4 Shortcut 5 Shortcut 6 Program 02/02/2013 10:10 3-27 - Kyocera TASKalfa 3010i | Fax System (W) Operation Guide Rev-2.2013.1 - Page 66
TX Resolution Off Normal 0 Density Text+Photo Preview Destination Status 2-sided/Book Original Quick Setup Org./Sending Data Format Continuous Scan Image Quality Original Image Advanced Setup Shortcut 1 Shortcut 2 Shortcut 3 Shortcut 4 Shortcut 5 Shortcut 6 Program 02/02/2013 10:10 Adding - Kyocera TASKalfa 3010i | Fax System (W) Operation Guide Rev-2.2013.1 - Page 67
Interrupt Send ...4-11 Chain Dial ...4-12 Manual Send ...4-14 Using after Confirming the for All Receptions ...4-19 Use Rule for Specific RX ...4-21 Changing/Deleting Requirements for Forwarding Previewing Images ...4-36 Printing a FAX Box List ...4-37 Sub Address Communication ...4-38 Sub Address - Kyocera TASKalfa 3010i | Fax System (W) Operation Guide Rev-2.2013.1 - Page 68
screen. 2 Place the originals in the document processor. 3 Press [Original/Sending Data Format], and then [Long Original]. 4 To scan long originals, press [On], and to scan standard size originals, press [Off]. 5 Press [OK]. 6 Set the destination, and press the [Start] key. Transmission begins. NOTE - Kyocera TASKalfa 3010i | Fax System (W) Operation Guide Rev-2.2013.1 - Page 69
Custom Box by fax, you cannot move documents until sending is finished. For details on using Custom Boxes, refer to the machine's Operation Guide. Batch Transmission Function When fax originals to be sent to the same destination are set to the same transmission start time with delayed transmission - Kyocera TASKalfa 3010i | Fax System (W) Operation Guide Rev-2.2013.1 - Page 70
and use the numeric keys to enter the transmission start time. 5 Press [OK]. 6 Set the destination, and press the [Start] key. Originals are scanned, and transmission begins at the preset time. NOTE When On is selected in Destination Check before Send, a destination confirmation screen is displayed - Kyocera TASKalfa 3010i | Fax System (W) Operation Guide Rev-2.2013.1 - Page 71
Job No. Accepted Time Type Destination 0007 9:30 A OFFICE User Name Start Time 12:00 1/1 Cancel Start Now Detail Printing Jobs /2013 10:10 3 Select the job you want to change or delete from the list, and press [Detail]. Detailed information of the selected job is displayed. Detail Job - Kyocera TASKalfa 3010i | Fax System (W) Operation Guide Rev-2.2013.1 - Page 72
the Address Book or enter the fax number using the numeric keys. When pressing [Address Book] 1 Select the destination you want to change in the list. When entering the fax number using the numeric keys 1 Enter the fax number using the numeric keys. 2 Press [OK]. 2 Press [OK]. NOTE If Entry Check - Kyocera TASKalfa 3010i | Fax System (W) Operation Guide Rev-2.2013.1 - Page 73
refer to Send and Forward on page 4-55. For details, refer to the machine's Operation Guide. (8 Setup and Registration (System menu) > Send > Entry Check for New Dest.) To boxes beside the destinations to select from the list. To use an LDAP address book, select [Ext Address Book] in [Destination]. 3 - Kyocera TASKalfa 3010i | Fax System (W) Operation Guide Rev-2.2013.1 - Page 74
FAX number is correct. Re-enter the same i-FAX number and press [OK] to complete the entry. For details, refer to the machine's Operation Guide. (8 Setup and Registration (System menu) > Send > Entry Check for New Dest.) To continue entering a new address, press [i-FAX Address Entry] and repeat the - Kyocera TASKalfa 3010i | Fax System (W) Operation Guide Rev-2.2013.1 - Page 75
Broadcast Transmission Select the destination from the Address Book 1 Press [Address Book]. 2 Select the check boxes beside the destinations to select from the list. To use an LDAP address book, select [Ext Address Book] in [Destination]. 3 Press [OK]. Select the destination from the One-touch keys - Kyocera TASKalfa 3010i | Fax System (W) Operation Guide Rev-2.2013.1 - Page 76
screen. 2 Place the originals. 3 Select the destination, and set transmitting functions if you want to use any. 4 Press the [Start] key. Scanning of the originals starts, and the next transmission is scheduled. NOTE When On is selected in Destination Check before Send, a destination confirmation - Kyocera TASKalfa 3010i | Fax System (W) Operation Guide Rev-2.2013.1 - Page 77
FAX Operation (Advanced) > Interrupt Send Interrupt Send During communication, when you scan originals by selecting direct transmission, you can use interrupt send. Even when the communication is prolonged due to broadcast transmission or a next transmission being scheduled, - Kyocera TASKalfa 3010i | Fax System (W) Operation Guide Rev-2.2013.1 - Page 78
FAX Operation (Advanced) > Chain Dial Chain Dial Chain dial is a function that allows you to dial by linking fax numbers of the receiving systems with a chain number created with a number common to several destinations. By setting multiple phone numbers from several telephone companies to a chain - Kyocera TASKalfa 3010i | Fax System (W) Operation Guide Rev-2.2013.1 - Page 79
Send and Forward on page 4-55. For details, refer to the machine's Operation Guide. (8 Setup and Registration (System menu) > Send > Entry Check for New Dest Address Book 1 Press [Address Book]. 2 Select the destination from the list. You can select several destinations. 3 Press [OK]. The chain - Kyocera TASKalfa 3010i | Fax System (W) Operation Guide Rev-2.2013.1 - Page 80
FAX Operation (Advanced) > Manual Send Manual Send This method allows you to send originals by pressing the [Start] key after confirming that the telephone line has connected to the receiving system. - Kyocera TASKalfa 3010i | Fax System (W) Operation Guide Rev-2.2013.1 - Page 81
1 Press the [Status/Job Cancel] key. 2 Press [Device/Communication], and then [Manual RX]. Reception will start. Status Scanner Ready. Printer Ready. Removable Memory / Format Remove FAX Port 1 Dialing... Line Off Manual RX FAX Printing Jobs Status Log Sending Jobs Storing Jobs Hard Disk - Kyocera TASKalfa 3010i | Fax System (W) Operation Guide Rev-2.2013.1 - Page 82
FAX Operation (Advanced) > Remote Switch Function Remote Switch Function You can start fax reception by operation from the connected telephone set. This function is convenient for using this machine and a telephone set (commercially available product) in combination installed at places distant from - Kyocera TASKalfa 3010i | Fax System (W) Operation Guide Rev-2.2013.1 - Page 83
send it as an i-FAX or E-mail attachment or transfer it to a folder (SMB or FTP). External FAX Telephone line External FAX Telephone line Network : 1 Sub address 2 Sender fax number 3 Port (when 2 optional FAX Kits (Dual FAX option) are installed) 4 Recipient's address (i-FAX) By using - Kyocera TASKalfa 3010i | Fax System (W) Operation Guide Rev-2.2013.1 - Page 84
Received originals are forwarded to multiple fax machines. By setting a sub address as the forwarding requirement, you can restrict relay broadcasting to a specific communication. NOTE When forwarding is used, you can select whether to print or not to print the received originals. Also, you can - Kyocera TASKalfa 3010i | Fax System (W) Operation Guide Rev-2.2013.1 - Page 85
Print or forward the received file according to rules. Off Use Rule for Specific RX Use Rule for All RX Forward Settings: Print: 1 Copy(s) Schedule to the list. FAX - Forward Destination ABC DEF Dest GHI Detail 012345678 9876543210 abc@efg Address Book E-mail Addr Entry Folder Path Entry - Kyocera TASKalfa 3010i | Fax System (W) Operation Guide Rev-2.2013.1 - Page 86
originals with folder (SMB) transmission or folder (FTP) transmission. Enter the Host Name, Path, Login User Name, and Login Password of the To remove a registered destination, select the destination to be removed from the list and press [Delete]. 9 Press [OK]. 10You can change the following settings - Kyocera TASKalfa 3010i | Fax System (W) Operation Guide Rev-2.2013.1 - Page 87
RX]. 4 Press [Add]. FAX - RX/Forward Rules Print or forward the received file according to rules. Off Use Rule for Specific RX Use Rule for All RX On ID 01 FAX A others Rule Name Priority 1 1/1 Detail Delete Raise Priority Status Cancel 5 Press [Change] of Rule Number. - Kyocera TASKalfa 3010i | Fax System (W) Operation Guide Rev-2.2013.1 - Page 88
[Port 1] or [Port 2]. If the port is selected, fax box forwarding will not be possible. This setting only appears when 2 optional FAX Kits (Dual FAX option) are installed. When i-FAX was selected in step 11. Search Requirements Registration method i-FAX Address Press [i-FAX Address]. Enter - Kyocera TASKalfa 3010i | Fax System (W) Operation Guide Rev-2.2013.1 - Page 89
keys, and press [OK] to add the other party to the list. Key Description Address Book Select the destination registered in the Address Folder Path Entry Forward originals with folder (SMB) transmission or folder (FTP) transmission. Enter the Host Name, Path, Login User Name, and Login Password - Kyocera TASKalfa 3010i | Fax System (W) Operation Guide Rev-2.2013.1 - Page 90
the originals and press [OK]. If you set the password to FAX Box, enter the password and press [OK]. 25You can change the following settings. 29Select the checkbox beside the forwarding settings to be enabled from the list. The checkbox beside the forwarding setting to be enabled is checked. NOTE - Kyocera TASKalfa 3010i | Fax System (W) Operation Guide Rev-2.2013.1 - Page 91
) Changing/Deleting Requirements for Forwarding To change or delete the requirements for forwarding, follow the steps below. 1 Follow steps 1 to 3 of Use Rule for Specific RX on page 4-21. 2 Select the requirement name to be deleted or changed. To delete the requirement name, go to the next step. To - Kyocera TASKalfa 3010i | Fax System (W) Operation Guide Rev-2.2013.1 - Page 92
to 3 of Use Rule for Specific RX on page 4-21, select or transferring it to a folder (SMB or FTP), select PDF, TIFF or XPS as PDF], [TIFF] or [XPS] and then [OK]. NOTE If you have selected PDF for file format, PDF Encryption functions are available. For details, refer to the machine's Operation Guide - Kyocera TASKalfa 3010i | Fax System (W) Operation Guide Rev-2.2013.1 - Page 93
, refer to the machine's Operation Guide. File Separation If transmission is by e-mail or to a folder (SMB) or folder (FTP), set whether page division is performed. 1 Follow steps 1 to 4 of Use Rule for All Receptions on page 4-19. Follow steps 1 to 3 of Use Rule for Specific RX on page 4-21, select - Kyocera TASKalfa 3010i | Fax System (W) Operation Guide Rev-2.2013.1 - Page 94
1 to 3 of Use Rule for All Receptions on page 4-19. Follow steps 1 to 3 of Use Rule for Specific RX on page 4-21, select the rule, and press [Detail]. 2 Press [Change] of File Name. 3 Press originals are forwarded with folder (SMB) transmission and folder (FTP) transmission. 6 Press [OK]. 4-28 - Kyocera TASKalfa 3010i | Fax System (W) Operation Guide Rev-2.2013.1 - Page 95
Guide. reads "There is a problem Login. Setting Administrator User Name, and Password restricts general users' access to pages other than the Start page. For security purposes, setting the Administrator password is highly recommended. The default Administrator password is factory-set as 'Admin - Kyocera TASKalfa 3010i | Fax System (W) Operation Guide Rev-2.2013.1 - Page 96
are shown below. Item Off Use Rule for Specific RX Use Rule for All RX Description Disables the Specify the Requirement List settings. The settings available on the Requirement List -Add page are details, refer to the Command Center RX User Guide. Schedule Specifies whether a time is specified - Kyocera TASKalfa 3010i | Fax System (W) Operation Guide Rev-2.2013.1 - Page 97
Folder], [FAX] and [i-FAX], and set the forwarding destination. For details, refer to the Command Center RX User Guide. File Format Choose either PDF in Except of Rules in the condition list. Set the Use Rule to [On] and then set each item. When Use Rule for Specific RX is selected, set the action - Kyocera TASKalfa 3010i | Fax System (W) Operation Guide Rev-2.2013.1 - Page 98
Detail/Edit Delete Status 4 Press [Change] of the required items. Close 02/02/2013 10:10 NOTE The Owner and Permission are displayed when the user login has been enabled. When Box No. is selected 1 Press [+]/[-], or enter the Box No. by using the numeric keys. 2 Press [OK]. NOTE If "0000" is - Kyocera TASKalfa 3010i | Fax System (W) Operation Guide Rev-2.2013.1 - Page 99
. 3 To complete the entry, press [OK]. NOTE A box password can be set if user login is disabled or if user login is enabled but the FAX Box is shared by other users. Set the password as necessary. If you set the password, the password entry is required when changing or deleting the box, or printing - Kyocera TASKalfa 3010i | Fax System (W) Operation Guide Rev-2.2013.1 - Page 100
0.0KB 68.0KB Search(Name) Search(No.) 1/1 Add/Edit Box Polling Box Detail Open Status 02/02/2013 10:10 NOTE You must enter a box password in the following situations: • If user login is disabled • If user login is enabled but the FAX Box has been selected by another - Kyocera TASKalfa 3010i | Fax System (W) Operation Guide Rev-2.2013.1 - Page 101
preview. For information on previewing images, refer to Previewing Images on page 4-36. For information on working with lists in FAX Boxes, refer to the machine's Advanced Operation Guide. From a FAX Box, only printing is available. Sending cannot be done. 4 Press [Print]. Box: 0001 File Name - Kyocera TASKalfa 3010i | Fax System (W) Operation Guide Rev-2.2013.1 - Page 102
FAX Operation (Advanced) > FAX Box Function Checking Details and Renaming Files You can use the procedure below to check the details of documents forwarded to a FAX Box. You can also use this procedure to rename files. 1 Follow steps 1 to 3 in Printing Originals from a FAX Box on page 4-34. 2 Press - Kyocera TASKalfa 3010i | Fax System (W) Operation Guide Rev-2.2013.1 - Page 103
registered FAX Boxes are described. When there are originals in the FAX Boxes, the number of pages is displayed. NOTE The list can be printed when user login has been enabled and the machine is logged in with administrator privileges. 1 Press the [System Menu] key. 2 Press [Document Box/Removable - Kyocera TASKalfa 3010i | Fax System (W) Operation Guide Rev-2.2013.1 - Page 104
same type. Sub address-based communication can be used together with various kind of functional communication. When registering a sub address and sub address password in the Address Book and One-touch keys, you can omit their entry before transmission. For details, refer to the explanations in the - Kyocera TASKalfa 3010i | Fax System (W) Operation Guide Rev-2.2013.1 - Page 105
[OK] to complete the entry. For details, refer to the machine's Operation Guide. (8 Setup and Registration (System menu) > Send > Entry Check for New and '*' characters to enter a sub address. 8 Press [Password] and enter the sub address password using the numeric keys. NOTE You can use up to 20 - Kyocera TASKalfa 3010i | Fax System (W) Operation Guide Rev-2.2013.1 - Page 106
on page 5-12. Sub Address Reception To perform sub-address reception, you must inform the sending party of the machine's sub-address and password prior to transmission. When sub-address reception is performed, the functions below can be used. • Printing/Sending Received Faxes by Requirements (Memory - Kyocera TASKalfa 3010i | Fax System (W) Operation Guide Rev-2.2013.1 - Page 107
function can be also registered to the program. Up to 50 programs including copying and sending functions can be registered. When user login has been enabled, only the administrator can register. Registering Programs 1 Transmission requirements have been registered, press the [Program] tab. 2 Press - Kyocera TASKalfa 3010i | Fax System (W) Operation Guide Rev-2.2013.1 - Page 108
FAX Operation (Advanced) > Program Dial To delete 1 Press the key(s) corresponding to the program number (01 to 50) to delete. 2 Press [Delete]. 3 Press [Yes] in the confirmation screen. Using Program Dial 1 Press [Program] in the home screen. 2 Place the originals. 01 ID Card Copy 02 Eco Copy 04 - Kyocera TASKalfa 3010i | Fax System (W) Operation Guide Rev-2.2013.1 - Page 109
board communication function. Some fax machines cannot store originals and some do not support polling reception. Check both the sending and receiving machines beforehand to ensure that they recipient with the sub address and sub address password. † On this machine, the sub address and sub address - Kyocera TASKalfa 3010i | Fax System (W) Operation Guide Rev-2.2013.1 - Page 110
Change the required functions for the original to be stored. For information on using the functions, refer to the machine's Advanced Operation Guide. To change the image quality, follow the steps on page 3-11. Function Original Image Mixed Sized Originals 2-sided/Book Original Original Orientation - Kyocera TASKalfa 3010i | Fax System (W) Operation Guide Rev-2.2013.1 - Page 111
the numbers from 0 to 9, ' (space)', '#' and '*' characters to enter a sub address password. When the machine receives originals, a sub address password is not used. 7 Press [OK]. 8 Press the [Start] key. The originals are scanned and stored in the Polling box. NOTE You can see a preview of the - Kyocera TASKalfa 3010i | Fax System (W) Operation Guide Rev-2.2013.1 - Page 112
communication is disabled for polling reception. When 2 optional FAX Kits (Dual FAX option) are installed and a receive-only port refer to Send and Forward on page 4-55. For details, refer to the machine's Operation Guide. (8 Setup and Registration (System menu) > Send > Entry Check for New Dest.) To - Kyocera TASKalfa 3010i | Fax System (W) Operation Guide Rev-2.2013.1 - Page 113
the sub address (on this machine, sub address and sub address password) set at the sending machine. This communication is still possible to Send and Forward on page 4-55. For details, refer to the machine's Operation Guide. (8 Setup and Registration (System menu) > Send > Entry Check for New Dest.) - Kyocera TASKalfa 3010i | Fax System (W) Operation Guide Rev-2.2013.1 - Page 114
home screen, and then [Polling Box]. 2 Select an original by pressing a checkbox in the list. A tick appears in the checkbox for the selected original. NOTE To cancel a selection, information on working with lists in a Polling box, refer to the machine's Advanced Operation Guide. 3 Press [Print]. - Kyocera TASKalfa 3010i | Fax System (W) Operation Guide Rev-2.2013.1 - Page 115
/02/2013 10:10 Description File name of the original Press [Change] to rename the file. Number of pages in the original Resolution used during scanning The date/time when the original was stored. Specified sub address If there is no information, this item is not displayed. 4 When you have finished - Kyocera TASKalfa 3010i | Fax System (W) Operation Guide Rev-2.2013.1 - Page 116
FAX Operation (Advanced) > Polling Communication Previewing Images Use this procedure to view a preview image of the stored document on the touch panel. 1 Follow steps 1 to 2 in Printing from a Polling Box on page 4-48. 2 Press [Preview]. The preview screen appears. For information on previewing - Kyocera TASKalfa 3010i | Fax System (W) Operation Guide Rev-2.2013.1 - Page 117
FAX Operation (Advanced) > Prohibiting entry of fax numbers with the numeric keys Prohibiting entry of fax numbers with the numeric keys You can prohibit direct entry of fax numbers with the numeric keys when faxes are sent. When direct entry is prohibited, faxes can only be sent to destinations - Kyocera TASKalfa 3010i | Fax System (W) Operation Guide Rev-2.2013.1 - Page 118
Guide. Description of User Accounting Setting Item Local User List Enable/Disable User accounting Description Register user access privileges, User ID and Password. Enable/Disable User sheets You can reset the counting, Kits (Dual FAX option). NOTE For details, refer to the - Kyocera TASKalfa 3010i | Fax System (W) Operation Guide Rev-2.2013.1 - Page 119
operations. • Normal transmission • Delayed transmission • Broadcast transmission • Sub address transmission • Output from FAX Box • Encrypted transmission • Manual send when dialed from this machine to the receiving system • Polling transmission • Network FAX transmission* • i-FAX Transmission - Kyocera TASKalfa 3010i | Fax System (W) Operation Guide Rev-2.2013.1 - Page 120
accounting has been enabled, you need to enter a User ID and Password to use the machine. 1 Press [Login User Name]. Login to: Login User Name Local abcdef Login Password ******** # Keys # Keys Simple Login Status 2 Enter a User Name, and press [OK]. Login 02/02/2013 10:10 NOTE For details - Kyocera TASKalfa 3010i | Fax System (W) Operation Guide Rev-2.2013.1 - Page 121
user accounting and job accounting have been enabled, the screen for entering a User ID and Password is displayed. 1 Use the numeric keys to enter Account ID, and press [Login]. ******** Check Counter Status Login machine's Operation Guide. (8 Setup and Registration (System menu) > Send > Send and Forward - Kyocera TASKalfa 3010i | Fax System (W) Operation Guide Rev-2.2013.1 - Page 122
convenient when sending fax are introduced here. For usage of each function, refer to the machine's Advanced Operation Guide. Original Size Selection Select the size of originals to be scanned. Be sure to select the original's size when using custom size originals. The original size can be selected - Kyocera TASKalfa 3010i | Fax System (W) Operation Guide Rev-2.2013.1 - Page 123
To ensure that the originals are sent in the correct orientation for reading, indicate which end of the original is the top. When the quality suitable for OCR software (applications that convert images into text data), press [On]. Otherwise, press [Off]. Continuous Scan When you cannot place - Kyocera TASKalfa 3010i | Fax System (W) Operation Guide Rev-2.2013.1 - Page 124
Border Erase You can erase black borders around originals when scanning. For border erase, the following methods are available. Border in each mode is as follows. Specifications Border Erase range Inch 0-2" (0.01" unit) Centimeter 0 mm to 50 mm (1 mm unit) Job Finish Notice This function is - Kyocera TASKalfa 3010i | Fax System (W) Operation Guide Rev-2.2013.1 - Page 125
5 Checking Transmission Results and Registration Status This chapter explains how to check fax transmission results and functional registration status. Various Tools for Checking Transmission Results and Registration Status 5-2 Checking FAX Job History ...5-3 Displaying Job Log Screen ...5-3 - Kyocera TASKalfa 3010i | Fax System (W) Operation Guide Rev-2.2013.1 - Page 126
Number, Local FAX Name, fax line setting, etc. Any time Reporting of FAX PC receipt result by E-mail Fax receipt Fax reception is reported by email. Reference Page 5-3 5-7 5-8 5-9 5-10 5-11 5-2 - Kyocera TASKalfa 3010i | Fax System (W) Operation Guide Rev-2.2013.1 - Page 127
details of the job history check, refer to the machine's Advanced Operation Guide. Displaying Job Log Screen 1 Press the [Status/Job Cancel] key. 438 14 All FAX i-FAX E-mail Folder Application Next Scheduled Job Log Destination User Name Result InProcess 1/1 Detail Printing Jobs - Kyocera TASKalfa 3010i | Fax System (W) Operation Guide Rev-2.2013.1 - Page 128
date Icon indicates job type. Fax reception Job Name User Name i-FAX reception Job name User name Blank if no information is available Result [ ] a job is ended. Specific type of job can be indicated (Fax or i-FAX transmission in this screen). Select a job from the list and press this key to - Kyocera TASKalfa 3010i | Fax System (W) Operation Guide Rev-2.2013.1 - Page 129
Specific type of job can be indicated. Select a job from the list and press this key to show detailed information of the job (Refer to Checking Details of the Job Log on page 5-5). NOTE Jobs stored in a Polling box appear as scanner Type: Sending Job - FAX User Name: User1 Job Name: - Kyocera TASKalfa 3010i | Fax System (W) Operation Guide Rev-2.2013.1 - Page 130
for each destination. Job type The number of destinations is displayed. User name Blank if no information is available Job name Time when job was mode used during scanning The Local FAX Name or Local FAX Number registered on the other party's machine (for fax reception and manual reception). i-FAX - Kyocera TASKalfa 3010i | Fax System (W) Operation Guide Rev-2.2013.1 - Page 131
] (not to print), [On] (to print), [Error Only], or [Specify Each Job]. Report - FAX Print a report of FAX transmission results. * Results including E-mail/Folder in multiple destinations are also printed. Off Attach Image On Error Only Off Specify Each Job Partial Image Full Image Cancel OK - Kyocera TASKalfa 3010i | Fax System (W) Operation Guide Rev-2.2013.1 - Page 132
Result Report and then [Change] of Recipient Format. 3 Press [Name or Destination], [Name and Destination]. 4 Press [OK]. NOTE This is not displayed if E-mail/Folder and Fax are both set to [Off] in Send Result Reports. FAX RX Result Reports Each time you receive a fax, you can print a report to - Kyocera TASKalfa 3010i | Fax System (W) Operation Guide Rev-2.2013.1 - Page 133
Press [OK]. FAX RX Result Report Completed Activity Report Activity reports are reports of both the sent faxes and the received faxes. Each report lists the history of the latest 50 sent or received fax data. When automatic printout is selected, a report is printed out automatically after every 50 - Kyocera TASKalfa 3010i | Fax System (W) Operation Guide Rev-2.2013.1 - Page 134
Press the [System Menu] key. 2 Press [Report], and [Next] of Admin Report Settings. Then press [Change] of Outgoing FAX Report or Incoming FAX Press [OK]. Status Page A status page provides information on a number of user setups. FAX-related information includes the Local FAX Number, Local FAX Name, - Kyocera TASKalfa 3010i | Fax System (W) Operation Guide Rev-2.2013.1 - Page 135
Checking Transmission Results and Registration Status > Reporting FAX Receipt Result by E-mail Reporting FAX Receipt Result by E-mail Fax receipt can also be notified by e-mail instead of checking the receipt result report. NOTE This setting is displayed when the FAX RX Result Report setting is [On] - Kyocera TASKalfa 3010i | Fax System (W) Operation Guide Rev-2.2013.1 - Page 136
appears after pressing the [Start] key. For details, refer to the Operation Guide for the machine. (8 Setup and Registration (System menu) > Send > list, press [Check] and then Start key. Destination Destination A OFFICE Detail 1234567890 1/1 Detail Delete Check Cancel Status Status Admin - Kyocera TASKalfa 3010i | Fax System (W) Operation Guide Rev-2.2013.1 - Page 137
6 Setup and Registration This chapter explains how to perform various setups and registrations. Selection of Telephone Line (Inch version only 6-2 Selection of Transmit Terminal Identification (TTI 6-3 Setting the TTI information...6-4 Local FAX Name Registration...6-4 Local FAX Information Entry - Kyocera TASKalfa 3010i | Fax System (W) Operation Guide Rev-2.2013.1 - Page 138
the type you are contracted with. Please note that selecting a wrong telephone line will prevent you from sending fax. NOTE If you install 2 optional FAX Kits (Dual FAX option) and then use 2 phone lines, select the option for each line. 1 Press the [System Menu] key. 2 Press [FAX], [Next] of - Kyocera TASKalfa 3010i | Fax System (W) Operation Guide Rev-2.2013.1 - Page 139
fax. The information includes the date and time of transmission, number of pages sent, name, fax number, and Internet FAX address. This machine enables the user to select if the TTI is printed out on the fax on the receiving system. Regarding the location of the information to be printed, you - Kyocera TASKalfa 3010i | Fax System (W) Operation Guide Rev-2.2013.1 - Page 140
the FAX came from. Local FAX Name Registration Register the local FAX name printed in the transmit terminal identification (TTI) area. NOTE If two fax kits are installed and two telephone lines are used, TTI information can be registered for each line. However, only one FAX ID can be registered. To - Kyocera TASKalfa 3010i | Fax System (W) Operation Guide Rev-2.2013.1 - Page 141
Local FAX Info in the TTI. For the procedure for registering an account name or account ID, refer to the machine's Operation Guide. NOTE If you install 2 optional FAX Kits (Dual FAX option) and then use 2 phone lines, you can register Local Fax Number for each of the lines and only one - Kyocera TASKalfa 3010i | Fax System (W) Operation Guide Rev-2.2013.1 - Page 142
Setup and Registration > Setting the TTI information Local FAX ID Entry 6 Press [Change] of Local FAX ID. The entry screen is displayed. FAX - Local FAX ID Set local FAX ID. Use [-]/[+] or the numeric keys to enter a number. (0000 - 9999) Status Cancel OK 02/02/2013 10:10 7 Using the numeric - Kyocera TASKalfa 3010i | Fax System (W) Operation Guide Rev-2.2013.1 - Page 143
Setup and Registration > ECM TX ECM TX ECM is a communication mode specified by the ITU-T (International Telecommunication Union) that retransmits data when an error occurs. Fax machines that have ECM mode check for errors as they communicate, preventing distortion of the image due to noise on the - Kyocera TASKalfa 3010i | Fax System (W) Operation Guide Rev-2.2013.1 - Page 144
conditions are bad, the fax may not be transmitted correctly. In that case, set a lower TX Start Speed. Normally this should be used with the default setting. 1 Press the [System Menu] key. 2 Press [FAX], [Next] of Transmission, [Next] of FAX, and then [Change] of TX Start Speed (Port1) or TX Start - Kyocera TASKalfa 3010i | Fax System (W) Operation Guide Rev-2.2013.1 - Page 145
is calling from a telephone, the machine makes a ringing tone urging the user to respond. IMPORTANT In order to use FAX/TEL Auto Switch Reception, with automatic send FAX When the other party has sent originals with manual send Telephone When the other party is calling from a telephone Receives - Kyocera TASKalfa 3010i | Fax System (W) Operation Guide Rev-2.2013.1 - Page 146
call is from a telephone 2 The machine makes a ringing tone urging the user to respond. Lift the handset of the telephone within 30 seconds. NOTE If you NOTE At the end of the conversation, you can manually receive the originals. (Refer to Manual Reception on page 4-15.) When the call is from a - Kyocera TASKalfa 3010i | Fax System (W) Operation Guide Rev-2.2013.1 - Page 147
the connected answering machine. Therefore, when the user is absent, the other party can leave such as responding to messages, refer to the Operation Guide of each answering machine. Set the number of rings originals with automatic send originals with manual send calling from a telephone Receive - Kyocera TASKalfa 3010i | Fax System (W) Operation Guide Rev-2.2013.1 - Page 148
is still making the ringing tone, the machine enters a status the same as manual reception. (Refer to Manual Reception on page 4-15.) 2 The answering machine responds. When the call is from a telephone, but the user is absent The answering machine plays a response message, and starts recording the - Kyocera TASKalfa 3010i | Fax System (W) Operation Guide Rev-2.2013.1 - Page 149
Setup and Registration > Rings Rings You can change the number of times to let the phone ring before answering a call as needed. The number of ringing times can be changed independently for each receiving mode of Auto (Normal), Auto (TAD) and Auto (FAX/TEL). NOTE The number of ringing times can be - Kyocera TASKalfa 3010i | Fax System (W) Operation Guide Rev-2.2013.1 - Page 150
Setup and Registration > Volume Adjustment Volume Adjustment Adjust the volume of the speaker and monitor. Speaker Volume: Volume of the built-in speaker when the line is connected by pressing [On Hook]. Monitor Volume: Volume of the built-in speaker when the line is connected without pressing [On - Kyocera TASKalfa 3010i | Fax System (W) Operation Guide Rev-2.2013.1 - Page 151
[Off], [On], or [FAX Reception Only]. 4 Press [OK]. NOTE For information on settings other than the buzzer job finish sound, refer to the machine's Operation Guide. 6-15 - Kyocera TASKalfa 3010i | Fax System (W) Operation Guide Rev-2.2013.1 - Page 152
Setup and Registration > Retry Times Retry Times The number of retry times can be changed automatically. NOTE Retry times can be set to between 0 and 14. For Redial, refer to Dialing the Same Receiving System (Redial) on page 3-23. 1 Press the [System Menu] key. 2 Press [FAX], [Next] of Transmission - Kyocera TASKalfa 3010i | Fax System (W) Operation Guide Rev-2.2013.1 - Page 153
FAX/TEL)] (Refer to 6-9.) • FAX/Answering Machine Auto Switch Reception [Auto (TAD)] (Refer to 6-11.) • DRD Reception [Auto (DRD)] (Refer to 6-24.) • Manual Reception [Manual] (Refer to 4-15.) Select the mode appropriate for the way the machine is used. NOTE DRD reception mode is available only for - Kyocera TASKalfa 3010i | Fax System (W) Operation Guide Rev-2.2013.1 - Page 154
Setup and Registration > Reception Date/Time Reception Date/Time Reception Date/Time function adds the reception date/time, sender information and number of pages on the top of each page when the message is printed out. It is useful for confirming the time of reception if the fax is from a different - Kyocera TASKalfa 3010i | Fax System (W) Operation Guide Rev-2.2013.1 - Page 155
for print output of the received fax. Supported paper types: All Media Types, Plain, to 8 NOTE Refer to the machine's Advanced Operation Guide for details on Custom Paper 1 to 8. 1 Press Media Type. 3 Select the desired paper type. If no specific paper type is selected, press [All Media Types]. FAX - Kyocera TASKalfa 3010i | Fax System (W) Operation Guide Rev-2.2013.1 - Page 156
setting is changed, it will not be possible to print faxes. For details, refer the machine's Operation Guide. (3 Preparation before Use > Specifying Paper Size and Media) 5 Press [OK]. The previous screen /2013 10:10 7 Press [Close]. The display returns to the default System Menu screen. 6-20 - Kyocera TASKalfa 3010i | Fax System (W) Operation Guide Rev-2.2013.1 - Page 157
Setup and Registration > MP Tray Paper Output MP Tray Paper Output You can select whether to use the MP tray paper when printing out the received fax. 1 Press the [System Menu] key. 2 Press [FAX], [Next] of Reception, [Next] of Basic and then [Change] of Multi Purpose Tray. 3 Select either [Off] ( - Kyocera TASKalfa 3010i | Fax System (W) Operation Guide Rev-2.2013.1 - Page 158
Setup and Registration > ECM RX ECM RX ECM is a communication mode specified by the ITU-T (International Telecommunication Union) that retransmits data when an error occurs. Fax machines that have ECM mode check for errors as they communicate, preventing distortion of the image due to noise on the - Kyocera TASKalfa 3010i | Fax System (W) Operation Guide Rev-2.2013.1 - Page 159
conditions are bad, the fax may not be received correctly. In that case, set a lower RX Start Speed. Normally this should be used with the default setting. 1 Press the [System Menu] key. 2 Press [FAX], [Next] of Reception, [Next] of FAX, [ ], and then [Change] of RX Start Speed (Port1) or RX Start - Kyocera TASKalfa 3010i | Fax System (W) Operation Guide Rev-2.2013.1 - Page 160
Reception DRD Reception This reception mode utilizes the Distinctive Ring Pattern service available through some telephone companies. With this service, you can use two or more fax numbers on a the same manner as standard Manual FAX Reception. For details, refer to Manual Reception on page 4-15. 6-24 - Kyocera TASKalfa 3010i | Fax System (W) Operation Guide Rev-2.2013.1 - Page 161
. When the call is from a telephone Lift the handset and speak with the other party. When the conversation is over, fax reception can be initiated manually. When the call is from a fax Once the ringing tone stops, fax reception will start automatically. 6-25 - Kyocera TASKalfa 3010i | Fax System (W) Operation Guide Rev-2.2013.1 - Page 162
you can communicate. Specifically, you must register list of Rejected FAX numbers or from senders whose Local FAX Number is not registered are rejected. NOTE Before using transmission restriction, be sure to read Local FAX Number. (Excludes manual transmissions.) Reception Restrictions • Register - Kyocera TASKalfa 3010i | Fax System (W) Operation Guide Rev-2.2013.1 - Page 163
be registered. 1 Press the [System Menu] key. 2 Press [FAX], [Next] of TX/RX Restriction and then [Add/Edit] of Permit No. List. 3 Press [Add]. FAX - Permit No. List Add a number from which faxes will be accepted. (Up to 50 numbers can be added.) 0120999333 TEL Number 1/1 Add Detail Delete - Kyocera TASKalfa 3010i | Fax System (W) Operation Guide Rev-2.2013.1 - Page 164
Setup and Registration > Transmission Restriction NOTE Press [Pause] to insert a pause (-) between numbers. Press [Space] to enter a space. Use [ ] or [ ] to move the cursor. Pressing [Backspace] deletes the character to the left of the cursor. 5 Press [OK]. 6 When registering other Permit FAX - Kyocera TASKalfa 3010i | Fax System (W) Operation Guide Rev-2.2013.1 - Page 165
Transmission Restriction Changing and Deleting Permit FAX No. 1 Follow steps 1 to 2 of Registering Permit FAX No. on page 6-27. FAX - Permit No. List Add a number from which faxes will be accepted. (Up to 50 numbers can be added.) 0120999333 TEL Number 1/1 Add Detail Delete Status Close 02 - Kyocera TASKalfa 3010i | Fax System (W) Operation Guide Rev-2.2013.1 - Page 166
be registered. 1 Press the [System Menu] key. 2 Press [FAX], [Next] of TX/RX Restriction and then [Add/Edit] of Reject No. List. 3 Press [Add]. FAX - Reject No. List Add a number from which faxes will be rejected. (Up to 50 numbers can be added.) 55555555555 TEL Number 1/1 Add Detail Delete - Kyocera TASKalfa 3010i | Fax System (W) Operation Guide Rev-2.2013.1 - Page 167
> Transmission Restriction Changing and Deleting Reject FAX No. 1 Follow steps 1 to 2 of Registering Reject FAX No. on page 6-30. FAX - Reject No. List Add a number from which faxes will be rejected. (Up to 50 numbers can be added.) 55555555555 TEL Number 1/1 Add Detail Delete Status Close - Kyocera TASKalfa 3010i | Fax System (W) Operation Guide Rev-2.2013.1 - Page 168
numbers can be registered. 1 Press the [System Menu] key. 2 Press [FAX], [Next] of TX/RX Restriction and then [Add/Edit] of Permit ID List. FAX - Permit ID List Add an ID from which faxes will be accepted. (Up to 25 IDs can be added.) 1234 FAX ID 1/1 Add Detail Delete Status 3 Press - Kyocera TASKalfa 3010i | Fax System (W) Operation Guide Rev-2.2013.1 - Page 169
and Registration > Transmission Restriction Changing and Deleting Permit ID No. 1 Follow steps 1 to 2 of Registering Permit ID No. on page 6-32. FAX - Permit ID List Add an ID from which faxes will be accepted. (Up to 25 IDs can be added.) 1234 FAX ID 1/1 Add Detail Delete Status Close 02 - Kyocera TASKalfa 3010i | Fax System (W) Operation Guide Rev-2.2013.1 - Page 170
only to the ones registered in Permit FAX No. and Permit ID No. as well as the ones registered in the Address Book, press [Permit List + Address Book]. 4 Press [OK]. Setting Reception Restriction Restrict incoming faxes so that you only receive originals from senders registered in Permit FAX No. and - Kyocera TASKalfa 3010i | Fax System (W) Operation Guide Rev-2.2013.1 - Page 171
need to have the same encryption key and 2-digit key No. registered in advance. Sending system Receiving system Encrypt Decrypt Scan originals Encryption Output originals Description of settings at sending and receiving systems Settings Sending system Receiving system Encryption Key No - Kyocera TASKalfa 3010i | Fax System (W) Operation Guide Rev-2.2013.1 - Page 172
Setup and Registration > Encryption Registering an Encryption Key An encryption key is required when registering the Address Book used for encryption communication (the other party is directly entered using the numeric keys) in the sending system and when setting encryption in the receiving system. - Kyocera TASKalfa 3010i | Fax System (W) Operation Guide Rev-2.2013.1 - Page 173
Setup and Registration > Encryption Changing and Deleting Registration Contents of Encryption Key 1 Follow steps 1 to 2 of Registering an Encryption Key on page 6-36. FAX - Encrypt. Key Registration Add a key to use for encrypted FAX transmissions. (Up to 20 keys can be added.) Key01 Key02 Key03 - Kyocera TASKalfa 3010i | Fax System (W) Operation Guide Rev-2.2013.1 - Page 174
Setup and Registration > Encryption 6 Press [Detail] and [Change] of Encrypted Transmission. Destination FAX No. Entry - Detail Sub Address : Transmission Start Speed : 33600bps ECM : On Encrypted Transmission : Off Change Change Change Change Status Cancel OK 02/02/2013 10:10 7 Press [On - Kyocera TASKalfa 3010i | Fax System (W) Operation Guide Rev-2.2013.1 - Page 175
Setup and Registration > Encryption Operation at the Receiving System To conduct encryption communication operating the receiving system, follow the steps below. NOTE In encryption communication, sub address communication cannot be used. 1 Register the encryption key you have arranged with the - Kyocera TASKalfa 3010i | Fax System (W) Operation Guide Rev-2.2013.1 - Page 176
Setup and Registration > Reduced Reception Reduced Reception When the reception size is larger than the paper size, you can reduce the print size. Item Off On Description Print the received data at 100% of the original size by dividing it into several sheets of paper. Print the received data by - Kyocera TASKalfa 3010i | Fax System (W) Operation Guide Rev-2.2013.1 - Page 177
Setup and Registration > Duplex Print Output Duplex Print Output When received multiple pages of data are the same width, they can be printed out on both sides of paper having the same width as the data. 1 Press the [System Menu] key. 2 Press [FAX], [Next] of Reception, [Next] of Basic and then [ - Kyocera TASKalfa 3010i | Fax System (W) Operation Guide Rev-2.2013.1 - Page 178
Setup and Registration > 2 in 1 Reception 2 in 1 Reception When you receive a multi-page Statement or A5 size original, this function prints 2 pages of the original at a time on one Letter or A4 size sheet of paper. NOTE If you specify 2 in 1 reception and duplex printing at the same time, 2 in 1 - Kyocera TASKalfa 3010i | Fax System (W) Operation Guide Rev-2.2013.1 - Page 179
the machine's status or look for problems. NOTE To use Remote Diagnostics, you must first sign an agreement with our service representative and register a Predetermined ID on the machine. For more information, contact your Service Representative or Authorized Service Center. 1 Press the [System Menu - Kyocera TASKalfa 3010i | Fax System (W) Operation Guide Rev-2.2013.1 - Page 180
the unusable time period, including printing of copy jobs and printer jobs, and printing from USB memory. Faxes and print user authentication screen is displayed. Enter a login user name and password, and press [Login]. The factory default settings for the login user name and password are both 'Admin - Kyocera TASKalfa 3010i | Fax System (W) Operation Guide Rev-2.2013.1 - Page 181
Setup and Registration > Setting the Paper Output Setting the Paper Output Set the output tray for printing of receiving faxes. NOTE This function is not displayed when a Document Finisher or Job Separator is not installed. 1 Press the [System Menu] key. 2 Press [Common Settings], and then [Change] - Kyocera TASKalfa 3010i | Fax System (W) Operation Guide Rev-2.2013.1 - Page 182
Setup and Registration > Setting the Paper Output 6-46 - Kyocera TASKalfa 3010i | Fax System (W) Operation Guide Rev-2.2013.1 - Page 183
7 Optional Equipment This chapter introduces the optional equipment available for the FAX kit. Internet FAX Kit(A) "Internet FAX Kit" ...7-2 Expansion Memory ...7-3 Dual FAX...7-3 Dual FAX Settings...7-3 Reception Port Selection ...7-3 Job Accounting Port Restrictions ...7-4 7-1 - Kyocera TASKalfa 3010i | Fax System (W) Operation Guide Rev-2.2013.1 - Page 184
Optional Equipment > Internet FAX Kit(A) "Internet FAX Kit" Internet FAX Kit(A) "Internet FAX Kit" You can use Internet FAX on this machine. For details, refer to Internet Faxing (i-FAX) on page 8-1. 7-2 - Kyocera TASKalfa 3010i | Fax System (W) Operation Guide Rev-2.2013.1 - Page 185
memory size and increase the number of incoming (faxed) original pages that can be stored. Call a service representative for mounting or removal of the expansion memory. Dual FAX Installing 2 optional FAX Kits (Dual FAX option) allows you to use 2 phone lines. This reduces the time until faxes are - Kyocera TASKalfa 3010i | Fax System (W) Operation Guide Rev-2.2013.1 - Page 186
screen is displayed. Enter a login user name and password, and press [Login]. The factory default settings for the login user name and password are both 'Admin'. 4 Press [Next] of Job Accounting Setting, [Next] of Job Accounting (Local), [Register/ Edit] of Accounting List, and then [Add]. 5 Press - Kyocera TASKalfa 3010i | Fax System (W) Operation Guide Rev-2.2013.1 - Page 187
8 Internet Faxing (i-FAX) This chapter explains how to use the Internet faxing (i-FAX) using the Internet FAX Kit. What is i-FAX? ...8-2 i-FAX Settings ...8-5 Accessing Command Center RX ...8-5 i-FAX Default Settings...8-6 i-FAX Transmission ...8-9 i-FAX Reception ...8-14 8-1 - Kyocera TASKalfa 3010i | Fax System (W) Operation Guide Rev-2.2013.1 - Page 188
FAX Transmission Flowchart The procedure for sending an i-FAX is shown below. Scan the original on this machine. T Send the fax to the recipient's E-mail address. T The mail server receives the fax. T The recipient's fax machines download the fax from the mail server. NOTE When Direct SMTP is used - Kyocera TASKalfa 3010i | Fax System (W) Operation Guide Rev-2.2013.1 - Page 189
The mail server receives the fax. T This machine downloads the fax from the mail server. T This machine from the server. However, in some cases problems can arise such that you do not receive specifications of the receiving machine before sending the fax. If you do not know the specifications - Kyocera TASKalfa 3010i | Fax System (W) Operation Guide Rev-2.2013.1 - Page 190
reception capacity information in response to a transmission confirmation request from the sender. Information on the resolutions, compression modes and paper sizes supported by this machine is sent to the sender. When this machine sends an i-FAX The machine sends a transmission confirmation to - Kyocera TASKalfa 3010i | Fax System (W) Operation Guide Rev-2.2013.1 - Page 191
Guide reads "There is a problem Login. Setting Administrator User Name, and Password restricts general users' access to pages other than the Start page. For security purposes, setting the Administrator password is highly recommended. The default Administrator password is factory-set as 'Admin - Kyocera TASKalfa 3010i | Fax System (W) Operation Guide Rev-2.2013.1 - Page 192
Internet Faxing (i-FAX) > i-FAX Settings i-FAX Default Settings Function Settings > FAX / i-FAX Use disables 2 in1 reception. Configure settings for FAX. For details, refer to the Command Center RX User Guide. Display whether an i-FAX connection is available or not. Configure i-FAX in [i-FAX (SMTP - Kyocera TASKalfa 3010i | Fax System (W) Operation Guide Rev-2.2013.1 - Page 193
screen. Refer to the machine's Operation Guide for details. POP3 Port Number Sets the port number used by POP3. Normally, 110 is used. POP3 Server Timeout Login User Name† Login Password† Enter the timeout period in seconds. Enter the login name for the user account. You can enter up to 64 - Kyocera TASKalfa 3010i | Fax System (W) Operation Guide Rev-2.2013.1 - Page 194
machine. Set in [E-mail Address] in POP3 User Settings. Signature Function Default Displays the signature to be inserted in the end of the Email body. Set on the [E-mail Settings] page. The default settings can be changed in [Common/Job Default Settings] page. After completing the settings, click - Kyocera TASKalfa 3010i | Fax System (W) Operation Guide Rev-2.2013.1 - Page 195
Image Quality Advanced Setup Destination Address Book E-mail Addr Entry Folder Path Entry FAX No. Entry i-FAX Addr Entry WSD Scan Program 02/02/2013 10:10 If the basic send Refer to the machine's Operation Guide. (5 Working with the Machine > Loading Originals > Placing Originals on the Platen - Kyocera TASKalfa 3010i | Fax System (W) Operation Guide Rev-2.2013.1 - Page 196
Setup Destination Address Book E-mail Addr Entry Folder Path Entry FAX No. Entry i-FAX Addr Entry WSD Scan Program 02/02/2013 10:10 2 press [OK] to complete the entry. For details, refer to the machine's Operation Guide. (8 Setup and Registration (System menu) > Send > Entry Check for New Dest.) - Kyocera TASKalfa 3010i | Fax System (W) Operation Guide Rev-2.2013.1 - Page 197
Manual Redial (recall) (Refer to 3-23.) NOTE In addition to an i-fax, you can include FAX transmission, e-mail transmission and folder (SMB/FTP) transmission to send as one job. For details, refer to the machine's Operation Guide. to respond to requests for read receipts on FAX arrival. To - Kyocera TASKalfa 3010i | Fax System (W) Operation Guide Rev-2.2013.1 - Page 198
. For information on how to select the resolution, refer to Selecting the Resolution on page 3-10. Selecting the Density Adjust the density when scanning originals. For information on how to select the density, refer to Selecting the Density on page 3-9. Entering the Subject and Body When sending - Kyocera TASKalfa 3010i | Fax System (W) Operation Guide Rev-2.2013.1 - Page 199
. For details, refer to the machine's Operation Guide. (8 Setup and Registration (System menu) > ] key. 2 Press [Sending Jobs]. The list of accepted time, destination, and status are displayed 438 14:47 [email protected] User Name Log Status InProcess 1/1 Cancel scanned cancels the transmission. 8-13 - Kyocera TASKalfa 3010i | Fax System (W) Operation Guide Rev-2.2013.1 - Page 200
server and automatically downloads and prints any Internet faxes found on the server. No particular user intervention is needed [Device/Communication]. Status Scanner Ready. Printer Ready. Removable Memory 2GB/16GB Format Remove FAX Port 1 Ready. Line Off Manual RX Hard Disk Overwriting - Kyocera TASKalfa 3010i | Fax System (W) Operation Guide Rev-2.2013.1 - Page 201
FAX? ...9-2 Setup...9-3 Flow of Setup ...9-3 Installing the Network Fax Driver ...9-4 Uninstalling the Network FAX Driver...9-6 Basic Transmission ...9-7 Changing Transmit Settings...9-13 Using Cover Pages ...9-18 Cover Page Registration (Default Settings) ...9-23 Transmission Control ...9-28 9-1 - Kyocera TASKalfa 3010i | Fax System (W) Operation Guide Rev-2.2013.1 - Page 202
of a cover page. • Transmission and printing can be done simultaneously. • E-mail reporting of the transmission result. • Sub address transmission is available. • Supports i-FAX transmission. • Operation is as simple as printing. Flow of Network FAX Sending Network FAX sending is performed in the - Kyocera TASKalfa 3010i | Fax System (W) Operation Guide Rev-2.2013.1 - Page 203
the network cable. For details, refer to the machine's Operation Guide. Machine Registration Using the memory transmission function, select the recipient Requirements (Memory Forwarding) on page 4-17. Installing Software on the PC Install the dedicated software (included in the supplied DVD) on your - Kyocera TASKalfa 3010i | Fax System (W) Operation Guide Rev-2.2013.1 - Page 204
Driver is explained below. (The screens in Windows 7 are shown.) NOTE Plug and Play is disabled on this device when in Sleep. Wake the device from Low Power Mode or Sleep before continuing. 1 Insert the DVD. NOTE Installation on Windows must be done by a user the user account management window appears - Kyocera TASKalfa 3010i | Fax System (W) Operation Guide Rev-2.2013.1 - Page 205
the print system to be installed. 3 Click [ ]. 4 5 6 4 Select [FAX Driver]. 5 Click [ ]. 6 Click [Install]. NOTE The machine cannot be detected unless it is . If the Windows security window appears, click [Install this driver software anyway]. 4 Finish the installation. If a system restart message - Kyocera TASKalfa 3010i | Fax System (W) Operation Guide Rev-2.2013.1 - Page 206
Windows must be done by a user logged on with administrator privileges. 1 Display the screen. Click [Start] button on the Windows and then select [All Programs], [Kyocera], and [Uninstall Kyocera Product Library] to display the Uninstall Wizard. 2 Uninstall the software. Place a check in the check - Kyocera TASKalfa 3010i | Fax System (W) Operation Guide Rev-2.2013.1 - Page 207
that you are using will appear. 3 1 2 2 Select settings in the Print dialog box. 1 Select the product name of the machine (Kyocera XXX XXX NW-FAX) to be used in the printer name list. 2 Set the print range and other settings. NOTE Make sure that the number of copies is set to 1. The following - Kyocera TASKalfa 3010i | Fax System (W) Operation Guide Rev-2.2013.1 - Page 208
detailed information on the settings on the tab, refer to Configuring the Driver Default Settings on page 9-9 2 You will return to the Print dialog page 8-10. 2 Click [Add to Destination List]. The destination information will appear in the address list. To send to multiple destinations, repeat this - Kyocera TASKalfa 3010i | Fax System (W) Operation Guide Rev-2.2013.1 - Page 209
Driver Default Settings Use the FAX Setting tab of the print settings screen to set the original size and other transmission conditions. 1 Display the screen. 1 From the start button, click [Control Panel], [Hardware and Sound], and [Devices and Printers from the pull-down list. Available settings: - Kyocera TASKalfa 3010i | Fax System (W) Operation Guide Rev-2.2013.1 - Page 210
box, you can minimize the need to change the settings each time. The Default Settings dialog box can be accessed by the following procedure: 1 Click the on the taskbar, click [Control Panel], and then click [View devices and printers]. 2 Right click the name of the machine to be used as the network - Kyocera TASKalfa 3010i | Fax System (W) Operation Guide Rev-2.2013.1 - Page 211
is set to User Login, select either Use Specific Login User Name or Prompt for Login User Name as desired. Use Specific Login User Name: Enter the Login User Name and Password. Transmission will be performed using the entered Login User Name and Password. Prompt for Login User Name: A screen for - Kyocera TASKalfa 3010i | Fax System (W) Operation Guide Rev-2.2013.1 - Page 212
it possible to receive the transmission results report by e-mail. (The fax machine must be set to transmit e-mail. For details, refer to the Operation Guide for the machine.) 9-12 - Kyocera TASKalfa 3010i | Fax System (W) Operation Guide Rev-2.2013.1 - Page 213
About Network FAX > Changing Transmit Settings Changing Transmit Settings Transmit Settings can be changed at the time of transmission. (1) Selecting a Destination from the Address Book NOTE There are three types of Address Books from which you can select the party to transmit to. They are the fax - Kyocera TASKalfa 3010i | Fax System (W) Operation Guide Rev-2.2013.1 - Page 214
the [Add] button, and then select the [Address Book data file]. 3 Select the Destination. The destinations registered in the Address Book are shown in the list on the left side of the dialog box. To select an Internet fax destination or a group of destinations, select [Internet FAX], or [Group] from - Kyocera TASKalfa 3010i | Fax System (W) Operation Guide Rev-2.2013.1 - Page 215
dialog box. Click on the [Option Settings] button in the [Address Setting] tab of the [Transmit Settings] dialog box. 2 Enter the sub-address and password as it is registered in the destination fax. A maximum of 20 characters can be entered (Entry is allowed for the characters 0 to 9, #, *, and - Kyocera TASKalfa 3010i | Fax System (W) Operation Guide Rev-2.2013.1 - Page 216
About Network FAX > Changing Transmit Settings (3) Cover Page Settings A Cover Page can be set as the first page of a fax transmission. In addition to the standard templates for Cover Pages, original templates can be created and used. To attach and transmit a Cover Page, place a check in the check - Kyocera TASKalfa 3010i | Fax System (W) Operation Guide Rev-2.2013.1 - Page 217
About Network FAX > Changing Transmit Settings (5) Transmitting Terminal Information Data The settings that were selected in (4) Sender Information Tab on page 9-12 can be changed by clicking the [Sender Information tab]. For the setting procedures, refer to (4) Sender Information Tab on page 9-12. - Kyocera TASKalfa 3010i | Fax System (W) Operation Guide Rev-2.2013.1 - Page 218
About Network FAX > Using Cover Pages Using Cover Pages Cover Page Selection (Transmission Settings) The Cover Page is attached to the fax and sent as the first page. About Cover Pages The Cover Page can be selected from a template. The Cover Page contains such destination information and sender - Kyocera TASKalfa 3010i | Fax System (W) Operation Guide Rev-2.2013.1 - Page 219
About Network FAX > Using Cover Pages 2 Enter the fax number. In the [Address Setting] tab, enter the destination fax number and click on the [Option Settings] button. NOTE For Internet fax transmission, select Internet FAX in the Transmission Mode and enter the Internet fax address. 1 Item FAX - Kyocera TASKalfa 3010i | Fax System (W) Operation Guide Rev-2.2013.1 - Page 220
information of a destination that has been added to the [Destination List], select the destination to be changed and click on the 32 characters can be entered. 3 When the sender information is not set in the Default Settings dialog box, click on the [Sender Information] tab and set the sender - Kyocera TASKalfa 3010i | Fax System (W) Operation Guide Rev-2.2013.1 - Page 221
[Attach Cover Page] checkbox. 6 Select the Cover Page to be attached. Select a Cover Page template from the Cover Page Templates list. NOTE If the Cover Page is registered in the Default Settings, then the action of selecting the Cover Page for each transmission can be omitted. Refer to Cover Page - Kyocera TASKalfa 3010i | Fax System (W) Operation Guide Rev-2.2013.1 - Page 222
About Network FAX > Using Cover Pages 8 Edit the Message. 1 Click on the [Edit Message] button. 2 Enter the message to be added to the Cover Page and click on the [OK] button. Item Message Description A maximum of 1,000 characters can be entered. 9 Transmit. Click on the [Send] button to begin - Kyocera TASKalfa 3010i | Fax System (W) Operation Guide Rev-2.2013.1 - Page 223
page 9-10, open the Default Settings dialog box. 2 Attach a Cover Page. Click on the [Cover Page] tab and place a check in the [Attach Cover Page] checkbox. 3 Select the Cover Page to be attached. Select a Cover Page template from the Cover Page Templates list. NOTE Original Cover Page templates - Kyocera TASKalfa 3010i | Fax System (W) Operation Guide Rev-2.2013.1 - Page 224
About Network FAX > Cover Page Registration (Default Settings) 4 Check the contents of the Cover Page. 1 Click on the [Preview] button. A preview of the currently selected template will be displayed. To display a different - Kyocera TASKalfa 3010i | Fax System (W) Operation Guide Rev-2.2013.1 - Page 225
Templates Perform the following procedure to create an original Cover Page template. 1 Open the Default Settings dialog box. Perform the Default Settings Dialog Box procedure shown on page 9-10, open the Default Settings dialog box. 2 Edit the Cover Page templates. 1 Place a check in the [Attach - Kyocera TASKalfa 3010i | Fax System (W) Operation Guide Rev-2.2013.1 - Page 226
font point size so that the inserted information will fit in the field box. NOTE When a fax is transmitted, the information entered in the Default Settings and Destination Settings will automatically be entered in the fields. The following field boxes can be used. Use them as required. Menu Item - Kyocera TASKalfa 3010i | Fax System (W) Operation Guide Rev-2.2013.1 - Page 227
About Network FAX > Cover Page Registration (Default Settings) Menu Item Template Display Sender Company Sender - Company Department Sender - Department Comment Name FAX Number Edit Cover Page screen. 7 The new template will be registered at the top of the list and can now be selected. 9-27 - Kyocera TASKalfa 3010i | Fax System (W) Operation Guide Rev-2.2013.1 - Page 228
About Network FAX > Transmission Control Transmission Control Perform the following procedure when you want to use your computer to verify the status of a fax transmission currently being processed, or to actually terminate that transmission. Once a fax transmission starts being processed, a - Kyocera TASKalfa 3010i | Fax System (W) Operation Guide Rev-2.2013.1 - Page 229
10 Troubleshooting This chapter explains how to deal with problems. Indicators During Sending/Receiving Operation 10-2 Precautions When Turning Power OFF ...10-3 Error Messages...10-4 Troubleshooting ...10-5 10-1 - Kyocera TASKalfa 3010i | Fax System (W) Operation Guide Rev-2.2013.1 - Page 230
Troubleshooting > Indicators During Sending/Receiving Operation Indicators During Sending/Receiving Operation The [Processing] and [Memory] indicators show the fax transmission status. • The [Processing] indicator blinks when - Kyocera TASKalfa 3010i | Fax System (W) Operation Guide Rev-2.2013.1 - Page 231
Troubleshooting > Precautions When Turning Power OFF Precautions When Turning Power OFF To receive faxes with the power turned off, press the [Power] key on the operation - Kyocera TASKalfa 3010i | Fax System (W) Operation Guide Rev-2.2013.1 - Page 232
Troubleshooting > Error Messages Error Messages When an error occurs, the display may show one of the error messages listed below. These will help you identify and correct the problem. NOTE When a transmission error occurs, a sent/receipt result report is produced. Check the error code shown in the - Kyocera TASKalfa 3010i | Fax System (W) Operation Guide Rev-2.2013.1 - Page 233
Troubleshooting > Troubleshooting Troubleshooting When a problem occurs, first check the following. If the problem persists, contact your dealer or service manual of your phone set. Is the remote switching number Check the registration. (Default use a sub address password for reception. 4-38 Is - Kyocera TASKalfa 3010i | Fax System (W) Operation Guide Rev-2.2013.1 - Page 234
Troubleshooting > Troubleshooting Symptom Cannot perform memory forwarding using a sub address. after the memory has free space, or create free space in the memory. 4-32 Enter the correct box password. 4-32 Check with the recipient. - Free up some space in memory - and then send, or simply - Kyocera TASKalfa 3010i | Fax System (W) Operation Guide Rev-2.2013.1 - Page 235
11 Appendix Character Entry Method ...11-2 Specifications ...11-5 Menu List ...11-6 Received FAX Sizes and Paper Priority (Inch Model 11-11 Received FAX Sizes and Paper Priority (Metric Model 11-13 Error Code List ...11-16 11-1 - Kyocera TASKalfa 3010i | Fax System (W) Operation Guide Rev-2.2013.1 - Page 236
as a PC keyboard are available. If necessary, change the layout. For information on how to change layouts, refer to the machine's Advanced Operation Guide. QWERTY layout is used here as an example. You may use another layout following the same steps. Entry Screens Lower-case Letter Entry Screen - Kyocera TASKalfa 3010i | Fax System (W) Operation Guide Rev-2.2013.1 - Page 237
Appendix > Character Entry Method Upper-case Letter Entry Screen Use the keyboard to enter. Limit: 128 characters Input: 0 characters Backspace ! @ # $ % ^ & * ( ) _ + ˜ Q W E R T Y U I O P { } | A S D F G H J K L : " Z X C V B N Upper-case LLoowweerr-- - Kyocera TASKalfa 3010i | Fax System (W) Operation Guide Rev-2.2013.1 - Page 238
-case]. 4 Press [i], [s], [t] and [Space]. Use the keyboard to enter. List Limit: 32characters Input: 4 characters Backspace 1 2 3 4 5 6 7 8 9 0 ! = ` q w e r t y u i o p [ ] \ a s d f g h j k l ; ' z x c v b n m , . / @ _ Upper-case Lower-case - Kyocera TASKalfa 3010i | Fax System (W) Operation Guide Rev-2.2013.1 - Page 239
Specifications Specifications NOTE Specifications are subject to change without notice. Type Optional FAX kit . length: 63"/1,600 mm Automatic Document Feed Max. 50 sheets (with document processor) Scanner Resolution Horizontal × Vertical 200 × 100 dpi Normal (8 dot/mm × 3.85 line/mm - Kyocera TASKalfa 3010i | Fax System (W) Operation Guide Rev-2.2013.1 - Page 240
and operation panel have the following menus. Refer to this list as necessary when you operate the machine. or FAX Destination Quick Image FAX TX Resolution Zoom Centering Border Erase FAX Delayed Transmission Continuous Scan Job Finish Notice File Name Entry FAX Direct Transmission FAX Polling - Kyocera TASKalfa 3010i | Fax System (W) Operation Guide Rev-2.2013.1 - Page 241
Appendix > Menu List or Send Destination † Optional Internet FAX Kit is required. i-FAX Address† FAX Box Open Detail Add/Edit Box Search(Name) Search(No.) Polling Common Settings FAX Setup Sound Paper Output Buzzer FAX Speaker Volume FAX Monitor Volume FAX Part 1 FAX Part 2 Job Finish 11-7 - Kyocera TASKalfa 3010i | Fax System (W) Operation Guide Rev-2.2013.1 - Page 242
Default Screen Send and Forward New Destination Entry Recall Destination TX/RX Common Transmission Reception FAX TX Resolution Continuous Scan (FAX) i-FAX Subject/Body† Add/Edit Box FAX Box List Port†† ECM RX (Part 1) ECM RX (Part 2)†† RX Start Speed (Port 1) RX Start Speed (Port 2)†† 11-8 - Kyocera TASKalfa 3010i | Fax System (W) Operation Guide Rev-2.2013.1 - Page 243
One-Touch Key Print List FAX List (Index) FAX List (No.) Address Book Defaults Address Book Type User Login/Job Accounting User Accounting Job Accounting † Optional Internet FAX Kit is required. †† Requires 2 optional FAX Kits (Dual FAX option) ††† Inch specification only This appears when - Kyocera TASKalfa 3010i | Fax System (W) Operation Guide Rev-2.2013.1 - Page 244
Appendix > Menu List or Status/ Job Cancel Printing Jobs Sending Jobs Storing Jobs Device/Communication † Optional Internet FAX Kit is required. Status Log Status Scheduled Job Log Status Log Line Off Manual Reception Check New FAX (i-FAX Reception)† Log Removable Memory Activity Report Print - Kyocera TASKalfa 3010i | Fax System (W) Operation Guide Rev-2.2013.1 - Page 245
Appendix > Received FAX Sizes and Paper Priority (Inch Model) Received FAX Sizes and Paper Priority (Inch Model) When no paper loaded in the cassettes matches the received fax size and orientation, the machine automatically chooses the printing paper according to the following priority. Same Size - Kyocera TASKalfa 3010i | Fax System (W) Operation Guide Rev-2.2013.1 - Page 246
Appendix > Received FAX Sizes and Paper Priority (Inch Model) NOTE The abbreviations denote the following paper sizes. ST: Statement STR: Statement-R LT: Letter LTR: Letter-R LG: Legal LD: Ledger When a paper type is selected in Media Type, a received fax is printed using the matching paper - Kyocera TASKalfa 3010i | Fax System (W) Operation Guide Rev-2.2013.1 - Page 247
Appendix > Received FAX Sizes and Paper Priority (Metric Model) Received FAX Sizes and Paper Priority (Metric Model) When no paper loaded in the cassettes matches the received fax size and orientation, the machine automatically chooses the printing paper according to the following priority. Same - Kyocera TASKalfa 3010i | Fax System (W) Operation Guide Rev-2.2013.1 - Page 248
Appendix > Received FAX Sizes and Paper Priority (Metric Model) NOTE The abbreviations denote the following paper sizes. FL: Folio When a paper type is selected in Media Type, a received fax is printed using the matching paper source. (Refer to page 6-19.) Even if [All Media Types] is selected, - Kyocera TASKalfa 3010i | Fax System (W) Operation Guide Rev-2.2013.1 - Page 249
Appendix > Received FAX Sizes and Paper Priority (Metric Model) NOTE The abbreviations denote the following paper sizes. FL: Folio When a paper type is selected in Media Type, a received fax is printed using the matching paper source. (Refer to 619.) Even if [All Media Types] is selected, paper - Kyocera TASKalfa 3010i | Fax System (W) Operation Guide Rev-2.2013.1 - Page 250
Appendix > Error Code List Error Code List When a transmission error occurs, one of part of the sender or recipient machine. Page(s) not sent correctly. Send again. If you still have trouble, reduce TX Start Speed and send again. NOTE If the communication error occurs frequently, change the default - Kyocera TASKalfa 3010i | Fax System (W) Operation Guide Rev-2.2013.1 - Page 251
you still have trouble, reduce TX Start Speed and send again. NOTE If the communication error occurs frequently, change the default setting of TX by the other party during polling reception. Communication was interrupted because the password was incorrect. 2 The other party's machine is an our-brand - Kyocera TASKalfa 3010i | Fax System (W) Operation Guide Rev-2.2013.1 - Page 252
send i-FAX. Check the following on the Command Center RX. • SMTP login user name and login password • POP3 login user name and login password 1104 Failed to send i-FAX. Check the i-FAX address. NOTE If If an error appears that is not in the list, refer to the machine's Operation Guide. 11-18 - Kyocera TASKalfa 3010i | Fax System (W) Operation Guide Rev-2.2013.1 - Page 253
About this Operation Guide vii Account Management 4-52 Address Book 2-5 Change/Deletion 3-21 Initially displayed address book 2-5 Printing Address List 2-14 Registering a Registration Status 5-1 Confirmation Screen of Destinations 5-12 Continuous Scan 4-57 D Date 2-4 Delayed Transmission 4-3 Cancel - Kyocera TASKalfa 3010i | Fax System (W) Operation Guide Rev-2.2013.1 - Page 254
Login 4-55 L LDAP address book 2-5 Local FAX Information 6-5 Local FAX Name 6-4 Long Originals 4-2 M Machine (Names) 1-3 Manual Reception 4-15, 6-17 Manual 4-57 Original Size Selection 4-56 Sizes xvi P Paper Sizes xvi Part Names and Functions 1-1 Permit Fax No. Change/Deletion 6-29 Registration - Kyocera TASKalfa 3010i | Fax System (W) Operation Guide Rev-2.2013.1 - Page 255
FAX Box List 4-37 FAX Paper Output 6-45 Shortcuts 3-28 Adding 3-28 Specifications 11-5 Speed Dial key 3-22 Standby Transmission Sub Address 4-38 Sub Address Password 4-38 Sub Address Relay Broadcast Troubleshooting 10-5 TX Start Speed 2-8 U Unusable Time 6-44 User Accounting 4-52 Contents 4-52 Login - Kyocera TASKalfa 3010i | Fax System (W) Operation Guide Rev-2.2013.1 - Page 256
Index Index-4 - Kyocera TASKalfa 3010i | Fax System (W) Operation Guide Rev-2.2013.1 - Page 257
MEMO - Kyocera TASKalfa 3010i | Fax System (W) Operation Guide Rev-2.2013.1 - Page 258
- Kyocera TASKalfa 3010i | Fax System (W) Operation Guide Rev-2.2013.1 - Page 259
- Kyocera TASKalfa 3010i | Fax System (W) Operation Guide Rev-2.2013.1 - Page 260
Phone: +65-6741-8733 Fax: +65-6748-3788 KYOCERA Document Solutions Hong Kong Limited 16/F.,Mita Centre, 552-566, Castle Peak Road Tsuenwan, NT, +822-747-0084 KYOCERA Document Solutions India Private Limited First Floor, ORCHID CENTRE Sector-53, Golf Course Road, Gurgaon 122 002, India Phone: +91-0124 - Kyocera TASKalfa 3010i | Fax System (W) Operation Guide Rev-2.2013.1 - Page 261
Netherlands Phone: +31-20-5877200 Fax: +31-20-5877260 KYOCERA Document Solutions (U.K.) Limited 8 Beacontree Plaza, Gillette Way Reading, Berkshire RG2 0BS, United Kingdom Phone: +44-118-931-1500 Fax: +44-118-931-1108 KYOCERA Document Solutions Italia S.p.A. Via Verdi, 89/91 20063 Cernusco s/N.(MI - Kyocera TASKalfa 3010i | Fax System (W) Operation Guide Rev-2.2013.1 - Page 262
Rev.2 2013.1 3N6KMEN002
-
 1
1 -
 2
2 -
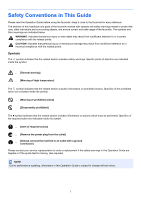 3
3 -
 4
4 -
 5
5 -
 6
6 -
 7
7 -
8
-
9
-
10
-
11
-
12
-
13
-
14
-
15
-
16
-
17
-
18
-
19
-
20
-
21
-
22
-
23
-
24
-
25
-
26
-
27
-
28
-
29
-
30
-
31
-
32
-
33
-
34
-
35
-
36
-
37
-
38
-
39
-
40
-
41
-
42
-
43
-
44
-
45
-
46
-
47
-
48
-
49
-
50
-
51
-
52
-
53
-
54
-
55
-
56
-
57
-
58
-
59
-
60
-
61
-
62
-
63
-
64
-
65
-
66
-
67
-
68
-
69
-
70
-
71
-
72
-
73
-
74
-
75
-
76
-
77
-
78
-
79
-
80
-
81
-
82
-
83
-
84
-
85
-
86
-
87
-
88
-
89
-
90
-
91
-
92
-
93
-
94
-
95
-
96
-
97
-
98
-
99
-
100
-
101
-
102
-
103
-
104
-
105
-
106
-
107
-
108
-
109
-
110
-
111
-
112
-
113
-
114
-
115
-
116
-
117
-
118
-
119
-
120
-
121
-
122
-
123
-
124
-
125
-
126
-
127
-
128
-
129
-
130
-
131
-
132
-
133
-
134
-
135
-
136
-
137
-
138
-
139
-
140
-
141
-
142
-
143
-
144
-
145
-
146
-
147
-
148
-
149
-
150
-
151
-
152
-
153
-
154
-
155
-
156
-
157
-
158
-
159
-
160
-
161
-
162
-
163
-
164
-
165
-
166
-
167
-
168
-
169
-
170
-
171
-
172
-
173
-
174
-
175
-
176
-
177
-
178
-
179
-
180
-
181
-
182
-
183
-
184
-
185
-
186
-
187
-
188
-
189
-
190
-
191
-
192
-
193
-
194
-
195
-
196
-
197
-
198
-
199
-
200
-
201
-
202
-
203
-
204
-
205
-
206
-
207
-
208
-
209
-
210
-
211
-
212
-
213
-
214
-
215
-
216
-
217
-
218
-
219
-
220
-
221
-
222
-
223
-
224
-
225
-
226
-
227
-
228
-
229
-
230
-
231
-
232
-
233
-
234
-
235
-
236
-
237
-
238
-
239
-
240
-
241
-
242
-
243
-
244
-
245
-
246
-
247
-
248
-
249
-
250
-
251
-
252
-
253
-
254
-
255
-
256
-
257
-
258
-
259
-
260
-
261
-
262
 |
 |

FAX System(W)
OPERATION GUIDE