Kyocera TASKalfa 3550ci KM-NET for Direct Printing Operation Guide Rev-3.2
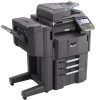
Kyocera TASKalfa 3550ci Manual
 |
View all Kyocera TASKalfa 3550ci manuals
Add to My Manuals
Save this manual to your list of manuals |
Kyocera TASKalfa 3550ci manual content summary:
- Kyocera TASKalfa 3550ci | KM-NET for Direct Printing Operation Guide Rev-3.2 - Page 1
KM-NET for Direct Printing Operation Guide - Kyocera TASKalfa 3550ci | KM-NET for Direct Printing Operation Guide Rev-3.2 - Page 2
Legal and General Information Notice Unauthorized reproduction of all or part of this guide is prohibited. The information in this guide is subject to change without notice. Kyocera Mita cannot be held liable for any problems arising from the use of this product, regardless of the information herein - Kyocera TASKalfa 3550ci | KM-NET for Direct Printing Operation Guide Rev-3.2 - Page 3
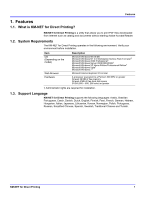
Table of Contents 1. Features ...1 1.1. What is KM-NET for Direct Printing 1 1.2. System Requirements 1 1.3. Support Language 1 2. Installation and Startup 2 2.1. Installation...2 2.2. Startup ...2 3. Printing PDF ...3 4. Names and Functions 5 5. Printing System Settings 6 6. Detailed Settings - Kyocera TASKalfa 3550ci | KM-NET for Direct Printing Operation Guide Rev-3.2 - Page 4
- Kyocera TASKalfa 3550ci | KM-NET for Direct Printing Operation Guide Rev-3.2 - Page 5
Vista† Microsoft Windows 7† Microsoft Internet Explorer 5.5 or later A processor equivalent to a Pentium 200 MHz or greater At least 32 MB of free memory At least 4 MB of free hard disk space SVGA (800 × 600, 256 color) or greater † Administrator rights are required for installation. 1.3. Support - Kyocera TASKalfa 3550ci | KM-NET for Direct Printing Operation Guide Rev-3.2 - Page 6
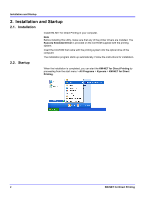
are installed. The Kyocera Extended Driver is provided on the CD-ROM supplied with the printing system. Insert the CD-ROM that came with the printing system into the optical drive of the computer. The installation program starts up automatically. Follow the instructions for installation. When - Kyocera TASKalfa 3550ci | KM-NET for Direct Printing Operation Guide Rev-3.2 - Page 7
it to the icon for this application (including shortcut). • Select the file in Windows explorer and then select KM-NET for Direct Printing in the context menu. • Select the file and then drag and drop it to this window. 3 Select the printing system to print PDF files from the Printer Listing pull - Kyocera TASKalfa 3550ci | KM-NET for Direct Printing Operation Guide Rev-3.2 - Page 8
not show this dialog again and then clicking OK can not be displayed the Confirmation dialog box. 7 When you want to continue printing, click OK. 4 KM-NET for Direct Printing - Kyocera TASKalfa 3550ci | KM-NET for Direct Printing Operation Guide Rev-3.2 - Page 9
4. Names and Functions When you start this utility, the window below appears. Names and Functions Name and Icon Add button Up button Down button Delete button Printer utility. Starts the printing process of the file displayed in the File Name list. Exits this utility. KM-NET for Direct Printing 5 - Kyocera TASKalfa 3550ci | KM-NET for Direct Printing Operation Guide Rev-3.2 - Page 10
Left), Booklet (Left Edge Binding) or Booklet (Right Edge Binding), the printing order is as follows. • Catalog (Left to Right) Original page order Printing result 6 KM-NET for Direct Printing - Kyocera TASKalfa 3550ci | KM-NET for Direct Printing Operation Guide Rev-3.2 - Page 11
as shown above, the printing results will vary. • Booklet (Left Edge Binding) Original page order • Booklet (Right Edge Binding) Printing result N-up KM-NET for Direct Printing Original page order Printing result Note Confirm the paper size and load the paper into the cassette before printing - Kyocera TASKalfa 3550ci | KM-NET for Direct Printing Operation Guide Rev-3.2 - Page 12
, Fast 1200 and Fine 1200. The default setting is 600. KIR (Kyocera Image Refinement) is a smoothing function that enhances resolution, resulting in high- to reduce the amount of toner consumption to save printing costs. The default setting is disabled (not checked). 8 KM-NET for Direct Printing - Kyocera TASKalfa 3550ci | KM-NET for Direct Printing Operation Guide Rev-3.2 - Page 13
settings in a file. When checked, click OK to save the settings. You can select the saved file by Load Setting File in the main window. The default setting is disabled (not checked) Displays another dialog box to perform more detailed settings. Information on using the Detailed Settings dialog box - Kyocera TASKalfa 3550ci | KM-NET for Direct Printing Operation Guide Rev-3.2 - Page 14
Transparency, Preprinted, Labels, Bond, Recycled, Vellum, Rough, Letterhead, Color, Prepunched, Envelope, Cardstock, Coated, 2nd Side, Thick, High (to 8). The default setting is Auto. Specifies the paper supply cassette. The following media sources are available: Auto, Multi KM-NET for Direct Printing - Kyocera TASKalfa 3550ci | KM-NET for Direct Printing Operation Guide Rev-3.2 - Page 15
version 1.4 or later file and using Transparency Flattenering function. Otherwise the setting is ignored. PDF version can be confirmed on the window displayed by which selecting from File menu > Document Properties > Summary. Transparency Flattenering function can be confimed on the Advanced Print - Kyocera TASKalfa 3550ci | KM-NET for Direct Printing Operation Guide Rev-3.2 - Page 16
User Login To use user login function, click User Login to check. For details on user login function, refer to Operation Guide of the printing system. Select Use Specific User ID when always printing with same ID. Select Prompt for User ID when printing with several different IDs. This prompt you - Kyocera TASKalfa 3550ci | KM-NET for Direct Printing Operation Guide Rev-3.2 - Page 17
Detailed Settings KM-NET for Direct Printing 13 - Kyocera TASKalfa 3550ci | KM-NET for Direct Printing Operation Guide Rev-3.2 - Page 18
- Kyocera TASKalfa 3550ci | KM-NET for Direct Printing Operation Guide Rev-3.2 - Page 19
- Kyocera TASKalfa 3550ci | KM-NET for Direct Printing Operation Guide Rev-3.2 - Page 20
Rev. 3.2 2010.06
-
 1
1 -
 2
2 -
 3
3 -
 4
4 -
 5
5 -
 6
6 -
 7
7 -
8
-
9
-
10
-
11
-
12
-
13
-
14
-
15
-
16
-
17
-
18
-
19
-
20
 |
 |

Operation Guide
KM-NET for Direct Printing