LG LFC20760SB Brochure
LG LFC20760SB Manual
 |
View all LG LFC20760SB manuals
Add to My Manuals
Save this manual to your list of manuals |
LG LFC20760SB manual content summary:
- LG LFC20760SB | Brochure - Page 1
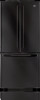
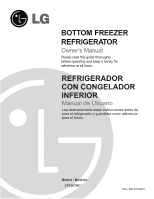
REFRIGERATOR Owner's Manual Please read this guide thoroughly before operating and keep it handy for reference at all times. REFRIGERADOR CON CONGELADOR INFERIOR Manual de Usuario Lea detenidamente estas instrucciones antes de usar el refrigerador y guárdelas como referencia para el futuro. Models - LG LFC20760SB | Brochure - Page 2
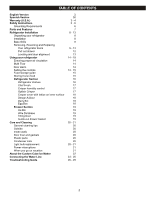
Plastic parts Condenser coils Light bulb replacement Power interruptions When you go on vacation About the Custom Cube Ice Maker Connecting the Water Line Troubleshooting Guide 2 30 3 - 4 5 - 6 6 7 8 - 13 8 8 8 9 - 13 12 13 14 - 19 14 14 14 14 - 15 15 15 16 16 17 17 17 18 18 18 18 19 19 19 19 19 20 - LG LFC20760SB | Brochure - Page 3
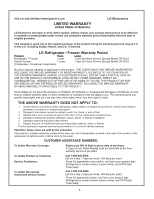
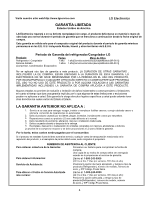
, and U.S. Territories. LG Refrigerator / Freezer Warranty Period Product Parts Labor Refrigerator / Freezer 1 year 1 year [In-Home Service (Except Model GR-051)] Sealed System 7 years 1 year [In-Home Service (Except Model GR-051)] (Compressor, Condenser, Evaporator) No other express - LG LFC20760SB | Brochure - Page 4
INCLUYENDO LA DE COMPRA, ESTAN LIMITADAS A LA DURACION DE ESTA GARANTIA. LG ELECTRONICS NO SE HACE RESPONSABLE POR LA PERDIDA EN EL USO DEL PRODUCTO, POR relacionado en la reparación del producto, o el reemplazo de partes defectuosas, serán cargados al propietario. NÚMEROS DE ASISTENCIA AL - LG LFC20760SB | Brochure - Page 5
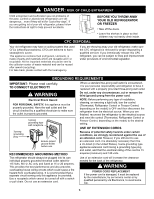
are in the area. Unplug your refrigerator before cleaning or making any repairs. NOTE: We strongly recommend that any servicing be performed by a qualified individual. Before replacing a burned-out light bulb, unplug the refrigerator or turn off power at the circuit breaker or fuse box in order to - LG LFC20760SB | Brochure - Page 6
and 120 volts. Use of an extension cord will increase the clearance needed for the back of the refrigerator. WARNING POWER CORD REPLACEMENT If the power cord is damaged, it must be replaced by the manufacturer, by our service center or by qualified personal by LG Electronics, to avoid some risk. 6 - LG LFC20760SB | Brochure - Page 7
this section to become more familiar with the parts and features. NOTE: This guide covers several different models. The refrigerator you have purchased may have some or all Icemaker * H Ice Tray * I Durabase J Divider K Filter (Inside)* L Dairy Bin M Egg Box * N Refrigerator Door Rack O Freezer - LG LFC20760SB | Brochure - Page 8
is too low or high, cooling ability may be adversely affected. CAUTION: Avoid placing the unit near heat sources, direct sunlight or moisture. NEXT 1. Clean your refrigerator thoroughly and wipe off all dust accumulated during shipping. 2. Install accessories such as ice cube bin, drawers, shelves - LG LFC20760SB | Brochure - Page 9
INSTALLATION HOW TO REMOVE REFRIGERATOR DOOR (models without water dispenser) 1. Removing Refrigerator Door NOTE: Handle appearance may vary. IMPORTANT: Before you begin, turn the refrigerator OFF and unplug it. Remove food and any bins from doors. Left Door Loosen the cover screw (1). Disconnect - LG LFC20760SB | Brochure - Page 10
Replacing Refrigerator Door Right Door Lower the door onto the middle hinge pin (7). Make sure the door is aligned with the cabinet. 7 Replace the top hinge (4) installing hinge screws (3) to secure it. Make sure the gasket on the door is flush against the cabinet and is not folded. Support - LG LFC20760SB | Brochure - Page 11
REFRIGERATOR INSTALLATION HOW TO REMOVE AND INSTALL THE PULLOUT DRAWER IMPORTANT: To avoid possible injury, product or property damage, you will need two people to perform the following instructions. • With both hands, hold both sides of the door and pull it up to separate it from the rails. 1. - LG LFC20760SB | Brochure - Page 12
REFRIGERATOR INSTALLATION HOW TO REMOVE AND INSTALL THE PULL OUT DRAWER IMPORTANT: To avoid possible injur or product or property damage, you will need two people to perform the following instructions door supports to assemble the rail cover. Verify the hole's assembly • Hook door supports (1) - LG LFC20760SB | Brochure - Page 13
the Refrigerator's tilt using the instructions below: 1. Plug the refrigerator's power cord into a 3-prong grounded outlet. Move the refrigerator the same amount. 4. Re-adjust if necessary. 5. Replace the base cover. NOTE: Your new refrigerator is uniquely designed with two fresh food doors. Either - LG LFC20760SB | Brochure - Page 14
wrap or cover foods tightly. (See the Food Storage Guide section for details.) ADJUSTING CONTROL SETTINGS Give the refrigerator time to cool down completely before adding food. It is best to wait 24 hours before you put food into the refrigerator. The mid-settings indicated in the previous section - LG LFC20760SB | Brochure - Page 15
ice usage Air vents blocked by items REFRIGERATOR Milk Wipe milk cartons. For best storage, place milk on interior refrigerator shelf. Leafy vegetables Remove store wrapping and trim or tear off bruised and discolored areas. Wash in cold water check a freezer guide or a reliable cookbook instructions - LG LFC20760SB | Brochure - Page 16
To replace a shelf : Tilt the front of the shelf up and guide the shelf ice crystals. NOTE: Allow hot foods to cool at room temperature for 30 minutes, then package and freeze. Cooling hot foods before freezing saves energy models) You can slide some glass shelves in and out of your refrigerator as - LG LFC20760SB | Brochure - Page 17
REFRIGERATOR CHEF FRESH / SNACK PAN While holding the chef fresh with one hand, pull it forward slightly. Lift slightly and pull it out. OPTIBIN CRISPERS (on some models out of the crisper for best storage of fruits. " " :Keeps moist air in the crisper for best storage of fresh, leafy vegetables - LG LFC20760SB | Brochure - Page 18
REFRIGERATOR CRISPER COVER WITH LATTICE ON INNER SURFACE (on some models) To remove the crisper cover: 1. Remove both crisper drawers. 2. While holding the crisper cover support (on some models) Store Egg Box on interior shelf, not on door shelf. CAUTION: Do not use the egg box as an ice storage bin - LG LFC20760SB | Brochure - Page 19
USING YOUR REFRIGERATOR FREEZER SECTION ICE BIN (on some models) 1. To separate the ice bin, pull out the drawer as much as possible. 2. Gently lift and pull out the ice bin. 3. To reinstall, pull out the drawer as much as possible and set the ice bin in its correct position, and then push in the - LG LFC20760SB | Brochure - Page 20
. Coils may need to be cleaned as often as every other month. Replace grille base. LIGHT BULB REPLACEMENT WARNING Electrical Shock Hazard Before replacing a burned-out light bulb, either unplug the refrigerator or turn off power at the circuit breaker or fuse box. NOTE: Moving the control to the OFF - LG LFC20760SB | Brochure - Page 21
frozen food in dry ice. 2. Depending on your model, turn the thermostat control (refrigerator control) to OFF. See the Setting the Controls section. 3. Unplug the refrigerator. 4. Empty water from the defrost pan. 5. Clean, wipe and dry thoroughly. 6. Take out all removable parts, wrap them well and - LG LFC20760SB | Brochure - Page 22
ABOUT THE AUTOMATIC ICEMAKER NOTE: Automatic Ice Maker feature is included only in certain models. Please check your product specification. WARNING Personal Injury Hazard Avoid contact with the moving parts of the ejector mechanism, or with the heating element that releases the cubes. DO NOT place - LG LFC20760SB | Brochure - Page 23
CONNECTING THE WATER LINE NOTE: Water line installation is needed when the Automatic Ice Maker and/or Water Dispenser features are available on your product. BEFORE YOU BEGIN This water line installation is not warranted by the refrigerator or icemaker manufacturer. Follow these instructions - LG LFC20760SB | Brochure - Page 24
CONNECTING THE WATER LINE INSTALLATION INSTRUCTIONS (CONTINUED) 4. FASTEN THE SHUTOFF VALVE Fasten the shutoff valve to the cold water pipe with the pipe clamp. Pipe Clamp 7. CONNECT THE TUBING TO THE VALVE Place the compression nut and ferrule (sleeve) for copper tubing onto the end of the tubing - LG LFC20760SB | Brochure - Page 25
has sand or particles that could clog the screen of the refrigerator's water valve. Install the filter in the water line near the refrigerator. Remove the plastic flexible cap from the refrigerator connection. 11. PLUG IN THE REFRIGERATOR Arrange the coil of tubing so that it does not vibrate - LG LFC20760SB | Brochure - Page 26
hear the evaporator fan motor circulating the air through the refrigerator and freezer compartments. As each cycle ends, you may hear a gurgling sound due to the refrigerant flowing in your refrigerator. Contraction and expansion of the inside walls may cause a popping noise. Water dripping on - LG LFC20760SB | Brochure - Page 27
TROUBLESHOOTING GUIDE COMPRESSOR MOTOR SEEMS TO RUN TOO MUCH Check if... Then... The refrigerator that was replaced was an older model. Modern refrigerators with more storage space require more operating time. The room temperature is hotter than normal. The motor will run longer under warm - LG LFC20760SB | Brochure - Page 28
and odor problems. The interior of refrigerator needs cleaning. See Care and Cleaning section. Ice storage bin needs cleaning. Empty and wash bin. Discard old cubes. THERE IS WATER IN THE DEFROST DRAIN PAN Check if... Then... The refrigerator is defrosting. The water will evaporate. It is - LG LFC20760SB | Brochure - Page 29
TROUBLESHOOTING GUIDE AUTOMATIC ICEMAKER DOES NOT WORK Check if... Then... Icemaker power switch in the O (off) position. Move the switch to the I (on) position. Water supply turned off or not connected. See the Connecting the Water Line section. Freezer compartment too warm. Wait 24 hours - LG LFC20760SB | Brochure - Page 30
hielos Durabase Puerta inclinable Cajón de alambre deslizable Cuidados de su refrigerador Para limpiar su refrigerador Exterior Interior Puertas y sellos Partes plásticas Serpentín del condensador Reemplazo de bombillas (focos) Interrupciones de energía Cuidados en vacaciones Acerca de la fábrica de - LG LFC20760SB | Brochure - Page 31
SEGURIDAD Hemos incluido muchos mensajes importantes de seguridad en este manual. Lea y obedezca siempre todos los mensajes de seguridad. refrigeradores con fábrica automática de hielo, evite el contacto de las partes móviles del mecanismo expulsor, o con el mecanismo de calentamiento que libera - LG LFC20760SB | Brochure - Page 32
) y 120 V. Al usar un cable de extensión, podrá dar más espacio a su refrigerador en la parte de atrás. Su refrigerador debe estar siempre conectado a un circuito propio que esté conectado adecuadamente a tierra. , por nuestro centro de servicio o personal calificado por LG para evitar algún riesgo. - LG LFC20760SB | Brochure - Page 33
NOTA: Esta guía cubre distintos modelos. Su refrigerador puede tener algunos o todas las características y partes que se muestran en la siguiente lista. Algunas de las localizaciones de las partes tal vez no concuerden con su modelo. A Control Digital del Sensor * B Luz del Refrigerador C Parrillas - LG LFC20760SB | Brochure - Page 34
base, los topes, etc. Puede lastimarse. No ponga sus manos o herramientas en las salidas de aire, la cubierta de la base o en la parte de abajo del refrigerador. Puede lastimarse o recibir un choque eléctrico. Cómo mover su refrigerador: Su refrigerador es muy pesado. Cuando mueva su refrigerador - LG LFC20760SB | Brochure - Page 35
INSTALACION COMO REMOVER LAS PUERTAS DEL REFRIGERADOR (modelos sin dispensador de agua) 1. Quitando las puertas del refrigerador NOTA: La apariencia de la jaladera puede variar. IMPORTANTE: Antes de empezar, apague el refrigerador y desconéctelo. Quite la comida y los soportes de las puertas. Puerta - LG LFC20760SB | Brochure - Page 36
INSTALACION 2. Reemplazando la puerta del refrigerador Puerta derecha Haga descender la puerta hacia el pasador situado en la mitad de la bisagra (7). Asegúrese que la puerta queda alineada con el gabinete. 7 Sustituya la bisagra superior (4) instalando los tornillos (3) para asegurarla. - LG LFC20760SB | Brochure - Page 37
ías encajen a la vez . • Retire los tornillos(2) de ambos lados de la guía. 2 PRECAUCION:Cuando Ud. quite el cajón, no sostenga la agarradera. Si se sale, podr ía causar lesiones personales. PRECAUCION:Al colocar el cajón en el piso, tenga cuidado de no dañar el piso y lesionarse el pie con las - LG LFC20760SB | Brochure - Page 38
: Para evitar una posible lesión, daño al producto o a la propiedad, Ud. necesitará dos personas para ejecutar las instrucciones siguientes • Compruebe la parte izquierda y derecha de la guía de la cubierta. Guía derecha 2. Instalacói n del Cajón Deslizable • Con ambas manos, sujete el centro de - LG LFC20760SB | Brochure - Page 39
ón adicionales hasta que las 3. puertas se alineen. (Se suministran 3 anillos de retención por unidad). NOTA: Hacer que alguien empuje contra la parte superior del refrigerador quita algo de peso aplicado a los tornillos de nivelación. Esto hace más fácil ajustarlos. 3. Abra ambas puertas otra vez - LG LFC20760SB | Brochure - Page 40
parte superior del congelador y circula hacia abajo. Del fondo del congealdor el aire forzado hasta la parte el compartimiento del refrigerador estará mas frío. REFRIGERATOR TEMP ADJUST WARMER 4 IS RECOMMENDED Control del se encontrará más frío. Ice Plus: Presione el botón Ice Plus. El LED se - LG LFC20760SB | Brochure - Page 41
Control del CONGELADOR al siguiente dígito inferior, espere 24 h y verifique Vegetales con Hojas Quite la envoltura original y remueva de los vegetales aquellas partes sucias o descoloridas. Lávelas con agua fría y escúrralas. Colóquelas en una bolsa o contenedor plástico y guárdelas en el cajón de - LG LFC20760SB | Brochure - Page 42
y congélelos. Al enfriar los alimentos calientes antes de introducirlos al congelador, Ud. ahorra energía. Para quitar un estante Incline el estante por la parte frontal en la dirección que se muestra en (1) y levántelo en la dirección (2). Jale el estante hacia usted. Para poner un estante Incline - LG LFC20760SB | Brochure - Page 43
cajones de vegetales. 2. Jale hacia arriba y después hacia afuera. Para quitar el cajón de vegetales: 1. Deslice el cajón hacia afuera hasta que tope. 2. Levante la parte frontal del cajón, jale para sacarlo 3. Vuelva a colocar el cajón, deslizándolo hacia adentro hasta pasar los topes. 43 - LG LFC20760SB | Brochure - Page 44
USO DEL REFRIGERADOR CUBIERTA DE LOS CAJONES CON REJILLA INTERIOR (en algunos modelos) Para quitar la cubierta de los cajones de vegetales: 1. Quite ambos cajones. 2. Jale la cubierta mientras sostiene el soporte (2). Jale hacia arriba y después hacia fuera (1) COMPARTIMIENTO EN PUERTA Las - LG LFC20760SB | Brochure - Page 45
en el ens.amble del riel. DURABASE (en algunos modelos) 1. Para quitar la Durabase (base durable), empuje hacia atrás lo más que pueda. Levante la parte de enfrente de la Durabase y jale hacia afuera. 2. Para volver a colocar, inserte la Durabase en el ensamble del riel CAJÓN DE ALAMBRE DESLIZABLE - LG LFC20760SB | Brochure - Page 46
conectar el suministro eléctrico. EXTERIOR Encere las superficies pintadas de metal exteriores para brindarles mayor protección. No encere las partes plásticas. Encere las partes pintadas de metal con cera para electrodomésticos (o cera suave para automóviles). Aplique la cera con una franela limpia - LG LFC20760SB | Brochure - Page 47
desmontables, envuélvalas bien y asegúrese con cinta adhesiva para que no se sacudan durante la mudanza. 7. Según el modelo, levante la parte delantera del refrigerador para que ruede con facilidad o atornille las patas niveladoras para no rayar el piso. Consulte la sección "Cierre de las puertas - LG LFC20760SB | Brochure - Page 48
hielos Automática la incluyen solo algunos modelos. Revise la especificación del suyo. ADVERTENCIA Peligro de daños personales Evite el contacto con las partes móviles del mecanismo expulsor, o con el calentador que libera los cubos. NO introduzca los dedos en la fábrica de hielo automática cuando - LG LFC20760SB | Brochure - Page 49
ambas terminales se corten cuadradas. Para determinar cuánta tubería puede necesitar, mida la distancia desde la válvula que se encuentra en la parte de atrás del refrigerador, hasta el suministro de agua. Después sume 8 pies (2,4 m). Asegúrese de que exista suficiente tubería extra para permitir el - LG LFC20760SB | Brochure - Page 50
CÓMO CONECTAR LA TUBERÍA DE AGUA INSTRUCCIONES DE INSTALACIÓN (CONTINUACIÓN) 4. APRIETE LA VÁLVULA Apriete la válvula a la tubería de agua fría con una trampa para tubos. Trampa 7. CONECTE LA TUBERÍA A LA VÁLVULA Ponga la tuerca de compresión y la férula para la tubería de cobre al final de la - LG LFC20760SB | Brochure - Page 51
al suministro de energía. Si su refrigerador no cuenta con filtro de agua, le recomendamos que instale uno. Si su suministro de agua contiene arena o partículas que puedan ser llevadas a través de la válvula, instale un filtro de agua en la tubería cerca del refrigerador. Quite la tapa de pl - LG LFC20760SB | Brochure - Page 52
del refrigerante, la tubería de agua, u objetos colocados en la parte superior del refrigerador. Su refrigerador está diseñado para funcionar con pueden causar un ligero sonido de bombeo. Puede que Ud. escuche el motor del ventilador del evaporador circulando el aire a través de los compartimentos - LG LFC20760SB | Brochure - Page 53
no se cierran completamente, vea a continuación "Las puertas no cierran completamente". Esto evita la transferencia de aire y hace que el motor trabaje por más tiempo. Limpie los serpentines del condensador. Vea la sección Cuidados y Limpieza del Refrigerador. LAS PUERTAS NO CIERRAN COMPLETAMENTE - LG LFC20760SB | Brochure - Page 54
GUÍA DE SOLUCIÓN DE PROBLEMAS EL HIELO TIENE SABOR Y OLOR EXTRAÑOS Verifique si... Entonces... La fábrica de hielos ha sido instalada recientemente. No utilice los primeros hielos que se produzcan. El hielo ha sido almacenado por mucho tiempo. Deshágase del hielo viejo y haga una nueva - LG LFC20760SB | Brochure - Page 55
revisar el flujo de aire y mueva los paquetes que bloqueen las ventilas y eviten el flujo de aire. Vea la sección Ice Beam Door Cooling / Door Cooling para mayor referencia. Las puertas se abren frecuentemente. El control del refrigerador no ha sido ajustado correctamente para las condiciones de la - LG LFC20760SB | Brochure - Page 56
-
 1
1 -
 2
2 -
 3
3 -
 4
4 -
 5
5 -
 6
6 -
 7
7 -
8
-
9
-
10
-
11
-
12
-
13
-
14
-
15
-
16
-
17
-
18
-
19
-
20
-
21
-
22
-
23
-
24
-
25
-
26
-
27
-
28
-
29
-
30
-
31
-
32
-
33
-
34
-
35
-
36
-
37
-
38
-
39
-
40
-
41
-
42
-
43
-
44
-
45
-
46
-
47
-
48
-
49
-
50
-
51
-
52
-
53
-
54
-
55
-
56
 |
 |
