LG LFD25860ST User Guide
LG LFD25860ST Manual
 |
View all LG LFD25860ST manuals
Add to My Manuals
Save this manual to your list of manuals |
LG LFD25860ST manual content summary:
- LG LFD25860ST | User Guide - Page 1
24 HEURES SUR 24, SERVICE À LA CLIENTÈLE LG 7 JOURS SUR 7 BOTTOM FREEZER REFRIGERATOR User's Guide Please read this guide thoroughly before operating and keep referencia para el futuro. CONGÉLATEUR INFÉRIEUR RÉFRIGÉRATEUR Guide d'Utilisation et d'Entretien Veuillez lire ce manuel en entier avant de - LG LFD25860ST | User Guide - Page 2
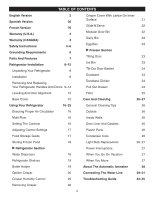
Version 70 Warranty (U.S.A.) 3 Warranty (CANADA) 4 Safety Instructions 5-6 Grounding Requirements 6 Parts And Features 7 Refrigerator Installation 8-15 Unpacking Your Refrigerator 8 Installation 8 Removing And Replacing Your Refrigerator Handles And Doors 9-14 Crisper Cover With - LG LFD25860ST | User Guide - Page 3
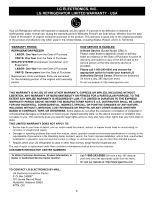
LG ELECTRONICS, INC. LG REFRIGERATOR LIMITED WARRANTY - USA Your LG Refrigerator will be will repaired or replaced, at LG's option, if it proves to be defective in material or workmanship under normal use, during the warranty period ("Warranty Period") set forth below, effective from - LG LFD25860ST | User Guide - Page 4
PERIOD MODEL# : LFD21860**/LFD25860** LABOR : 2 Years PARTS : 2 Years SEALED SYSTEM : Labor/ 2 Years, Parts/ 5 Years (Compressor, condenser, and evaporator) HOW SERVICE IS HANDLED : Call 1-888-542-2623 (1-888-LG-CANADA) and choose the appropriate prompt. Please have product type (refrigerator - LG LFD25860ST | User Guide - Page 5
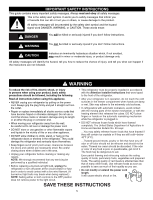
instructions before using this appliance. • NEVER unplug your refrigerator by pulling on the power cord. Always grip the plug firmly and pull it straight out from the outlet. • Repair or replace immediately all electric service and should not be eaten. Thawed ice cream should be discarded. If the - LG LFD25860ST | User Guide - Page 6
refrigerator, please follow the instructions at right to help prevent accidents. BEFORE YOU THROW AWAY YOUR OLD REFRIGERATOR OR FREEZER • Take off the doors encountered, it is your personal responsibility and obligation to have it replaced with a properly grounded three-prong wall outlet. Do not, - LG LFD25860ST | User Guide - Page 7
convenience. NOTE: This guide covers several different models. The refrigerator you have purchased may have some or all of the items listed below. The locations of the features shown below may not match your model. A Refrigerator Light (p. 26) B Filter (Inside) (p. 25) C Modular Door Bins (p. 22 - LG LFD25860ST | User Guide - Page 8
the Important Safety Instructions section. Refrigerator shelves are installed in the shipping position. Please reinstall shelves according to your individual storage needs. WARNING When Moving Your Refrigerator Your refrigerator is heavy. When moving the refrigerator for cleaning or service, be sure - LG LFD25860ST | User Guide - Page 9
INSTALLATION HOW TO REMOVE DOOR HANDLES To move refrigerator through a house door, it maybe necessary to remove refrigerator and freezer door handles. NOTE: Handle appearance may vary from illustrations on this page. 1. Removing Refrigerator Handle • Grasp the handle tightly with both - LG LFD25860ST | User Guide - Page 10
appearance may vary from illustrations on this page. 1. Replacing Refrigerator Door Handle • Align keyhole slots (1) on the top and bottom of the back of the handle with the screws (2) mounted on the front of the door. • Press the handle against the door front, making sure that the screws (2) go - LG LFD25860ST | User Guide - Page 11
INSTALLATION REMOVING AND REPLACING REFRIGERATOR DOORS 1. Removing Refrigerator Door w CAUTION: Before you begin, unplug the refrigerator. Remove food and bins from doors. u Left Door 1. Disconnect water supply tube by pushing back on the disconnect ring (4). 2. Open door. Loosen top hinge - LG LFD25860ST | User Guide - Page 12
REFRIGERATOR INSTALLATION 2. Replacing Refrigerator Door u Right Door 1. Lower the door onto middle hinge pin (10). 2. Fit top screw (6) and connect the three wire harnesses (5). 4. Connect door switch wire harness (2). 5. Insert the water supply tube (4) into the connector tube until you see only - LG LFD25860ST | User Guide - Page 13
REFRIGERATOR INSTALLATION HOW TO REMOVE AND INSTALL THE PULLOUT DRAWER IMPORTANT: To avoid possible injury or product or property damage, you will need two people to perform the following instructions. • With both hands, hold both sides of the door and pull it up to separate it from the rails. 1. - LG LFD25860ST | User Guide - Page 14
REFRIGERATOR INSTALLATION HOW TO REMOVE AND INSTALL THE PULLOUT DRAWER IMPORTANT: To avoid possible injury or product or property damage, you will need two people to perform the following instructions top holes of the door supports to assemble the rail covers. • Hook door supports (1) into rail - LG LFD25860ST | User Guide - Page 15
5. Replace the base cover. NOTE: Your new refrigerator is uniquely designed with two fresh food doors. Either door can doors to get them to close completely. Door Alignment If the space between your doors is uneven, follow the instructions below to align the doors: 1. With one hand, lift up the door - LG LFD25860ST | User Guide - Page 16
problems may ICE PLUS : Press the ICE PLUS refrigerator. If you have changed the filter after 6 months of use, press and hold the FILTER button 3 seconds or more and the filter display will be initialized with a buzzing sound. NOTE: The average life of the filter is 6 months. w WARNING: If a door - LG LFD25860ST | User Guide - Page 17
like and when ice cream is firm. The refrigerator control functions as the thermostat for the entire appliance (refrigerator and freezer sections). guide. Always remember to wait at least 24 hours between adjustments. CONDITION/ REASON: RECOMMENDED ADJUSTMENT: REFRIGERATOR section too warm - Door - LG LFD25860ST | User Guide - Page 18
instructions door Ice crystals REFRIGERATOR SECTION WATER DISPENSER Push the dispenser pad with a glass until you hear a click to get cold water. Dispenser Switch Push Tray can be easily removed by pressing and pulling it. Tilt up the front of tray slightly and snap the ribs into the holes to replace - LG LFD25860ST | User Guide - Page 19
reduce the amount of time the refrigerator door is open, saving energy. IMPORTANT: Do not clean glass shelves with warm water when they are cold. Shelves may It can be attached to any shelf. • To replace a shelf-Tilt the front of the shelf up and guide the shelf hooks into the slots at a desired - LG LFD25860ST | User Guide - Page 20
OPTIBIN CRISPERS 2 USING YOUR REFRIGERATOR u Crispers with rails To remove the crisper 1. Pull storage of fruits. • keeps moist air in the crisper for best storage of fresh, leafy vegetables. To replace the crisper 1. Push rails to the back of the compartment. 2. Insert the back corner of the - LG LFD25860ST | User Guide - Page 21
USING YOUR REFRIGERATOR To remove the crisper door flap 1. Raise the door flap as high as it will open. 2. Press the plastic hinge toward the center of the door flap with your finger. 3. Lift the door out of its place. 4. To replace, reverse the above procedure. CRISPER COVER WITH LATTICE ON INNER - LG LFD25860ST | User Guide - Page 22
slide it in above the desired support button and push down until it stops. To replace Glide'N'Serve 1. Push metal rails to the back of the refrigerator. 2. Place drawer onto rails and slide drawer back until it falls into place. w WARNING: Somebody can be hurt if door bins are not firmly assembled - LG LFD25860ST | User Guide - Page 23
USING YOUR REFRIGERATOR DAIRY BIN 1. To remove the dairy bin, simply lift it and pull straight out. 2. To replace the dairy bin, slide it in above the desired location and push down until it stops. ICE BIN 1. To separate the ice bin, pull out the drawer as much as possible. 2. Gently lift and pull - LG LFD25860ST | User Guide - Page 24
REFRIGERATOR TILT-OUT DOOR BASKET (LFD25860** only) To remove basket 1. Pull one of the brackets upward. 2. Remove basket from both brackets. To replace , insert the Durabase in rail assembly. To install, reposition the gear part of rear left and right side of the drawer after pulling out both - LG LFD25860ST | User Guide - Page 25
clockwise. Pull out the filter cartridge. 3. Flushing the Water System After Replacing Filter Dispense water through the water dispenser for 3 minutes to purge the system. NOTE: To purchase replacement water filter cartridges, visit your local appliance dealer or part distributor. You can also - LG LFD25860ST | User Guide - Page 26
, soft cloth. For products with a stainless steel exterior, use a clean sponge or soft cloth and a mild detergent in warm water. Do not use abrasive or harsh cleaners. Dry thoroughly with a soft cloth. Before replacing a burned-out light bulb, either unplug the refrigerator or turn off power at the - LG LFD25860ST | User Guide - Page 27
to sections in Using your Refrigerator for removable instructions. 6. Depending on the model, raise the front of the refrigerator so it rolls more easily OR screw in the leveling legs all the way so they don't scrape the floor. See the Door Closing section. 7. Tape the doors shut and tape the power - LG LFD25860ST | User Guide - Page 28
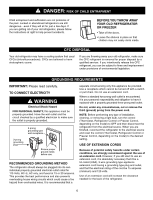
mechanism while the refrigerator is plugged in. OPERATION INSTRUCTIONS A newly-installed refrigerator may take 12 to 24 hours to begin making ice. NOTE: If the water supply to the refrigerator. If the ambient temperature will drop below freezing, have a qualified servicer drain the water supply - LG LFD25860ST | User Guide - Page 29
is not warranted by the refrigerator or icemaker manufacturer. Follow these instructions carefully to minimize the risk of expensive water damage. Water hammer (water banging in the pipes) in house plumbing can cause damage to refrigerator parts and lead to water leakage or flooding. Call - LG LFD25860ST | User Guide - Page 30
THE WATER LINE INSTALLATION INSTRUCTIONS (CONTINUED) 4. FASTEN THE SHUTOFF VALVE Fasten the shutoff valve to the cold water pipe with between the cold water line and the refrigerator. Route the tubing through a hole drilled in the wall or floor (behind the refrigerator or adjacent base cabinet - LG LFD25860ST | User Guide - Page 31
CONNECT THE TUBING TO THE REFRIGERATOR Removing and Replacing Valve Cover NOTE: • Before making the connection to the refrigerator, be sure the refrigerator power cord is not plugged into the wall outlet. 1. Remove the plastic flexible cap from the water valve. 10. TURN THE WATER ON AT THE SHUTOFF - LG LFD25860ST | User Guide - Page 32
and ends. The thermostat control (or refrigerator control, depending on the model) will also click when cycling on and off. • Rattling noises may come from the flow of refrigerant, the water line, or items stored on top of the refrigerator. • Your refrigerator is designed to run more efficiently to - LG LFD25860ST | User Guide - Page 33
TROUBLESHOOTING GUIDE Check if... Then... COMPRESSOR MOTOR SEEMS TO RUN TOO MUCH The refrigerator that was replaced was an older model. The room temperature is hotter than normal. The door is opened often or a large amount of food has just been added. The refrigerator was recently plugged in and - LG LFD25860ST | User Guide - Page 34
to the ice if food is not wrapped properly. u A filter may need to be installed (or replaced) to eliminate taste and odor problems. u See Care and Cleaning section on pages 26-27. u Empty and wash bin. Discard old cubes. THERE IS WATER IN THE DEFROST DRAIN PAN The refrigerator is defrosting - LG LFD25860ST | User Guide - Page 35
accumulation. If necessary, repackage food according to the guidelines in the Food Storage Guide section on page 17. u See Doors will not close completely on page 33. u In humid weather, air carries moisture into refrigerator when doors are opened. u It is normal for droplets to form on the back - LG LFD25860ST | User Guide - Page 36
-
 1
1 -
 2
2 -
 3
3 -
 4
4 -
 5
5 -
 6
6 -
 7
7 -
8
-
9
-
10
-
11
-
12
-
13
-
14
-
15
-
16
-
17
-
18
-
19
-
20
-
21
-
22
-
23
-
24
-
25
-
26
-
27
-
28
-
29
-
30
-
31
-
32
-
33
-
34
-
35
-
36
 |
 |

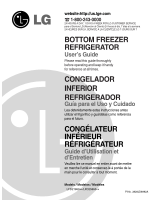
BOTTOM FREEZER
REFRIGERATOR
User’s Guide
Please read this guide thoroughly
before operating and keep it handy
for reference at all times.
CONGELADOR
INFERIOR
REFRIGERADOR
Guía para el Uso y Cuidado
Lea detenidamente estas instrucciones antes
utilizar el frigorífico y guárdelas como referencia
para el futuro.
CONGÉLATEUR
INFÉRIEUR
RÉFRIGÉRATEUR
Guide d’Utilisation et
d’Entretien
Veuillez lire ce manuel en entier avant de mettre
en marche l'unité et conservez-le à portée de la
main pour le consulter à tout moment.
Models / Modelos / Modèles
LFD21860
**
/LFD25860
**
P/No. 3828JD8992A
website:http://us.lge.com
☎
1-800-243-0000
24 HOURS A DAY, 7 DAYS A WEEK FOR LG CUSTOMER SERVICE
para el Servicio LG (Atención al Cliente) 24 horas al día, 7 días a la semana
24 HEURES SUR 24, SERVICE À LA CLIENTÈLE LG 7 JOURS SUR 7