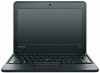
Lenovo 06222FU User Manual
Lenovo 06222FU Manual
 |
View all Lenovo 06222FU manuals
Add to My Manuals
Save this manual to your list of manuals |
Lenovo 06222FU manual content summary:
- Lenovo 06222FU | User Manual - Page 1
User Guide ThinkPad X130e - Lenovo 06222FU | User Manual - Page 2
To refer to them, go to http://www.lenovo.com/support, and then click User Guides & Manuals. Second Edition (December 2011) © Copyright Lenovo 2011. LIMITED AND RESTRICTED RIGHTS NOTICE: If data or software is delivered pursuant a General Services Administration "GSA" contract, use, reproduction, or - Lenovo 06222FU | User Manual - Page 3
. . 21 Registering your computer 21 Frequently asked questions 21 Special keys and buttons 22 Function key combinations 22 Windows key and application key . . . . . 25 Using the UltraNav pointing device 26 Using the TrackPoint pointing device . . . . 27 © Copyright Lenovo 2011 Using the touch - Lenovo 06222FU | User Manual - Page 4
149 Universal Serial Bus problems 149 Chapter 11. Getting support . . . . 151 Before you contact Lenovo 151 Registering your computer 151 Downloading system updates 151 Recording information 151 Getting help and service 152 Using diagnostic programs 152 Lenovo Support Web site 152 Calling - Lenovo 06222FU | User Manual - Page 5
statement for products which connect to the power mains with rated current less than or equal to 20 A per phase 159 Lenovo product service information for Taiwan 159 Additional regulatory information 159 Appendix B. WEEE and recycling statements 161 EU WEEE statements 161 Japan recycling - Lenovo 06222FU | User Manual - Page 6
iv User Guide - Lenovo 06222FU | User Manual - Page 7
contact with a hot section of the computer for any extended time. • Periodically take is connected to an electrical outlet and your computer, it generates heat. Extended contact computer from getting wet. • To avoid spills and the danger of electrical shock, keep liquids away from your computer - Lenovo 06222FU | User Manual - Page 8
or the Lenovo® Limited Warranty. For more information, see "Warranty Information" in the Safety and Warranty Guide that comes with your computer. Customer safety , follow the instructions included with your product, observe all warnings on the product and in the operating instructions, and review - Lenovo 06222FU | User Manual - Page 9
safety information" in the Safety and Warranty Guide that comes with your computer. Service and upgrades Do not attempt to service a product yourself unless instructed to do so by the Customer Support Center or your documentation. Only use a Service Provider who is approved to repair your particular - Lenovo 06222FU | User Manual - Page 10
or replace CRUs. You must closely follow all instructions when installing or replacing parts. The Off state of have any questions or concerns, contact the Customer Support Center. Although there are no moving parts in your computer after the power cord has been disconnected, the way. viii User Guide - Lenovo 06222FU | User Manual - Page 11
outlets DANGER If a receptacle (power outlet) that you intend to use with your computer equipment appears to be damaged or corroded, do not use the outlet serviceable parts inside these components. If you suspect a problem with one of these parts, contact a service technician. © Copyright Lenovo - Lenovo 06222FU | User Manual - Page 12
. To avoid possible damage to attached devices, wait at least five seconds after the computer is shut down to disconnect external devices. General battery notice DANGER Personal computers manufactured by Lenovo contain a coin cell battery to provide power to the system clock. In addition, many - Lenovo 06222FU | User Manual - Page 13
of an explosion. The battery pack contains a small amount of harmful substances. To avoid possible injury: • Replace only with a battery of the type recommended by Lenovo. • Keep the battery pack away from fire. • Do not expose it to water or rain. • Do not attempt to disassemble it. • Do not short - Lenovo 06222FU | User Manual - Page 14
computer section of the computer for any extended . Your computer generates some operate your computer or charge the to an electrical outlet and your computer, it generates heat computer: • Keep the cover closed whenever the computer is plugged in. • Regularly inspect the outside of the computer - Lenovo 06222FU | User Manual - Page 15
Do not use your computer during a lightning storm. grounded electrical outlet. • Connect to properly wired outlets any equipment instructed otherwise in the installation and configuration procedures. • Do not use you computer headphones or earphones If your computer has both a headphone connector and - Lenovo 06222FU | User Manual - Page 16
to excessive sound pressure levels. If your Lenovo computer came with headphones or earphones in the package, as a set, . Notice for Tablet PC users Safety Notice for users in Australia: DANGER Do not connect phone line while using tablet mode. Notice instructions. xiv User Guide - Lenovo 06222FU | User Manual - Page 17
following topics: • "Locating computer controls, connectors, and Locating computer controls, connectors, and indicators This section introduces the computer hardware features the basic information you will need to start using the computer. This section includes the following topics: • "Front - Lenovo 06222FU | User Manual - Page 18
ThinkPad X130e front view 1 UltraConnect™ wireless antennas (left) 3 UltraConnect wireless antennas (right) 5 Power status indicator 7 Bluetooth antenna 9 TrackPoint® buttons 11 computer might computer. To turn off your computer, use the Start menu shutdown option. If you cannot turn off the computer - Lenovo 06222FU | User Manual - Page 19
Bluetooth" on page 36 for more information. 8 Built-in stereo speaker (right) 11 Built-in stereo speaker (left) For details, refer to "Volume and mute buttons" or mute the sound from your computer. For details, refer to the instructions in "Volume and mute buttons" on page 23. Chapter 1. - Lenovo 06222FU | User Manual - Page 20
view Figure 2. ThinkPad X130e right-side view 1 Media card reader slot 3 USB connector 5 Security keyhole 2 Always On USB connector 4 Power jack 1 Media card reader slot Depending on the model, your computer might have a Media Card Reader slot. The Media Card Reader supports the following four - Lenovo 06222FU | User Manual - Page 21
smartphones, by attaching the devices to the connector. However, with the ac power adapter attached, if you want to charge these devices when your computer is in hibernation mode or powered off, you will need to open the Power Manager program and configure corresponding settings to enable the Always - Lenovo 06222FU | User Manual - Page 22
ThinkPad X130e left-side view 1 Monitor connector 3 HDMI connector 5 Ethernet connector 2 Fan louvers (right) 4 USB connector 6 Combo audio jack 1 Monitor connector The monitor connector is used to connect an external monitor or projector to your computer your computer to a LAN. 6 User Guide - Lenovo 06222FU | User Manual - Page 23
audio devices supported by the combo audio jack, see "Using audio features" on page 45. Bottom view Figure 4. ThinkPad X130e bottom view 1 Battery 3 Memory slot 5 WLAN card slot 2 SIM card slot 4 WWAN card slot 6 Hard disk drive or solid state drive slot 1 Battery Use your computer with battery - Lenovo 06222FU | User Manual - Page 24
computer memory in your computer by installing a memory wireless WAN Your computer might include a LAN/WiMAX Your computer might include a PCI drive slot Your computer might have a installed on your computer. For details Note: The hidden service partition is the reason computer has two system- - Lenovo 06222FU | User Manual - Page 25
System status indicators The illuminated dot in the ThinkPad logo on the outer lid of your computer and on the palm rest works as a system status indicator: it shows whether the computer is in sleep (standby), hibernation, or normal mode. The meaning of the indicator is as follows: • Red: The - Lenovo 06222FU | User Manual - Page 26
indicator is as follows: • Green: The ac power adapter is connected. If a battery is installed on the computer, the indicator is green when it is charged. • Off: The ac power adapter is not connected. Locating and IC Certification label, and Windows® Certificate of Authenticity label. 10 User Guide - Lenovo 06222FU | User Manual - Page 27
machine type and model label identifies your computer. When you contact Lenovo for help, the machine type and model information helps support technicians to identify your computer and provide faster service. You can find the machine type and model of your computer in the label as shown below: FCC - Lenovo 06222FU | User Manual - Page 28
computer or reinstall the operating system. The following illustration shows the location of the label. Features Processor • To view the system properties of your computer, click Start, right-click Computer (in Windows XP, My Computer), then from the pull-down menu select Properties. 12 User Guide - Lenovo 06222FU | User Manual - Page 29
drive • 2.5-inch (7 mm height) solid state drive Display The color display uses TFT technology. • Size: 11.6 inches (295 mm) • Resolution: - LCD: up to 1366-by-768, depending on the model - This section lists the physical specifications for your computer. Size Chapter 1. Product overview 13 - Lenovo 06222FU | User Manual - Page 30
mm (11.6 inches information about your computer operating environment. 5% to 95% If possible, place your computer in a well-ventilated and dry area without oven away from your computer because the strong magnetic computer or other attached devices. If liquid is spilled on or in the computer - Lenovo 06222FU | User Manual - Page 31
on page 19 • "ThinkVantage Productivity Center" on page 19 Note: To learn more about ThinkVantage technologies and other computing solutions, offered by Lenovo, go to http://www.lenovo.com/support. Accessing applications in Windows 7 If you are using the Windows 7 operating system, you can access - Lenovo 06222FU | User Manual - Page 32
Backup and Restore SimpleTap SimpleTap System Update Update and Drivers ThinkVantage GPS GPS • You also can get the applications the Lenovo ThinkVantage Tools application navigation window and double-click the dimmed icon to install the application you need. Then, follow the instructions on - Lenovo 06222FU | User Manual - Page 33
Lenovo - Update and Drivers Lenovo Lenovo ThinkVantage Toolbox program, see "Lenovo ThinkVantage Toolbox" on page 18. The Lenovo Solution Center program enables you to troubleshoot and resolve computer problems. It combines diagnostic tests, system information collection, security status, and support - Lenovo 06222FU | User Manual - Page 34
, you can download it from http://www.lenovo.com/support. Lenovo ThinkVantage Toolbox Note: Depending on the date when your computer was manufactured, your computer is preinstalled with either the Lenovo Solution Center program or the Lenovo ThinkVantage Toolbox program for diagnostic purposes. For - Lenovo 06222FU | User Manual - Page 35
program, you can download it from http://www.lenovo.com/support. System Update The System Update program helps you keep the software on your computer up-to-date by downloading and installing software packages (ThinkVantage applications, device drivers, UEFI Firmware updates, and other third party - Lenovo 06222FU | User Manual - Page 36
20 User Guide - Lenovo 06222FU | User Manual - Page 37
will help you optimize the use of ThinkPad notebook. To ensure that you receive the best performance from your computer, browse the following Web page to find information such as aids for troubleshooting and answers to frequently asked questions: http://www.lenovo.com/support/faq. On the go and need - Lenovo 06222FU | User Manual - Page 38
different locations is a challenge? • To troubleshoot a wireless networking issue, see http://www.lenovo.com/support/faq. • Take advantage of the networking page 99 • "Computer stops responding" on page 128 • "Power problems" on page 146 Special keys and buttons Your computer has several special - Lenovo 06222FU | User Manual - Page 39
to use Fn+F5 to enable or disable the wireless features, the following device drivers must be installed on your computer beforehand: - Power Management driver - OnScreen Display Utility - Wireless device drivers For information on the wireless features, refer to "Wireless connections" on page 34 - Lenovo 06222FU | User Manual - Page 40
scheme, refer to "Presentation Director" on page 19. Note: If your computer is a Windows 7 model, it does not support presentation schemes, however the Fn+F7 key combination might still be used to Fn+F7 Settings. Brightness control features • Fn+F8 Display brightness down using Fn+F8. 24 User Guide - Lenovo 06222FU | User Manual - Page 41
the settings of the Power Option in the Control Panel or use the Power Manager. • Fn+F9 Display brightness up using Fn+F9. The computer display becomes brighter. The purpose of this method is to change the brightness level temporarily. To change the default brightness level, change the settings of - Lenovo 06222FU | User Manual - Page 42
of the Mouse Properties window. To open it, use one of the following methods: • Use the Start menu of your computer as follows: - For Windows 7: Click Start ➙ Control Panel ➙ Hardware and Sound ➙ Mouse ➙ UltraNav. - For Windows Adding the UltraNav icon to the system tray" on page 29. 26 User Guide - Lenovo 06222FU | User Manual - Page 43
scroll bars on the side of the window. If you are not familiar with the TrackPoint, these instructions will help you get started: 1. Place your hands in the typing position, and press gently the TrackPoint scrolling function. • Enable the TrackPoint Scrolling Tips. Chapter 2. Using your computer 27 - Lenovo 06222FU | User Manual - Page 44
over the pad in the direction in which you want the pointer to move. Using the multi-touch touch pad The touch pad of your computer supports multi-touch with which you can zoom in, zoom out, scroll or rotate on the screen while browsing the Internet or reading or editing a document - Lenovo 06222FU | User Manual - Page 45
customizing the touch pad. For details, refer to the Help in the ThinkPad Setup. Behavior of the UltraNav and an external mouse If you attach the UltraNav icon in the task bar. For details, refer to the instructions in "Adding the UltraNav icon to the system tray" on page 29 2. Using your computer 29 - Lenovo 06222FU | User Manual - Page 46
outlets, you depend on battery power to keep your computer running. Different computer components consume power at different rates. The more you use the power-intensive components, the faster you consume battery power. Do more, save more and spend more time unplugged with ThinkPad batteries - Lenovo 06222FU | User Manual - Page 47
battery. If an ac outlet is convenient, plug the ac power adapter into it, and then insert the jack into the computer. The battery will be the physical environment. Note: To increase the life of the battery, the computer does not start recharging the battery if the remaining power is greater than - Lenovo 06222FU | User Manual - Page 48
you enter hibernation, all open applications, folders, and files are saved to the hard disk drive, and then the computer turns off. To enter hibernation, do as follows: • For Windows 7: 1. Click Start. 2. Click the triangle set the percentage of the power level and set the action. 32 User Guide - Lenovo 06222FU | User Manual - Page 49
with a new one of the type recommended by Lenovo. For more information on replacing the battery pack, contact your Customer Support Center. DANGER Do not drop, crush, puncture the battery pack strictly according to instructions included in the product documentation. Chapter 2. Using your computer 33 - Lenovo 06222FU | User Manual - Page 50
see "Accessing applications in Windows 7" on page 15, and follow the instructions on the screen. For Windows XP: To start the Access Connections wizard, as DSL or CATV, by use of the Ethernet feature built into your computer. Depending on the model, this feature enables you to do either 10Mbps/ Guide - Lenovo 06222FU | User Manual - Page 51
. Devices based on the 802.11 standards can connect to this network services with the airline before boarding the airplane. • If there are restrictions on the use of computers on an airplane with the wireless feature, you need to disable it before boarding. To disable it, refer to the instructions - Lenovo 06222FU | User Manual - Page 52
or satellite systems maintained by wireless service providers. Some ThinkPad Notebooks come with a built-in the instructions on the screen. Using Bluetooth For Windows 7: If your computer is use the wireless feature (the 802.11 standard) of your computer simultaneously with a Bluetooth option, data - Lenovo 06222FU | User Manual - Page 53
Devices. 5. Click the Options tab. 6. Click Learn more about Bluetooth Settings. Using ThinkPad Bluetooth with Enhanced Data Rate Software If ThinkPad Bluetooth with Enhanced Data Rate Software is installed on your computer, two icons are displayed on the screen: • My Bluetooth Places on the desktop - Lenovo 06222FU | User Manual - Page 54
computer settings so that your computer can find remote Bluetooth-enabled devices • Configuring, on your computer, the Bluetooth-enabled services provided for remote devices • Configuring the services on remote Bluetooth-enabled devices • Displaying information about Bluetooth hardware 38 User Guide - Lenovo 06222FU | User Manual - Page 55
software with ThinkPad Bluetooth with Enhanced Data Rate Software as follows: 1. Press F9 to turn the Bluetooth power on. 2. Click Start ➙ Run. 3. Type C:\SWTOOLS\Drivers\TPBTooth\Setup.exe (or specify the full path to the setup.exe file you have downloaded from http://www.lenovo.com/support); then - Lenovo 06222FU | User Manual - Page 56
ThinkPad Bluetooth with Enhanced Data Rate icon to open the Properties window. 6. Click the Driver tab; then click Update Driver driver that has no "Digital Signed" icon; then click Next. 11. Click Finish. Note: If you use the wireless feature (the 802.11 standard) of your computer instructions Guide - Lenovo 06222FU | User Manual - Page 57
Connections wireless status icon in the task bar. Note: If your computer is a Windows 7 model, to display the Access Connections status icon 2 - Signal level 3 Note: If you have trouble in making a connection, try moving your computer closer to your wireless access point. Chapter 2. Using your - Lenovo 06222FU | User Manual - Page 58
the change will take effect after the computer restarts. Attaching an external monitor Your computer can support a maximum video resolution of up to 2048x1536 (with an external monitor attached to the CRT connector) or up to 2560x1600 (with an external monitor attached to the HDMI port 42 User Guide - Lenovo 06222FU | User Manual - Page 59
supports that resolution. For more details, refer to the manuals provided with your monitor. You can set any resolution for either the computer monitor to the monitor connector; then connect the monitor to an electrical outlet 2. Turn on the external monitor. 3. Change the display output location - Lenovo 06222FU | User Manual - Page 60
Driver tab. 10. Click Update Driver. 11. Click Browse my computer for driver software, and then click Let me pick from a list of device drivers on my computer electrical outlet. 2. Turn on the external monitor and the computer. 10. Click the Driver tab. 11. Click Update Driver. The Hardware Update - Lenovo 06222FU | User Manual - Page 61
the display driver for your monitor that is supplied with the computer, and Note: If your computer is a Windows 7 model, it does not support Presentation Director, but manuals provided with the Windows operating system. Note: The color profile for ThinkPad LCD has been pre-installed in your computer - Lenovo 06222FU | User Manual - Page 62
computer computer. Note: The combo audio jack does not support a conventional microphone. If a conventional headphone is attached to it, the headphone function is supported microphone functions are supported. Setting the volume Using the integrated camera If your computer has an integrated camera, when - Lenovo 06222FU | User Manual - Page 63
opens. 3. In the Communications Utility window, configure the camera settings depending on your individual needs. Using dual displays Using the Extend desktop function Your computer supports a function named the Extend desktop. With the Extend desktop function, you can display output on both the - Lenovo 06222FU | User Manual - Page 64
the external monitor to the monitor connector; then connect the monitor to an electrical outlet. 3. Turn on the external monitor and the computer. 4. Right-click on the desktop, and click Properties to open the Display Properties must touch each other. 6. Click OK to apply the changes. 48 User Guide - Lenovo 06222FU | User Manual - Page 65
Using the media card reader If your computer has a media card reader slot, it supports the following cards: • SD card • SDHC card • SDXC card • MultiMediaCard (MMC) Notes: • Your computer does not support the Content Protection for Recordable Media (CPRM) feature for SD cards. • When transferring - Lenovo 06222FU | User Manual - Page 66
50 User Guide - Lenovo 06222FU | User Manual - Page 67
and comfort Because your computer enables you to work in so many places, it is important that you remain attentive to good posture, good lighting and proper seating. By keeping these considerations in mind, you can improve performance and achieve greater comfort. Lenovo is committed to providing - Lenovo 06222FU | User Manual - Page 68
a chair that gives you good back support and seat height adjustment. Use chair adjustments ThinkPad product solutions available to help you modify and expand your computer to best suit your needs. Access the following Web site to view some of these options: http://www.lenovo.com/accessories/services - Lenovo 06222FU | User Manual - Page 69
Lenovo is committed to providing people with disabilities greater access to information and technology. As a result, the following information provides ways to help users that have hearing, vision, and mobility limitations get the most out of their computer supports Guide Web-based service provided by - Lenovo 06222FU | User Manual - Page 70
Internet and Bluetooth) services, check the services with the airline before boarding the airplane. • If there are restrictions on the use of computers with the wireless feature on an airplane, you need to disable it before boarding. To disable it, refer to the instructions in "Enabling or disabling - Lenovo 06222FU | User Manual - Page 71
keyhole of the computer; then secure the chain on the lock to a stationary object. Refer to the instructions shipped with the mechanical lock. Note: You are responsible for evaluating, selecting, and implementing the locking devices and security features. Lenovo - Lenovo 06222FU | User Manual - Page 72
computer computer against access computer. Setting a power-on password 1. Print these instructions. 2. Save all open files, and exit all applications. 3. Turn your computer off and then turn it on again. 4. When the logo screen is displayed, press F1. The ThinkPad password on the ThinkPad Setup menu. - Lenovo 06222FU | User Manual - Page 73
have to take your computer to a Lenovo reseller or a marketing representative to have the password canceled. 11. Press F10 to exit instructions. 2. Save all open files, and exit all applications. 3. Turn your computer off and then on again. 4. When the logo screen is displayed, press F1. The ThinkPad - Lenovo 06222FU | User Manual - Page 74
can set the minimum length of a hard disk password in the ThinkPad Setup. For details, refer to "Security menu" on page 107. computer to a Lenovo reseller or a marketing representative to have the hard disk drive replaced. Proof of purchase is required, and a fee will be charged for parts and service - Lenovo 06222FU | User Manual - Page 75
will be removed. Supervisor password The supervisor password protects the system information stored in the ThinkPad Setup. Without it, no one can change the configuration of the computer. It provides the following security features: • If a supervisor password is set, a password prompt is displayed - Lenovo 06222FU | User Manual - Page 76
verify it. 11. Commit your computer to a Lenovo reseller or a Lenovo marketing representative to have the system board replaced. Proof of purchase is required, and a fee will be charged for parts and service. 12. Press F10 to exit from the Setup Notice window. The next time you open the ThinkPad - Lenovo 06222FU | User Manual - Page 77
11 and step 12 in "Setting a supervisor password" on page 60 to remove your supervisor password. Hard disk security To protect passwords from unauthorized security attacks, several of the latest technologies and algorithms are integrated into UEFI BIOS and hardware design of ThinkPad computer Lenovo, - Lenovo 06222FU | User Manual - Page 78
of the solid state drive from the ThinkPad Setup within a minute. To download this application, go to the Lenovo Web site http://www.lenovo.com/support. If Encryption solid state drive or Disk Encryption hard disk drive is supported and installed in your computer, you can logically dispose of all - Lenovo 06222FU | User Manual - Page 79
the recovery solutions provided by Lenovo. Note: You can attach • "Reinstalling preinstalled applications and device drivers" on page 68 • "Solving recovery problems" on page 69 Notes: 1. There transfer the computer to another area, sell the computer, recycle the computer, or put the computer in an - Lenovo 06222FU | User Manual - Page 80
Lenovo ThinkVantage Tools ➙ Factory Recovery Disks. Then, follow the instructions the computer to instructions on the screen to complete the operation. Notes: 1. After restoring your computer to the factory default settings, you might have to reinstall device drivers computer the computer to the - Lenovo 06222FU | User Manual - Page 81
if a secondary hard disk drive is installed in your computer • On an attached external USB hard disk drive • desktop, click Start ➙ All Programs ➙ Lenovo ThinkVantage Tools ➙ Enhanced Backup and Restore. backup operation options. Then, follow the instructions on the screen to complete the backup - Lenovo 06222FU | User Manual - Page 82
instructions icon. 4. Follow the instructions on the screen to complete sure that the computer is turned off. 2. Repeatedly press and release the F11 key when turning on the computer. When you and Recovery workspace fails to open, see "Solving recovery problems" on page 69. 4. Do one of the following - Lenovo 06222FU | User Manual - Page 83
drivers for some devices. See "Reinstalling preinstalled applications and device drivers" on page 68. 2. Some computers All Programs ➙ Lenovo ThinkVantage Tools ➙ instructions to use the rescue medium: 1. Turn off your computer. 2. Repeatedly press and release the F12 key when turning on the computer - Lenovo 06222FU | User Manual - Page 84
for each feature is available from the Rescue and Recovery workspace. Follow the instructions to complete the recovery process. Reinstalling preinstalled applications and device drivers Your computer has provisions that enable you to reinstall selected factory-installed applications and device - Lenovo 06222FU | User Manual - Page 85
instructions on the screen. Attention: If you need updated device drivers, do not download them from the Windows Update Web site. Obtain them from Lenovo. For more information, see "Making sure device drivers are current" on page 122. Solving recovery problems sequence in the ThinkPad Setup. See " - Lenovo 06222FU | User Manual - Page 86
70 User Guide - Lenovo 06222FU | User Manual - Page 87
and place the part on it. • Do not place the part on the computer cover or other metal surface. Replacing the battery Before you start, print these instructions. This system might not support batteries that are not genuine Lenovo-made or authorized. These systems will continue to boot, but might not - Lenovo 06222FU | User Manual - Page 88
possible injury: • Replace only with a battery of the type recommended by Lenovo. • Keep the battery pack away from fire. • Do not expose it computer, or enter hibernation mode. Then disconnect the ac power adapter and all cables from the computer. 2. Close the computer display, and turn the computer - Lenovo 06222FU | User Manual - Page 89
disk drive with a new one that can be purchased from your Lenovo reseller or a marketing representative. To replace the solid state drive turn the computer off. Never remove the drive while the computer is operating, in sleep (standby) mode, or in hibernation mode. Replacement instructions To replace - Lenovo 06222FU | User Manual - Page 90
drive door. 5. Remove the screws 1 , and then slide the solid state drive or hard disk drive in the direction shown by the arrow 2 . 74 User Guide - Lenovo 06222FU | User Manual - Page 91
6. Remove the solid state drive or hard disk drive by lifting its left side. 7. Insert the new solid state drive or hard disk drive as shown in the following picture. Chapter 6. Replacing devices 75 - Lenovo 06222FU | User Manual - Page 92
how to reinstall the battery, refer to "Replacing the battery" on page 71. 11. Turn the computer over again. Reconnect the ac power adapter and all cables. Replacing a memory module Before you start, print these instructions. To replace a memory module, read the following prerequisites, and then the - Lenovo 06222FU | User Manual - Page 93
Replacing memory in the slot under the keyboard 1. Turn off the computer; then disconnect the ac power adapter and all cables from the computer. 2. Close the computer display, and turn it over. 3. Remove the battery. For information about how to remove the battery, refer to "Replacing the battery" - Lenovo 06222FU | User Manual - Page 94
firmly fixed in the slot and cannot be moved easily. 10. Put the cover back in place 1 and close the cover 2 . Then tighten the screws 3 . 11. Reinstall the battery. For information about how to reinstall the battery, refer to "Replacing the battery" on page 71. 12. Turn the - Lenovo 06222FU | User Manual - Page 95
or disconnect it from the telephone outlet on the wall. DANGER Electric instructions. To replace the keyboard, do as follows: Removing the keyboard 1. Turn off the computer; then disconnect the ac power adapter and all cables from the computer. 2. Close the computer display, and turn the computer - Lenovo 06222FU | User Manual - Page 96
5. Remove the screws. 6. Push hard in the direction shown by the arrows 1 in the drawing to unlatch the front side of the keyboard. The keyboard will open up slightly 2 . 80 User Guide - Lenovo 06222FU | User Manual - Page 97
7. Remove the cables 2 and 4 by flipping the connectors 1 and 3 upwards. Now the keyboard has been removed. Installing the keyboard 1. Attach the cables 1 and 3 by flipping the connectors 2 and 4 downwards. Chapter 6. Replacing devices 81 - Lenovo 06222FU | User Manual - Page 98
2. Insert the keyboard. Make sure that the rear edge of the keyboard is under the frame, as shown by the arrows. 3. Slide the keyboard as shown by the arrows. 82 User Guide - Lenovo 06222FU | User Manual - Page 99
; then turn it on. Installing and replacing the PCI Express Mini Card for wireless LAN/WiMAX connection Before you start, print these instructions. Your computer has a PCI Express Mini Card slot for connection to a wireless LAN/WiMAX. To replace the PCI Express Mini Card with a new one, read the - Lenovo 06222FU | User Manual - Page 100
telephone outlet on print these instructions. Your computer has a computer display, and turn the computer over. 3. Remove the battery. For information about how to remove the battery, refer to "Replacing the battery" on page 71. 4. Loosen the screws 1 , and then remove the cover 2 . 84 User Guide - Lenovo 06222FU | User Manual - Page 101
5. If a tool for removing connectors is included in the package with the new card, use it to disconnect the cables from the card. If no such tool is included, disconnect the cables by picking up the connectors with your fingers and gently unplugging them. 6. Remove the screw 1 . The card pops up 2 . - Lenovo 06222FU | User Manual - Page 102
the black cable to the connector marked "AUX" or "A." 9. Put the cover back in place 1 , close the cover 2 , and then tighten the screws 3 . 86 User Guide - Lenovo 06222FU | User Manual - Page 103
11. Turn the computer over again. Connect the ac power adapter and cables to the computer; then turn it on. Installing and replacing the PCI Express Mini Card for wireless WAN connection Some ThinkPad cable to or disconnect it from the telephone outlet on the wall. DANGER Electric current from power - Lenovo 06222FU | User Manual - Page 104
is included, disconnect the cables by picking up the connectors with your fingers and gently unplugging them. Note: Depending on the system configuration of your computer, the card might have only one connector. 88 User - Lenovo 06222FU | User Manual - Page 105
6. Remove the screw 1 . The card pops up 2 . Remove the card. 7. Align the contact edge of the new PCI Express Mini Card with the corresponding socket 1 . Pivot the card until you can snap it into place. Secure the card with the screw 2 . Chapter 6. Replacing devices 89 - Lenovo 06222FU | User Manual - Page 106
, refer to "Replacing the battery" on page 71. 11. Turn the computer over again. Connect the ac power adapter and cables to the computer; then turn it on. Replacing the SIM card Before you start, print these instructions. Your computer might require a SIM (Subscriber Identification Module) card to - Lenovo 06222FU | User Manual - Page 107
the IC chip mounted on one side of the card. Replacement instructions To replace the SIM card, do as follows: 1. Turn off the computer; then disconnect the ac power adapter and all cables from the computer. 2. Close the computer display, and turn it over. 3. Remove the battery. For information about - Lenovo 06222FU | User Manual - Page 108
battery. For information about how to reinstall the battery, refer to "Replacing the battery" on page 71. 9. Turn the computer over again. Connect the ac power adapter and cables to the computer; then turn it on. Replacing the backup battery Before you start, print these instructions. 92 User Guide - Lenovo 06222FU | User Manual - Page 109
: • Replace only with a battery of the type recommended by Lenovo. • Keep the battery pack away from fire. • Do not instructions To replace the backup battery, do the following: Removing the backup battery 1. Turn off the computer; then disconnect the ac power adapter and all cables from the computer - Lenovo 06222FU | User Manual - Page 110
5. Detach the connector 1 . Then remove the backup battery 2 . Installing the backup battery 1. Install the backup battery 1 . Then attach the connector 2 . 2. Put the cover back in place 1 , close the cover 2 , and then tighten the screws 3 . 94 User Guide - Lenovo 06222FU | User Manual - Page 111
3. Reinstall the battery. For information about how to reinstall the battery, refer to "Replacing the battery" on page 71. 4. Turn the computer over again. Connect the ac power adapter and cables to the computer; then turn it on. Chapter 6. Replacing devices 95 - Lenovo 06222FU | User Manual - Page 112
96 User Guide - Lenovo 06222FU | User Manual - Page 113
provides information on installing devices and taking advantage of your computer's high-technology features. • "Finding ThinkPad options" on page 97 Finding ThinkPad options If you want to expand the capabilities of your computer, Lenovo has a number of hardware accessories and upgrades to meet your - Lenovo 06222FU | User Manual - Page 114
98 User Guide - Lenovo 06222FU | User Manual - Page 115
drivers, and application software you need on your hard disk drive, or if you want to receive updates and the latest information about them, refer to the ThinkPad Web site at http://www.lenovo If your computer is a Windows 7 model, - 32-bit versions of Windows do not support ThinkPad Setup features. - Lenovo 06222FU | User Manual - Page 116
. Then restart the computer, and follow the instructions on the screen. 7. Install Intel Chipset Support for Windows 2000/XP/Vista/7. See "Installing Intel Chipset Support for Windows 2000/XP/Vista/7" on page 105. 8. Install the necessary device drivers. See "Installing device drivers" on page 104 - Lenovo 06222FU | User Manual - Page 117
these instructions. Note: Your computer supports Windows Vista with Service Pack 2. Before you install Windows Vista Service Pack 2, make sure you install the Windows Vista Service Pack 1 first. To install Windows Vista and its related software on your computer, do as follows: 1. Start the ThinkPad - Lenovo 06222FU | User Manual - Page 118
Before you start, print these instructions. Note: Your computer supports Windows XP with Service Pack 3. Before you install the Windows XP Service Pack 3, make sure you install the Windows XP Service Pack 2 first. You must install Intel Rapid Storage Technology Driver before installing the operating - Lenovo 06222FU | User Manual - Page 119
CD or DVD drive, and restart the computer. 10. Complete the installation of Windows XP Service Pack 2 by following OS installing instructions. 11. Install Windows XP Service Pack 3. You can install the Windows XP Service Pack 3 using the Windows XP Service Pack 3 Installation CD or download it from - Lenovo 06222FU | User Manual - Page 120
/XP/Vista/7" on page 105. 25. Install device drivers. To do this, refer to "Installing drivers and software" on page 106. Installing device drivers To install device drivers, refer to the web site: http://www.lenovo.com/support. To install the ThinkPad Monitor File for Windows 2000/XP/Vista/7, refer - Lenovo 06222FU | User Manual - Page 121
software, and then click Let me pick from a list of device drivers on my computer. 10. Click Have Disk. 11. Specify path C:\SWTOOLS\DRIVERS\MONITOR to this monitor INF. Then, click Open. 12. Click OK. 13. Confirm the correct display type, then click Next. 14. Windows has finished installing. - Lenovo 06222FU | User Manual - Page 122
the Supplement files, device drivers, and application software you need on your hard disk drive, or if you want to receive updates and the latest information about them, refer to the ThinkPad Web site at: http://www.lenovo.com/ThinkPadDrivers ThinkPad Setup Your computer provides a program, called - Lenovo 06222FU | User Manual - Page 123
drive. • CPU: Specify the settings for the CPU. Date/Time menu If you need to set the current date and time of your computer, select Date/Time from the ThinkPad Setup menu. The following submenu is displayed: • System Date • System Time To change the date and time, do the following: 1. Using the - Lenovo 06222FU | User Manual - Page 124
Anti-Theft services, such as computer. Lock UEFI BIOS Settings enable or disable the function that protects items in the ThinkPad any items in the ThinkPad Setup. If you computer. If you select Disabled, no password prompt is displayed; the computer your computer. For computer from booting. Changing - Lenovo 06222FU | User Manual - Page 125
. For each device that is attached to or installed on the computer, information about it is presented after the colon. 1. USB CD: 2. USB FDD: 3. ATAPI CD0: 4. ATA HDD0: 5. ATA HDD1: 6. ATA HDD2: 7. USB HDD: 8. PCI LAN: 9. ATAPI CD1: 10. ATAPI CD2: 11. ATA HDD3: 12. ATA HDD4: 13. Other CD: 14. Other - Lenovo 06222FU | User Manual - Page 126
close the ThinkPad Setup and restart the system, select Restart from the ThinkPad Setup menu the changes. • Save Changes: Save the changes. ThinkPad Setup items The following tables show the contents of the ThinkPad Setup. Note: Some items are displayed on the menu only if the computer supports the - Lenovo 06222FU | User Manual - Page 127
," you can use the Wireless LAN and WiMAX device. Enable or disable boot support for USB diskette, USB memory key, and USB optical drive. If you select BlackBerry smartphone. Note: If you want to charge these devices when your computer is in hibernation mode or powered off, you will need to open the - Lenovo 06222FU | User Manual - Page 128
technology (Intel SpeedStep mounted models only) 112 User Guide Selection • Disabled • Enabled Comments settings to enable boot time, password prompt, and ThinkPad Setup. "Digital on Thinkpad" is HDMI on your computer. • Disabled • Enabled Select runtime support, lowest speed Note: This sub-menu - Lenovo 06222FU | User Manual - Page 129
or disable additional execution core units within a CPU. Note: If you are using a computer with a single-core processor, this item does not appear. Note: For Core Multi-Processing, refer to the instructions in "Installing Windows XP" on page 102. Enable or disable additional logical processors - Lenovo 06222FU | User Manual - Page 130
• Enter Intel TXT Feature UEFI BIOS Update Option Flash BIOS Updating by End-Users • Disabled • Enabled • Disabled • Enabled 114 User Guide Comments Note: This sub-menu is not supported in AMD models. Comments Refer to "Security menu" on page 107 and "Using passwords" on page 55. If you select - Lenovo 06222FU | User Manual - Page 131
your operating system, then by selecting "Enabled" you can protect your computer against attacks by such viruses and worms. If after choosing "Enabled the platform infrastructure for I/O virtualization. Note: This sub-menu is not supported in AMD models. If you select "Enabled," you can use Ethernet - Lenovo 06222FU | User Manual - Page 132
again. Note: This sub-menu is not supported in AMD models. Enable or disable the UEFI BIOS interface to activate Computrace module. Computrace is an optional monitoring service from Absolute Software. Note: If you set the OS. Note: If you select UEFI Only, system cannot boot from the 116 User Guide - Lenovo 06222FU | User Manual - Page 133
UEFI and Legacy. Screen during the POST: • Quick: ThinkPad Logo screen is displayed. • Diagnostics: Text messages are displayed instructions on the screen: http://www.lenovo.com/ThinkPadDrivers Using system management This section is intended primarily for network administrators. Your computer - Lenovo 06222FU | User Manual - Page 134
computer computer supports computer computer supports the PC functions that PXE requires. For example, with the appropriate LAN card, your computer minimum. If a computer is turned on by computer remotely, you must configure the network interface by setting the system-management features in the ThinkPad - Lenovo 06222FU | User Manual - Page 135
Startup sequence When your computer is turned on remotely, the devices attached to it start in an order determined by the settings for automatic power-on. To define a sequence: 1. On the ThinkPad Setup menu, select Startup. The Startup submenu appears. 2. Select Network Boot. The Network Boot - Lenovo 06222FU | User Manual - Page 136
120 User Guide - Lenovo 06222FU | User Manual - Page 137
part of owning a ThinkPad Notebook is maintenance. With proper care, you can avoid common problems. The following sections provide information that can help you to keep your computer running smoothly. • "General tips for preventing problems" on page 121 • "Making sure device drivers are current" on - Lenovo 06222FU | User Manual - Page 138
cause of the problem. Getting the latest drivers from the Web site You can download and install updated device drivers from the Lenovo Web site by doing the following: 1. Connect to the Internet. 2. Go to: http://www.lenovo.com/ThinkPadDrivers. 3. Enter the product number of the computer or click - Lenovo 06222FU | User Manual - Page 139
disk drive, or solid state drive, follow the instructions shipped with your hardware, and apply pressure only where needed on the device. • Turn off your computer if you are replacing the hard disk drive or containers or packaging when they are not being used. Chapter 9. Preventing problems 123 - Lenovo 06222FU | User Manual - Page 140
drive or solid state drive. Register your computer • Register your ThinkPad products with Lenovo (refer to the Web page: http://www.lenovo.com/register). This can help authorities return your computer to you if it is lost or no liquid drips onto or between the keys. 3. Allow to dry. 124 User Guide - Lenovo 06222FU | User Manual - Page 141
a hair dryer. Note: Avoid spraying cleaner directly onto the display or the keyboard. Cleaning your computer display 1. Gently wipe the display with a dry, soft, lint-free cloth. If you see let any liquid drip into the computer. 6. Be sure to dry the display before closing it. Chapter 9. Preventing - Lenovo 06222FU | User Manual - Page 142
126 User Guide - Lenovo 06222FU | User Manual - Page 143
program, you can download it from http://www.lenovo.com/support. The Lenovo Solution Center program enables you to troubleshoot and resolve computer problems. It combines diagnostic tests, system information collection, security status, and support information, along with hints and tips for maximum - Lenovo 06222FU | User Manual - Page 144
and repair the problem yourself after running the program, save and print the log files created by the program. You will need the log files when you speak to a Lenovo technical support representative. Using the Lenovo Support Web site If your computer has neither the Lenovo Solution Center program - Lenovo 06222FU | User Manual - Page 145
. Press F10 and then press Enter to restart the system. • Message: 0187: EAIA data access error Solution: The access to EEPROM is failed. Have the computer serviced. • Message: 0188: Invalid RFID Serialization Information Area. Chapter 10. Troubleshooting computer problems 129 - Lenovo 06222FU | User Manual - Page 146
. Solution: The system EFI Variable Block Data might have been corrupted. The computer uses the default settings. Run ThinkPad Setup to reconfigure the settings. If you still see the same error code, have the computer serviced. • Message: 0271: Date and time error Solution: Neither the date nor the - Lenovo 06222FU | User Manual - Page 147
ac power adapter is connected to the computer and the power cord is plugged into a working electrical outlet. - The computer is turned on. (Turn the problem persists, have the computer serviced. • Problem: My screen goes blank while the computer is on. Chapter 10. Troubleshooting computer problems - Lenovo 06222FU | User Manual - Page 148
and you still hear the beeps, have the computer serviced. The video function has a problem. Have the computer serviced. The system board has a problem. Have the computer serviced. Memory problems Print these instructions now and keep it with your computer for reference later. If your memory is not - Lenovo 06222FU | User Manual - Page 149
your wireless LAN driver is the latest version. Check the Web site and confirm the driver version supported by Access Connections is the latest documented in the README file. Make sure that your computer is within range of a wireless access point. Chapter 10. Troubleshooting computer problems 133 - Lenovo 06222FU | User Manual - Page 150
not supported on this computer. Remove it. Note: Depending on your computer, some models do not have a wireless WAN. Bluetooth problems For Windows 7 • Problem: If you are using the ThinkPad Bluetooth with Enhanced Data Rate Software, refer to the following instructions. Note: Check your connection - Lenovo 06222FU | User Manual - Page 151
the Bluetooth power off and then on again, or restart your computer. Then search for the device again. Note: If you are using the ThinkPad Bluetooth with Enhanced Data Rate Software, refer to the following instructions. • Problem: You cannot connect to any Bluetooth-enabled device. Solution: Make - Lenovo 06222FU | User Manual - Page 152
Microsoft Bluetooth software is installed on your computer. If you want to use ThinkPad Bluetooth with Enhanced Data Rate Software, you have to install it and then replace the Bluetooth driver. For more information, see "Using Bluetooth" on page 36. • Problem: While looking at the Classic View of - Lenovo 06222FU | User Manual - Page 153
computer and try using the keyboard again. If the keyboard problem is resolved, carefully reconnect the external numeric keypad, external keyboard, making sure that you have seated the connectors properly. If the problem remains, make sure that the correct device driver computer serviced. • Problem: - Lenovo 06222FU | User Manual - Page 154
problem below. Note: If your computer is a Windows 7 model, it does not support the presentation scheme. • Problem: The screen is unreadable or distorted. Solution: Make sure that: - The display device driver is working properly. If not, click the Troubleshoot button. For Windows XP: 138 User Guide - Lenovo 06222FU | User Manual - Page 155
. If not, click the Troubleshoot button. • Problem: Incorrect characters are displayed on the screen. Solution: Did you install the operating system or application program correctly? If they are installed and configured correctly, have the computer serviced. • Problem: The screen stays on even - Lenovo 06222FU | User Manual - Page 156
outlet. 2. Turn on the external monitor and the computer. 3. Right-click on the desktop, and click Screen resolution. Note: If your computer Driver tab. 10. Click Update Driver. 11. Click Browse my computer for driver software, and then click Let me pick from a list of device drivers on my computer - Lenovo 06222FU | User Manual - Page 157
connect the monitor to an electrical outlet. 2. Turn on the external monitor and the computer. 3. Press Fn+F7 to change Default Monitor. 9. Click Properties. 10. Click the Driver tab. 11. Click Update Driver. The Hardware Update Wizard appears. 12. Click No, Troubleshooting computer problems 141 - Lenovo 06222FU | User Manual - Page 158
. • Problem: The Extend desktop function does not work. Solution: Enable the Extend desktop function by doing the following: For Windows 7: 1. Connect the external monitor to the monitor connector, and then connect the monitor to an electrical outlet. 2. Turn on the external monitor and the computer - Lenovo 06222FU | User Manual - Page 159
the Device Manager button. 5. Click the + mark for Sound, video and game controllers. 6. Make sure the following device is enabled and configured correctly: Chapter 10. Troubleshooting computer problems 143 - Lenovo 06222FU | User Manual - Page 160
be grayed out. This means that its position is fixed by the hardware and cannot be changed. • Problem: The volume sliders do not stay in place when some audio applications are used. Solution: It is normal This is because the Built-In Synthesizer Software does not support the control. 144 User Guide - Lenovo 06222FU | User Manual - Page 161
battery pack. • Problem: The computer does not operate with a fully charged battery pack. Solution: The surge protector in the battery pack might be active. Turn off the computer for one minute to reset the protector; then turn on the computer again. Chapter 10. Troubleshooting computer problems 145 - Lenovo 06222FU | User Manual - Page 162
serviced. AC power adapter problems • Problem: The ac power adapter is connected to the computer and the working electrical outlet Instructions manual included in the shipping contents of your computer. 2. If the above step is correct, turn off the computer If your computer does not the computer is - Lenovo 06222FU | User Manual - Page 163
the computer display. Note: If your computer is a Windows 7 model, it does not support the presentation scheme. • Problem: The computer does not return from sleep (standby) mode, or the sleep (standby) indicator stays on and the computer does not work. Chapter 10. Troubleshooting computer problems - Lenovo 06222FU | User Manual - Page 164
. Now you cannot unlock the hard disk password. Solution: Your computer supports an enhanced password algorithm. Computers older than yours might not support such a security function. Solid state drive problems • Problem: When you compress files or folders by use of the data compression function - Lenovo 06222FU | User Manual - Page 165
or provide confirmation. For Windows XP: 1. Click Start ➙ Control Panel. 2. Click System. 3. Click the Hardware tab, and click the Device Manager button. Refer to "Diagnosing problems" on page 127 and run a diagnostic test of the USB connector. Chapter 10. Troubleshooting computer problems 149 - Lenovo 06222FU | User Manual - Page 166
150 User Guide - Lenovo 06222FU | User Manual - Page 167
services" on page 153 Before you contact Lenovo Often, you can solve your computer problems by referring to the information in the explanations of error codes, running diagnostic programs or by consulting the ThinkPad Web site. Registering your computer Register your ThinkPad products with Lenovo - Lenovo 06222FU | User Manual - Page 168
the latest support information such as the following: • Drivers and software • Diagnostic solutions • Product and service warranty • Product and parts details • User guides and manuals • Knowledge base and frequently asked questions Calling Lenovo If you have tried to correct the problem yourself - Lenovo 06222FU | User Manual - Page 169
information for your system Telephone numbers For a list of the Lenovo Support phone numbers for your country or region, go to http://www.lenovo.com/support/phone or refer to the Safety and Warranty Guide that comes with your computer. Note: Phone numbers are subject to change without notice. The - Lenovo 06222FU | User Manual - Page 170
154 User Guide - Lenovo 06222FU | User Manual - Page 171
2.1 + EDR as defined by the Bluetooth SIG. Following profiles are supported by Bluetooth devices: • Generic Access • Service Discovery • Serial Port • Dial-up Networking • LAN Access using PPP energy emitted by wireless devices like for example mobile phones. © Copyright Lenovo 2011 155 - Lenovo 06222FU | User Manual - Page 172
frequency safety standards and recommendations, Lenovo believes they are safe for where the risk of interference to other devices or services is perceived or identified as harmful. If you are on the computer. Locating the UltraConnect wireless antennas ThinkPad models computer. 156 User Guide - Lenovo 06222FU | User Manual - Page 173
lenovo.com/support In the right pane, type your computer number in the Quick Path filed, and click Go. 2. Click User's guides and manuals ThinkPad X130e outlet on a circuit different from that to which the receiver is connected. • Consult an authorized dealer or service representative for help. Lenovo - Lenovo 06222FU | User Manual - Page 174
to electromagnetic compatibility. Lenovo cannot accept responsibility der Lenovo empfohlene Kabel angeschlossen werden. Lenovo Lenovo verändert bzw. wenn Erweiterungskomponenten von Fremdherstellern ohne Empfehlung der Lenovo Paragraf 5 des EMVG ist die Lenovo (Deutschland) GmbH, Gropiusplatz 10, - Lenovo 06222FU | User Manual - Page 175
information, refer to the Regulatory Notice shipped with your computer. If your computer is shipped without the Regulatory Notice, you can find it on the Web site at http://www.lenovo.com/support. For details, refer to the instructions on "Locating wireless regulatory notices" on page 156. Appendix - Lenovo 06222FU | User Manual - Page 176
160 User Guide - Lenovo 06222FU | User Manual - Page 177
Law for Promotion of Effective Utilization of Resources, Lenovo Japan provides, through its PC Collecting and Recycling Services, for the collecting, reuse, and recycling of disused computers and monitors. For details, go to: http://www.lenovo.com/recycling/japan. Pursuant to the Law for Promotion - Lenovo 06222FU | User Manual - Page 178
in Lenovo sales, service, or marketing, and follow that person's instructions. You also can refer to the instructions at http://www.lenovo.com/jp/ja/enviroment/recycle/battery/. If you use a Lenovo notebook computer at waste batteries and accumulators. The Directive determines the 162 User Guide - Lenovo 06222FU | User Manual - Page 179
human health due to the potential presence of hazardous substances. For proper collection and treatment, go to: http://www.lenovo.com/lenovo/environment Battery recycling information for Taiwan Battery recycling information for the United States and Canada Appendix B. WEEE and recycling statements - Lenovo 06222FU | User Manual - Page 180
164 User Guide - Lenovo 06222FU | User Manual - Page 181
and verify the operation of any other product, program, or service. Lenovo might have patents or pending patent applications covering subject matter described document are not intended for use in implantation or other life support applications where malfunction might result in injury or death to - Lenovo 06222FU | User Manual - Page 182
trademarks of Lenovo in the United States, other countries, or both: Lenovo Access Connections Active Protection System Rescue and Recovery ThinkPad ThinkVantage from Research In Motion Limited. Other company, product, and service names might be trademarks or service marks of others. 166 User Guide - Lenovo 06222FU | User Manual - Page 183
- Lenovo 06222FU | User Manual - Page 184
Part Number: (1P) P/N: **
-
 1
1 -
 2
2 -
 3
3 -
 4
4 -
 5
5 -
 6
6 -
 7
7 -
8
-
9
-
10
-
11
-
12
-
13
-
14
-
15
-
16
-
17
-
18
-
19
-
20
-
21
-
22
-
23
-
24
-
25
-
26
-
27
-
28
-
29
-
30
-
31
-
32
-
33
-
34
-
35
-
36
-
37
-
38
-
39
-
40
-
41
-
42
-
43
-
44
-
45
-
46
-
47
-
48
-
49
-
50
-
51
-
52
-
53
-
54
-
55
-
56
-
57
-
58
-
59
-
60
-
61
-
62
-
63
-
64
-
65
-
66
-
67
-
68
-
69
-
70
-
71
-
72
-
73
-
74
-
75
-
76
-
77
-
78
-
79
-
80
-
81
-
82
-
83
-
84
-
85
-
86
-
87
-
88
-
89
-
90
-
91
-
92
-
93
-
94
-
95
-
96
-
97
-
98
-
99
-
100
-
101
-
102
-
103
-
104
-
105
-
106
-
107
-
108
-
109
-
110
-
111
-
112
-
113
-
114
-
115
-
116
-
117
-
118
-
119
-
120
-
121
-
122
-
123
-
124
-
125
-
126
-
127
-
128
-
129
-
130
-
131
-
132
-
133
-
134
-
135
-
136
-
137
-
138
-
139
-
140
-
141
-
142
-
143
-
144
-
145
-
146
-
147
-
148
-
149
-
150
-
151
-
152
-
153
-
154
-
155
-
156
-
157
-
158
-
159
-
160
-
161
-
162
-
163
-
164
-
165
-
166
-
167
-
168
-
169
-
170
-
171
-
172
-
173
-
174
-
175
-
176
-
177
-
178
-
179
-
180
-
181
-
182
-
183
-
184
 |
 |

User Guide
ThinkPad X130e