Lenovo 102912U TD230 User Guide
Lenovo 102912U Manual
 |
View all Lenovo 102912U manuals
Add to My Manuals
Save this manual to your list of manuals |
Lenovo 102912U manual content summary:
- Lenovo 102912U | TD230 User Guide - Page 1
ThinkServer TD230 Installation and User Guide Machine Types: 1027, 1029, 1039, and 1040 - Lenovo 102912U | TD230 User Guide - Page 2
- Lenovo 102912U | TD230 User Guide - Page 3
ThinkServer TD230 Installation and User Guide Machine Types: 1027, 1029, 1039, and 1040 - Lenovo 102912U | TD230 User Guide - Page 4
Information and the Warranty and Support Information on the ThinkServer Documentation DVD that came with your product • Appendix B "Notices" on page 129 Third Edition (February 2011) © Copyright Lenovo 2010, 2011. LENOVO products, data, computer software, and services have been developed exclusively - Lenovo 102912U | TD230 User Guide - Page 5
hardware devices 29 Installing or removing a memory module. . . 29 Removing or installing internal drives . . . . 32 Installing or removing a PCI card 53 Installing or removing the Ethernet card . . . 56 Installing or removing the ThinkServer TD230 SATA RAID 5 Upgrade 58 Installing or removing - Lenovo 102912U | TD230 User Guide - Page 6
Installing the ThinkServer EasyManage program 110 Chapter 7. Troubleshooting. . . . . 111 Troubleshooting tables 111 DVD drive problems 111 General problems 112 Hard disk drive problems 112 Intermittent problems 112 Keyboard, mouse, or pointing-device problems 113 Memory problems 113 - Lenovo 102912U | TD230 User Guide - Page 7
Safety information Before installing this product, read the Safety Information. © Copyright Lenovo 2010, 2011 v - Lenovo 102912U | TD230 User Guide - Page 8
any additional safety information that comes with the server or an optional device before you install, remove before you open the device covers, unless instructed otherwise in the installation and configuration procedures all cables from devices. vi ThinkServer TD230 Installation and User Guide - Lenovo 102912U | TD230 User Guide - Page 9
3 CAUTION: When laser products (such as CD-ROMs, DVD drives, fiber optic devices, or transmitters) are installed, note the in exposure to hazardous laser radiation. There are no serviceable parts inside the device. • Use of controls or lifting. © Copyright Lenovo 2010, 2011 ≥ 55 kg (121.2 lb) vii - Lenovo 102912U | TD230 User Guide - Page 10
. If you suspect a problem with one of these parts, contact a service technician. Statement 11 CAUTION: The following label indicates sharp edges, corners, or joints nearby. Statement 12 CAUTION: The following label indicates a hot surface nearby. viii ThinkServer TD230 Installation and User Guide - Lenovo 102912U | TD230 User Guide - Page 11
15 CAUTION: Make sure that the rack is secured properly to avoid tipping when the server unit is extended. Statement 17 CAUTION: The following label indicates moving parts nearby. Statement 26 CAUTION: Do not place any object on top of rack-mounted devices. © Copyright Lenovo 2010, 2011 ix - Lenovo 102912U | TD230 User Guide - Page 12
x ThinkServer TD230 Installation and User Guide - Lenovo 102912U | TD230 User Guide - Page 13
and statements in the document" on page 1 • "Related documentation" on page 2 Introduction This Installation and User Guide is for your Lenovo® ThinkServer® TD230 server (machine types 1027, 1029, 1039, and 1040). This document contains the following information: • Setting up and cabling the - Lenovo 102912U | TD230 User Guide - Page 14
you configure RAID using the ThinkServer 9240-8i RAID 0/1 Adapter. Available on the ThinkServer Documentation DVD Note: You can obtain all the documentation in PDF for your server from the Lenovo Support Web site at http://www.lenovo.com/support. 2 ThinkServer TD230 Installation and User Guide - Lenovo 102912U | TD230 User Guide - Page 15
"Rear view" on page 12 and power cord Turn on the server to verify operation "Turning on the server" on page 91 Review the BIOS settings and customize as needed "Starting the Setup Utility program" on page 95 Configure RAID "RAID controllers" on page 102 Check for firmware updates "Using the - Lenovo 102912U | TD230 User Guide - Page 16
4 ThinkServer TD230 Installation and User Guide - Lenovo 102912U | TD230 User Guide - Page 17
This chapter provides information about the server package, features, specifications, and software programs. What is included with your server The ThinkServer TD230 server package includes the server, a power cord, documentation, the ThinkServer Documentation DVD, and software media. Features - Lenovo 102912U | TD230 User Guide - Page 18
the specific type and speed information about the microprocessor, use the Setup Utility program. See "Using the Setup Utility program" on page 95. For a list of supported microprocessors, go to http://www.lenovo.com/thinkserver and click Options under the Products tab. Large system-memory capacity - Lenovo 102912U | TD230 User Guide - Page 19
the process of configuring RAID and installing supported Microsoft® Windows® and Linux operating systems and device drivers on your server. The EasyStartup program is provided with your server on the ThinkServer EasyStartup DVD. The DVD is self-starting (bootable). The user guide for the EasyStartup - Lenovo 102912U | TD230 User Guide - Page 20
Error codes and messages to help you identify problems • Generating error logs for the power-on self-test (POST) failures • Hot-swap SAS hard disk drives • and replacement part numbers, stored in the nonvolatile memory for easier remote maintenance 8 ThinkServer TD230 Installation and User Guide - Lenovo 102912U | TD230 User Guide - Page 21
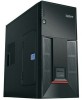
light-emitting diodes (LEDs), and connectors. Front view Figure 1 "Front view of the server" on page 9 shows the LEDs and parts on the front of the server. Figure 1. Front view of the server 1 Power LED 2 Hard disk drive status LED 3 Ethernet status LED 4 System status LED 5 Front door lock 6 Logo - Lenovo 102912U | TD230 User Guide - Page 22
You can open the front door with the key to locate controls, LEDs, connectors, and other parts on the front panel. Figure 2. Opening the front door 10 ThinkServer TD230 Installation and User Guide - Lenovo 102912U | TD230 User Guide - Page 23
, and other parts on the front panel after you open the front door. Figure 3. Front view of the server (with the front door open) 1 5.25-inch drive bay 2 Power LED 3 Hard disk drive status LED 4 Ethernet status LED 5 System status LED 6 Power button 7 Reset button 8 USB connectors (2) 9 3.5-inch - Lenovo 102912U | TD230 User Guide - Page 24
on page 12 shows the locations of the connectors and parts on the rear of the server. Figure 4. Rear view of the server 1 Power cord connector 2 Serial port 3 VGA monitor connector 4 USB connectors (4) attach a device that uses a 9-pin serial port. 12 ThinkServer TD230 Installation and User Guide - Lenovo 102912U | TD230 User Guide - Page 25
connect additional USB devices. Used to attach a VGA monitor or other devices that use a VGA monitor connector. Hot-swap hard disk drive status LEDs For server models with hot-swap hard disk drives, each hot-swap hard disk drive also has two status LEDs on the front. Figure 5. Hot-swap hard disk - Lenovo 102912U | TD230 User Guide - Page 26
microprocessor is optional) 9 Onboard ICH10R SATA RAID controller 10 PCI Express x4 slot 11 PCI card slot 12 PCI Express x8 slots (3) 13 Heat sink and fan assembly (microprocessor 1 underneath) 14 Rear fan (system fan 3) 15 System board battery 14 ThinkServer TD230 Installation and User Guide - Lenovo 102912U | TD230 User Guide - Page 27
memory modules) 16 System board Note: * denotes that this illustration only shows the server models with four hot-swap hard disk drives. There are also server models that support up to five non-hot-swap hard disk drives connector (ports 2-3) 25 SATA connector 5 26 PCI Express x4 slot 27 PCI card - Lenovo 102912U | TD230 User Guide - Page 28
TD230 SATA RAID 5 Upgrade (see "Installing or removing the ThinkServer TD230 SATA RAID 5 Upgrade" on page 58) 33 System board battery 34 System fan 3 connector Locating diagnostic LEDs on the system board There are several diagnostic LEDs on the system board to help you diagnose specific problems - Lenovo 102912U | TD230 User Guide - Page 29
board that can be used to configure, recover, or enable/disable specific features of the server system board. Figure 9 "Jumper blocks on the system board" on 2-3 2 J8C1: BMC force update Pins 1-2 Pins 2-3 3 J1A1: BIOS recovery Pins 1-2 Pins 2-3 Description These pins should have a jumper in - Lenovo 102912U | TD230 User Guide - Page 30
hard disk drive backplanes installed in the server model with hot-swap hard disk drives. Figure 10 "Connector locations on the hot-swap hard disk drive backplanes" on page 19 shows the connector locations on the hot-swap hard disk drive backplanes. 18 ThinkServer TD230 Installation and User Guide - Lenovo 102912U | TD230 User Guide - Page 31
signal connector 3 3 Power connector 4 Hot-swap hard disk drive 3 connector 5 Hot-swap hard disk drive 2 connector 6 Power connector 7 Hot-swap hard disk drive 1 connector 8 Hot-swap hard disk drive 0 connector 9 First hot-swap hard disk drive backplane 10 SATA/SAS signal connector 1 11 SATA/SAS - Lenovo 102912U | TD230 User Guide - Page 32
20 ThinkServer TD230 Installation and User Guide - Lenovo 102912U | TD230 User Guide - Page 33
levels of performance. To download firmware updates for your server, do the following: 1. Go to http://www.lenovo.com/support. 2. Click Download & Drivers ➙ ThinkServer and then follow the instructions on the Web page to download firmware updates for your server. • Before you install optional - Lenovo 102912U | TD230 User Guide - Page 34
replace a new part, touch the static-protective package containing the new part to a metal expansion-slot cover or other unpainted metal surface on the server for at least two seconds. This reduces static electricity from the package and your body. 22 ThinkServer TD230 Installation and User Guide - Lenovo 102912U | TD230 User Guide - Page 35
and the Warranty and Support Information on the ThinkServer Documentation DVD that came with your product, and "Guidelines" on page 21. To obtain a copy of the publications, go to: http://www.lenovo.com/support This section provides instructions on how to remove the server cover. Attention: For - Lenovo 102912U | TD230 User Guide - Page 36
and you need to use a tool, for example a screw driver, to loosen the thumbscrews. b. The two thumbscrews are integrated parts of the server cover and they cannot be removed from the server cover. Figure 11. Sliding the server cover to the rear 24 ThinkServer TD230 Installation and User Guide - Lenovo 102912U | TD230 User Guide - Page 37
, go to: http://www.lenovo.com/support This section provides instructions on how to remove and reinstall the front bezel. To remove and reinstall the front bezel, do the following: 1. Remove all media from the drives and turn off all attached devices and the server. Then, disconnect all power - Lenovo 102912U | TD230 User Guide - Page 38
Documentation DVD that came with your product, and "Guidelines" on page 21. To obtain a copy of the publications, go to: http://www.lenovo.com/support This section provides instructions on how to lock or unlock the hard disk drive side door. 26 ThinkServer TD230 Installation and User Guide - Lenovo 102912U | TD230 User Guide - Page 39
cover. If you do so, you must turn off the server, disconnect all power cords, and remove the server cover when you want to replace any hard disk drives, including the hot-swap hard disk drives. To lock or unlock the hard disk drive side door, do the following: 1. Press the blue button 1 to open - Lenovo 102912U | TD230 User Guide - Page 40
2. Rotate the plastic latch of the side door to the closed position. Then, close the side door until it snaps into position. The side door is locked and cannot be opened when you press the blue button. Figure 15. Locking the side door 28 ThinkServer TD230 Installation and User Guide - Lenovo 102912U | TD230 User Guide - Page 41
instructions on how to install or remove a memory module. For a list of the supported memory modules for your server, go to http://www.lenovo.com/thinkserver. On the ThinkServer systems page, click Products ➙ Options ➙ ThinkServer Memory. Memory module installation rules Your server has eight memory - Lenovo 102912U | TD230 User Guide - Page 42
of the publications, go to: http://www.lenovo.com/support This section provides instructions on how to install a memory module. To install a memory module, do the following: 1. Remove all media from the drives and turn off all attached devices and the server. Then, disconnect all power cords from - Lenovo 102912U | TD230 User Guide - Page 43
to "Completing the parts replacement" on page 90. Removing a memory module Attention: Do not open your server or attempt any repair before reading and understanding the Safety Information and the Warranty and Support Information on the ThinkServer Documentation DVD that came with your product, and - Lenovo 102912U | TD230 User Guide - Page 44
event that you later remove the device. An unoccupied drive bay or PCI card slot without cover, shield, filler, or any other protection might impact the EMI integrity and cooling of the server, which might result in overheating or component damage. 32 ThinkServer TD230 Installation and User Guide - Lenovo 102912U | TD230 User Guide - Page 45
• For a list of the supported hard disk drives for your server, go to http://www.lenovo.com/thinkserver. On the ThinkServer systems page, click Products ➙ Options ➙ ThinkServer Hard Drives. Removing the optical drive Attention: Do not open your server or attempt any repair before reading and - Lenovo 102912U | TD230 User Guide - Page 46
of the front of the server. Figure 20. Removing the optical drive 6. Remove the optical drive retainers from both sides of the old optical drive and save them to use when you install a new optical drive. Figure 21. Removing the optical drive retainers 34 ThinkServer TD230 Installation and User Guide - Lenovo 102912U | TD230 User Guide - Page 47
Information on the ThinkServer Documentation DVD that came with your product, and "Guidelines" on page 21. To obtain a copy of the publications, go to: http://www.lenovo.com/support This section provides instructions on how to install the optical drive. To install the optical drive, do the following - Lenovo 102912U | TD230 User Guide - Page 48
retainers on both sides of the new optical drive. Note: Note the orientation of the optical drive retainers and the corresponding holes in both sides of the optical drive when installing the retainers. Figure 22. Installing the optical drive retainers 36 ThinkServer TD230 Installation and User Guide - Lenovo 102912U | TD230 User Guide - Page 49
8. Connect one end of the signal cable 2 to the rear of the new optical drive and the other end to an available SATA connector (SATA connector 5 recommended) on the system board. See "Locating parts on the system board" on page - Lenovo 102912U | TD230 User Guide - Page 50
to remove, install, or replace any hard disk drives. See "Locking or unlocking the hard disk drive side door" on page 26 and "Removing the server cover" on page 23. 1. Press the blue button 1 to open the side door. Figure 25. Opening the side door 38 ThinkServer TD230 Installation and User Guide - Lenovo 102912U | TD230 User Guide - Page 51
2. Locate the hot-swap hard disk drive you want to remove. Then, press the blue release button 1 and rotate the handle of the hard disk drive bracket to the open position. Figure 26. Opening the handle of the hot-swap hard disk drive bracket Chapter 5. Installing, removing, or replacing hardware 39 - Lenovo 102912U | TD230 User Guide - Page 52
3. Grasp the handle 1 and pull the hard disk drive bracket with the hard disk drive out of the drive bay. Figure 27. Removing the hot-swap hard disk drive bracket with the hard disk drive 40 ThinkServer TD230 Installation and User Guide - Lenovo 102912U | TD230 User Guide - Page 53
on the ThinkServer Documentation DVD that came with your product, and "Guidelines" on page 21. To obtain a copy of the publications, go to: http://www.lenovo.com/support This section provides instructions on how to install a hot-swap hard disk drive. This section applies only to server models that - Lenovo 102912U | TD230 User Guide - Page 54
1. Press the blue button 1 to open the side door. Figure 29. Opening the side door 42 ThinkServer TD230 Installation and User Guide - Lenovo 102912U | TD230 User Guide - Page 55
2. Locate a hot-swap hard disk drive bay that you want to install the drive. Then, press the blue release button 1 and rotate the handle of the hard disk drive bracket to the open position. Figure 30. Opening the handle of the hot-swap hard disk drive bracket Chapter 5. Installing, removing, or - Lenovo 102912U | TD230 User Guide - Page 56
cooling of the server, which might result in overheating or component damage. 5. Touch the static-protective package that contains the new hard disk drive to any unpainted metal surface on the server. Then, remove the hard disk drive from the package. 44 ThinkServer TD230 Installation and User Guide - Lenovo 102912U | TD230 User Guide - Page 57
Align the screw holes in both sides of the hard disk drive with the corresponding holes in the hard disk drive bracket. Then, install the four screws to secure the hard disk drive in the bracket. Note: Carefully install the hard disk drive without touching the circuit board on the bottom of the hard - Lenovo 102912U | TD230 User Guide - Page 58
have to reconfigure the disk arrays after you replace hard disk drives. What to do next: • To work with another piece of hardware, go to the appropriate section. • To complete the installation, go to "Completing the parts replacement" on page 90. 46 ThinkServer TD230 Installation and User Guide - Lenovo 102912U | TD230 User Guide - Page 59
on the ThinkServer Documentation DVD that came with your product, and "Guidelines" on page 21. To obtain a copy of the publications, go to: http://www.lenovo.com/support This section provides instructions on how to remove a non-hot-swap hard disk drive. This section applies only to server models - Lenovo 102912U | TD230 User Guide - Page 60
hard disk drive out of the drive bay. Figure 36. Disconnecting cables and sliding the non-hot-swap hard disk drive out 4. Depending on the non-hot-swap hard disk drive is secured in the bracket by screws or plastic retainers, do one of the following: 48 ThinkServer TD230 Installation and User Guide - Lenovo 102912U | TD230 User Guide - Page 61
on the ThinkServer Documentation DVD that came with your product, and "Guidelines" on page 21. To obtain a copy of the publications, go to: http://www.lenovo.com/support This section provides instructions on how to install a non-hot-swap hard disk drive. This section applies only to server models - Lenovo 102912U | TD230 User Guide - Page 62
cords, and remove the server cover when you want to remove, install, or replace any hard disk drives. See "Locking or unlocking the hard disk drive side door" on page 26 and "Removing the server cover" on page 23. Figure 39. Opening the side door 50 ThinkServer TD230 Installation and User Guide - Lenovo 102912U | TD230 User Guide - Page 63
for future use. Note: The EMI integrity and cooling of the server are protected by having all drive bays and PCI card slots covered or occupied. When you install a drive or PCI card, save the EMC shield or drive bay filler from the drive bay or save the PCI card slot cover in the event - Lenovo 102912U | TD230 User Guide - Page 64
in both sides of the hard disk drive with the corresponding holes in the bracket. Then, carefully install the retainers 1 on both sides to secure the hard disk drive in the bracket. Figure 42. Securing the hard disk drive in the bracket by retainers 52 ThinkServer TD230 Installation and User Guide - Lenovo 102912U | TD230 User Guide - Page 65
that the hard disk drive is operating correctly. Note: If the server is configured for RAID operation using a RAID controller, you might have to reconfigure the disk arrays after you replace hard disk drives. Installing or removing a PCI card This section provides instructions on how to install - Lenovo 102912U | TD230 User Guide - Page 66
bracket to cover the place. 6. Touch the static-protective package that contains the new PCI card to any unpainted surface on the outside of the server. Then, remove the new PCI card from the package. Note: Carefully handle the PCI card by its edges. 54 ThinkServer TD230 Installation and User Guide - Lenovo 102912U | TD230 User Guide - Page 67
the Safety Information and the Warranty and Support Information on the ThinkServer Documentation DVD that came with your product, and "Guidelines" on page 21. To obtain a copy of the publications, go to: http://www.lenovo.com/support This section provides instructions on how to remove a PCI card. To - Lenovo 102912U | TD230 User Guide - Page 68
those instructions in addition to the instructions in this section. 1. Remove all media from the drives and turn off all attached devices and the server. Ethernet card This section provides instructions on how to install or remove the Ethernet card. 56 ThinkServer TD230 Installation and User Guide - Lenovo 102912U | TD230 User Guide - Page 69
on the ThinkServer Documentation DVD that came with your product, and "Guidelines" on page 21. To obtain a copy of the publications, go to: http://www.lenovo.com/support This section provides instructions on how to install the Ethernet card and how to install the Ethernet card driver on Windows - Lenovo 102912U | TD230 User Guide - Page 70
instructions on how to install or remove the ThinkServer TD230 SATA RAID 5 Upgrade (hereafter called the RAID 5 key). The RAID 5 key is an activation key, which you can install on the system board to enable the RAID 5 configuration function of the onboard SATA RAID for your server. Installing - Lenovo 102912U | TD230 User Guide - Page 71
http://www.lenovo.com/support This section provides instructions on how to remove the RAID 5 key from the system board. If you remove the RAID 5 key, the RAID 5 configuration function of the onboard SATA RAID becomes unavailable. However, the RAID 5 configuration function of the ThinkServer 9240-8i - Lenovo 102912U | TD230 User Guide - Page 72
following procedure at an ESD-safe workstation. 1. Remove all media from the drives and turn off all attached devices and the server. Then, disconnect all power cords from electrical outlets and disconnect all cables that are connected to the server. 60 ThinkServer TD230 Installation and User Guide - Lenovo 102912U | TD230 User Guide - Page 73
, go to: http://www.lenovo.com/support This section provides instructions on how to remove the 9240-8i RAID 5 key from the ThinkServer 9240-8i RAID 0/1 Adapter. If you remove the 9240-8i RAID 5 key, the RAID 5 configuration function of the ThinkServer 9240-8i RAID 0/1 Adapter becomes unavailable - Lenovo 102912U | TD230 User Guide - Page 74
90. Installing or removing the ThinkServer Remote Management Module 3 This section provides product information about the ThinkServer Remote Management Module 3 (hereafter called the RMM3) and instructions on how to install or remove the RMM3 option. 62 ThinkServer TD230 Installation and User Guide - Lenovo 102912U | TD230 User Guide - Page 75
and the Warranty and Support Information on the ThinkServer Documentation DVD that came with your product, and "Guidelines" on page 21. To obtain a copy of the publications, go to: http://www.lenovo.com/support This section provides instructions on how to install the RMM3 in your server. You can get - Lenovo 102912U | TD230 User Guide - Page 76
the static-protective package that contains the RMM3 to any unpainted surface on the outside of the server. Then, remove the RMM3 from the package. 7. Make a note of the Media Access Controller eliminate the needs to reopen the server cover later. 64 ThinkServer TD230 Installation and User Guide - Lenovo 102912U | TD230 User Guide - Page 77
8. Attach the RMM3 to the slot bracket that came with the option package so that the two screw holes in the slot bracket are aligned with the corresponding holes in the RMM3. Then, install the two screws that came with the option package to secure the RMM3 to the slot bracket. Notes: a. There are - Lenovo 102912U | TD230 User Guide - Page 78
RMM3 in place by installing the screw that you have removed in step 5 on page 64. Figure 53. Installing the slot bracket with RMM3 66 ThinkServer TD230 Installation and User Guide - Lenovo 102912U | TD230 User Guide - Page 79
on the ThinkServer Documentation DVD that came with your product, and "Guidelines" on page 21. To obtain a copy of the publications, go to: http://www.lenovo.com/support This section provides instructions on how to remove the RMM3. If you have installed a RMM3 option in your server, you can - Lenovo 102912U | TD230 User Guide - Page 80
package. If necessary, disconnect the ribbon cable from the RMM3. 6. If you are instructed to return the removed RMM3 kit to the manufacturer, follow all packaging instructions and use any packaging materials that are supplied to you for shipping. 68 ThinkServer TD230 Installation and User Guide - Lenovo 102912U | TD230 User Guide - Page 81
-8i RAID 0/1 Adapter This section provides instructions on how to remove or install the ThinkServer 9240-8i RAID 0/1 Adapter (hereafter called the RAID card). Note: This section only applies to server models with hot-swap hard disk drives. Removing the RAID card Attention: Do not open your server or - Lenovo 102912U | TD230 User Guide - Page 82
21. To obtain a copy of the publications, go to: http://www.lenovo.com/support This section provides instructions on how to install the RAID card. Note: This section only applies to server models with hot-swap hard disk drives. To install the RAID card, do the following: 1. Remove all media from the - Lenovo 102912U | TD230 User Guide - Page 83
the Safety Information and the Warranty and Support Information on the ThinkServer Documentation DVD that came with your product, and "Guidelines" on page 21. To obtain a copy of the publications, go to: http://www.lenovo.com/support This section provides instructions on how to remove the heat sink - Lenovo 102912U | TD230 User Guide - Page 84
in the server, there will also be a heat sink and fan assembly installed above the second microprocessor. 4. Lay the server on its side for easier operation. 5. Depending on which heat sink and fan assembly you are removing, do one of the following: 72 ThinkServer TD230 Installation and User Guide - Lenovo 102912U | TD230 User Guide - Page 85
• If you are removing the heat sink and fan assembly for microprocessor 1, disconnect the heat sink and fan assembly cable from the system fan 2 connector on the system board. See "Locating parts on the system board" on page 15. Then, remove the four screws 1 that secure the heat sink and fan - Lenovo 102912U | TD230 User Guide - Page 86
bottom of it. Figure 59. Heat sink and fan assembly 7. If you are instructed to return the removed heat sink and fan assembly to the manufacturer, follow all packaging instructions and use any packaging materials that are supplied to you for shipping. 74 ThinkServer TD230 Installation and User Guide - Lenovo 102912U | TD230 User Guide - Page 87
the Safety Information and the Warranty and Support Information on the ThinkServer Documentation DVD that came with your product, and "Guidelines" on page 21. To obtain a copy of the publications, go to: http://www.lenovo.com/support This section provides instructions on how to install the heat sink - Lenovo 102912U | TD230 User Guide - Page 88
surface on the outside of the server. Then, remove the heat sink and fan assembly from the package. Note: When handling the heat sink and fan assembly, do not touch the thermal grease 1 on the bottom of it. Figure 60. Heat sink and fan assembly 76 ThinkServer TD230 Installation and User Guide - Lenovo 102912U | TD230 User Guide - Page 89
to the appropriate section. • To complete the installation, go to "Completing the parts replacement" on page 90. Removing or installing a front fan This section provides instructions on how to remove or install a front fan. Chapter 5. Installing, removing, or replacing hardware 77 - Lenovo 102912U | TD230 User Guide - Page 90
: http://www.lenovo.com/support This section provides instructions on how to remove a front fan. DANGER Hazardous moving parts. Keep fingers and other body parts away. To remove a front fan, do the following: 1. Remove all media from the drives and turn off all attached devices and the server. Then - Lenovo 102912U | TD230 User Guide - Page 91
the Safety Information and the Warranty and Support Information on the ThinkServer Documentation DVD that came with your product, and "Guidelines" on page 21. To obtain a copy of the publications, go to: http://www.lenovo.com/support This section provides instructions on how to install a front fan - Lenovo 102912U | TD230 User Guide - Page 92
that are connected to the server. 2. Remove the server cover. See "Removing the server cover" on page 23. 3. Remove the hard disk drives. See "Removing a hot-swap hard disk drive" on page 38 or "Removing a non-hot-swap hard disk drive" on page 47. 80 ThinkServer TD230 Installation and User Guide - Lenovo 102912U | TD230 User Guide - Page 93
new rubber mounts attached. b. If two microprocessors are installed in your server, you can install two front fans, one for microprocessor 1 and 6. Reinstall all hard disk drives. See "Installing a hot-swap hard disk drive" on page 41 or "Installing a non-hot-swap hard disk drive" on page 49. What - Lenovo 102912U | TD230 User Guide - Page 94
http://www.lenovo.com/support This section provides instructions on how to remove the rear fan. DANGER Hazardous moving parts. Keep fingers and other body parts away. To remove the rear fan, do the following: 1. Remove all media from the drives and turn off all attached devices and the server. Then - Lenovo 102912U | TD230 User Guide - Page 95
the Safety Information and the Warranty and Support Information on the ThinkServer Documentation DVD that came with your product, and "Guidelines" on page 21. To obtain a copy of the publications, go to: http://www.lenovo.com/support This section provides instructions on how to install the rear fan - Lenovo 102912U | TD230 User Guide - Page 96
the drives and turn off all attached devices and the server. Then, disconnect all power cords from electrical outlets and disconnect all cables that are connected to the server. 2. Remove the server cover. See "Removing the server cover" on page 23. 84 ThinkServer TD230 Installation and User Guide - Lenovo 102912U | TD230 User Guide - Page 97
3. Place the rear fan on the chassis so that the four rubber mounts are aligned with the corresponding holes in the chassis. Then, push the rubber mounts through the holes. Notes: a. The new rear fan will have four new rubber mounts attached. b. You might also need to pull the rubber mounts through - Lenovo 102912U | TD230 User Guide - Page 98
the edges of the microprocessor. Figure 67. Removing the microprocessor 6. If you are instructed to return the microprocessor to the manufacturer, follow all packaging instructions and use any packaging materials that are supplied to you for shipping. 86 ThinkServer TD230 Installation and User Guide - Lenovo 102912U | TD230 User Guide - Page 99
Support Information on the ThinkServer Documentation DVD that came with your product, and "Guidelines" on page 21. To obtain a copy of the publications, go to: http://www.lenovo.com/support This section provides instructions from the drives and turn off all attached devices and the server. Then, - Lenovo 102912U | TD230 User Guide - Page 100
the microprocessor socket cover 8. Remove the new microprocessor from the protective cover that protects the gold contacts on the bottom of the new microprocessor. 88 ThinkServer TD230 Installation and User Guide - Lenovo 102912U | TD230 User Guide - Page 101
on the ThinkServer Documentation DVD that came with your product, and "Guidelines" on page 21. To obtain a copy of the publications, go to: http://www.lenovo.com/support This section provides instructions on how to replace the system board battery. Your server has a special type of memory that - Lenovo 102912U | TD230 User Guide - Page 102
drives and turn off all attached devices and the server. server. See Chapter 6 "Configuring the server" on page 95. Completing the parts replacement This section provides instructions to help you complete the parts replacement and turn on your server. 90 ThinkServer TD230 Installation and User Guide - Lenovo 102912U | TD230 User Guide - Page 103
the parts replacement, you must reinstall the server cover, reconnect all the cables and, for some devices, run the Setup Utility program to do further setup. Installing the server cover This section provides instructions on how to install the server cover. Attention: For proper cooling and airflow - Lenovo 102912U | TD230 User Guide - Page 104
the Safety Information on the ThinkServer Documentation DVD that comes with your product, and "Guidelines" on page 21. To obtain a copy of the publications, go to: http://www.lenovo.com/support 2. Turn off the server and all attached devices. 92 ThinkServer TD230 Installation and User Guide - Lenovo 102912U | TD230 User Guide - Page 105
3. Follow the instructions that come with the device to prepare it for installation and to connect it to the server. Chapter 5. Installing, removing, or replacing hardware 93 - Lenovo 102912U | TD230 User Guide - Page 106
94 ThinkServer TD230 Installation and User Guide - Lenovo 102912U | TD230 User Guide - Page 107
the MegaRAID SAS Software User Guide on the ThinkServer Documentation DVD that came with you server. The following table lists the different server configurations and the applications that are available for configuring and managing RAID arrays. Table 9. Server configurations and applications for - Lenovo 102912U | TD230 User Guide - Page 108
to review the POST process and information. 3. The Setup server system management parameters. See Table 22 "Items under the Server Management menu" on page 100. Set the boot parameters. See Table 23 "Items under the Boot Options menu" on page 101. 96 ThinkServer TD230 Installation and User Guide - Lenovo 102912U | TD230 User Guide - Page 109
are the default settings in the Setup Utility program. Description Enable or disable the feature to show OEM Logo during the POST. Pause or not when boot error page 98. Memory Configuration Enter the submenu to see all the options. See Table 14 "Submenus under the Memory Configuration" on server 97 - Lenovo 102912U | TD230 User Guide - Page 110
server supports Setup memory capacity. Current configuration is the most effective mode. View the memory speed information. Enter the submenu to see all the options. See Table 15 "Submenus under the Memory RAS and Performance Configuration" on page 99. 98 ThinkServer TD230 Installation and User Guide - Lenovo 102912U | TD230 User Guide - Page 111
memory modules. NUMA Optimized Disabled / [Enabled] Whether the BIOS contains the ACPI configuration form required by NUMA OS. Note: The settings in [ ] are the default settings in the Setup RAID Note: The settings in [ ] are the default settings in the Setup in the Setup Utility program. Support - Lenovo 102912U | TD230 User Guide - Page 112
] / Last state / Reset Clear System Event Log [Disabled] / Enabled Description If the power is interrupted when the server is on, after the power resumes, the server will restart automatically, or keep the off state, or resume to the last state. 100 ThinkServer TD230 Installation and User Guide - Lenovo 102912U | TD230 User Guide - Page 113
to the default settings, press F9 or select Exit ➙ Load Default Values. Using passwords By using the Setup Utility program, you can set a password to prevent unauthorized access to your server and data. The following options are available to help you set an administrator password or a user password - Lenovo 102912U | TD230 User Guide - Page 114
7) alphabetic and numeric characters. For more information, see "Password considerations" on page 102. RAID controllers The following table lists the various utilities available to configure RAID controllers before an operating system is installed. 102 ThinkServer TD230 Installation and User Guide - Lenovo 102912U | TD230 User Guide - Page 115
page 103 "Configuring the onboard SATA software RAID" on page 106 Refer to the MegaRAID SAS Software User Guide on the ThinkServer Documentation DVD that came with you server or download the publication from the Lenovo Support Web site at http://www.lenovo. com/support. And you can find and install - Lenovo 102912U | TD230 User Guide - Page 116
EasyStartup program • Use a shortcut to configure RAID controllers based on a RAID response file that you previously created using the EasyStartup program If you continue to the main program interface, you will have the following selectable options: 104 ThinkServer TD230 Installation and User Guide - Lenovo 102912U | TD230 User Guide - Page 117
arrays with or without hot-spare hard disk drives. As you configure each controller you will be given the option to save the RAID configuration settings to a RAID response file, which you can use on other similarly configured Lenovo servers. This method satisfies most users' needs. Typical operating - Lenovo 102912U | TD230 User Guide - Page 118
, however, you cannot select the capacity of the array. • New Configuration: If you use this method to create a RAID array, the existing RAID array will be deleted. You can select both the stripe size and the array capacity for the new RAID array. 106 ThinkServer TD230 Installation and User Guide - Lenovo 102912U | TD230 User Guide - Page 119
disk drive number]. For example, ONLIN A1-3 denotes the number 3 hard disk drive in array 1. 4. After you finish selecting the physical drives, press are creating a RAID volume by using the New Configuration option, you can also set the volume capacity. 9. Follow the instructions on the screen to - Lenovo 102912U | TD230 User Guide - Page 120
volume. Note: Only the RAID 1 volume can be selected. If you select other RAID volume, for example RAID 0, a message will be displayed, showing this volume cannot be selected. 3. Press F10. When prompted, select Yes to start checking the consistency. 108 ThinkServer TD230 Installation and User Guide - Lenovo 102912U | TD230 User Guide - Page 121
outages. Firmware Updater updates the server system and adapter firmware. To update your system, do the following: 1. Go to http://www.lenovo.com/support. 2. Click Download & Drivers ➙ ThinkServer and then follow the instructions on the Web page to download the ISO image for the EasyUpdate - Lenovo 102912U | TD230 User Guide - Page 122
disk drives) in the server, you must reflash the BIOS, the BMC firmware, and the FRU/SDR. 2. After updating the BIOS, all the BIOS settings become the default settings of the updated BIOS version. You need to check and reconfigure the BIOS settings for your specific needs. Installing the ThinkServer - Lenovo 102912U | TD230 User Guide - Page 123
device and the server is not working, complete the following steps before you use the troubleshooting tables: 1. Check the operator information panel. 2. Remove the software or device that you just added. 3. Reinstall the new software or new device. DVD drive problems • Follow the suggested - Lenovo 102912U | TD230 User Guide - Page 124
Manual to determine which components are customer replaceable units (CRUs) and which components are field replaceable units (FRUs). • If an action step is preceded by "(Trained service technician only)," that step must be performed only by a trained service technician. 112 ThinkServer TD230 - Lenovo 102912U | TD230 User Guide - Page 125
, in the order shown, restarting the server each time: a. Mouse or pointing device b. (Trained service technician only) System board Memory problems • Follow the suggested actions in the order in which they are listed in the Action column until the problem is solved. Chapter 7. Troubleshooting 113 - Lenovo 102912U | TD230 User Guide - Page 126
If you changed the memory, you updated the memory configuration in the Setup Utility program. • All banks of memory are enabled. The server might have automatically disabled a memory bank when it detected a problem, or a memory bank might have been manually disabled. 2. Check the POST event log for - Lenovo 102912U | TD230 User Guide - Page 127
Symptom The server emits a continuous beep during the POST, indicating that the startup (boot) microprocessor is not working correctly. Action 1. Make sure that the server supports all the microprocessors and that the microprocessors match in speed and cache size. 2. (Trained service technician - Lenovo 102912U | TD230 User Guide - Page 128
• You updated the configuration information in the Setup Utility program. Whenever memory or any other device is changed, you must update the configuration. 2. Reseat the device that you just installed. 3. Replace the device that you just installed. 116 ThinkServer TD230 Installation and User Guide - Lenovo 102912U | TD230 User Guide - Page 129
Manual to determine which components are customer replaceable units (CRUs) and which components are field replaceable units (FRUs). • If an action step is preceded by "(Trained service technician only)," that step must be performed only by a trained service technician. Chapter 7. Troubleshooting - Lenovo 102912U | TD230 User Guide - Page 130
an ACPI-aware operating system, suspect the system board. See "Solving undetermined problems" on page 121. Serial port problems • Follow the suggested actions in the order in which they are listed in the Action column until the problem is solved. 118 ThinkServer TD230 Installation and User Guide - Lenovo 102912U | TD230 User Guide - Page 131
be performed only by a trained service technician. Symptom You suspect a software problem. Action 1. To determine whether the problem is caused by the software, make sure that: • The server has the minimum memory that is needed to use the software. For memory requirements, see the information that - Lenovo 102912U | TD230 User Guide - Page 132
is installed correctly. - The cable must be securely attached at all connections. If the cable is attached but the problem remains, try a different cable. - If the Ethernet controller is set to operate at 100 Mbps, you must use Category 5 cabling. 120 ThinkServer TD230 Installation and User Guide - Lenovo 102912U | TD230 User Guide - Page 133
drivers are installed. • Check for operating-system-specific causes of the problem. • Make sure that the device drivers on the client and server are device (on the server) • Modem, printer, mouse, and non-Lenovo devices • Each adapter • Hard disk drives • Memory modules: the minimum configuration - Lenovo 102912U | TD230 User Guide - Page 134
error is logged to the SEL. The POST Error Pause option setting in the BIOS setup determines whether the system pauses to the code. The system cannot boot unless the error is resolved. The user must replace the faulty part and restart the system. 122 ThinkServer TD230 Installation and User Guide - Lenovo 102912U | TD230 User Guide - Page 135
the front panel and the system board Identifying the diagnostic LEDs on the front panel and the system board is a very important method for diagnosing server problems. See "Front view" on page 9 and "Locating diagnostic LEDs on the system board" on page 16 for detailed information. Chapter - Lenovo 102912U | TD230 User Guide - Page 136
124 ThinkServer TD230 Installation and User Guide - Lenovo 102912U | TD230 User Guide - Page 137
maintains pages on the World Wide Web where you can get the latest technical information and download device drivers and updates. To access these pages, go to http://www.lenovo.com/support and follow the instructions. Getting help and information from the World Wide Web On the World Wide Web, the - Lenovo 102912U | TD230 User Guide - Page 138
and Drivers Warranty Technical Support ThinkVantage Lenovo Forums User Guides & Manuals Download drivers, flash BIOS, and update your software. Check your warranty status and upgrade your warranty. Click Need Help? for self-help tips to help diagnose a problem. Learn more about ThinkVantage - Lenovo 102912U | TD230 User Guide - Page 139
. To determine whether your computer is eligible for International Warranty Service and to view a list of the countries where service is available, go to http://www.lenovo.com/support, click Warranty, and follow the instructions on the screen. For technical assistance with the installation of, or - Lenovo 102912U | TD230 User Guide - Page 140
128 ThinkServer TD230 Installation and User Guide - Lenovo 102912U | TD230 User Guide - Page 141
the operation of any other product, program, or service. Lenovo may have patents or pending patent applications covering support applications where malfunction may result in injury or death to persons. The information contained in this document does not affect or change Lenovo product specifications - Lenovo 102912U | TD230 User Guide - Page 142
bays with the largest currently supported drives that are available from Lenovo. Maximum memory might require replacement of the standard memory with an optional memory module. Lenovo makes no representation or warranties regarding non-Lenovo products and services, including but not limited to the - Lenovo 102912U | TD230 User Guide - Page 143
sobre las ofertas de reciclado de productos de Lenovo en el sitio web de Lenovo http://www.lenovo.com/lenovo/environment/recycling. EU Only Notice: This mark damage that might cause the server to malfunction or cease functioning altogether. This specification sets forth limits for particulates and - Lenovo 102912U | TD230 User Guide - Page 144
lithium or lithium ion battery. Consult your user manual or service manual for specific battery information. The battery must be recycled or to http://www.lenovo.com/lenovo/environment or contact your local waste disposal facility. US & Canada Only 132 ThinkServer TD230 Installation and User Guide - Lenovo 102912U | TD230 User Guide - Page 145
.com/lenovo/environment. For California: Perchlorate material - special handling may apply. See http://www.dtsc.ca.gov/hazardouswaste/perchlorate/. The foregoing notice is provided in accordance with California Code of Regulations Title 22, Division 4.5 Chapter 33. Best Management Practices for - Lenovo 102912U | TD230 User Guide - Page 146
following information applies to Lenovo ThinkServer TD230 server machine types 1027, 1029, 1039, and 1040 if not installed and used in accordance with the instruction manual, may cause harmful interference to radio communications. Operation of . 134 ThinkServer TD230 Installation and User Guide - Lenovo 102912U | TD230 User Guide - Page 147
für die Konformitätserklärung nach Paragraf 5 des EMVG ist die Lenovo (Deutschland) GmbH, Gropiusplatz 10, D-70563 Stuttgart. Informationen in Hinsicht besonderer Genehmigung des Bundesministers für Post und Telekommunikation oder des Bundesamtes für Post und Telekommunikation betrieben werden. Die - Lenovo 102912U | TD230 User Guide - Page 148
which connect to the power mains with rated current less than or equal to 20 A per phase China Class A compliance statement Taiwan Class A compliance statement Lenovo product service information for Taiwan 136 ThinkServer TD230 Installation and User Guide - Lenovo 102912U | TD230 User Guide - Page 149
Lenovo 2010, 2011 drive bays, internal 32 drives hot-swap, removing 38 non-hot-swap, removing 47 DVD drive problems 111 error symptoms 111 E EasyStartup using 103 error symptoms CD-ROM drive, DVD-ROM drive 111 general 112 hard disk drive 112 intermittent 112 keyboard, non-USB 113 memory 113 - Lenovo 102912U | TD230 User Guide - Page 150
or SATA hard disk drive 49 optical drive 35 PCI card 54 RAID 5 key 58 RAID card 70 rear fan 83 RMM3 63 server cover 91 integrated functions 7 intermittent problems 112 internal drives installing 32 removing 32 138 ThinkServer TD230 Installation and User Guide K keyboard problems 113 L LEDs rear of - Lenovo 102912U | TD230 User Guide - Page 151
91 removing 23 server cover, reinstalling 90 serviceability 7 Setup Utility program starting 95 using 95 Setup Utility program, exiting 101 size 7 software problems 119 specifications 5 starting Setup Utility program 95 statements and notices 1 static-sensitive devices, handling 22 support, Web site - Lenovo 102912U | TD230 User Guide - Page 152
passwords 101 Setup Utility program 95 V VGA monitor connector 13 video problems 115 video controller, integrated specifications 6 W Web site compatible options 29 Lenovo support 21 publication ordering 125 support 125 working inside the server with the power on 23 140 ThinkServer TD230 Installation - Lenovo 102912U | TD230 User Guide - Page 153
- Lenovo 102912U | TD230 User Guide - Page 154
-
 1
1 -
 2
2 -
 3
3 -
 4
4 -
 5
5 -
 6
6 -
 7
7 -
8
-
9
-
10
-
11
-
12
-
13
-
14
-
15
-
16
-
17
-
18
-
19
-
20
-
21
-
22
-
23
-
24
-
25
-
26
-
27
-
28
-
29
-
30
-
31
-
32
-
33
-
34
-
35
-
36
-
37
-
38
-
39
-
40
-
41
-
42
-
43
-
44
-
45
-
46
-
47
-
48
-
49
-
50
-
51
-
52
-
53
-
54
-
55
-
56
-
57
-
58
-
59
-
60
-
61
-
62
-
63
-
64
-
65
-
66
-
67
-
68
-
69
-
70
-
71
-
72
-
73
-
74
-
75
-
76
-
77
-
78
-
79
-
80
-
81
-
82
-
83
-
84
-
85
-
86
-
87
-
88
-
89
-
90
-
91
-
92
-
93
-
94
-
95
-
96
-
97
-
98
-
99
-
100
-
101
-
102
-
103
-
104
-
105
-
106
-
107
-
108
-
109
-
110
-
111
-
112
-
113
-
114
-
115
-
116
-
117
-
118
-
119
-
120
-
121
-
122
-
123
-
124
-
125
-
126
-
127
-
128
-
129
-
130
-
131
-
132
-
133
-
134
-
135
-
136
-
137
-
138
-
139
-
140
-
141
-
142
-
143
-
144
-
145
-
146
-
147
-
148
-
149
-
150
-
151
-
152
-
153
-
154
 |
 |

ThinkServer TD230
Installation and User Guide
Machine Types:
1027, 1029, 1039, and 1040