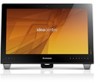
Lenovo B540 Lenovo IdeaCentre B3/B5 Series User Guide
Lenovo B540 Manual
 |
View all Lenovo B540 manuals
Add to My Manuals
Save this manual to your list of manuals |
Lenovo B540 manual content summary:
- Lenovo B540 | Lenovo IdeaCentre B3/B5 Series User Guide - Page 1
Machine type: 10097/2566 [B340] 10099/2568 [B540] 10101/3363 [B540p] 10098/2567 [B345] 10100/4749 [B545] Lenovo IdeaCentre B3/B5 Series User Guide Version 1.0 2012.02 31501557 - Lenovo B540 | Lenovo IdeaCentre B3/B5 Series User Guide - Page 2
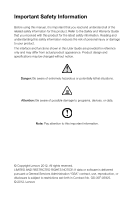
manual, it is important that you read and understand all of the related safety information for this product. Refer to the Safety and Warranty Guide of possible damage to programs, devices, or data. Note: Pay attention to this important information. © Copyright Lenovo 2012. All rights reserved. - Lenovo B540 | Lenovo IdeaCentre B3/B5 Series User Guide - Page 3
- Lenovo B540 | Lenovo IdeaCentre B3/B5 Series User Guide - Page 4
(selected models only 10 Chapter 2 Touch screen user instruction 11 2.1 Touch Screen Calibration 12 2.2 User Gesture Instructions for the Touch screen 12 2.3 Attentions when using the Touch Screen 20 Chapter 3 Using the Onekey TV (selected models only)..... 23 3.1 Guide to the remote control - Lenovo B540 | Lenovo IdeaCentre B3/B5 Series User Guide - Page 5
38 4.5 System Recovery 38 4.6 Create Recovery Disc 38 Chapter 5 Troubleshooting and Confirming Setup 39 5.1 Troubleshooting Display Problems 40 5.2 Troubleshooting Audio Problems 41 5.3 Troubleshooting Software Problems 41 5.4 Troubleshooting Problems with Optical Drives and Hard Disks 42 - Lenovo B540 | Lenovo IdeaCentre B3/B5 Series User Guide - Page 6
connections Note: The descriptions in this chapter 3 might be different from what you see on your computer, depending on the computer models and configurations. 4 5 6 User Guide 1 - Lenovo B540 | Lenovo IdeaCentre B3/B5 Series User Guide - Page 7
can cause overheating. 12 34 5 6 7 8 9 10 11 12 13 14 Built-in microphone area Built-in IR Emitter(do not block) (selected models only) Bluetooth status indicator TV indicator Volume up Brightness up PC mode / HDMI-in / AV-in switch Camera Hard Disk Drive Indicator WIFI status indicator - Lenovo B540 | Lenovo IdeaCentre B3/B5 Series User Guide - Page 8
1.2 Left and right view of the computer 1 3 4 5 6 2 7 8 Optical drive TV buttons (selected models only) USB connector Headphone port Microphone port USB connector Memory card reader Power button User Guide 3 - Lenovo B540 | Lenovo IdeaCentre B3/B5 Series User Guide - Page 9
1.3 Rear view of the computer 8 7 8 6 1 2 34 5 Ethernet port USB connectors HDMI-out connector HDMI-in connector (selected models only) AV-IN connectors (selected models only) TV tuner ports (selected models only) Power connector Air vents (do not block) 4 User Guide - Lenovo B540 | Lenovo IdeaCentre B3/B5 Series User Guide - Page 10
1.4 TV button instructions (selected models only) 1 2 3 4 5 6 7 Channel up Channel down Volume up Volume down TV mode menu button Signal source selection button TV power On/Off User Guide 5 - Lenovo B540 | Lenovo IdeaCentre B3/B5 Series User Guide - Page 11
1.5 Computer stand Use the stand to position the display to your preference. It can be rotated between 15º and 40º from the vertical. Attention: 1. The computer stand must remain is at least 15 degrees from the vertical; otherwise the computer will be unstable and could fall over. 6 User Guide - Lenovo B540 | Lenovo IdeaCentre B3/B5 Series User Guide - Page 12
on your display or TV. Connects to an external antenna to view programs using the optional TV tuner card. Connects to the composite audio and video connectors on your video device. Note: If your computer is equipped with a wireless keyboard or mouse, follow the installation instructions for those - Lenovo B540 | Lenovo IdeaCentre B3/B5 Series User Guide - Page 13
1.6.2 Connecting the power cord Connect the power cord properly to grounded electrical outlets. 1.7 Important information about using the computer Press the power button on the side of the computer to turn on the computer. 8 User Guide - Lenovo B540 | Lenovo IdeaCentre B3/B5 Series User Guide - Page 14
Note: The buttons at the bottom of the screen are touch buttons. When you touch these, the indicator lights turn on. Hold the computer tightly when you carry it. User Guide 9 - Lenovo B540 | Lenovo IdeaCentre B3/B5 Series User Guide - Page 15
Windows compatible software, specially configured to run on this model of computer. F2 -- Your computer has the Lenovo Rescue System installed. To learn more about this program, repeatedly press and release the F2 key once turning on the computer until the Lenovo Rescue System open. 10 User Guide - Lenovo B540 | Lenovo IdeaCentre B3/B5 Series User Guide - Page 16
Chapter Touch screen user instruction 1 This chapter contains the following topics: 2 Touch Screen Calibration User Gesture Instructions for the Touch screen Attentions when using the Touch Screen 3 Attention: Only some selected models are equipped with touch screens. 4 5 6 User Guide - Lenovo B540 | Lenovo IdeaCentre B3/B5 Series User Guide - Page 17
"Hardware and Sound". 3. In "Hardware and Sound" window, select "Tablet PC Settings". 4. In "Tablet PC Settings" dialogue, click "Calibrate" button. 2.2 User Gesture Instructions for the Touch screen The Touch screen supports single touch and rotational movements, enlargement and reduction multi - Lenovo B540 | Lenovo IdeaCentre B3/B5 Series User Guide - Page 18
2. Single Finger Right Click For the item selected on the touch screen, press and hold your finger on the screen until a circle appears. After lifting your finger from the touch screen, a menu bar will pop up, completing the single finger right click operation. This is similar to the action - Lenovo B540 | Lenovo IdeaCentre B3/B5 Series User Guide - Page 19
desired item and hold it there, then touch another finger anywhere nearby on the screen and quickly lift it up again, to click menu or perform related operations. 12 4. Dragging Movement First touch your finger on the desired item on the screen and hold it there, then make a dragging movement. This - Lenovo B540 | Lenovo IdeaCentre B3/B5 Series User Guide - Page 20
operations for the IE browser; or Previous and Next slide operations in Windows Photo Viewer slideshow mode. about 5 FP 6. Rolling Movement When you move your finger one time vertically (or horizontally) on the touch screen, this is called a Rolling Operation. For example: This operation is similar - Lenovo B540 | Lenovo IdeaCentre B3/B5 Series User Guide - Page 21
you can enlarge or reduce the picture size in Windows Photo Viewer. 8. Rotation Operation Use two figures to touch the desired item on the touch screen, then rotate them in the desired direction. For example: you can rotate the picture which is being displayed in Windows Photo Viewer. 16 User Guide - Lenovo B540 | Lenovo IdeaCentre B3/B5 Series User Guide - Page 22
2.2.2 Related Touch Screen Settings 1. Flicks: In the notification area of the taskbar at the bottom of the screen, click on the Flicks icon, and the current Flicks window will appear. Click once anywhere in this window to enter Flicks Training. The user can perform operations according to the - Lenovo B540 | Lenovo IdeaCentre B3/B5 Series User Guide - Page 23
" in the Flicks pop-up window. In the "Pen and Touch" window, the user can adjust more settings related to "Pen and Touch" according to their specific preferences. On the Flicksmenu you can: • Select commonly used Flicks operation groups • Adjust the sensitivity of the touch screen 18 User Guide - Lenovo B540 | Lenovo IdeaCentre B3/B5 Series User Guide - Page 24
options such as "Use your finger as an input device" and "Enable multi-touch gestures and inking". • Select touch actions which you wish to adjust. By clicking on Enable / disable touch Pointer. Note: Users can access more help information from the Windows "Help and Support" menu. User Guide 19 - Lenovo B540 | Lenovo IdeaCentre B3/B5 Series User Guide - Page 25
to affect the precision of positioning on the touch screen, please avoid handling or touching the glass frame of the touch screen by your hands when you are carrying out touching operations. 4. To ensure the safety of users, please clean the screen and frame with a soft cotton cloth after turning - Lenovo B540 | Lenovo IdeaCentre B3/B5 Series User Guide - Page 26
. Note: To learn accurate hand gesture operations, the user can consult this manual and also the related Windows help content. 8. The touch screen does not function in Rescue System mode. 9. The touch screen also does not function during the startup process, and in Sleep mode or Safe mode. User - Lenovo B540 | Lenovo IdeaCentre B3/B5 Series User Guide - Page 27
22 User Guide - Lenovo B540 | Lenovo IdeaCentre B3/B5 Series User Guide - Page 28
Using the Onekey TV Chapter (selected models only) This chapter contains the following 1 topics: Ø Guide to the remote control Ø Onekey TV Instructions (ASTC model) 2 Ø Onekey TV Instructions (DVB-T model) Ø Onekey TV Instructions (ATV model) 3 4 5 6 User Guide 23 - Lenovo B540 | Lenovo IdeaCentre B3/B5 Series User Guide - Page 29
To turn on the Onekey TV Press the power button on the side of the computer or remote control to turn on the TV. To turn on the computer Press the power button on the side of the computer to turn on the computer. 24 User Guide - Lenovo B540 | Lenovo IdeaCentre B3/B5 Series User Guide - Page 30
3.1 Guide to the remote control (selected models only) Notes: 1. The remote control can only turn on the Onekey TV, it cannot turn on the computer. 2. Use the remote control within 23 feet of the TV. 3. The color and shape may vary depending on the model. User Guide 25 - Lenovo B540 | Lenovo IdeaCentre B3/B5 Series User Guide - Page 31
to directly access channels. Display the main on-screen menu. Return to the previous menu. Adjust the volume. Turn the TV sound off. Change channels. Freeze the screen. C.C. : Control the caption decoder. (ATSC) SUB : Display digital subtitles. (DVB-T) Not available on ATV models. 26 User Guide - Lenovo B540 | Lenovo IdeaCentre B3/B5 Series User Guide - Page 32
to automatic page update. Press repeatedly to display the upper part of the teletext screen, then the lower part, and then to return to full screen. Note: These buttons are usable with TV Tuner cards installed and in countries that support Teletext functions only. Press to reveal hidden words - Lenovo B540 | Lenovo IdeaCentre B3/B5 Series User Guide - Page 33
ASTC model) (selected models only) Notes: 1. The interface and functions shown in the instructions below are for reference only. 2. The touch function cannot be used in Onekey TV mode. 3. You must be in TV mode to the MENU button on the remote control, then select Setup → Language. 28 User Guide - Lenovo B540 | Lenovo IdeaCentre B3/B5 Series User Guide - Page 34
and sub-picture. Record TV The Onekey TV must be turned off in order to use the recording function. Once it is turned off, use Windows Media Center or the Total Media software in PC mode to record TV programs. User - Lenovo B540 | Lenovo IdeaCentre B3/B5 Series User Guide - Page 35
DVB-T model) (selected models only) Notes: 1. The interface and functions shown in the instructions below are for reference only. 2. The touch function cannot be used in Onekey TV mode. 3. You must be in TV mode to is locked using the Child Lock function, press the button to unlock it. 30 User Guide - Lenovo B540 | Lenovo IdeaCentre B3/B5 Series User Guide - Page 36
-picture. Note: When in PIP mode, press the button on the remote control to alternate the video between the main picture and sub-picture. User Guide 31 - Lenovo B540 | Lenovo IdeaCentre B3/B5 Series User Guide - Page 37
set a new password. Record TV The Onekey TV must be turned off in order to use the recording function. Once it is turned off, use Windows Media Center or the Total Media software in PC mode to record TV programs. 32 User - Lenovo B540 | Lenovo IdeaCentre B3/B5 Series User Guide - Page 38
models only) Notes: 1. The interface and functions shown in the instructions below are for reference only. 2. The touch function cannot be used in Onekey TV mode. 3. You must be on the remote control, then select Setup → Manual Scan to scan for channels and store them in the TV automatically. User - Lenovo B540 | Lenovo IdeaCentre B3/B5 Series User Guide - Page 39
and sub-picture. Record TV The Onekey TV must be turned off in order to use the recording function. Once it is turned off, use Windows Media Center or the Total Media software in PC mode to record TV programs. 34 User - Lenovo B540 | Lenovo IdeaCentre B3/B5 Series User Guide - Page 40
C: will be lost, but the content and format of the other partitions of the hard disk drive will 5 remain unchanged. • If you want to install an operating system and back it up with OneKey Recovery, you must format the C: partition in NTFS format and 6 install the operating system on the - Lenovo B540 | Lenovo IdeaCentre B3/B5 Series User Guide - Page 41
the computer until the Lenovo Rescue System opens, then select OneKey Recovery. Note: System Recovery will overwrite all of the data on the C: drive. To prevent loss of data, be sure to back up relevant data before performing system recovery. 2. Follow the on-screen instructions to select the backup - Lenovo B540 | Lenovo IdeaCentre B3/B5 Series User Guide - Page 42
process will continue until it has completed. Method 2: Manual Installation In the Windows system, Click Start → All Programs → Lenovo → Lenovo Drivers and Application Installation. After starting the procedure, install all the drivers and software manually by following the prompts. Notes: 1. Do not - Lenovo B540 | Lenovo IdeaCentre B3/B5 Series User Guide - Page 43
guide you through the entire restoration process. In the Windows system, click Start → All Programs → Lenovo → Lenovo Rescue System. After starting Rescue System, click Create Recovery Disc to create a bootable recovery disc from the current system. Follow the on-screen prompts to create a recovery - Lenovo B540 | Lenovo IdeaCentre B3/B5 Series User Guide - Page 44
and Chapter Confirming Setup 1 This chapter contains the following topics: 2 Ø Troubleshooting and Problem Resolution Note: The description of the TV tuner card in this manual is only applicable to machines 3 which have the TV tuner card. It does not apply to machines that do not have a TV - Lenovo B540 | Lenovo IdeaCentre B3/B5 Series User Guide - Page 45
Display Problems Problem: Blank screen or no image is displayed on the monitor. Troubleshooting and problem resolution: Check that the LCD screen has been turned on; If not, press the LCD On/Off button to turn on the LCD. If still cannot solve the problem, contact to Lenovo Customer Service. Problem - Lenovo B540 | Lenovo IdeaCentre B3/B5 Series User Guide - Page 46
and problem resolution: • Adjust the Windows volume control - double-click the speaker icon in the lower-right corner of your screen. Ensure that the volume is turned up and the sound is not muted. Adjust the volume, bass, or treble controls to eliminate distortion. • Reinstall the audio driver - Lenovo B540 | Lenovo IdeaCentre B3/B5 Series User Guide - Page 47
box and then select Uninstall/Modify. 6. Perform the instructions displayed to uninstall the software. 5.4 Troubleshooting Problems with Optical Drives and Hard Disks Problem: The Optical drive is unable to read a CD/DVD. Troubleshooting and problem resolution: 1. Check to determine if there is an - Lenovo B540 | Lenovo IdeaCentre B3/B5 Series User Guide - Page 48
it may be useful later when troubleshooting system problems. The serial number was shipped with the computer and provided separately by the manufacturer. The Help Center is unable to retrieve this number. 2. The drivers for this computer model only support the Windows 7 system. 3. When you use the - Lenovo B540 | Lenovo IdeaCentre B3/B5 Series User Guide - Page 49
display, do not spray cleaning solution directly onto the display. Only use products specifically designed for cleaning displays, and follow the instructions water directly onto the surface of the monitor or inside the computer. LCD monitors should be cleaned daily. Use a dry cloth to brush dust - Lenovo B540 | Lenovo IdeaCentre B3/B5 Series User Guide - Page 50
Chapter Hardware Replacement Guide 1 This chapter contains the following topics: 2 Ø Removing the computer cover Ø Installing a wall mount bracket adapter Ø Installing a B-CAS card Ø Replacing a memory module 3 Ø Replacing the optical drive Ø Replacing the hard disk drive Ø Replacing the - Lenovo B540 | Lenovo IdeaCentre B3/B5 Series User Guide - Page 51
not have the TV-Tuner card installed. This guide contains procedures for replacing the following parts: • Memory modules • Hard disk drive • Optical drive • Keyboard, mouse (wired) • Power cord Safety information for replacing CRUs Do not open your computer or attempt any repairs before reading the - Lenovo B540 | Lenovo IdeaCentre B3/B5 Series User Guide - Page 52
: • CRU removal and installation information • Publications • Troubleshooting information • Parts information • Links to other useful sources of information To access this information, go to: http://consumersupport.lenovo.com Tools required To disassemble the computer, you need the following tools - Lenovo B540 | Lenovo IdeaCentre B3/B5 Series User Guide - Page 53
, system boards, and microprocessors by the edges. Never touch any exposed circuitry. • Prevent others from touching the parts and other computer components. • Before you replace a new part, touch the anti-static package containing the part to a metal expansion slot cover or other unpainted metal - Lenovo B540 | Lenovo IdeaCentre B3/B5 Series User Guide - Page 54
in the Hardware Maintenance Manual (HMM) for the computer. To obtain copies of the Safety and Warranty Guide or HMM, go to the Support Web site at: http://consumersupport.lenovo.com Note: Use only parts provided by Lenovo. 6.2.1 General information Pre-disassembly instructions Before proceeding with - Lenovo B540 | Lenovo IdeaCentre B3/B5 Series User Guide - Page 55
mount Note: It may be helpful to place the computer face-down on a soft flat surface for this procedure. Lenovo recommends that you use a blanket, towel, or other soft cloth to protect the touch screen from scratching or other damage. * VESA wall mount spec: VESA100, 100mm x 100mm, M4 bolts. 50 User - Lenovo B540 | Lenovo IdeaCentre B3/B5 Series User Guide - Page 56
1. Push the stand lock upward to unlock it and then slide the stand out. 1 2 3 2. Align the VESA wall mount with the mounting holes on the computer, and then secure it to the computer with the 4 screws. User Guide 51 - Lenovo B540 | Lenovo IdeaCentre B3/B5 Series User Guide - Page 57
to the computer. Follow the steps below to install the B-CAS card. Notes: Before installing the B-CAS card, make sure that you do the following: • Turn off the Removing the computer cover". 2. Insert the B-CAS card into the card port. 3. Align then slide the computer cover back into position. 52 User - Lenovo B540 | Lenovo IdeaCentre B3/B5 Series User Guide - Page 58
face-down on a soft flat surface for this procedure. Lenovo recommends that you use a blanket, towel, or other soft cloth to protect the touch screen from scratching or other damage. 1. Remove any media (disks, CDs, or memory cards) from the drives, shut down the operating system, and turn off the - Lenovo B540 | Lenovo IdeaCentre B3/B5 Series User Guide - Page 59
face-down on a soft flat surface for this procedure. Lenovo recommends that you use a blanket, towel, or other soft cloth to protect the screen from scratching or other damage. 1. Remove any media (disks, CDs, or memory cards) from the drives, shut down the operating system, and turn off the - Lenovo B540 | Lenovo IdeaCentre B3/B5 Series User Guide - Page 60
6. Push a small iron stick (paper clip) into the small hole on the optical drive cover so that the disk springs out as shown. 7. Remove the 2 screws that secure the optical drive to the metal bracket. 8. Use a small flat head screwdriver to press and push out the pins that secure the cover to the - Lenovo B540 | Lenovo IdeaCentre B3/B5 Series User Guide - Page 61
it cool down before replacing the hard disk drive. To replace the hard disk drive: Note: It may be helpful to place the computer face-down on a soft flat surface for this procedure. Lenovo recommends that you use a blanket, towel, or other soft cloth to protect the screen from scratching or other - Lenovo B540 | Lenovo IdeaCentre B3/B5 Series User Guide - Page 62
as shown. 1 2 3. Push the pins and release the hard disk drive from the bracket. 4. Install the new hard disk drive as follows: Line up the new hard disk drive with the bracket and secure it with the pins. 5. Slide the hard disk drive and bracket back into position. 6. Slide the computer cover back - Lenovo B540 | Lenovo IdeaCentre B3/B5 Series User Guide - Page 63
or in the Hardware Maintenance Manual (HMM) for the computer. To obtain copies of the Safety and Warranty Guide or HMM, go to the Support Web site at: http://consumersupport.lenovo.com To replace the keyboard: 1. Remove any media (disks, CDs, or memory cards) from the drives, shut down the operating - Lenovo B540 | Lenovo IdeaCentre B3/B5 Series User Guide - Page 64
in the Hardware Maintenance Manual (HMM) for the computer. To obtain copies of the Safety and Warranty Guide or HMM, go to the Support Web site at: http://consumersupport.lenovo.com To replace the power cord: 1. Remove any media (disks, CDs, or memory cards) from the drives, shut down the operating - Lenovo B540 | Lenovo IdeaCentre B3/B5 Series User Guide - Page 65
Lenovo professional service personnel. You are responsible if you fail to operate the product according to instructions and requirements in the manuals the product sales. The content of the manuals included with your computer is protected by copyright laws and rules. None of the manuals included with - Lenovo B540 | Lenovo IdeaCentre B3/B5 Series User Guide - Page 66
are trademarks of Advanced Micro Devices, Inc. Other company, product, or service names referred to herein or in other Lenovo publications may be trademarks or service marks of others. All rights reserved. Names or marks of certain companies mentioned in the manuals included with your computer or - Lenovo B540 | Lenovo IdeaCentre B3/B5 Series User Guide - Page 67
XP • Turn off monitor: After 15 minutes • Turn off hard disk drives: Never • System standby: After 20 minutes • System hibernates: Never Microsoft Windows Vista and Windows 7 Power plan: Balanced • Turn off the display: After 10 minutes • Put the computer to sleep: After 25 minutes • Advanced
-
 1
1 -
 2
2 -
 3
3 -
 4
4 -
 5
5 -
 6
6 -
 7
7 -
8
-
9
-
10
-
11
-
12
-
13
-
14
-
15
-
16
-
17
-
18
-
19
-
20
-
21
-
22
-
23
-
24
-
25
-
26
-
27
-
28
-
29
-
30
-
31
-
32
-
33
-
34
-
35
-
36
-
37
-
38
-
39
-
40
-
41
-
42
-
43
-
44
-
45
-
46
-
47
-
48
-
49
-
50
-
51
-
52
-
53
-
54
-
55
-
56
-
57
-
58
-
59
-
60
-
61
-
62
-
63
-
64
-
65
-
66
-
67
 |
 |

Version 1.0
Machine type: 10097/2566 [B340]
10099/2568 [B540]
10101/3363 [B540p]
10098/2567 [B345]
10100/4749 [B545]
2012.02
Lenovo
IdeaCentre B3/B5 Series
User Guide
31501557