Lenovo B570e Lenovo V470&V570&B470&B570&B570e User Guide V2.0
Lenovo B570e Manual
 |
View all Lenovo B570e manuals
Add to My Manuals
Save this manual to your list of manuals |
Lenovo B570e manual content summary:
- Lenovo B570e | Lenovo V470&V570&B470&B570&B570e User Guide V2.0 - Page 1
Lenovo V470/V570/ B470/B570/B570e User Guide V2.0 Read the safety notices and important tips in the included manuals before using your computer. - Lenovo B570e | Lenovo V470&V570&B470&B570&B570e User Guide V2.0 - Page 2
read it before using wireless devices on your computer. • To refer to it, go to http://www.lenovo.com, click Support, and then click User's guides and manuals. Second Edition (July 2011) © Copyright Lenovo 2011. LENOVO products, data, computer software, and services have been developed exclusively - Lenovo B570e | Lenovo V470&V570&B470&B570&B570e User Guide V2.0 - Page 3
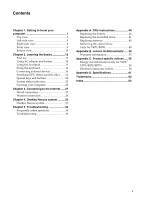
27 Wireless connection 28 Chapter 4. OneKey Rescue system ..........33 OneKey Rescue system 33 Chapter 5. Troubleshooting 34 Frequently asked questions 34 Troubleshooting 36 Appendix A. CRU instructions 40 Replacing the battery 40 Replacing the hard disk drive 41 Replacing memory 45 - Lenovo B570e | Lenovo V470&V570&B470&B570&B570e User Guide V2.0 - Page 4
- Lenovo B570e | Lenovo V470&V570&B470&B570&B570e User Guide V2.0 - Page 5
Chapter 1. Getting to know your computer Top view „ V470 a b c d V470 e k f g i h Notes: • Only the V570 and B570/B570e have a numeric keypad. • The illustrations in this manual may differ from the actual product. Please refer to the actual product. Attention: • Do NOT open the display panel - Lenovo B570e | Lenovo V470&V570&B470&B570&B570e User Guide V2.0 - Page 6
Chapter 1. Getting to know your computer „ V570 a b c d V570 k e f j g i h 2 - Lenovo B570e | Lenovo V470&V570&B470&B570&B570e User Guide V2.0 - Page 7
„ B470 b c d B470 e f g Chapter 1. Getting to know your computer a k i h 3 - Lenovo B570e | Lenovo V470&V570&B470&B570&B570e User Guide V2.0 - Page 8
B570/B570e a b c d B570 k e f j g i h a Integrated camera (Select models only) b Wireless module antennas (Select models only) c Computer display d Speakers Use the camera f OneKey Rescue system button Press this button to open OneKey Rescue system (If OneKey Rescue system has been preinstalled) - Lenovo B570e | Lenovo V470&V570&B470&B570&B570e User Guide V2.0 - Page 9
as a conventional mouse. Note: For details, see "Using the touchpad" on page 15. i Fingerprint reader (Select models only) j Numeric keypad (V570/B570/B570e) k System status indicators With the fingerprint reader you can register fingerprints and use them as passwords to secure your computer. For - Lenovo B570e | Lenovo V470&V570&B470&B570&B570e User Guide V2.0 - Page 10
Chapter 1. Getting to know your computer Left-side view „ V470/B470 ab c „ V570/B570/B570e d e f gh ab c d f gh a Kensington slot Attach a security lock (not supplied) here. Note: For details, see "Attaching a security lock (not supplied)" on page 26. b AC power adapter jack Connect - Lenovo B570e | Lenovo V470&V570&B470&B570&B570e User Guide V2.0 - Page 11
Chapter 1. Getting to know your computer g USB port or eSATA/ USB combo port (Select models only) Connects to eSATA or USB devices. Note: For details, see "Connecting a universal serial bus (USB) device" on page 19. h USB port Connects to USB devices. Note: For details, see "Connecting a - Lenovo B570e | Lenovo V470&V570&B470&B570&B570e User Guide V2.0 - Page 12
Getting to know your computer Right-side view „ V470/B470 ab c „ V570/B570/B570e d c ab c d ce a Headphone jack Connects to external headphones. Attention: • . e RJ-45 port This port connects the computer to an Ethernet network. Note: For details, see "Wired connection" on page 27. 8 - Lenovo B570e | Lenovo V470&V570&B470&B570&B570e User Guide V2.0 - Page 13
under Windows operating system to switch the GPU (Graphics Processing Unit) mode used by the system. switch (Select models only) c Memory card slot Insert memory cards (not supplied) here. Note: For details, see "Using memory cards (not supplied)" on page 19. d Integrated wireless device - Lenovo B570e | Lenovo V470&V570&B470&B570&B570e User Guide V2.0 - Page 14
Chapter 1. Getting to know your computer Bottom view „ V470/B470 a b c d e 10 - Lenovo B570e | Lenovo V470&V570&B470&B570&B570e User Guide V2.0 - Page 15
V570/B570/B570e a Chapter 1. Getting to know your computer b c d e a Battery latch - manual The manual battery latch is used to keep the battery pack secured in place. b Battery pack For details, see "Using AC adapter and battery" on page 14. c Battery latch - spring loaded d SIM card slot - Lenovo B570e | Lenovo V470&V570&B470&B570&B570e User Guide V2.0 - Page 16
manuals Read the supplied manuals before using your computer. „ Conncting to the power The supplied battery pack is not fully charged at purchase. To charge the battery and begin using your computer, insert the battery the operating system You may need to configure the operating system when it is - Lenovo B570e | Lenovo V470&V570&B470&B570&B570e User Guide V2.0 - Page 17
the hard disk, causing loss of data. To wake the computer, do one of the following. • Press the power button. • Press any key on the keyboard. Shutting down your computer If you are not going to use your computer for a day or two, shut it down. To shut down your computer - Lenovo B570e | Lenovo V470&V570&B470&B570&B570e User Guide V2.0 - Page 18
or if you need to send your computer to Lenovo for service, etc. remove the battery pack from the computer. Before removing the battery pack, make sure the computer has been shut down. „ Handling the battery If the rechargeable battery pack is replaced with an incorrect type, there may be danger of - Lenovo B570e | Lenovo V470&V570&B470&B570&B570e User Guide V2.0 - Page 19
Chapter 2. Learning the basics Using the touchpad V570 a bc a Touchpad b Left click button c Right click button To move the cursor on the screen, slide your fingertip over the pad in the direction in which you want the cursor to move. The function corresponds to that of the left - Lenovo B570e | Lenovo V470&V570&B470&B570&B570e User Guide V2.0 - Page 20
keypad and function keys incorporated in its standard keyboard. „ Numeric keypad V470/B470 The keyboard has keys that, when enabled, work as a 10-key numeric keypad. To enable or disable the numeric keypad, press Fn + F8. V570/B570/B570e The keyboard has a separate numeric keypad. To enable or - Lenovo B570e | Lenovo V470&V570&B470&B570&B570e User Guide V2.0 - Page 21
Chapter 2. Learning the basics „ Function key combinations Through the use of the function keys, you can change operational features instantly. To use this function, press and hold Fn a ; then press one of the function keys b . b a b 17 - Lenovo B570e | Lenovo V470&V570&B470&B570&B570e User Guide V2.0 - Page 22
Player. Fn + F10: Stop playback of Windows Media Player. Fn + F11: Skip to the previous track. Fn + F12: Skip to the next track. Fn + Insert (V570/B570/B570e): Fn + PgUp (V470/B470): Enable/Disable the scroll lock. Fn + PrtSc: Activate the system request. Fn + Home: Activate the pause - Lenovo B570e | Lenovo V470&V570&B470&B570&B570e User Guide V2.0 - Page 23
(xD) card Notes: • Insert ONLY one card in the slot at a time. • This card reader does not support SDIO devices (e.g., SDIO Bluetooth, etc.). Inserting a memory card 1 Push the dummy card until you hear a click. Gently pull the dummy card out of the memory card slot. Note: The dummy card is used for - Lenovo B570e | Lenovo V470&V570&B470&B570&B570e User Guide V2.0 - Page 24
communications on your computer 1 Slide the integrated wireless device switch from to . 2 Press Fn + F5 to make configuration. Notes: • When you do not need to use the Bluetooth function, turn it off to save battery power. • You need to pair the Bluetooth enabled device with your computer before you - Lenovo B570e | Lenovo V470&V570&B470&B570&B570e User Guide V2.0 - Page 25
(Select models only Some IdeaPad models support Switchable Graphics. With this technology, you have the flexibility to switch between a dedicated Nvidia® GPU* (increased-performance GPU) and an integrated Intel GPU (power-saving GPU), without restarting the Windows operating system. * GPU is short - Lenovo B570e | Lenovo V470&V570&B470&B570&B570e User Guide V2.0 - Page 26
keys and buttons V570 „ OneKey Rescue system button • When the computer is powered-off, press this button to enter the OneKey Rescue system if Lenovo OneKey Rescue system has been preinstalled. • In Windows operating system, press this button to start Lenovo OneKey Recovery. Note: For details, see - Lenovo B570e | Lenovo V470&V570&B470&B570&B570e User Guide V2.0 - Page 27
Chapter 2. Learning the basics System status indicators These indicators inform you of the computer status. „ V470/B470 a b c d V470 a b c B470 e f g 23 - Lenovo B570e | Lenovo V470&V570&B470&B570&B570e User Guide V2.0 - Page 28
Chapter 2. Learning the basics „ V570/B570/B570e a b c d V570 a b c B570/ B570e e f g 24 - Lenovo B570e | Lenovo V470&V570&B470&B570&B570e User Guide V2.0 - Page 29
a Caps lock indicator b Num lock indicator c Hard disk drive indicator d APS status indicator (V470/V570) e Power status indicator f Battery status indicator g Wireless communication indicator Chapter 2. Learning the basics 25 - Lenovo B570e | Lenovo V470&V570&B470&B570&B570e User Guide V2.0 - Page 30
instructions slot BIOS setup utility, press F2 when the Lenovo logo appears on the screen while the computer is starting up. „ Fingerprint reader (Select models only) With the fingerprint reader, in addition to registering fingerprint information and using it as a password for Windows operating system - Lenovo B570e | Lenovo V470&V570&B470&B570&B570e User Guide V2.0 - Page 31
Wireless network technology: connect without wiring. Wired connection Wired connections are a reliable and safe way to connect the computer to the Internet. Cable Cable Internet services method may vary. „ Software configuration Consult your Internet Service Provider (ISP) for details - Lenovo B570e | Lenovo V470&V570&B470&B570&B570e User Guide V2.0 - Page 32
: 1 Slide the integrated wireless device switch from to . 2 Press Fn + F5 to make configuration. Hardware connection Access point * V570 Wi-Fi/WiMAX network * Not supplied Software configuration Consult your Internet Service Provider (ISP) and search Windows Help and Support Center for details on - Lenovo B570e | Lenovo V470&V570&B470&B570&B570e User Guide V2.0 - Page 33
. For instructions on inserting the SIM card, refer to "Inserting the SIM card" on page 30. Notes: • Various standards are in use by mobile operators to provide Mobile Broadband services. The Lenovo Mobile Broadband module may support one or more of the following standards: ƒ GSM (Global System for - Lenovo B570e | Lenovo V470&V570&B470&B570&B570e User Guide V2.0 - Page 34
; then disconnect the AC adapter and all cables from the computer. 2 Close the computer display and turn it over. 3 Remove the battery. 4 Insert the SIM card in the card slot until it clicks into place as shown in the illustration. Notes: • The direction of insertion is shown by the SIM card mark - Lenovo B570e | Lenovo V470&V570&B470&B570&B570e User Guide V2.0 - Page 35
V570 Chapter 3. Connecting to the Internet Notched Corner 5 Put the battery back in place. Turn the computer over and reconnect the cables. 31 - Lenovo B570e | Lenovo V470&V570&B470&B570&B570e User Guide V2.0 - Page 36
computer. 2 Close the computer display and turn it over. 3 Remove the battery. 4 Push the SIM card in until you hear a click, and then pull the SIM card out. V470 V570 5 Put the battery back in place. Turn the computer over and reconnect the cables. Note: Never - Lenovo B570e | Lenovo V470&V570&B470&B570&B570e User Guide V2.0 - Page 37
optical drive support the creation of recovery discs; however an appropriate external optical drive is needed to physically create the recovery discs. For more instructions, see the Help file of Lenovo OneKey Recovery. „ Using Lenovo OneKey Rescue system (without Windows operating system) In the - Lenovo B570e | Lenovo V470&V570&B470&B570&B570e User Guide V2.0 - Page 38
find the detailed specifications for my computer? See http://consumersupport.lenovo.com. I need to upgrade a device or I need to replace one of the following: the hard disk drive, memory, or the keyboard. See "Appendix A. CRU instructions" on page 40 of this guide. Where are the recovery discs? Your - Lenovo B570e | Lenovo V470&V570&B470&B570&B570e User Guide V2.0 - Page 39
Chapter 5. Troubleshooting When do I need to restore the system to the factory status? You can use this feature when your system fails or you need to re-install your operating system. This will restore your computer back to the initial status when you first booted up your computer after receiving it - Lenovo B570e | Lenovo V470&V570&B470&B570&B570e User Guide V2.0 - Page 40
only a • Restore backed-up files to your Windows environment or the entire white cursor appears on a blank contents of your hard disk to the original factory contents using screen. OneKey Recovery. If you still see only the cursor on the screen, have the computer serviced. My screen goes blank - Lenovo B570e | Lenovo V470&V570&B470&B570&B570e User Guide V2.0 - Page 41
Chapter 5. Troubleshooting Sleep or hibernation problems The critical low-battery error message appears, and the computer immediately turns off. • The battery power is getting low. Connect the AC adapter to the computer, or replace the battery with a fully charged one. The computer enters sleep - Lenovo B570e | Lenovo V470&V570&B470&B570&B570e User Guide V2.0 - Page 42
33. OneKey Rescue system problems Backup cannot be made. • You are not currently using a Windows operating system. • There is not enough space to store the backed up data. You will need to free more hard disk space on your system partition (C drive). Fail to restore system partition to factory - Lenovo B570e | Lenovo V470&V570&B470&B570&B570e User Guide V2.0 - Page 43
Chapter 5. Troubleshooting Other problems Your computer does not respond. • To turn off your computer, press and hold the power button for 4 seconds or more. If the computer still does not respond, remove the AC adapter and the battery. • Your computer might lock when it enters sleep mode during - Lenovo B570e | Lenovo V470&V570&B470&B570&B570e User Guide V2.0 - Page 44
A. CRU instructions Notes: • The illustrations used in this chapter are of the Lenovo V570, unless otherwise stated. • The following steps about upgrading and replacing devices are the same for the V470, V570, B470 and B570/B570e. Replacing the battery Note: Use only the battery provided by Lenovo - Lenovo B570e | Lenovo V470&V570&B470&B570&B570e User Guide V2.0 - Page 45
hard disk drive with one of greater capacity. You can purchase a new hard disk drive from your reseller or Lenovo marketing representative. Notes: • Replace the hard disk drive only if you upgrade it or have it repaired. The connectors and bay of the hard disk drive were not designed for frequent - Lenovo B570e | Lenovo V470&V570&B470&B570&B570e User Guide V2.0 - Page 46
A. CRU instructions To replace the hard disk drive, do the following: 1 Turn off the computer; then disconnect the AC adapter and all cables from the computer. 2 Close the computer display, and then turn the computer over. 3 Remove the battery pack. 4 Remove the Hard disk drive (HDD)/Memory/Mini PCI - Lenovo B570e | Lenovo V470&V570&B470&B570&B570e User Guide V2.0 - Page 47
5 Remove the frame fixing screw c . Appendix A. CRU instructions c 6 Pull the tab in the direction shown by arrow d . d 43 - Lenovo B570e | Lenovo V470&V570&B470&B570&B570e User Guide V2.0 - Page 48
Appendix A. CRU instructions 7 Take out the hard disk drive secured in a metal frame e . e 8 Remove frame fixing screw. B Reinstall the compartment cover and tighten the screws. C Reinstall the battery pack. D Turn the computer over again. Connect the AC adapter and the cables to the computer again. - Lenovo B570e | Lenovo V470&V570&B470&B570&B570e User Guide V2.0 - Page 49
Appendix A. CRU instructions Replacing memory You can increase the amount of memory in your computer by installing a double-data-rate three synchronous dynamic random access memory (DDR3 SDRAM)-available as an option-in the memory slot of your computer. DDR3 SDRAMs are available in various - Lenovo B570e | Lenovo V470&V570&B470&B570&B570e User Guide V2.0 - Page 50
Appendix A. CRU instructions 6 If two DDR3 SDRAMs are already installed in the memory slot, remove one of them to make room for the new one by pressing out on the latches on both edges of the socket at the same time. Be sure to save the old DDR3 SDRAM for future use. a a b 7 Align the notch - Lenovo B570e | Lenovo V470&V570&B470&B570&B570e User Guide V2.0 - Page 51
you are servicing, the card must be installed in SLOT-0 ( : lower slot), but not in SLOT-1 ( : upper slot). To make sure that the DDR3 SDRAM is installed correctly, do as follows: 1 Turn the computer on. 2 Hold F2 during startup. The BIOS setup utility screen opens. The System Memory item shows - Lenovo B570e | Lenovo V470&V570&B470&B570&B570e User Guide V2.0 - Page 52
The following table provides a list of CRUs (Customer Replaceable Units) for your computer, and informs you of where to find replacement instructions. AC adapter Power cord for AC adapter Battery Bottom access doors Hard disk drive Memory Optical drive Setup Poster O O O User Guide O O O O O 48 - Lenovo B570e | Lenovo V470&V570&B470&B570&B570e User Guide V2.0 - Page 53
you must follow the problem determination and resolution procedures specified. Your Service Provider will attempt to diagnose and resolve your problem over the telephone, e-mail or through remote assistance. Your Service Provider may direct you to download and install designated software updates. 49 - Lenovo B570e | Lenovo V470&V570&B470&B570&B570e User Guide V2.0 - Page 54
that you can install yourself called a "Customer Replaceable Unit" or "CRU." If so, your Service Provider will ship the CRU to you to install. If your problem cannot be resolved over the telephone or remotely, through your application of software updates or the installation of a CRU by you, your - Lenovo B570e | Lenovo V470&V570&B470&B570&B570e User Guide V2.0 - Page 55
error-free operation of a product; • loss of, or damage to, your data; • any software service provider; • failure of, or damage caused by, any third party products, including those that Lenovo may provide or integrate into the Lenovo product at your request; and • any technical or other support - Lenovo B570e | Lenovo V470&V570&B470&B570&B570e User Guide V2.0 - Page 56
India shall be held in accordance with the laws of India THIS WARRANTY GIVES YOU SPECIFIC LEGAL RIGHTS AND YOU MAY Lenovo at the following address: EMEA Service Organisation, Lenovo (International) B.V., Floor 2, Einsteinova 21, 851 01, Bratislava, Slovakia. Service under this warranty for Lenovo - Lenovo B570e | Lenovo V470&V570&B470&B570&B570e User Guide V2.0 - Page 57
pack - 1 year Turkey parts and labor - 2 years 1, 4 battery pack - 1 year * Excludes some components. 90-day limited warranty for power adapters, keyboards, plastics and hinges. If required, your Service Provider will provide repair or exchange service depending on the type of warranty - Lenovo B570e | Lenovo V470&V570&B470&B570&B570e User Guide V2.0 - Page 58
warranty „ Types of warranty service 1 Customer Replaceable Unit ("CRU") Service Under CRU Service, your Service Provider will ship CRUs to you for installation by you. CRU information and replacement instructions are shipped with your product and are available from Lenovo at any time upon request - Lenovo B570e | Lenovo V470&V570&B470&B570&B570e User Guide V2.0 - Page 59
limited warranty 5 Product Exchange Service Under Product Exchange Service, Lenovo will ship a replacement product to your location. You are responsible for its installation and verification of its operation. The replacement product becomes your property in exchange for the failed product, which - Lenovo B570e | Lenovo V470&V570&B470&B570&B570e User Guide V2.0 - Page 60
notices in this appendix are specific to the product with the given MT number. Notices that are common for most Lenovo products are included in "Appendix A. Notices" of the Lenovo Safety and General Information Guide. Energy star information (only for V470/V570/B470/B570 ENERGY STAR® is a joint - Lenovo B570e | Lenovo V470&V570&B470&B570&B570e User Guide V2.0 - Page 61
Appendix C. Product specific notices Table 1. ENERGY STAR power-management features Windows® 7 Power plan: Energy Star • Turn off the display: After 10 minutes • , press any key on your keyboard. For more information about these settings, refer to your Windows Help and Support information system. 57 - Lenovo B570e | Lenovo V470&V570&B470&B570&B570e User Guide V2.0 - Page 62
specific notices Electronic emissions notices The following information refers to Lenovo V470/V570/B470/B570/B570e used in accordance with the instructions, may cause harmful interference to connected. • Consult an authorized dealer or service representative for help. Properly shielded and grounded - Lenovo B570e | Lenovo V470&V570&B470&B570&B570e User Guide V2.0 - Page 63
Appendix C. Product specific notices „ Industry Canada Class B Emission Compliance Statement This Class B Verantwortlich für die Konformitätserklärung nach Paragraf 5 des EMVG ist die Lenovo (Deutschland) GmbH, Gropiusplatz 10, D-70563 Stuttgart. Informationen in Hinsicht EMVG Paragraf 4 Abs. (1) 4: - Lenovo B570e | Lenovo V470&V570&B470&B570&B570e User Guide V2.0 - Page 64
Appendix C. Product specific notices „ European Union Compliance Statement Class B Compliance European approximation of the laws of the Member States relating to electromagnetic compatibility. Lenovo cannot accept responsibility for any failure to satisfy the protection requirements resulting from - Lenovo B570e | Lenovo V470&V570&B470&B570&B570e User Guide V2.0 - Page 65
mm × 32.3 mm (V570) Appr. 378 mm × 252 mm × 33.1 mm (B570/B570e) Appr. 2.4 kg with 6 cell battery System Platform Intel Huron River SV Memory DDR3, 2 × SODIMM slot LCD 14-inch HD 15.6-inch HD HDD 2.5-inch, 7 mm / 2.5-inch, 9.5 mm SATA II Keyboard 6-row Lenovo Keyboard Integrated Camera - Lenovo B570e | Lenovo V470&V570&B470&B570&B570e User Guide V2.0 - Page 66
or registered trademarks of Lenovo in the United States, other countries, or both. Lenovo OneKey Microsoft and Windows are trademarks of Microsoft Corporation in the United States, other countries, or both. Other company, products, or service names may be trademarks or service marks of others. 62 - Lenovo B570e | Lenovo V470&V570&B470&B570&B570e User Guide V2.0 - Page 67
34 Function key combinations 17 K Keyboard Using 16 L Lenovo Limited Warranty 49 M Meomory card reader 19 Microphone Built-in 5 N Notice Electronic emissions 58 O OneKey Rescue system button 33 P Password Problems 36 Using 26 Problems Battery 38 Computer screen 37 Display 36 Hard disk - Lenovo B570e | Lenovo V470&V570&B470&B570&B570e User Guide V2.0 - Page 68
- Lenovo B570e | Lenovo V470&V570&B470&B570&B570e User Guide V2.0 - Page 69
THE STORE. For technical assistance, contact a Lenovo support specialist 24 hours a day by calling toll free 1-877-4 LENOVO (1-877-453-6686). Additionally, you can find support information and updates on the Lenovo Web site located at http://consumersupport.lenovo.com. * Only for the users from the - Lenovo B570e | Lenovo V470&V570&B470&B570&B570e User Guide V2.0 - Page 70
©Lenovo China 2011 New World. New Thinking.TM www.lenovo.com P/N: 147500265 Printed in China
-
 1
1 -
 2
2 -
 3
3 -
 4
4 -
 5
5 -
 6
6 -
 7
7 -
8
-
9
-
10
-
11
-
12
-
13
-
14
-
15
-
16
-
17
-
18
-
19
-
20
-
21
-
22
-
23
-
24
-
25
-
26
-
27
-
28
-
29
-
30
-
31
-
32
-
33
-
34
-
35
-
36
-
37
-
38
-
39
-
40
-
41
-
42
-
43
-
44
-
45
-
46
-
47
-
48
-
49
-
50
-
51
-
52
-
53
-
54
-
55
-
56
-
57
-
58
-
59
-
60
-
61
-
62
-
63
-
64
-
65
-
66
-
67
-
68
-
69
-
70
 |
 |

Read the safety notices and important tips in the
included manuals before using your computer.
Lenovo V470/
V570/
B470/B570/B570e
User Guide
V2.0