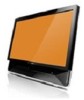
Lenovo IdeaCentre B305 Lenovo IdeaCentre B3 Series User Guide V1.0
Lenovo IdeaCentre B305 Manual
 |
View all Lenovo IdeaCentre B305 manuals
Add to My Manuals
Save this manual to your list of manuals |
Lenovo IdeaCentre B305 manual content summary:
- Lenovo IdeaCentre B305 | Lenovo IdeaCentre B3 Series User Guide V1.0 - Page 1
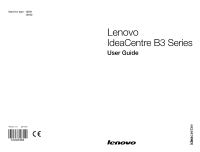
Machine type: 10051 10052 Version 1.0 2010.04 31043484 Lenovo IdeaCentre B3 Series User Guide - Lenovo IdeaCentre B305 | Lenovo IdeaCentre B3 Series User Guide V1.0 - Page 2
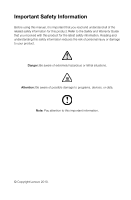
Information Before using this manual, it is important that you read and understand all of the related safety information for this product. Refer to the Safety and Warranty Guide that you received programs, devices, or data. Note: Pay attention to this important information. © Copyright Lenovo 2010. - Lenovo IdeaCentre B305 | Lenovo IdeaCentre B3 Series User Guide V1.0 - Page 3
- Lenovo IdeaCentre B305 | Lenovo IdeaCentre B3 Series User Guide V1.0 - Page 4
Remote Control 11 Chapter 2 Touch Screen Instructions 15 2.1 Touch Screen Calibration 16 2.2 User Gesture Instructions for the Touch screen 16 2.3 Attentions when using the Touch Screen 25 Chapter 3 Using the Rescue System 27 3.1 OneKey Recovery 28 3.2 Driver and Application Installation 28 - Lenovo IdeaCentre B305 | Lenovo IdeaCentre B3 Series User Guide V1.0 - Page 5
39 6.1 Troubleshooting Display Problems 40 6.2 Troubleshooting Audio Problems 41 6.3 Troubleshooting Software Problems 41 6.4 Troubleshooting Problems with Optical Drives and Hard Disks 42 6.5 Special considerations for troubleshooting Windows 43 6.6 Wireless keyboard and mouse instructions 44 - Lenovo IdeaCentre B305 | Lenovo IdeaCentre B3 Series User Guide V1.0 - Page 6
Using the Computer Hardware 1 This chapter contains the following topics: 2 Ø Computer hardware introduction Ø Information on computer connections Note: The descriptions in this chapter might 3 vary from your computer, depending on computer models and configurations. 4 5 6 User Guide - Lenovo IdeaCentre B305 | Lenovo IdeaCentre B3 Series User Guide V1.0 - Page 7
1.1 Front view 1 2 345678 9 Camera Built-in microphone LCD On/Off Brightness down Brightness up 10 LCD On/Off indicator Hard disk drive indicator Wireless LAN card indicator Bluetooth indicator Power button 2 User Guide - Lenovo IdeaCentre B305 | Lenovo IdeaCentre B3 Series User Guide V1.0 - Page 8
1.2 Left and right view of the computer Attention: Be sure not to block any air vents on the computer. Blocked air vents may cause thermal problems. 1 2 3 4 2 Memory card reader USB connector Headphone connector 5 Microphone connector Optical drive User Guide 3 - Lenovo IdeaCentre B305 | Lenovo IdeaCentre B3 Series User Guide V1.0 - Page 9
1.3 Rear view of the computer Power connector PS/2 keyboard connector IEEE 1394 connector Ethernet connector 1 23 4 5 6 7 TV tuner connector (selected models) USB ports (4) Wireless reset button 4 User Guide - Lenovo IdeaCentre B305 | Lenovo IdeaCentre B3 Series User Guide V1.0 - Page 10
the vertical; otherwise the computer will be unstable and could fall over. 1.5 Connecting your computer Use the following information to connect your computer: • Look for the small connector icons on the back that the required voltage and frequency match the available power source. User Guide 5 - Lenovo IdeaCentre B305 | Lenovo IdeaCentre B3 Series User Guide V1.0 - Page 11
attach them using the following instructions: 1 2 Microphone Use this connector to use speech-recognition software. Headphone Use this connector to attach headphones (purchased separately) to your computer when you want to listen to music or other sounds without disturbing anyone. 6 User Guide - Lenovo IdeaCentre B305 | Lenovo IdeaCentre B3 Series User Guide V1.0 - Page 12
to the Headphone port on the computer. d. Connect the adapter to the power source. 1.5.6 If you have powered speakers without an adapter: (This picture is only a sketch print, it does computer. d. Connect the plug to the power source. Note: Some models are not equipped with external speakers. User - Lenovo IdeaCentre B305 | Lenovo IdeaCentre B3 Series User Guide V1.0 - Page 13
devices that you have. Your computer might not have all connectors shown. 1 2 USB connector Use this connector to attach a device that requires a USB connection. Network adapter Use this connector to attach the computer to an connector ethernet-type local area network. 1.5.8 Connect the - Lenovo IdeaCentre B305 | Lenovo IdeaCentre B3 Series User Guide V1.0 - Page 14
computer is equipped with a Memory Card Reader Connector, it is able to read/write data from: MS/MS Pro/MMC/SD/SDHC 1.6 Important information about using the computer Press the power button on the bottom right of the screen to turn on the computer. Hold the computer tightly when you carry it. User - Lenovo IdeaCentre B305 | Lenovo IdeaCentre B3 Series User Guide V1.0 - Page 15
to launch the LVT (Lenovo Vantage Technology) program, Lenovo's pre-loaded Home PC software. In addition to Lenovo Rescue System installed. To learn more about this program, turn on the computer, and when the Lenovo logo appears, press the F2 key and the Lenovo Rescue System will open. 10 User Guide - Lenovo IdeaCentre B305 | Lenovo IdeaCentre B3 Series User Guide V1.0 - Page 16
1.8 Using the Remote Control The remote control (only shipped with some types of computers) works with the remote control receiver on the chassis. Adjust the angle of the remote control properly. User Guide 11 - Lenovo IdeaCentre B305 | Lenovo IdeaCentre B3 Series User Guide V1.0 - Page 17
Buttons on the remote control: Button Description Up Down Left Right OK Confirm Back Details Guide (This function is not available in Microsoft Windows operating systems.) Shows live TV on the currently selected channel. Displays the Recorded TV page in Windows - Lenovo IdeaCentre B305 | Lenovo IdeaCentre B3 Series User Guide V1.0 - Page 18
0~9 CLEAR ENTER Starts Windows Media Center. Turns volume up/down Previous/next channel Mute DVD menu Power supply (standby) Number (or Letter) buttons # key * key Clear Enter Teletext ON/OFF (Selected models only) Red, Green, Yellow, Blue (Selected models only) User Guide 13 - Lenovo IdeaCentre B305 | Lenovo IdeaCentre B3 Series User Guide V1.0 - Page 19
14 User Guide - Lenovo IdeaCentre B305 | Lenovo IdeaCentre B3 Series User Guide V1.0 - Page 20
Chapter Touch Screen Instructions 1 This chapter contains the following topics: 2 Ø Touch Screen Calibration Ø User Gesture Instructions for the Touch screen Ø Attentions when using the Touch Screen 3 Attention: Only some models are equipped with touch screen. 4 5 6 User Guide 15 - Lenovo IdeaCentre B305 | Lenovo IdeaCentre B3 Series User Guide V1.0 - Page 21
Tablet PC Settings" dialogue, click "Calibrate" button. 5. Use your finger or the touch pen of 6-7mm diameter to touch each of the calibration points that are shown in sequence, to finish the calibration. 2.2 User Gesture Instructions for the Touch screen The Touch screen supports single touches and - Lenovo IdeaCentre B305 | Lenovo IdeaCentre B3 Series User Guide V1.0 - Page 22
2.2.1 Basic Hand Gestures 1. Single Click / Double Click For the item selected on the touch screen, with one finger touch it very gently one or two times, to perform a single click or double click operation. This is similar to the action performed by clicking the left mouse button. User Guide 17 - Lenovo IdeaCentre B305 | Lenovo IdeaCentre B3 Series User Guide V1.0 - Page 23
on the touch screen, press and hold your finger on the screen until a circle appears. After lifting your finger from the touch screen, a menu bar will pop up, completing the single finger right click operation. This is similar to the action performed by clicking the right mouse button. 18 User Guide - Lenovo IdeaCentre B305 | Lenovo IdeaCentre B3 Series User Guide V1.0 - Page 24
is similar to the click and drag movement you can make with a mouse. 4. High Speed Slide If you touch the screen with a single finger and slide it a short distance horizontally (about 5 cm), then quickly lift it up again operations in Windows Photo Viewer slideshow mode. about 5 FP User Guide 19 - Lenovo IdeaCentre B305 | Lenovo IdeaCentre B3 Series User Guide V1.0 - Page 25
desired item on the touch screen, then keeping both fingers on the screen, change the distance between them. By increasing (or decreasing) the distance, you can perform a zoom out (or zoom in) operation. For example: you can enlarge or reduce the picture size in Windows Photo Viewer. 20 User Guide - Lenovo IdeaCentre B305 | Lenovo IdeaCentre B3 Series User Guide V1.0 - Page 26
7. Rotation Operation Use two figures to lightly touch the desired item on the touch screen, then rotate them in the desired direction. For example: you can rotate the picture which is being displayed in Windows Photo Viewer. User Guide 21 - Lenovo IdeaCentre B305 | Lenovo IdeaCentre B3 Series User Guide V1.0 - Page 27
Touch Screen Settings 1. Flicks: In the notification area of the taskbar at the bottom of the screen operations according to the advice given on screen. 2. For more detailed configuration, you can screen, then click on "Customize your flicks setting" in the Flicks pop-up window. In the "Pen and Touch - Lenovo IdeaCentre B305 | Lenovo IdeaCentre B3 Series User Guide V1.0 - Page 28
On the Flicks menu you can: • Select commonly used Flicks operation groups • Adjust the sensitivity of the touch screen User Guide 23 - Lenovo IdeaCentre B305 | Lenovo IdeaCentre B3 Series User Guide V1.0 - Page 29
Enable / disable options such as "Use your finger as an input device" and "Enable multi-touch gestures and inking". • Select touch actions which you wish to adjust. By Enable / disable touch points. Note: Users can access more help information from the Windows "Help and Support" menu. 24 User Guide - Lenovo IdeaCentre B305 | Lenovo IdeaCentre B3 Series User Guide V1.0 - Page 30
of the screen or any part of its frame, because this could separate the screen from the frame and stop the screen from being able to sense position properly. Note: When it is used in normal operation, the touch screen process will not affect the running of other computer processes. User Guide 25 - Lenovo IdeaCentre B305 | Lenovo IdeaCentre B3 Series User Guide V1.0 - Page 31
: To learn accurate hand gesture operations, the user can consult this manual and also the related Windows help content. 6. In order to achieve a better degree of sensitivity from the touch screen, the user should avoid placing the screen too close to an artificial light source or in the direct path - Lenovo IdeaCentre B305 | Lenovo IdeaCentre B3 Series User Guide V1.0 - Page 32
following 1 topics: Ø OneKey Recovery Ø Driver and Application Installation Ø System Setup 2 Ø System Backup Ø System Recovery Ø Create Recovery Disc 3 Attention: Using this program will result in a loss on the C partition. Otherwise, the OneKey Recovery system cannot run. User Guide 27 - Lenovo IdeaCentre B305 | Lenovo IdeaCentre B3 Series User Guide V1.0 - Page 33
used by the rescue system are saved in the service partition. If the service partition is deleted or damaged by someone other than authorized Lenovo servicers, Lenovo system recovery. 2. Follow the onscreen instructions to select the backup task you want Driver and Application Installation The Driver - Lenovo IdeaCentre B305 | Lenovo IdeaCentre B3 Series User Guide V1.0 - Page 34
the operating system, make sure that the Drivers and Application installation has been installed automatically. After that, the manual installation function can be used. 3.3 System Setup System Setup configures the network configuration for the Lenovo Rescue System to ensure your Rescue System can - Lenovo IdeaCentre B305 | Lenovo IdeaCentre B3 Series User Guide V1.0 - Page 35
a bootable recovery disc from current system. These recovery discs are used to boot your computer and will guide you through the entire restoration process. In the Windows system, click Start → All Programs → Lenovo → Lenovo Rescue System. After starting the procedure, click Create Recovery Disc to - Lenovo IdeaCentre B305 | Lenovo IdeaCentre B3 Series User Guide V1.0 - Page 36
Chapter Using the Computer Software 1 This chapter contains the following topics: 2 Ø Computer software instructions Note: The interface and function of each of these features are subject to the actual 3 software that was shipped with the computer model that you purchased. 4 5 6 User Guide - Lenovo IdeaCentre B305 | Lenovo IdeaCentre B3 Series User Guide V1.0 - Page 37
off. Note: This function applies only to the computer equipped with a Lenovo PC camera and is available only after the camera is installed. Before using this software, do the following: 1) Click Start → All Programs → Lenovo USB2.0 UVC Camera → vmcap. 2) Select Options → Preview from the pop-up - Lenovo IdeaCentre B305 | Lenovo IdeaCentre B3 Series User Guide V1.0 - Page 38
interval beyond which a warning will pop up. Note: This function applies only to the computer equipped with a Lenovo PC camera and is available only after the camera is installed. To use this software, do the following: Click Start → All Programs → Lenovo → Lenovo Eye Distance System. User Guide 33 - Lenovo IdeaCentre B305 | Lenovo IdeaCentre B3 Series User Guide V1.0 - Page 39
): Elevation angle: 20 degrees Depression angle: 30 degrees The horizontal rotary angle (the face rotary angle scope in the horizontal): -20 ~ +20 degrees 34 User Guide - Lenovo IdeaCentre B305 | Lenovo IdeaCentre B3 Series User Guide V1.0 - Page 40
System Maintenance and Chapter Recovery 1 This chapter contains the following topics: 2 Ø Daily Maintenance and Tools Instructions 3 4 5 6 User Guide 35 - Lenovo IdeaCentre B305 | Lenovo IdeaCentre B3 Series User Guide V1.0 - Page 41
If software problems develop in the originally installed software, you can restore the system by using system backup Select the location for your backup. Click Next and follow the instructions to continue. 5.3 Cleaning Up the Disk Do the following periodically to the cleanup process. 36 User Guide - Lenovo IdeaCentre B305 | Lenovo IdeaCentre B3 Series User Guide V1.0 - Page 42
from disk Properties and select Defragment Now. 3. Select the time and scheme to be used by the defragging program, then start the defragmenting program. Depending on the amount of defragmentation dampened with water. Do not use liquid or aerosol cleaners, which may contain flammable substances. User - Lenovo IdeaCentre B305 | Lenovo IdeaCentre B3 Series User Guide V1.0 - Page 43
directly onto the display. Only use products specifically designed for cleaning displays, and follow the instructions that are included with the cloth. • Do not use the keyboard until it is dry. Do not do any of the following: • Allow water to enter the computer • Use a heavily dampened cloth • - Lenovo IdeaCentre B305 | Lenovo IdeaCentre B3 Series User Guide V1.0 - Page 44
and Chapter Confirming Setup 1 This chapter contains the following topics: 2 Ø Troubleshooting and Problem Resolution Note: The description of the TV-Tuner card in this manual is only used for the machines 3 which have the TV-Tuner card. It does not apply to those machines that do - Lenovo IdeaCentre B305 | Lenovo IdeaCentre B3 Series User Guide V1.0 - Page 45
or no image is displayed on the monitor. Troubleshooting and problem resolution: Check that the LCD screen has been turned on; If not, press the LCD On/Off button to turn on the LCD. If still cannot solve the problem, contact to Lenovo Customer Service. Problem: You need to change display property - Lenovo IdeaCentre B305 | Lenovo IdeaCentre B3 Series User Guide V1.0 - Page 46
persists, consult with Lenovo Service. 6.2 Troubleshooting Audio Problems Problem: No sound from integrated speakers. Troubleshooting and problem resolution: • Adjust the windows volume control - Double-click the speaker icon in the lower-right corner of your screen. Ensure that the volume is - Lenovo IdeaCentre B305 | Lenovo IdeaCentre B3 Series User Guide V1.0 - Page 47
is unable to read a CD/DVD. Troubleshooting and problem resolution: 1. Check to determine if there is an optical drive icon in the resource manager of the operating system. If not, restart your computer. If there is still no icon, contact Lenovo Service. Otherwise, continue with the next step of - Lenovo IdeaCentre B305 | Lenovo IdeaCentre B3 Series User Guide V1.0 - Page 48
the Service useful in troubleshooting system problems: 1. The serial number of the software. The serial number was shipped with the computer and was provided separately by the manufacturer. The Help Center is unable to retrieve this number. 2. The drivers for this computer model only support Guide 43 - Lenovo IdeaCentre B305 | Lenovo IdeaCentre B3 Series User Guide V1.0 - Page 49
instructions (Only some models are equipped with wireless keyboard and mouse) Before using the wireless keyboard and mouse, carefully read the configuration instructions using the instructions below. Method 1: 1. After installing the batteries, turn on the power the driver will Before using the method - Lenovo IdeaCentre B305 | Lenovo IdeaCentre B3 Series User Guide V1.0 - Page 50
click Next to establish the bluetooth connection. 6. Select the Lenovo Bluetooth keyboard and click Next. (Press Add a device icon if the dialog box is closed and press the connect button again.) 7. Enter the pairing code and press the Enter key to complete the bluetooth connection. User Guide 45 - Lenovo IdeaCentre B305 | Lenovo IdeaCentre B3 Series User Guide V1.0 - Page 51
46 User Guide
-
 1
1 -
 2
2 -
 3
3 -
 4
4 -
 5
5 -
 6
6 -
 7
7 -
8
-
9
-
10
-
11
-
12
-
13
-
14
-
15
-
16
-
17
-
18
-
19
-
20
-
21
-
22
-
23
-
24
-
25
-
26
-
27
-
28
-
29
-
30
-
31
-
32
-
33
-
34
-
35
-
36
-
37
-
38
-
39
-
40
-
41
-
42
-
43
-
44
-
45
-
46
-
47
-
48
-
49
-
50
-
51
 |
 |

Version 1.0
Machine type: 10051
10052
2010.04
Lenovo
IdeaCentre B3 Series
User Guide
31043484