Lenovo K315 Lenovo IdeaCentre K3 Series Hardware Replacemeng Guide V6.0
Lenovo K315 Manual
 |
View all Lenovo K315 manuals
Add to My Manuals
Save this manual to your list of manuals |
Lenovo K315 manual content summary:
- Lenovo K315 | Lenovo IdeaCentre K3 Series Hardware Replacemeng Guide V6.0 - Page 1
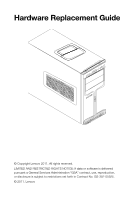
Machine type: 10062/7727 10073/1169 10066/7747 10067/7748 10079/1197/3098 IdeaCentre K3 Series Hardware Replacement Guide Version 6.0 2011.08 31500431 - Lenovo K315 | Lenovo IdeaCentre K3 Series Hardware Replacemeng Guide V6.0 - Page 2
Hardware Replacement Guide © Copyright Lenovo 2011. All rights reserved. LIMITED AND RESTRICTED RIGHTS NOTICE: If data or software is delivered pursuant a General Services Administration "GSA" contract, use, reproduction, or disclosure is subject to restrictions set forth in Contract No. GS-35F- - Lenovo K315 | Lenovo IdeaCentre K3 Series Hardware Replacemeng Guide V6.0 - Page 3
- Lenovo K315 | Lenovo IdeaCentre K3 Series Hardware Replacemeng Guide V6.0 - Page 4
Contents Overview 1 Chapter 1 Locations 5 Locating components and connectors 5 Identifying parts on the system board 11 Chapter 2 Replacing hardware 17 General information 17 Removing the computer cover 17 Removing the front bezel 19 Replacing a memory module 20 Replacing the hard disk - Lenovo K315 | Lenovo IdeaCentre K3 Series Hardware Replacemeng Guide V6.0 - Page 5
- Lenovo K315 | Lenovo IdeaCentre K3 Series Hardware Replacemeng Guide V6.0 - Page 6
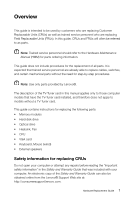
Lenovo®. The description of the TV-Tuner card in this manual applies only to those computer models that have the TV-Tuner card installed, and therefore does not apply to models without a TV-Tuner card. This guide contains instructions for replacing the following parts: • Memory modules • Hard disk - Lenovo K315 | Lenovo IdeaCentre K3 Series Hardware Replacemeng Guide V6.0 - Page 7
lenovo.com. You can find the following information: • CRU removal and installation • Publications • Troubleshooting • Parts • Links to other useful sources of information Tools required To disassemble the computer, the computer and you are ready to install the new part. 2 Hardware Replacement Guide - Lenovo K315 | Lenovo IdeaCentre K3 Series Hardware Replacemeng Guide V6.0 - Page 8
anti-static packaging on a smooth, flat surface prior to installing it. • Do not place parts on the computer cover or other metal surface. Hardware Replacement Guide 3 - Lenovo K315 | Lenovo IdeaCentre K3 Series Hardware Replacemeng Guide V6.0 - Page 9
4 Hardware Replacement Guide - Lenovo K315 | Lenovo IdeaCentre K3 Series Hardware Replacemeng Guide V6.0 - Page 10
in your computer. To remove the computer cover, refer to the section in this manual entitled "Removing the computer cover". Locating components and connectors The following illustrations will help illustration shows the components inside your computer. 1 2 3 4 5 6 8 7 Hardware Replacement Guide 5 - Lenovo K315 | Lenovo IdeaCentre K3 Series Hardware Replacemeng Guide V6.0 - Page 11
computer. 1 2 3 4 7 5 6 8 9 Power button Power dial indicator ON/OFF File backup button USB connector Microphone connector Headphone connector Memory card reader (Selected models only) 6 Hardware Replacement Guide - Lenovo K315 | Lenovo IdeaCentre K3 Series Hardware Replacemeng Guide V6.0 - Page 12
following illustrations show the location of the connectors on the rear of the computer. IdeaCentre K315 Voltage selection switch (Selected models only) Power connector USB connectors (6) On-board VGA card slots (Access connectors for any installed PCI express cards) Hardware Replacement Guide 7 - Lenovo K315 | Lenovo IdeaCentre K3 Series Hardware Replacemeng Guide V6.0 - Page 13
IdeaCentre K335 Voltage selection switch (Selected models only) Power connector PS/2 keyboard connector PS/2 mouse connector eSATA connector USB connectors graphic card (Selected models only) Expansion card slots (Access connectors for any installed PCI express cards) 8 Hardware Replacement Guide - Lenovo K315 | Lenovo IdeaCentre K3 Series Hardware Replacemeng Guide V6.0 - Page 14
IdeaCentre K330 Voltage selection switch (Selected models only) Power connector PS/2 keyboard connector PS/2 mouse connector USB connectors (6) eSATA Audio connectors (6) Standalone graphic card Expansion card slots (Access connectors for any installed PCI express cards) Hardware Replacement Guide 9 - Lenovo K315 | Lenovo IdeaCentre K3 Series Hardware Replacemeng Guide V6.0 - Page 15
IdeaCentre K330A/IedaCentre K330B Voltage selection switch (Selected models only) Power connector PS/2 keyboard connector PS/2 mouse connector HDMI connector graphic card (Selected models only) Expansion card slots (Access connectors for any installed PCI express cards) 10 Hardware Replacement Guide - Lenovo K315 | Lenovo IdeaCentre K3 Series Hardware Replacemeng Guide V6.0 - Page 16
. It provides basic computer functions and supports a variety of devices that are factory-installed or that you can install later. The following illustrations show the locations of the different parts on the system board. IdeaCentre K315 Microprocessor and heat sink Microprocessor fan connector - Lenovo K315 | Lenovo IdeaCentre K3 Series Hardware Replacemeng Guide V6.0 - Page 17
(2) Front audio connector PCI express X 1 adapter connectors (3) PCI express X 16 adapter connector System fan connector 12V power connector IdeaCentre K335 Microprocessor and heat sink Microprocessor fan connector Memory connectors (4) Thermal sensor header connector Power connector SATA connectors - Lenovo K315 | Lenovo IdeaCentre K3 Series Hardware Replacemeng Guide V6.0 - Page 18
connectors (3) Serial(com2) connector Front audio connector PCI express X 1 adapter connectors (2) PCI express X 16 adapter connectors (2) System fan connector 12V power connector IdeaCentre K330 Microprocessor and heat sink Microprocessor fan connector Memory connectors (4) Hardware Replacement - Lenovo K315 | Lenovo IdeaCentre K3 Series Hardware Replacemeng Guide V6.0 - Page 19
connector Front USB connectors (3) Serial (com2) connector Front audio connector PCI express X 1 adapter connectors (2) PCI express X 16 adapter connectors (2) System fan connector 12V power connector IdeaCentre K330A 14 Hardware Replacement Guide - Lenovo K315 | Lenovo IdeaCentre K3 Series Hardware Replacemeng Guide V6.0 - Page 20
connector Front USB connectors (3) Serial(com2) connector Front audio connector PCI express X 1 adapter connectors (3) PCI express X 16 adapter connector System fan connector 12V power connector IdeaCentre K330B Hardware Replacement Guide 15 - Lenovo K315 | Lenovo IdeaCentre K3 Series Hardware Replacemeng Guide V6.0 - Page 21
connectors (3) Serial(com2) connector Front audio connector PCI express X 1 adapter connectors (3) PCI express X 16 adapter connector System fan connector 12V power connector 16 Hardware Replacement Guide - Lenovo K315 | Lenovo IdeaCentre K3 Series Hardware Replacemeng Guide V6.0 - Page 22
in the Hardware Maintenance Manual (HMM) for the computer. To obtain copies of the Safety and Warranty Guide or HMM, go to the Support Web site at http://consumersupport.lenovo.com. Note: Use only parts provided by Lenovo. General information Pre-disassembly instructions Before proceeding with the - Lenovo K315 | Lenovo IdeaCentre K3 Series Hardware Replacemeng Guide V6.0 - Page 23
cover to the rear of the chassis to remove. Note: For this procedure, it helps to lay the computer on its side. 18 Hardware Replacement Guide - Lenovo K315 | Lenovo IdeaCentre K3 Series Hardware Replacemeng Guide V6.0 - Page 24
in the chassis, and then snap it into position at the bottom and top of the chassis. 4. Refer to the "Completing the installation". Hardware Replacement Guide 19 - Lenovo K315 | Lenovo IdeaCentre K3 Series Hardware Replacemeng Guide V6.0 - Page 25
the "Important safety information" in the Safety and Warranty Guide that was included with your computer or in the Hardware Maintenance Manual (HMM) for the computer. To obtain copies of the Safety and Warranty Guide or HMM, go to the Support Web site at http://consumersupport.lenovo.com. To replace - Lenovo K315 | Lenovo IdeaCentre K3 Series Hardware Replacemeng Guide V6.0 - Page 26
the "Important safety information" in the Safety and Warranty Guide that was included with your computer or in the Hardware Maintenance Manual (HMM) for the computer. To obtain copies of the Safety and Warranty Guide or HMM, go to the Support Web site at http://consumersupport.lenovo.com. To replace - Lenovo K315 | Lenovo IdeaCentre K3 Series Hardware Replacemeng Guide V6.0 - Page 27
the "Important safety information" in the Safety and Warranty Guide that was included with your computer or in the Hardware Maintenance Manual (HMM) for the computer. To obtain copies of the Safety and Warranty Guide or HMM, go to the Support Web site at http://consumersupport.lenovo.com To replace - Lenovo K315 | Lenovo IdeaCentre K3 Series Hardware Replacemeng Guide V6.0 - Page 28
the "Important safety information" in the Safety and Warranty Guide that was included with your computer or in the Hardware Maintenance Manual (HMM) for the computer. To obtain copies of the Safety and Warranty Guide or HMM, go to the Support Web site at http://consumersupport.lenovo.com To replace - Lenovo K315 | Lenovo IdeaCentre K3 Series Hardware Replacemeng Guide V6.0 - Page 29
4. Pull the system fan assembly out of chassis. 24 Hardware Replacement Guide - Lenovo K315 | Lenovo IdeaCentre K3 Series Hardware Replacemeng Guide V6.0 - Page 30
in place. 7. Connect the system fan assembly cable to the system fan connector on the system board. 8. Refer to the "Completing the installation". Hardware Replacement Guide 25 - Lenovo K315 | Lenovo IdeaCentre K3 Series Hardware Replacemeng Guide V6.0 - Page 31
the "Important safety information" in the Safety and Warranty Guide that was included with your computer or in the Hardware Maintenance Manual (HMM) for the computer. To obtain copies of the Safety and Warranty Guide or HMM, go to the Support Web site at: http://consumersupport.lenovo.com To replace - Lenovo K315 | Lenovo IdeaCentre K3 Series Hardware Replacemeng Guide V6.0 - Page 32
fan assembly on the heat sink retention bracket. 9. Reconnect the disconnected cables to the system board. 10. Refer to the "Completing the installation". Hardware Replacement Guide 27 - Lenovo K315 | Lenovo IdeaCentre K3 Series Hardware Replacemeng Guide V6.0 - Page 33
the "Important safety information" in the Safety and Warranty Guide that was included with your computer or in the Hardware Maintenance Manual (HMM) for the computer. To obtain copies of the Safety and Warranty Guide or HMM, go to the Support Web site at: http://consumersupport.lenovo.com To replace - Lenovo K315 | Lenovo IdeaCentre K3 Series Hardware Replacemeng Guide V6.0 - Page 34
the rear of the computer, turn the adapter latch to the closed position to secure the adapter. 6. Refer to the "Completing the installation". Hardware Replacement Guide 29 - Lenovo K315 | Lenovo IdeaCentre K3 Series Hardware Replacemeng Guide V6.0 - Page 35
plastic bracket at the bottom of the chassis. 2. Lift the plastic bracket out of the chassis. 3. Then remove the adapter as above. 30 Hardware Replacement Guide - Lenovo K315 | Lenovo IdeaCentre K3 Series Hardware Replacemeng Guide V6.0 - Page 36
plastic bracket to clip onto the adapter. 2. Fit the two screws to secure the plastic bracket. Note: Use only screws provided by Lenovo. Hardware Replacement Guide 31 - Lenovo K315 | Lenovo IdeaCentre K3 Series Hardware Replacemeng Guide V6.0 - Page 37
the chassis. 2. Press the pin on one end of the metal bracket and pull the metal bracket straight out of the chassis. 32 Hardware Replacement Guide - Lenovo K315 | Lenovo IdeaCentre K3 Series Hardware Replacemeng Guide V6.0 - Page 38
on the metal bracket clip the adapter. 2. Screw back the screws on the metal bracket. Note: Use only the screw provided by Lenovo. Hardware Replacement Guide 33 - Lenovo K315 | Lenovo IdeaCentre K3 Series Hardware Replacemeng Guide V6.0 - Page 39
the "Important safety information" in the Safety and Warranty Guide that was included with your computer or in the Hardware Maintenance Manual (HMM) for the computer. To obtain copies of the Safety and Warranty Guide or HMM, go to the Support Web site at http://consumersupport.lenovo.com To replace - Lenovo K315 | Lenovo IdeaCentre K3 Series Hardware Replacemeng Guide V6.0 - Page 40
retainer is fully open. 8. Holding the microprocessor with your fingers, remove the protective cover that protects the gold contacts on the new microprocessor . Hardware Replacement Guide 35 - Lenovo K315 | Lenovo IdeaCentre K3 Series Hardware Replacemeng Guide V6.0 - Page 41
section entitled "Replacing the system board". 16. Reconnect the disconnected cables to the system board. 17. Refer to the "Completing the installation". 36 Hardware Replacement Guide - Lenovo K315 | Lenovo IdeaCentre K3 Series Hardware Replacemeng Guide V6.0 - Page 42
the new keyboard cable to the same connector. 5. Refer to the "Completing the installation". 6. The mouse can be replaced using the same method. Hardware Replacement Guide 37 - Lenovo K315 | Lenovo IdeaCentre K3 Series Hardware Replacemeng Guide V6.0 - Page 43
need to confirm the updated information in the Setup Utility program. Refer to "Starting the Setup Utility" in the User Guide or in the Hardware Maintenance Manual for further information. To complete the part installation: 1. Ensure that all components have been reassembled correctly and that no - Lenovo K315 | Lenovo IdeaCentre K3 Series Hardware Replacemeng Guide V6.0 - Page 44
the computer cover on the chassis so that the rail guides on the bottom of the computer cover engage the rails update your configuration settings, refer to "Starting the Setup Utility" in the Hardware Maintenance Manual. Note: In most areas of the world, Lenovo requires the return of the defective - Lenovo K315 | Lenovo IdeaCentre K3 Series Hardware Replacemeng Guide V6.0 - Page 45
40 Hardware Replacement Guide - Lenovo K315 | Lenovo IdeaCentre K3 Series Hardware Replacemeng Guide V6.0 - Page 46
service personnel. You are responsible if you fail to operate the product according to instructions and requirements in the manuals manuals included with your computer is protected by copyright laws and rules. None of the manuals configuration described in the manuals included with your computer - Lenovo K315 | Lenovo IdeaCentre K3 Series Hardware Replacemeng Guide V6.0 - Page 47
Trademarks Lenovo and the Lenovo logo, IdeaCentre and IdeaCentre logo are trademarks of Lenovo in the United States, Lenovo publications may be trademarks or service marks of others. All rights reserved. Names or marks of certain companies mentioned in the manuals included with your computer or this
-
 1
1 -
 2
2 -
 3
3 -
 4
4 -
 5
5 -
 6
6 -
 7
7 -
8
-
9
-
10
-
11
-
12
-
13
-
14
-
15
-
16
-
17
-
18
-
19
-
20
-
21
-
22
-
23
-
24
-
25
-
26
-
27
-
28
-
29
-
30
-
31
-
32
-
33
-
34
-
35
-
36
-
37
-
38
-
39
-
40
-
41
-
42
-
43
-
44
-
45
-
46
-
47
 |
 |

Version 6.0
2011.08
Hardware Replacement Guide
IdeaCentre K3 Series
Machine type: 10062/7727
10073/1169
10066/7747
10067/7748
10079/1197/3098
31500431