Lenovo ThinkPad 380XD TP 380, Aptiva - Real Estate Solution - Setup and Tips G
Lenovo ThinkPad 380XD Manual
 |
View all Lenovo ThinkPad 380XD manuals
Add to My Manuals
Save this manual to your list of manuals |
Lenovo ThinkPad 380XD manual content summary:
- Lenovo ThinkPad 380XD | TP 380, Aptiva - Real Estate Solution - Setup and Tips G - Page 1
Real Estate Solution Setup and Tips Guide 1 - Lenovo ThinkPad 380XD | TP 380, Aptiva - Real Estate Solution - Setup and Tips G - Page 2
, connect and disconnect cables when installing, moving, or opening the covers of this product or attached devices. © International Business Machines Corporation, 1998. All Rights Reserved. Cover image Copyright © 1997 PhotoDisc, Inc. Any warranty, service or support for non-IBM products is provided - Lenovo ThinkPad 380XD | TP 380, Aptiva - Real Estate Solution - Setup and Tips G - Page 3
trying to configure your system with hardware and software that is not provided as part of your Real Estate Solution, you will not be eligible for IBM service and support on those items. If, after carefully reading and following these instructions, you still have problems, IBM provides a toll-free - Lenovo ThinkPad 380XD | TP 380, Aptiva - Real Estate Solution - Setup and Tips G - Page 4
to a product's manufacturer for warrantee, service, and technical support. To contact other companies who may have IBM Global Network) 1-800-821-4612 http://www.ibm.net Additional Information For helpful tips and information, see the IBM Real Estate Solution technical Web site at: http://www.ibm - Lenovo ThinkPad 380XD | TP 380, Aptiva - Real Estate Solution - Setup and Tips G - Page 5
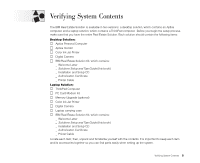
: Aptiva Personal Computer Aptiva monitor Color Ink Jet Printer Digital Camera IBM Real Estate Solution Kit, which contains: _ Welcome Letter _ Solutions Setup and Tips Guide (this book) _ Installation and Setup CD _ Authorization Certificate _ Printer Cable Laptop Solution: ThinkPad Computer PC - Lenovo ThinkPad 380XD | TP 380, Aptiva - Real Estate Solution - Setup and Tips G - Page 6
Working on the Internet 13 Using the Backup and Restore Service 15 Setting Up Fax Options ...16 Using the HomeSeekers Web Site ...18 Using Electronic Mail ...18 If you have an Aptiva desktop solution, go to "Setting Up Your Aptiva System" on page 7. If you have a ThinkPad laptop solution, go to - Lenovo ThinkPad 380XD | TP 380, Aptiva - Real Estate Solution - Setup and Tips G - Page 7
at this time. Setting Up the Aptiva Monitor The first step in setting up the Real Estate Solution system is to assemble the monitor components. Refer to the "Installing the Monitor" section of the IBM Color Monitor User's Guide for instructions on installing the monitor. This booklet is located - Lenovo ThinkPad 380XD | TP 380, Aptiva - Real Estate Solution - Setup and Tips G - Page 8
the language and keyboard layout (the standard choice is United States 101) for your system, the Windows 95 Certificate of Authenticity ID number, and a user ID and password. Follow the instructions on the screen. Some options, such as the mouse tutorial and the IBM and Lotus product registration - Lenovo ThinkPad 380XD | TP 380, Aptiva - Real Estate Solution - Setup and Tips G - Page 9
Setting Up Your ThinkPad System To set up the ThinkPad, follow the instructions in the ThinkPad Quick Setup Guide to attach the battery, ac adapter, and power supply. If your Real Estate Solution contained a separate memory package, install it on your ThinkPad at this time, following the " - Lenovo ThinkPad 380XD | TP 380, Aptiva - Real Estate Solution - Setup and Tips G - Page 10
double-click on the Display icon, Setting tab. 6. In the Color Palette field, select High Color (16 bit), and click OK. When prompted, restart the computer with the new settings by clicking OK. Now continue with "Setting Up the Printer" on page 11. 10 Setting up Your ThinkPad - Lenovo ThinkPad 380XD | TP 380, Aptiva - Real Estate Solution - Setup and Tips G - Page 11
from your system, you must attach the printer included in the Real Estate Solution. Make sure that you have the printer's documentation and the printer cable from the Real Estate Solution kit. Follow the steps outlined in the printer's documentation to install your printer. If your IBM Real Estate - Lenovo ThinkPad 380XD | TP 380, Aptiva - Real Estate Solution - Setup and Tips G - Page 12
on the Olympus Driver & Utility CD, double-click My Computer, double-click the CDROM drive, and click Win9nt4, Twain, D200-320, and Olympus. Double-click the Setup icon that looks like Tip a computer. When the "Setup Needs the Next Disk" window appears, click OK to complete the installation, and - Lenovo ThinkPad 380XD | TP 380, Aptiva - Real Estate Solution - Setup and Tips G - Page 13
the CDROM drive. The Real Estate Solution software is started automatically. (If the Real Estate Solution software does not start, double-click the My Computer icon and double-click the CDROM icon. When the IBM Real Estate Solution window appears, click the Install button. The Installation and Setup - Lenovo ThinkPad 380XD | TP 380, Aptiva - Real Estate Solution - Setup and Tips G - Page 14
and follow the instructions presented. Enter your registration information in the blanks provided. Click the Submit button at the end of the forms, and the IBM Global Network will authorize and register you as a new user. The system will welcome you to the IBM Internet Connection service and display - Lenovo ThinkPad 380XD | TP 380, Aptiva - Real Estate Solution - Setup and Tips G - Page 15
Service Tip Provider such as IBM Global Network. To register with Connected Online: 1. Select Start, Programs, Connected, Connected Online Backup. 2. Click the Next button until the Welcome to Registration window your system support. Also, keep your data encryption key in a safe place - this code - Lenovo ThinkPad 380XD | TP 380, Aptiva - Real Estate Solution - Setup and Tips G - Page 16
Setting Up Fax Options You can set up your IBM Real Estate Solution system to send faxes. To send a fax, you must first set up and then click OK again to return to the Compose New Fax Window. If you are not using a ThinkPad computer and you will only be dialing from one location, check the box at - Lenovo ThinkPad 380XD | TP 380, Aptiva - Real Estate Solution - Setup and Tips G - Page 17
fax machine icon appear (near the digital clock). While you are in Inbox-Windows Messaging, click Help, Microsoft Fax Help Topics, Send and Receiving Faxes Tip to the lower right corner of the task bar (near the digital clock) to activate the fax machine to wait for a fax call. Click Answer Now to - Lenovo ThinkPad 380XD | TP 380, Aptiva - Real Estate Solution - Setup and Tips G - Page 18
for sign-in information. You will be asked for your MLS Public ID and IBM Client ID (printed on your Authorization Certificate). Complete the menu items to sign in in the lower right corner of the Netscape window. This will bring up the Netscape Mail window. When prompted for a password, enter the - Lenovo ThinkPad 380XD | TP 380, Aptiva - Real Estate Solution - Setup and Tips G - Page 19
Notes Notes 19 - Lenovo ThinkPad 380XD | TP 380, Aptiva - Real Estate Solution - Setup and Tips G - Page 20
20
-
 1
1 -
 2
2 -
 3
3 -
 4
4 -
 5
5 -
 6
6 -
 7
7 -
8
-
9
-
10
-
11
-
12
-
13
-
14
-
15
-
16
-
17
-
18
-
19
-
20
 |
 |

Real Estate Solution
Setup and Tips Guide