Lexmark 09H0052 2000-Sheet Drawer User's Guide
Lexmark 09H0052 - T522 25PPM LASERPR Manual
 |
UPC - 734646620529
View all Lexmark 09H0052 manuals
Add to My Manuals
Save this manual to your list of manuals |
Lexmark 09H0052 manual content summary:
- Lexmark 09H0052 | 2000-Sheet Drawer User's Guide - Page 1
Lexmark T522 2000-Sheet Drawer User's Guide Gaveta de 2000 folhas Guia do usuário Tiroir 2000 feuilles Manuel d'utilisation 2000-Blatt-Zuführung Benutzerhandbuch Cassetto da 2000 fogli Guida per l'utente Alimentador de 2000 hojas Guía del usuario - Lexmark 09H0052 | 2000-Sheet Drawer User's Guide - Page 2
English - Lexmark 09H0052 | 2000-Sheet Drawer User's Guide - Page 3
. Evaluation and verification of operation in conjunction with other products, programs, or services, except those expressly designated by the manufacturer, are the user's responsibility. Lexmark is a trademark of Lexmark International, Inc., registered in the United States and/or other countries - Lexmark 09H0052 | 2000-Sheet Drawer User's Guide - Page 4
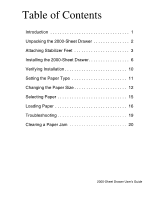
Feet 3 Installing the 2000-Sheet Drawer 6 Verifying Installation 10 Setting the Paper Type 11 Changing the Paper Size 12 Selecting Paper 15 Loading Paper 16 Troubleshooting 19 Clearing a Paper Jam 20 2000-Sheet Drawer User - Lexmark 09H0052 | 2000-Sheet Drawer User's Guide - Page 5
2000-Sheet Drawer User's Guide - Lexmark 09H0052 | 2000-Sheet Drawer User's Guide - Page 6
page 12. Your printer has an autoconnect feature that recognizes when the 2000-sheet drawer has been installed. After starting your printer, this option is on paper specifications and page 16 for loading instructions. To ensure compatibility with your printer, verify your drawer is labeled with a - Lexmark 09H0052 | 2000-Sheet Drawer User's Guide - Page 7
only with units intended to operate at 100 - 127V power. Printer compatibility label (colored triangle) Decals 2000-sheet Stabilizer feet 16 AWG material in case you need to repack the 2000-sheet drawer for service or storage. 3 Peel the appropriately numbered decals from the sheet and - Lexmark 09H0052 | 2000-Sheet Drawer User's Guide - Page 8
Attaching Stabilizer Feet CAUTION! If you are not using an optional printer stand, the four stabilizer feet must be attached to the drawer. Note: If you later choose to use the drawer with the printer stand, you must remove the stabilizer feet and reattach the rubber feet. 2000-Sheet Drawer User - Lexmark 09H0052 | 2000-Sheet Drawer User's Guide - Page 9
3 Insert the tab on the end of the stabilizer foot into the slot on the bottom of the drawer. Rotate the stabilizer foot down until it is aligned with the bottom of the drawer. 4 Slide the foot away from the center of the tray until it locks into place. 4 2000-Sheet Drawer User's Guide - Lexmark 09H0052 | 2000-Sheet Drawer User's Guide - Page 10
5 Using one of the rubber feet removed in step 2 on page 3, align the openings of the rubber and stabilizer feet and attach the screw as shown. 6 Repeat step 3 on page 4 through step 5 on page 5 for the remaining rubber and stabilizer feet. 2000-Sheet Drawer User's Guide 5 - Lexmark 09H0052 | 2000-Sheet Drawer User's Guide - Page 11
. 3 Place any options you may have on top of the drawer one at a time. Refer to your printer documentation for proper installation instructions. 4 Ask someone to help you lift the printer and position it above the drawer and any options you may have installed in step 3. CAUTION! Make sure your - Lexmark 09H0052 | 2000-Sheet Drawer User's Guide - Page 12
5 Place the printer on top of the drawer and any options installed. The openings on top of the drawer will help you set the printer so the edges are aligned properly. Make sure the printer is securely in place. Round hole Handhold Tab Square hole 2000-Sheet Drawer User's Guide 7 - Lexmark 09H0052 | 2000-Sheet Drawer User's Guide - Page 13
6 Plug the jumper cord into the printer. Plug the other end of the jumper cord into the drawer. 7 Reconnect any disconnected cables. 8 2000-Sheet Drawer User's Guide - Lexmark 09H0052 | 2000-Sheet Drawer User's Guide - Page 14
with the printer; however, you may retain it for possible future printer from the 2000-sheet drawer, and use the printer with other paper options, you should use the original power cord provided with the printer power cord provided with the printer. Plug the power cord into the back of - Lexmark 09H0052 | 2000-Sheet Drawer User's Guide - Page 15
to begin using it. If the drawer is not listed on the page, the printer or other options may not be seated securely or aligned properly. Return to page 6 of this guide and carefully follow all installation instructions. Print the menu settings page again to verify installation. 10 2000-Sheet Drawer - Lexmark 09H0052 | 2000-Sheet Drawer User's Guide - Page 16
you should set the paper type. To set the paper type, go to the printer operator panel, and then follow these steps: 1 Make sure the printer power is on and the Ready status message appears on the display. 2 Press Menu Press Go to display the Ready status message. 11 2000-Sheet Drawer User's Guide - Lexmark 09H0052 | 2000-Sheet Drawer User's Guide - Page 17
paper size prior to installation, proceed to step 7 of the following instructions now. If you are changing the paper size for a unit that is already attached to a printer and a power source, proceed with step 1: 1 Open the loading the paper size to executive (EXEC). 12 2000-Sheet Drawer User's Guide - Lexmark 09H0052 | 2000-Sheet Drawer User's Guide - Page 18
Note: Make a note of the color associated with the paper size you select. Paper size selector knob 13 2000-Sheet Drawer User's Guide - Lexmark 09H0052 | 2000-Sheet Drawer User's Guide - Page 19
located on the inside bottom of the unit. The guides should now be seated flush against the top of the unit. 13 Push each pin down to lock the guides in place. Selecting Paper The print quality and feeding reliability of your printer can vary with the type of paper you use. For - Lexmark 09H0052 | 2000-Sheet Drawer User's Guide - Page 20
not use the following print materials in the drawer: • Envelopes • Labels • Card Stock • Transparencies • Preprinted forms that require exact registration 15 2000-Sheet Drawer User's Guide - Lexmark 09H0052 | 2000-Sheet Drawer User's Guide - Page 21
paper loading can prevent paper jams and help to ensure trouble-free printing. To avoid paper jams: • Do not loaded. If you are unsure of the paper size, go to the printer operator panel and follow these steps: a Make sure the printer power is on and the Ready status message appears on the display. - Lexmark 09H0052 | 2000-Sheet Drawer User's Guide - Page 22
the 2000- sheet drawer). If you want to load a paper size different from the one selected see page 12 for instructions, and then proceed with step 2 on page 17. 2 Open the loading door. If the elevator tray is not paper. Straighten the edges on a level surface. 17 2000-Sheet Drawer User's Guide - Lexmark 09H0052 | 2000-Sheet Drawer User's Guide - Page 23
to return your 2000-sheet drawer, please make sure that all paper has been removed from the unit before packing. 18 2000-Sheet Drawer User's Guide - Lexmark 09H0052 | 2000-Sheet Drawer User's Guide - Page 24
Troubleshooting Problem drawer. Action Check the following: • The printer is properly attached to the 2000sheet drawer. • The printer is powered on. • The power cord not damaged. • Paper meets specifications. • Paper guides are positioned correctly for the paper size selected. See page 12. - Lexmark 09H0052 | 2000-Sheet Drawer User's Guide - Page 25
Turn the printer off, wait about 10 seconds, and then turn the printer on. If the error recurs, write down the error number, the problem, and a detailed description. Call service. Make sure the paper size selector knob is set to the correct paper size. See page 12. 20 2000-Sheet Drawer User's Guide - Lexmark 09H0052 | 2000-Sheet Drawer User's Guide - Page 26
door. 2 Press the elevator down button. Elevator down button 3 Remove the paper jam and clear all paper from the paper path of the drawer and printer. 4 Check to see if the stack of paper is neat and aligned. 5 Close the door. 6 Allow a few seconds for the elevator to reach the top - Lexmark 09H0052 | 2000-Sheet Drawer User's Guide - Page 27
Português do Brasil - Lexmark 09H0052 | 2000-Sheet Drawer User's Guide - Page 28
edição (Maio de 2001) O parágrafo a seguir não se aplica a países onde tais medidas sejam incompatíveis com as leis locais: A LEXMARK INTERNATIONAL, INC., FORNECE ESTA PUBLICAÇÃO NA PRESENTE FORMA SEM GARANTIA, TANTO EXPLÍCITA QUANTO IMPLÍCITA, INCLUINDO MAS NÃO LIMITADA ÀS GARANTIAS IMPLÍCITAS DE - Lexmark 09H0052 | 2000-Sheet Drawer User's Guide - Page 29
Índice analítico Introdução 1 Desembalar a gaveta de 2000 folhas 2 Anexar os pés do estabilizador 3 Instalar a bandeja de 2000 folhas 6 Verificar a instalação 10 Definir o tipo do papel 11 Alterar o tamanho do papel 12 Selecionar papel 15 Carregar papel 16 Solução de problemas 20 Eliminar - Lexmark 09H0052 | 2000-Sheet Drawer User's Guide - Page 30
Guia do usuário para gaveta de 2000 folhas - Lexmark 09H0052 | 2000-Sheet Drawer User's Guide - Page 31
Introdução A gaveta de 2000 folhas fornece à sua impressora uma capacidade adicional, permitindo que você carregue até quatro resmas (aproximadamente 2.000 folhas) de papel de 20 lb. (80 gsm). A gaveta é pré-configurada para tamanho de papel Carta ou A4. Para usar um tamanho de papel diferente, - Lexmark 09H0052 | 2000-Sheet Drawer User's Guide - Page 32
Desembalar a gaveta de 2000 folhas 1 Retire todos os itens exibidos na ilustração de dentro da embalagem. Se algum item estiver faltando, entre em contato com o local onde você comprou a gaveta de 2000 folhas. Nota: O cabo de alimentação de 16 AWG só acompanha unidades destinadas a operar a 100 - - Lexmark 09H0052 | 2000-Sheet Drawer User's Guide - Page 33
Anexar os pés do estabilizador CUIDADO: Se você não estiver usando um suporte opcional de impressora, os quatro pés do estabilizador devem ser anexados à gaveta. 1 Cuidadosamente, inverta a gaveta de 2000 folhas de modo que o fundo fique virado para cima. 2 Remova os parafusos que prendem os pés de - Lexmark 09H0052 | 2000-Sheet Drawer User's Guide - Page 34
3 Insira a lingüeta da extremidade do pé do estabilizador no orifício do fundo da gaveta. Gire o pé do estabilizador para baixo até que fique alinhado com o fundo da gaveta. 4 Afaste o pé do centro da bandeja até que ele trave no lugar. 4 Guia do usuário para gaveta de 2000 folhas - Lexmark 09H0052 | 2000-Sheet Drawer User's Guide - Page 35
5 Usando um dos pés de borracha removidos na etapa 2 na página 3, alinhe as aberturas dos pés de borracha e do estabilizador e fixe o parafuso como mostrado. 6 Repita da etapa 3 na página 4 até a 5 na página 5 para os pés restantes. Guia do usuário para gaveta de 2000 folhas 5 - Lexmark 09H0052 | 2000-Sheet Drawer User's Guide - Page 36
Instalar a bandeja de 2000 folhas Decida sobre o local de instalação da bandeja de 2000 folhas. A impressora e, possivelmente, outras opções serão colocadas na parte superior da gaveta, de modo a permitir um espaço livre de 137,16 cm (4 ½ pés). Nota: A gaveta é pré-configurada para tamanho de - Lexmark 09H0052 | 2000-Sheet Drawer User's Guide - Page 37
5 Coloque a impressora na parte superior da gaveta, assim como quaisquer outras opções instaladas. As aberturas na parte superior da gaveta ajudarão a fixar a impressora, de modo que as bordas fiquem devidamente alinhadas. Certifique-se de que a impressora esteja bem segura. Orifício redondo Apoio - Lexmark 09H0052 | 2000-Sheet Drawer User's Guide - Page 38
6 Ligue uma extremidade do cabo de conexão à impressora e a outra à gaveta. 7 Reconecte todos os cabos desconectados. 8 Guia do usuário para gaveta de 2000 folhas - Lexmark 09H0052 | 2000-Sheet Drawer User's Guide - Page 39
8 Se pretender operar a gaveta de 2000 folhas a 100 - 127V, você deve usar o cabo de alimentação de 16 AWG fornecido com a unidade. Conecte o cabo de alimentação de 16 AWG à parte traseira da gaveta e, depois, a uma tomada elétrica devidamente aterrada. Não use o cabo de alimentação fornecido com a - Lexmark 09H0052 | 2000-Sheet Drawer User's Guide - Page 40
Verificar a instalação Uma vez instalada a gaveta de 2000 folhas, verifique se a instalação foi feita corretamente, imprimindo uma página de configurações de menu. Para imprimir uma página de configurações de menu: 1 Certifique-se de que a impressora esteja ligada e a mensagem de status Pronta - Lexmark 09H0052 | 2000-Sheet Drawer User's Guide - Page 41
Definir o tipo do papel Depois que a gaveta estiver instalada, você deve definir o tipo do papel. Para isso, vá para o painel do operador e, em seguida, siga estas etapas: 1 Certifique-se de que a impressora esteja ligada e que a mensagem de status Pronta apareça na tela. 2 Pressione Menu> ou - Lexmark 09H0052 | 2000-Sheet Drawer User's Guide - Page 42
Alterar o tamanho do papel A gaveta de 2000 folhas vem pré-configurada para papel Carta ou A4. Para alterar o tamanho do papel antes da instalação, vá para a etapa 7 das instruções a seguir. Se estiver alterando o tamanho do papel para uma unidade que já esteja anexada a uma impressora e a uma - Lexmark 09H0052 | 2000-Sheet Drawer User's Guide - Page 43
8 Para fazer uma seleção, gire o botão totalmente no sentido anti-horário. Esse procedimento define o tamanho do papel para Ofício (LGL). 9 Conte os cliques à medida que você gira o botão no sentido horário a fim de encontrar o tamanho correto do papel. Por exemplo, um clique define o tamanho do - Lexmark 09H0052 | 2000-Sheet Drawer User's Guide - Page 44
10 Solte os pinos de travamento e, em seguida, puxe as guias a fim de removê-las. Pinos de travamento Guia traseira Guias laterais Orifícios codificados por cor (superiores) Orifícios codificados por cor (inferiores) 11 Recoloque as guias de papel nos orifícios codificados por cor, localizados na - Lexmark 09H0052 | 2000-Sheet Drawer User's Guide - Page 45
Selecionar papel A qualidade da impressão e a confiabilidade da alimentação de sua impressora podem variar de acordo com o tipo de papel usado. Para obter mais informações sobre as especificações do papel, consulte a documentação da impressora. Para garantir a melhor qualidade de impressão, use - Lexmark 09H0052 | 2000-Sheet Drawer User's Guide - Page 46
Carregar papel Um carregamento adequado de papel pode evitar atolamentos, além de ajudar a garantir uma impressão livre de problemas. Para evitar atolamentos de papel: • Não carregue material de impressão além da marca de capacidade de papel. Consulte a página 19 para saber onde fica essa marca. • - Lexmark 09H0052 | 2000-Sheet Drawer User's Guide - Page 47
e Selecione Tamanho na bandeja x (onde x representa o número da bandeja da gaveta de 2000 folhas). Se quiser carregar um tamanho de papel diferente do selecionado, consulte a página 12 para obter instruções e, depois, continue na etapa 2 na página 17. 2 Abra a porta de carregamento. Se a bandeja do - Lexmark 09H0052 | 2000-Sheet Drawer User's Guide - Page 48
3 Flexione ligeiramente cada pilha de papel para frente e para trás. Não amasse ou dobre o papel. Alinhe as bordas sobre uma superfície plana. 4 Incline levemente a pilha de papel, como mostrado, e coloque-a na bandeja do elevador com o lado apropriado para impressão virado para baixo. Alinhe a - Lexmark 09H0052 | 2000-Sheet Drawer User's Guide - Page 49
Com cuidado, alinhe cada pilha de papel à medida que as carregar para garantir que não haja desníveis entre uma pilha e outra. Não carregue material de impressão acima da marca de capacidade de papel. Marca de capacidade de papel Essa ilustração mostra a orientação correta para o carregamento de - Lexmark 09H0052 | 2000-Sheet Drawer User's Guide - Page 50
Solução de problemas Problema A bandeja do elevador não sobe quando a porta de carregamento é fechada, ou a bandeja do elevador não desce quando a porta é aberta e o botão de descida do elevador é pressionado. A bandeja do elevador desce inesperadamente. Mais de uma folha de papel foi alimentada ou - Lexmark 09H0052 | 2000-Sheet Drawer User's Guide - Page 51
Problema Mensagens de manutenção Papel pequeno demais Ação Uma mensagem de manutençao indica uma falha na impressora que pode necessitar de serviço. Desligue a impressora, espere cerca de 10 segundos e, em seguida, ligue-a novamente. Se o erro persistir, anote o número do erro e o problema, e faça - Lexmark 09H0052 | 2000-Sheet Drawer User's Guide - Page 52
Eliminar um atolamento de papel 1 Abra a porta de carregamento. 2 Pressione o botão de descida do elevador. Botão de descida do elevador 3 Remova o atolamento e retire qualquer papel do trajeto de papel da gaveta e da impressora. 4 Verifique se a pilha de papel está ordenada e alinhada. 5 Feche a - Lexmark 09H0052 | 2000-Sheet Drawer User's Guide - Page 53
Français - Lexmark 09H0052 | 2000-Sheet Drawer User's Guide - Page 54
et la vérification du bon fonctionnement conjointement avec des produits, programmes ou services autres que ceux désignés expressément par le fabricant sont de la responsabilité de l'utilisateur. Lexmark est une marque de Lexmark International, Inc., déposées aux Etats-Unis et/ou dans d'autres pays - Lexmark 09H0052 | 2000-Sheet Drawer User's Guide - Page 55
Table des matières Introduction 1 Déballage du tiroir 2000 feuilles 2 Fixation des pieds stabilisateurs 3 Installation du tiroir 2000 feuilles 6 Vérification de l'installation 10 Réglage du type de papier 11 Changement de taille de papier 12 Sélection du papier 15 Chargement de papier 16 Ré - Lexmark 09H0052 | 2000-Sheet Drawer User's Guide - Page 56
Manuel d'utilisation du tiroir 2000 feuilles - Lexmark 09H0052 | 2000-Sheet Drawer User's Guide - Page 57
un papier adéquat et de veiller à le charger correctement. Vous trouverez page 16 des informations sur les différents types de support et page 17 des instructions pour le chargement. Pour garantir la compatibilité avec l'imprimante, vérifiez que le tiroir est marqué d'un triangle de couleur dans - Lexmark 09H0052 | 2000-Sheet Drawer User's Guide - Page 58
Déballage du tiroir 2000 feuilles 1 Sortez du carton tous les éléments indiqués sur le schéma. S'il manque un élément, contactez votre point de vente. Remarque : Le cordon d'alimentation 16 AWG est inclus uniquement avec les dispositifs prévus pour fonctionner à une tension d'alimentation de 100 - - Lexmark 09H0052 | 2000-Sheet Drawer User's Guide - Page 59
3 Décollez les numéros de tiroir appropriés et apposez-les sur les zones renfoncées du tiroir. Sélectionnez le nombre correspondant au nombre d'options que vous mettez en place, y compris le tiroir d'alimentation standard. Manuel d'utilisation du tiroir 2000 feuilles 3 - Lexmark 09H0052 | 2000-Sheet Drawer User's Guide - Page 60
Fixation des pieds stabilisateurs ATTENTION : Si vous n'utilisez pas le meuble d'imprimante optionnel, vous devez fixer au tiroir les quatre pieds stabilisateurs. 1 Retournez le tiroir 2000 feuilles avec précaution. 2 Retirez les vis qui fixent les pieds en caoutchouc au tiroir. Conservez-les pour - Lexmark 09H0052 | 2000-Sheet Drawer User's Guide - Page 61
3 Insérez l'onglet qui se trouve à l'extrémité du pied stabilisateur dans la fente située sous le tiroir. Faites pivoter le pied vers le bas jusqu'à ce qu'il soit aligné avec le fond du tiroir. 4 Eloignez le pied du centre du tiroir (en le faisant glisser) jusqu'à ce qu'il s'enclenche. Manuel d' - Lexmark 09H0052 | 2000-Sheet Drawer User's Guide - Page 62
5 Prenez l'un des pieds en caoutchouc retiré à l'étape 2 page 4, alignez les orifices du pied en caoutchouc et du pied stabilisateur et fixez la vis comme indiqué. 6 Répétez la procédure de l'étape 3 page 5 à l'étape 5 page 6 pour les autres pieds. 6 Manuel d'utilisation du tiroir 2000 feuilles - Lexmark 09H0052 | 2000-Sheet Drawer User's Guide - Page 63
és à l'imprimante. 3 Installez les options dont vous disposez sur le tiroir une par une. Reportez-vous à la documentation de l'imprimante pour les instructions d'installation. 4 Demandez à quelqu'un de vous aider à soulever l'imprimante et placez-la sur le tiroir et les options installées à l'étape - Lexmark 09H0052 | 2000-Sheet Drawer User's Guide - Page 64
5 Placez l'imprimante sur le tiroir et les options installées. Les ouvertures se trouvant sur la partie supérieure du tiroir vous aideront à aligner correctement les bords de l'imprimante. Vérifiez que l'imprimante est bien en place. Trou rond Poignée Onglet Trou carré 8 Manuel d'utilisation du - Lexmark 09H0052 | 2000-Sheet Drawer User's Guide - Page 65
6 Branchez le cordon de raccordement sur l'imprimante. Branchez l'autre extrémité de ce cordon sur le tiroir. 7 Rebranchez tous les câbles déconnectés. Manuel d'utilisation du tiroir 2000 feuilles 9 - Lexmark 09H0052 | 2000-Sheet Drawer User's Guide - Page 66
8 Si vous avez l'intention de faire fonctionner le tiroir 2000 feuilles à 100 - 127V, vous devez utiliser le cordon d'alimentation 16 AWG fourni. Branchez le cordon 16 AWG à l'arrière du tiroir, puis sur une prise correctement mise à la terre. N'utilisez pas le cordon d'alimentation livré avec l' - Lexmark 09H0052 | 2000-Sheet Drawer User's Guide - Page 67
ou une autre option soit mal fixée ou ne soit pas alignée correctement. Retournez à la page 6 de ce manuel et suivez bien toutes les instructions d'installation. Imprimez de nouveau la page des paramètres de menus pour vérifier l'installation. 11 Manuel d'utilisation du tiroir 2000 feuilles - Lexmark 09H0052 | 2000-Sheet Drawer User's Guide - Page 68
Réglage du type de papier Une fois le tiroir installé, vous devez configurer le type de papier. Pour ce faire, procédez aux étapes suivantes à partir du panneau de commandes : 1 Assurez-vous que l'imprimante est sous tension et que le message d'état Prêt est affiché à l'écran. 2 Appuyez sur Menu> ou - Lexmark 09H0052 | 2000-Sheet Drawer User's Guide - Page 69
configuré pour du papier au format lettre ou A4. Pour changer de format avant l'installation, passez directement à l'étape 7 des instructions suivantes. Pour modifier la configuration d'une unité déjà connectée à l'imprimante et à une source d'alimentation, procédez à l'étape 1. 1 Ouvrez la porte - Lexmark 09H0052 | 2000-Sheet Drawer User's Guide - Page 70
8 Pour effectuer une sélection, tournez le bouton à fond dans le sens anti-horaire. Vous réglez ainsi la taille de papier sur légal (LGL). 9 Tournez le bouton dans le sens horaire en comptant les déclics pour obtenir la taille de papier souhaitée. Par exemple, le premier déclic règle la taille sur - Lexmark 09H0052 | 2000-Sheet Drawer User's Guide - Page 71
à la taille de papier sélectionnée qui se trouvent sur le dessus de l'unité. 12 Insérez les guides papier dans les fentes de même couleur situées au fond de l'unité. Les guides papier devraient maintenant être calés contre la partie supérieure de l'unité. 13 Appuyez sur les broches afin - Lexmark 09H0052 | 2000-Sheet Drawer User's Guide - Page 72
professionnels sont conçus pour une utilisation générale et permettent d'obtenir une qualité d'impression convenable. Remarque : Essayez toujours vos nouveaux supports d'impression avant de vous en procurer de grandes quantités. Le tableau suivant répertorie les types de papier conseillés pour le - Lexmark 09H0052 | 2000-Sheet Drawer User's Guide - Page 73
Chargement de papier En veillant à charger correctement le papier, vous éviterez les bourrages et les problèmes d'impression. Pour éviter les bourrages : • Ne dépassez pas la limite de capacité du tiroir. Voir page 18 pour identifier le repère de capacité. • N'utilisez pas de papier plié ou froissé. - Lexmark 09H0052 | 2000-Sheet Drawer User's Guide - Page 74
Si vous souhaitez charger un papier d'une taille différente de la taille sélectionnée, lisez les instructions page 13, puis passez à l'étape 2 page 18. 2 Ouvrez la porte de chargement. Si le tiroir élévaleur n'est pas encore en position basse, abaissez-le en - Lexmark 09H0052 | 2000-Sheet Drawer User's Guide - Page 75
tiroir est installé correctement. • Le papier est chargé correctement. • Le papier n'est pas endommagé. • Le papier correspond aux spécifications. • Les guides papiers sont positionnés correctement en fonction de la taille sélectionnée. Voir page 13. 19 Manuel d'utilisation du tiroir 2000 feuilles - Lexmark 09H0052 | 2000-Sheet Drawer User's Guide - Page 76
10 secondes, puis remettez-la sous tension. Si l'erreur se reproduit, notez le numéro d'erreur, le problème et les détails. Appelez les services d'entretien. Vérifiez que le bouton de sélection de taille de papier est réglé correctement. Voir page 13. 20 Manuel d'utilisation du tiroir 2000 feuilles - Lexmark 09H0052 | 2000-Sheet Drawer User's Guide - Page 77
Dégagement d'un bourrage de papier 1 Ouvrez la porte de chargement. 2 Appuyez sur le bouton de descente du tiroir élévateur. Bouton de descente du tiroir élévateur 3 Dégagez le bourrage et retirez toutes les feuilles qui se trouvent sur le chemin du papier dans le tiroir et l'imprimante. 4 Vérifiez - Lexmark 09H0052 | 2000-Sheet Drawer User's Guide - Page 78
22 Manuel d'utilisation du tiroir 2000 feuilles - Lexmark 09H0052 | 2000-Sheet Drawer User's Guide - Page 79
Deutsch - Lexmark 09H0052 | 2000-Sheet Drawer User's Guide - Page 80
eingetragen in den Vereinigten Staaten und/oder anderen Ländern. Sonstige Warenzeichen sind Eigentum ihrer jeweiligen Inhaber. © Copyright 2001 Lexmark International, Inc. Alle Rechte vorbehalten. EINGESCHRÄNKTE RECHTE DER REGIERUNG DER VEREINIGTEN STAATEN VON AMERIKA. Die vorliegende Software und - Lexmark 09H0052 | 2000-Sheet Drawer User's Guide - Page 81
Inhalt Einführung 1 Auspacken der 2000-Blatt-Zuführung 2 Anbringen von Stabilisierungsfüßen 4 Installieren der 2000-Blatt-Zuführung 7 Überprüfen der Installation 12 Einstellen der Papiersorte 13 Ändern des Papierformats 14 Papierauswahl 17 Einlegen von Papier 18 Problemlösung 22 Beheben - Lexmark 09H0052 | 2000-Sheet Drawer User's Guide - Page 82
2000-Blatt-Zuführung - Benutzerhandbuch - Lexmark 09H0052 | 2000-Sheet Drawer User's Guide - Page 83
Einführung Mit der 2000-Blatt-Papierzuführung wird die Papierkapazität Ihres Druckers erhöht. Sie können bis zu vier Ries (ca. 2000 Blatt) Papier mit einem Gewicht von 75 g/m2 einlegen. Die Zuführung ist für das Format „Letter" oder „A4" vorkonfiguriert. Informationen zur Verwendung anderer - Lexmark 09H0052 | 2000-Sheet Drawer User's Guide - Page 84
Auspacken der 2000-Blatt-Zuführung 1 Nehmen Sie alle in der Abbildung dargestellten Teile aus der Verpackung. Sollten Teile fehlen, wenden Sie sich an den Händler, bei dem Sie die 2000-Blatt-Zuführung erworben haben. Hinweis: Das Netzkabel 16 AWG ist nur beigefügt, wenn das Gerät mit einer - Lexmark 09H0052 | 2000-Sheet Drawer User's Guide - Page 85
3 Ziehen Sie die numerierten Aufkleber ab, und bringen Sie diese an den ausgesparten Stellen der Zuführung an. Verwenden Sie den Aufkleber mit der Nummer, die der Anzahl der installierten Papieroptionen entspricht (einschließlich des Standardausgabefachs). 2000-Blatt-Zuführung - Benutzerhandbuch 3 - Lexmark 09H0052 | 2000-Sheet Drawer User's Guide - Page 86
Anbringen von Stabilisierungsfüßen ACHTUNG: Wenn Sie kein optionales Druckergestell verwenden, müssen die vier Stabilisierungsfüße an der Zuführung angebracht werden. 1 Stellen Sie die 2000-Blatt-Zuführung vorsichtig auf den Kopf. 2 Lösen Sie die Schrauben der Gummifüße an der Zuführung. Bewahren - Lexmark 09H0052 | 2000-Sheet Drawer User's Guide - Page 87
3 Stecken Sie die Nase am Ende des Stabilisierungsfußes in die Aufnahme im Boden der Zuführung. Kippen Sie den Stabilisierungsfuß, bis er auf dem Boden der Zuführung aufliegt. 4 Drücken Sie den Fuß nach außen, bis er einrastet. 2000-Blatt-Zuführung - Benutzerhandbuch 5 - Lexmark 09H0052 | 2000-Sheet Drawer User's Guide - Page 88
5 Richten Sie mit Hilfe eines der in Schritt 2 auf Seite 4 entfernten Gummifüße die Öffnung von Gummi- und Stabilisierungsfuß aufeinander aus, und bringen Sie die Schraube wie abgebildet an. 6 Wiederholen Sie die Schritte 3 auf Seite 5 bis 5 auf Seite 6 für die restlichen Gummi- und Stabilisierungsf - Lexmark 09H0052 | 2000-Sheet Drawer User's Guide - Page 89
Installieren der 2000-Blatt-Zuführung Suchen Sie einen Aufstellungsort für die 2000-Blatt-Zuführung. Der Drucker und, falls vorhanden, weitere Optionen werden auf der Zuführung installiert. Lassen Sie also mindestens 137,16 cm Freiraum. Hinweis: Die Zuführung ist für das Format „Letter" oder „A4" - Lexmark 09H0052 | 2000-Sheet Drawer User's Guide - Page 90
5 Setzen Sie den Drucker auf die Zuführung und eventuell zusätzlich installierte Optionen. Die Aufnahmen auf der Oberseite der Zuführung ermöglichen eine genaue Ausrichtung der Geräte. Achten Sie darauf, daß der Drucker sicher steht. Runde Aussparung Griffmulde Sicherungsstift Quadratische - Lexmark 09H0052 | 2000-Sheet Drawer User's Guide - Page 91
6 Stecken Sie das Verbindungskabel in den Drucker. Stecken Sie das andere Ende des Verbindungskabels in die Zuführung. 7 Schließen Sie sämtliche anderen Kabel wieder an. 2000-Blatt-Zuführung - Benutzerhandbuch 9 - Lexmark 09H0052 | 2000-Sheet Drawer User's Guide - Page 92
8 Wenn Sie die 2000-Blatt-Zuführung mit einer Netzspannung von 100 bis 127 Volt betreiben möchten, müssen Sie das mitgelieferte Netzkabel 16 AWG verwenden. Schließen Sie das Netzkabel 16 AWG an die Zuführung und an eine ordnungsgemäß geerdete Steckdose an. Verwenden Sie nicht das Netzkabel des - Lexmark 09H0052 | 2000-Sheet Drawer User's Guide - Page 93
Falls die 2000-Blatt-Zuführung mit einer Netzspannung von 200 bis 240 Volt betrieben werden soll, verwenden Sie das mit dem Drucker mitgelieferte Netzkabel. Schließen Sie das Netzkabel an die Zuführung und an eine ordnungsgemäß geerdete Steckdose an. 11 2000-Blatt-Zuführung - Benutzerhandbuch - Lexmark 09H0052 | 2000-Sheet Drawer User's Guide - Page 94
Überprüfen der Installation Drucken Sie nach der Installation der 2000-Blatt-Zuführung eine Seite mit Menüeinstellungen, um die Installation zu überprüfen. So drucken Sie eine Seite mit Menüeinstellungen: 1 Vergewissern Sie sich, daß der Drucker eingeschaltet ist und daß die Statusmeldung Bereit in - Lexmark 09H0052 | 2000-Sheet Drawer User's Guide - Page 95
Einstellen der Papiersorte Nach der Installation der Zuführung sollte die Papiersorte eingestellt werden. Gehen Sie zur Einstellung der Papiersorte an der Druckerbedienerkonsole folgendermaßen vor: 1 Vergewissern Sie sich, daß der Drucker eingeschaltet ist und daß die Statusmeldung Bereit in der - Lexmark 09H0052 | 2000-Sheet Drawer User's Guide - Page 96
Ändern des Papierformats Die 2000-Blatt-Zuführung ist für das Format „Letter" oder „A4" vorkonfiguriert. Wenn Sie das Papierformat vor der Installation ändern möchten, fahren Sie jetzt mit Schritt 7 der folgenden Anweisungen fort. Wenn Sie das Papierformat für eine bereits am Drucker angebrachte und - Lexmark 09H0052 | 2000-Sheet Drawer User's Guide - Page 97
8 Wenn Sie ein Format auswählen möchten, drehen Sie den Knopf vollständig gegen den Uhrzeigersinn. Dadurch wird das Papierformat „Legal" (LGL) eingestellt. 9 Welches Papierformat eingestellt ist, richtet sich nach der Anzahl der Klicks beim Drehen des Knopfs im Uhrzeigersinn. Bei einem Klicken ist - Lexmark 09H0052 | 2000-Sheet Drawer User's Guide - Page 98
10 Ziehen Sie die Sicherungsstifte hoch, um sie zu entsperren, und ziehen Sie dann an den Führungen, um sie zu entfernen. Sicherungsstifte Hintere Führung Seitliche Führungen Farbcodierte Aufnahmen (oben) Farbcodierte Aufnahmen (unten) 11 Stellen Sie die Papierführungen in den farbcodierten - Lexmark 09H0052 | 2000-Sheet Drawer User's Guide - Page 99
Papierauswahl Je nach verwendeter Papiersorte können Druckqualität und Zuverlässigkeit des Papiereinzugs durch den Druckers variieren. Detaillierte Informationen zu Papierspezifikationen finden Sie in der Dokumentation zum Drucker. Verwenden Sie für eine optimale Druckqualität xerografisches Papier - Lexmark 09H0052 | 2000-Sheet Drawer User's Guide - Page 100
Einlegen von Papier Durch das ordnungsgemäße Einlegen des Papiers können Papierstaus vermieden und somit ein problemloser Druckbetrieb ermöglicht werden. So vermeiden Sie Papierstaus: • Legen Sie nur soviel Papier ein, daß die Kapazitätsmarkierung (Füllstandslinie) nicht überschritten wird. Die - Lexmark 09H0052 | 2000-Sheet Drawer User's Guide - Page 101
c Wählen Sie MENÜ PAPIER. d Wählen Sie Papierformat. e Wählen Sie Fach x Format (wobei x für die Fachnummer der 2000-Blatt-Zuführung steht). Wenn Sie ein anderes als das ausgewählte Papierformat einlegen möchten, befolgen Sie die Anweisungen auf Seite 14, und fahren Sie anschließend mit Schritt 2 - Lexmark 09H0052 | 2000-Sheet Drawer User's Guide - Page 102
3 Fächern Sie die Papierstapel jeweils in beide Richtungen auf. Das Papier darf nicht geknickt oder zerknittert sein. Gleichen Sie die Kanten auf einer ebenen Fläche an. 4 Biegen Sie den Papierstapel leicht (siehe Abbildung), und legen Sie ihn mit der bevorzugten Druckseite nach unten auf das - Lexmark 09H0052 | 2000-Sheet Drawer User's Guide - Page 103
Achten Sie beim Einlegen darauf, daß sämtliche Stapel bündig übereinander liegen. Legen Sie nur soviel Papier ein, daß die Kapazitätsmarkierung (Füllstandslinie) nicht überschritten wird. Papierkapazitätsmarkierung In dieser Abbildung ist die korrekte Ausrichtung beim Einlegen von Papier für den - Lexmark 09H0052 | 2000-Sheet Drawer User's Guide - Page 104
Problemlösung Problem Das Papierhebefach wird nach Schließen der Ladeklappe nicht hochgefahren oder beim Öffnen der Ladeklappe trotz Betätigung des Absenkknopfs nicht heruntergefahren. Das Hebefach fährt - Lexmark 09H0052 | 2000-Sheet Drawer User's Guide - Page 105
Sie etwa 10 Sekunden, und schalten Sie den Drucker wieder ein. Wenn der Fehler erneut auftritt, notieren Sie sich die Fehlernummer, das Problem und eine ausführliche Beschreibung des Fehlers. Wenden Sie sich an den Kundendienst. Stellen Sie sicher, daß der Drehknopf für die Papierformatauswahl auf - Lexmark 09H0052 | 2000-Sheet Drawer User's Guide - Page 106
Beheben von Papierstaus 1 Öffnen Sie die Ladeklappe. 2 Drücken Sie den Absenkknopf. Absenkknopf 3 Beseitigen Sie den Papierstau, indem Sie das gesamte Papier aus dem Papierpfad von Zuführung und Drucker entfernen. 4 Prüfen Sie, ob der Stapel Papier richtig ausgerichtet und bündig eingelegt ist. 5 - Lexmark 09H0052 | 2000-Sheet Drawer User's Guide - Page 107
Italiano - Lexmark 09H0052 | 2000-Sheet Drawer User's Guide - Page 108
2001) Il presente paragrafo non è valido nei Paesi in cui le disposizioni qui riportate non sono ammissibili ai sensi di legge: LEXMARK INTERNATIONAL, INC. FORNISCE LA PRESENTE PUBBLICAZIONE "COSÌ COM'È" SENZA ALCUN TIPO DI GARANZIA, IMPLICITA O ESPLICITA, INCLUSE, TRA L'ALTRO, EVENTUALI GARANZIE DI - Lexmark 09H0052 | 2000-Sheet Drawer User's Guide - Page 109
Sommario Introduzione 1 Disimballaggio del cassetto da 2000 fogli 2 Montaggio dei piedini di sostegno 4 Installazione del cassetto da 2000 fogli 7 Verifica dell'installazione 12 Impostazione del tipo di carta 13 Modifica delle dimensioni carta 14 Selezione della carta 17 Caricamento della - Lexmark 09H0052 | 2000-Sheet Drawer User's Guide - Page 110
Cassetto da 2000 fogli - Guida per l'utente - Lexmark 09H0052 | 2000-Sheet Drawer User's Guide - Page 111
Introduzione Il cassetto da 2000 fogli aumenta la capacità della stampante consentendo di caricare fino a quattro risme di carta (circa 2.000 fogli) da 75 g/m² (20 libbre). Il cassetto è preimpostato sulle dimensioni A4 o Letter. Per utilizzare altre dimensioni carta, vedere a pagina 14. La - Lexmark 09H0052 | 2000-Sheet Drawer User's Guide - Page 112
Disimballaggio del cassetto da 2000 fogli 1 Estrarre dalla confezione tutti i componenti illustrati nella figura. Qualora un componente risultasse mancante, rivolgersi al rivenditore presso cui è stato acquistato il cassetto da 2000 fogli. Nota: Il cavo di alimentazione 16 AWG viene fornito solo - Lexmark 09H0052 | 2000-Sheet Drawer User's Guide - Page 113
2 Rimuovere il materiale di imballaggio e il nastro da ciascun componente. Nota: Conservare il materiale di imballaggio in modo da poter reimballare il cassetto da 2000 fogli per eventuali riparazioni o per riporlo. 3 Rimuovere dal foglio le etichette numerate e applicarle alle scanalature sul - Lexmark 09H0052 | 2000-Sheet Drawer User's Guide - Page 114
Montaggio dei piedini di sostegno AVVERTENZA: Se non si utilizza una base opzionale per la stampante, è necessario applicare al cassetto i quattro piedini di sostegno. 1 Capovolgere con cautela il cassetto da 2000 fogli. 2 Svitare le viti che fissano i piedini di gomma al cassetto. Conservare le - Lexmark 09H0052 | 2000-Sheet Drawer User's Guide - Page 115
3 Inserire la linguetta posta sull'estremità del piedino di sostegno nella scanalatura sul fondo del cassetto. Ruotare il piedino verso il basso fino a farlo aderire sul fondo del cassetto. 4 Far scorrere il piedino lateralmente fino a fissarlo in posizione. Cassetto da 2000 fogli - Guida per l' - Lexmark 09H0052 | 2000-Sheet Drawer User's Guide - Page 116
5 Utilizzando uno dei piedini di gomma rimossi al passo 2 a pagina 4, allineare le aperture dei piedini di gomma e di sostegno e applicare la vite come illustrato nella figura. 6 Ripetere le operazioni dal passo 3 a pagina 5 al passo 5 a pagina 6 per i restanti piedini di gomma e di sostegno. 6 - Lexmark 09H0052 | 2000-Sheet Drawer User's Guide - Page 117
Installazione del cassetto da 2000 fogli Scegliere un'ubicazione per il cassetto da 2000 fogli. La stampante e le altre opzioni utilizzate verranno montate sopra il cassetto; è pertanto opportuno lasciare uno spazio libero massimo pari a 137,16 cm (4 ½ piedi). Nota: Il cassetto è preimpostato sulle - Lexmark 09H0052 | 2000-Sheet Drawer User's Guide - Page 118
5 Collocare la stampante sul cassetto e sulle eventuali opzioni installate. Le aperture sulla parte superiore del cassetto facilitano il corretto allineamento dei lati della stampante. Verificare che la stampante sia posizionata correttamente. Foro rotondo Punto di presa Linguetta Foro quadrato 8 - Lexmark 09H0052 | 2000-Sheet Drawer User's Guide - Page 119
6 Inserire un'estremità del cavo di collegamento alla stampante e l'altra estremità nel cassetto. 7 Ricollegare tutti i cavi scollegati. Cassetto da 2000 fogli - Guida per l'utente 9 - Lexmark 09H0052 | 2000-Sheet Drawer User's Guide - Page 120
8 Se per il cassetto da 2000 fogli verrà utilizzata un'alimentazione compresa tra 100 e 127V, è necessario utilizzare il cavo di alimentazione 16 AWG fornito con l'unità. Inserire il cavo di alimentazione 16 AWG sul retro del cassetto, quindi collegarlo ad una presa elettrica dotata di messa a terra - Lexmark 09H0052 | 2000-Sheet Drawer User's Guide - Page 121
Se per il cassetto da 2000 fogli verrà utilizzata un'alimentazione compresa tra 200 e 240V, si dovrà utilizzare il cavo di alimentazione fornito con la stampante. Inserire il cavo di alimentazione sul retro del cassetto, quindi collegarlo ad una presa elettrica dotata di messa a terra. 11 Cassetto - Lexmark 09H0052 | 2000-Sheet Drawer User's Guide - Page 122
Verifica dell'installazione Dopo aver installato il cassetto da 2000 fogli, verificare che sia installato correttamente stampando la pagina delle impostazioni dei menu. Per stampare la pagina delle impostazioni dei menu: 1 Verificare che la stampante sia accesa e che sullo schermo sia visualizzato - Lexmark 09H0052 | 2000-Sheet Drawer User's Guide - Page 123
Impostazione del tipo di carta Dopo aver installato il cassetto, è necessario impostare il tipo di carta. Per effettuare questa operazione, andare al pannello operatore e attenersi alla procedura seguente: 1 Verificare che la stampante sia accesa e che sullo schermo sia visualizzato il messaggio di - Lexmark 09H0052 | 2000-Sheet Drawer User's Guide - Page 124
Modifica delle dimensioni carta Il cassetto da 2000 fogli è preimpostato sulle dimensioni A4 o Letter. Per modificare le dimensioni carta prima dell'installazione, andare al passo 7 della procedura. Se si modificano le dimensioni per un'unità già collegata alla stampante e all'alimentazione, andare - Lexmark 09H0052 | 2000-Sheet Drawer User's Guide - Page 125
8 Per selezionare l'opzione corretta, ruotare completamente il selettore in senso antiorario. In tal modo, vengono impostate le dimensioni Legal (LGL). 9 Ruotando il selettore in senso orario, contare gli scatti per individuare le dimensioni carta corrette. Ad esempio, spostando il selettore di uno - Lexmark 09H0052 | 2000-Sheet Drawer User's Guide - Page 126
, situati sulla parte superiore dell'unità, corrispondenti alle dimensioni carta selezionate. 12 Inserire le guide carta negli alloggiamenti corrispondenti situati nella parte inferiore dell'unità. Le guide devono aderire alla parte superiore dell'unità. 13 Abbassare i perni per fissare le - Lexmark 09H0052 | 2000-Sheet Drawer User's Guide - Page 127
Selezione della carta La qualità di stampa e il funzionamento dell'alimentazione possono variare a seconda del tipo di carta utilizzato. Per ulteriori informazioni sulle specifiche della carta, consultare la documentazione fornita con la stampante. Per ottenere la migliore qualità di stampa, - Lexmark 09H0052 | 2000-Sheet Drawer User's Guide - Page 128
Caricamento della carta Un corretto caricamento della carta consente di evitare inceppamenti e garantisce un processo di stampa regolare. Per evitare inceppamenti: • Non caricare il supporto di stampa oltre il limite massimo di caricamento. Per individuare il limite massimo di caricamento, vedere a - Lexmark 09H0052 | 2000-Sheet Drawer User's Guide - Page 129
Se si desidera caricare carta di dimensioni diverse da quelle selezionate, vedere a pagina 14 per le relative istruzioni, quindi andare al passo 2 qui di seguito. 2 Aprire lo sportello di caricamento. Se il vassoio elevatore non è abbassato, premere l'apposito pulsante. Pulsante di discesa del - Lexmark 09H0052 | 2000-Sheet Drawer User's Guide - Page 130
4 Flettere leggermente la risma di carta, come illustrato nella figura, quindi inserirla nel vassoio elevatore con il lato di stampa consigliato rivolto verso il basso. Inserire la risma di carta verificando che aderisca alla parte posteriore del cassetto. Caricare le risme di carta allineandole in - Lexmark 09H0052 | 2000-Sheet Drawer User's Guide - Page 131
Se si stampa in fronte/retro su carta intestata, inserire il lato stampato rivolto verso l'alto e il bordo superiore della pagina verso il retro del cassetto. 5 Chiudere lo sportello di caricamento. Nota: Se è necessario restituire il cassetto da 2000 fogli, verificare che tutta la carta sia stata - Lexmark 09H0052 | 2000-Sheet Drawer User's Guide - Page 132
carta sia installato correttamente. • La carta sia caricata correttamente. • La carta sia intatta. • La carta sia conforme alle specifiche. • Le guide carta siano posizionate correttamente per le dimensioni carta selezionate. Vedere a pagina 14. 22 Cassetto da 2000 fogli - Guida per l'utente - Lexmark 09H0052 | 2000-Sheet Drawer User's Guide - Page 133
Problema Messaggi di intervento Errore Carta corta Soluzione Tali messaggi indicano un malfunzionamento della stampante che può richiedere l'intervento di un tecnico dell'assistenza. Spegnere la stampante, attendere alcuni secondi, quindi accendere la stampante. Se l'errore si verifica nuovamente, - Lexmark 09H0052 | 2000-Sheet Drawer User's Guide - Page 134
Eliminazione di un inceppamento carta 1 Aprire lo sportello di caricamento. 2 Premere il pulsante di discesa del vassoio elevatore. Pulsante di discesa del vassoio elevatore 3 Rimuovere tutta la carta inceppata dal percorso della carta all'interno del cassetto e della stampante. 4 Verificare che la - Lexmark 09H0052 | 2000-Sheet Drawer User's Guide - Page 135
Español - Lexmark 09H0052 | 2000-Sheet Drawer User's Guide - Page 136
de 2001) El siguiente párrafo no tiene vigencia en aquellos países en los que estas disposiciones entren en conflicto con las leyes locales: LEXMARK INTERNATIONAL, INC. PROPORCIONA ESTA PUBLICACIÓN "TAL COMO ESTÁ" SIN GARANTÍA DE NINGÚN TIPO, NI EXPRESA NI IMPLÍCITA, INCLUIDA PERO NO LIMITADA A LAS - Lexmark 09H0052 | 2000-Sheet Drawer User's Guide - Page 137
Índice Introducción 1 Desembalaje del alimentador de 2000 hojas 2 Colocación de los pies de estabilización 4 Instalación del alimentador de 2000 hojas 7 Verificación de la instalación 11 Configuración del tipo de papel 12 Cambio del tamaño del papel 13 Selección del papel 16 Carga del papel - Lexmark 09H0052 | 2000-Sheet Drawer User's Guide - Page 138
Guía del usuario del alimentador de 2000 hojas - Lexmark 09H0052 | 2000-Sheet Drawer User's Guide - Page 139
Introducción El alimentador de 2000 hojas ofrece a la impresora capacidad añadida ya que permite cargar hasta cuatro resmas (aproximadamente 2.000 hojas) de papel de 75 g/m2. El alimentador ya está configurado para papel de tamaño carta o A4. Para utilizar un tamaño distinto, consulte la página 13. - Lexmark 09H0052 | 2000-Sheet Drawer User's Guide - Page 140
Desembalaje del alimentador de 2000 hojas 1 Extraiga de la caja todos los elementos que se muestran en la ilustración. Si falta alguno, póngase en contacto con el establecimiento donde adquirió el alimentador de 2000 hojas. Nota: El cable 16 AWG sólo se suministra con las unidades que vayan a - Lexmark 09H0052 | 2000-Sheet Drawer User's Guide - Page 141
3 Despegue las calcomanías numeradas de la hoja y péguelas en las áreas hundidas del alimentador. Seleccione el número que corresponda al número de opciones de papel que va a instalar, incluida la bandeja de salida estándar. Guía del usuario del alimentador de 2000 hojas 3 - Lexmark 09H0052 | 2000-Sheet Drawer User's Guide - Page 142
Colocación de los pies de estabilización PRECAUCIÓN: Si no va a utilizar un soporte de impresora opcional, debe colocar los cuatro pies de estabilización en el alimentador. 1 Dele la vuelta con cuidado al alimentador de 2000 hojas, de forma que la parte inferior esté boca arriba. 2 Extraiga los - Lexmark 09H0052 | 2000-Sheet Drawer User's Guide - Page 143
3 Inserte la lengüeta que hay a un extremo del pie de estabilización dentro de la ranura de la parte inferior del alimentador. Gire el pie de estabilización hacia abajo hasta que esté alineado con la parte inferior del alimentador. 4 Deslice el pie desde el centro de la bandeja hacia afuera hasta - Lexmark 09H0052 | 2000-Sheet Drawer User's Guide - Page 144
5 Utilice uno de los pies de caucho que ha quitado en el paso 2 en la página 4, alinee las aberturas de los pies de caucho y de estabilización y apriete el tornillo tal como se muestra en la ilustración. 6 Para el resto de los pies de caucho y de estabilización, repita desde el paso 3 en la página 5 - Lexmark 09H0052 | 2000-Sheet Drawer User's Guide - Page 145
Instalación del alimentador de 2000 hojas Decida una ubicación para la instalación del alimentador de 2000 hojas. La impresora, y posiblemente otras opciones, se colocarán encima del alimentador, así que deje un máximo de 137,16 cm de espacio libre. Nota: El alimentador ya está configurado para - Lexmark 09H0052 | 2000-Sheet Drawer User's Guide - Page 146
5 Coloque la impresora encima del alimentador y las demás opciones instaladas. Las aberturas que hay en la parte superior del alimentador ayudan a colocar la impresora de modo que los bordes queden alineados correctamente. Asegúrese de que la impresora está colocada de forma segura. Orificio - Lexmark 09H0052 | 2000-Sheet Drawer User's Guide - Page 147
6 Conecte un extremo del cable de puente en la impresora. Enchufe el otro extremo en el alimentador. 7 Vuelva a conectar los cables que haya desconectado. Guía del usuario del alimentador de 2000 hojas 9 - Lexmark 09H0052 | 2000-Sheet Drawer User's Guide - Page 148
8 Si piensa utilizar el alimentador 2000 hojas con corriente de 100 - 127V, debe usar el cable de alimentación 16 AWG suministrado con la unidad. Enchúfelo en la parte posterior del alimentador y en una toma de tierra. No utilice el cable de alimentación suministrado con la impresora; guárdelo por - Lexmark 09H0052 | 2000-Sheet Drawer User's Guide - Page 149
Verificación de la instalación Una vez instalado el alimentador de 2000 hojas, verifique que se ha instalado correctamente mediante la impresión de una página de parámetros de menús. Para imprimir una página de parámetros de menús: 1 Asegúrese de que la impresora está encendida y de que el mensaje - Lexmark 09H0052 | 2000-Sheet Drawer User's Guide - Page 150
Configuración del tipo de papel Una vez instalado el alimentador, deberá configurar el tipo de papel. Para ello, vaya al panel del operador de la impresora y siga estos pasos: 1 Asegúrese de que la impresora está encendida y de que el mensaje de estado Lista aparece en la pantalla. 2 Pulse Menú> o < - Lexmark 09H0052 | 2000-Sheet Drawer User's Guide - Page 151
Cambio del tamaño del papel El alimentador de 2000 hojas ya está configurado para papel de tamaño carta o A4. Para cambiar el tamaño del papel antes de la instalación, vaya ahora al paso 7 de las instrucciones siguientes. Si va a cambiar el tamaño del papel de una unidad que ya está conectada a una - Lexmark 09H0052 | 2000-Sheet Drawer User's Guide - Page 152
8 Para realizar una selección, gire el mando por completo en sentido contrario a las agujas del reloj.De esta forma, el tamaño del papel se configura en legal (LGL). 9 Cuente los clics a medida que gira el mando en el sentido de las agujas del reloj para encontrar el tamaño del papel correcto. Por - Lexmark 09H0052 | 2000-Sheet Drawer User's Guide - Page 153
10 Tire hacia arriba de cada patilla de bloqueo para desbloquearla y, a continuación, tire de las guías para extraerlas. Patillas de bloqueo Guía posterior Guías laterales Ranuras de color (parte superior) Ranuras de color (parte inferior) 11 Vuelva a colocar las guías del papel en las ranuras - Lexmark 09H0052 | 2000-Sheet Drawer User's Guide - Page 154
Selección del papel La calidad de impresión y la fiabilidad de carga de la impresora pueden variar según el tipo de papel que utilice. Para obtener información más detallada sobre las especificaciones del papel, consulte la documentación de la impresora. Para obtener la mejor calidad de impresión, - Lexmark 09H0052 | 2000-Sheet Drawer User's Guide - Page 155
Carga del papel La carga del papel correcta puede evitar atascos de papel y asegurar una impresión sin problemas. Para evitar atascos de papel: • No cargue material de impresión por encima de la marca de capacidad del papel. Consulte la página 19 para averiguar dónde se encuentra la marca de - Lexmark 09H0052 | 2000-Sheet Drawer User's Guide - Page 156
Si desea cargar un tamaño de papel distinto del seleccionado, consulte la página 13 para obtener instrucciones y siga con el paso 2 en la página 18. 2 Abra la puerta de carga. Si la bandeja del elevador no se encuentra en la posición inferior, pulse el botón para bajar el elevador. Botón para bajar - Lexmark 09H0052 | 2000-Sheet Drawer User's Guide - Page 157
4 Doble ligeramente la pila de papel tal como se muestra en la ilustración y colóquela en la bandeja del elevador con la cara de impresión recomendada boca abajo. Alinee la pila de papel contra la parte posterior del alimentador. Alinee con cuidado cada pila de papel a medida que la cargue para - Lexmark 09H0052 | 2000-Sheet Drawer User's Guide - Page 158
En el caso de la impresión dúplex en papel con cabecera, coloque la cara impresa boca arriba con el margen superior de la página mirando hacia la parte posterior del alimentador. 5 Cierre la puerta de carga. Nota: Si necesita devolver el alimentador de 2000 hojas, asegúrese de extraer todo el papel - Lexmark 09H0052 | 2000-Sheet Drawer User's Guide - Page 159
Solución de problemas Problema La bandeja del elevador no sube cuando se cierra la puerta de carga o la bandeja no baja cuando se abre la puerta y se pulsa el botón para bajar el elevador. La bandeja del elevador baja de forma inesperada. Se carga más de una hoja de papel o las hojas se cargan - Lexmark 09H0052 | 2000-Sheet Drawer User's Guide - Page 160
Problema Mensajes de servicio Error Papel corto Acción Los mensajes de servicio indican un error de la impresora que puede requerir la intervención del servicio técnico. Apague la impresora, espere unos 10 segundos y vuelva a encenderla. Si se vuelve a producir el error, anote el número de error, - Lexmark 09H0052 | 2000-Sheet Drawer User's Guide - Page 161
Eliminación de un atasco de papel 1 Abra la puerta de carga. 2 Pulse el botón para hacer bajar el elevador. Botón para bajar el elevador 3 Retire el atasco de papel y quite todo el papel del trayecto del papel del alimentador y de la impresora. 4 Compruebe que la pila está ordenada y alineada. 5 - Lexmark 09H0052 | 2000-Sheet Drawer User's Guide - Page 162
24 Guía del usuario del alimentador de 2000 hojas - Lexmark 09H0052 | 2000-Sheet Drawer User's Guide - Page 163
-
 1
1 -
 2
2 -
 3
3 -
 4
4 -
 5
5 -
 6
6 -
 7
7 -
8
-
9
-
10
-
11
-
12
-
13
-
14
-
15
-
16
-
17
-
18
-
19
-
20
-
21
-
22
-
23
-
24
-
25
-
26
-
27
-
28
-
29
-
30
-
31
-
32
-
33
-
34
-
35
-
36
-
37
-
38
-
39
-
40
-
41
-
42
-
43
-
44
-
45
-
46
-
47
-
48
-
49
-
50
-
51
-
52
-
53
-
54
-
55
-
56
-
57
-
58
-
59
-
60
-
61
-
62
-
63
-
64
-
65
-
66
-
67
-
68
-
69
-
70
-
71
-
72
-
73
-
74
-
75
-
76
-
77
-
78
-
79
-
80
-
81
-
82
-
83
-
84
-
85
-
86
-
87
-
88
-
89
-
90
-
91
-
92
-
93
-
94
-
95
-
96
-
97
-
98
-
99
-
100
-
101
-
102
-
103
-
104
-
105
-
106
-
107
-
108
-
109
-
110
-
111
-
112
-
113
-
114
-
115
-
116
-
117
-
118
-
119
-
120
-
121
-
122
-
123
-
124
-
125
-
126
-
127
-
128
-
129
-
130
-
131
-
132
-
133
-
134
-
135
-
136
-
137
-
138
-
139
-
140
-
141
-
142
-
143
-
144
-
145
-
146
-
147
-
148
-
149
-
150
-
151
-
152
-
153
-
154
-
155
-
156
-
157
-
158
-
159
-
160
-
161
-
162
-
163
 |
 |

Lexmark T
5
22
2000-Sheet Drawer
User’s Guide
Gaveta de 2000 folhas
Guia do usuário
Tiroir 2000 feuilles
Manuel d’utilisation
2000-Blatt-Zuführung
Benutzerhandbuch
Cassetto da 2000 fogli
Guida per l’utente
Alimentador de 2000 hojas
Guía del usuario