Lexmark 17S0200 Setup Guide
Lexmark 17S0200 - C 760dtn Color Laser Printer Manual
 |
UPC - 734646082259
View all Lexmark 17S0200 manuals
Add to My Manuals
Save this manual to your list of manuals |
Lexmark 17S0200 manual content summary:
- Lexmark 17S0200 | Setup Guide - Page 1
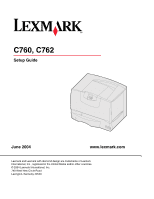
C760, C762 Setup Guide June 2004 www.lexmark.com Lexmark and Lexmark with diamond design are trademarks of Lexmark International, Inc., registered in the United States and/or other countries. © 2004 Lexmark International, Inc. 740 West New Circle Road Lexington, Kentucky 40550 - Lexmark 17S0200 | Setup Guide - Page 2
- Lexmark 17S0200 | Setup Guide - Page 3
English - Lexmark 17S0200 | Setup Guide - Page 4
Federal Communications Commission (FCC) compliance information statement This printer complies with the limits for a Class B digital instructions, to a professional service person. • This product is designed, tested, and approved to meet strict global safety standards with the use of specific Lexmark - Lexmark 17S0200 | Setup Guide - Page 5
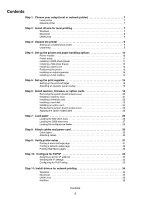
your setup (local or network printer 7 Local printer 7 Network printer 7 Step 2: Install drivers for local printing 7 Windows 7 Macintosh 8 UNIX/Linux 9 Step 3: Unpack the printer 9 Setting up a multifunction printer 9 Unpacking 9 Step 4: Set up the printer and paper handling options 10 - Lexmark 17S0200 | Setup Guide - Page 6
Step 12: Other sources of information 38 Viewing and using the publications CD 38 Contents 6 - Lexmark 17S0200 | Setup Guide - Page 7
functionality than our enhanced custom printer driver. Use the drivers CD that shipped with your printer to install the custom printer driver and obtain all the enhanced printer features and functionality. Drivers are also available in downloadable software packages on our Lexmark Web site at www - Lexmark 17S0200 | Setup Guide - Page 8
a downloadable software package on our Lexmark Web site at www.lexmark.com. Refer to the User's Guide on the publications CD for information to install Macintosh drivers and to create a desktop printer icon for Macintosh 8.6-9.x. 1 Install a printer PostScript Printer Description (PPD) file on your - Lexmark 17S0200 | Setup Guide - Page 9
packages are available on the drivers CD and on our Lexmark Web site at www.lexmark.com. The User's Guide in each package gives detailed instructions for installing and using Lexmark printers in UNIX and Linux environments. All the printer driver packages support local printing using a parallel - Lexmark 17S0200 | Setup Guide - Page 10
: (1) Printer with one 500-sheet tray (2) Four print cartridges (preinstalled) (3) Setup Guide with a publications CD (4) Drivers CD (5) Power cord If any items are missing or damaged, refer to the User's Guide on the publications CD for information about contacting Lexmark Customer Support. Save - Lexmark 17S0200 | Setup Guide - Page 11
printer with no options, follow the directions under "Positioning the printer" on page 13. Use the following table to locate the instructions you need to set up your printer the power cord for the 2000-sheet drawer later. Your printer supports one optional 2000-sheet drawer. 1 Unpack the 2000-sheet - Lexmark 17S0200 | Setup Guide - Page 12
have an optional duplex unit and a 2000-sheet drawer, you must install a 500-sheet drawer between the duplex unit and the 2000-sheet drawer. Your printer supports up to three additional 500-sheet drawers. However, if you install a 2000-sheet drawer, you can only add one additional 500-sheet drawer - Lexmark 17S0200 | Setup Guide - Page 13
have an optional duplex unit and a 2000-sheet drawer, you must install a 500-sheet drawer between the duplex unit and the 2000-sheet drawer. Your printer supports an optional duplex unit that lets you print on both sides of a sheet of paper. 1 Unpack the duplex unit and remove any packing material - Lexmark 17S0200 | Setup Guide - Page 14
hold the weight of print material only. Do not use it as a shelf; excess weight may cause it to disengage from the output expander. Your printer supports an optional output expander that lets you stack up to 650 sheets of paper in one bin. 1 Unpack the output expander and remove any packing - Lexmark 17S0200 | Setup Guide - Page 15
. Warning: The mailbox is designed to hold the weight of print material only. Do not use it as a shelf; excess weight may damage it. Your printer supports a 5-bin mailbox that lets you collate and stack up to 500 sheets of paper. 1 Unpack the mailbox and remove any packing material. 2 Remove the - Lexmark 17S0200 | Setup Guide - Page 16
Warning: Be sure to remove all packing materials or the printer may be damaged. This step describes how to prepare the print cartridges and remove the packing materials inside the printer. Setting up the print cartridges 1 Open the printer front cover. 2 Remove the packing material on top of the - Lexmark 17S0200 | Setup Guide - Page 17
out and use the handle to lift it off the guides. c Set the cartridge on a firm, flat, clean surface in the upright sheet, then remove both items from the printer. Detensioner 1 2 1 b a 5 Reinstall the print cartridges. For each cartridge: a Turn the cartridge over so the handle is on the - Lexmark 17S0200 | Setup Guide - Page 18
Failure to remove the packing material from the print cartridges damages the printer. Warning: Do not touch the photoconductor drum on the bottom of the print cartridge. c d c Turn the cartridge so the handle is on the top. d Rotate the cartridge in all directions to distribute the toner. e Holding - Lexmark 17S0200 | Setup Guide - Page 19
covering away from the overlay. Refer to the User's Guide on the publications CD for instructions on changing the language of the text displayed on the installing memory or option cards sometime after setting up the printer, turn the printer off and unplug the power cord before continuing. Note - Lexmark 17S0200 | Setup Guide - Page 20
access cover 1 Locate the access cover on the back of the printer. 2 Remove the four access cover screws (two at top, two memory card connectors Hard disk connector 5 Use the following table to locate the instructions you need. To install a... Memory card Firmware card Hard disk Option card Go - Lexmark 17S0200 | Setup Guide - Page 21
for other Lexmark printers cannot be used with your printer. Refer to the User's Guide on the publications CD for memory specifications. Warning: Memory cards are easily damaged by static electricity. Touch something metal on the printer before you touch a card. Latch Follow the instructions in - Lexmark 17S0200 | Setup Guide - Page 22
and flash memory cards offered for other Lexmark printers cannot be used with your printer. Warning: Firmware and flash memory cards are easily damaged by static electricity. Touch something metal on the printer before you touch a card. Follow the instructions in this section to install an optional - Lexmark 17S0200 | Setup Guide - Page 23
Installing a hard disk Warning: Hard disks are easily damaged by static electricity. Touch something metal on the printer before you touch a disk. Follow the instructions in this section to install an optional hard disk. You need a small Phillips screwdriver to attach the hard disk to the mounting - Lexmark 17S0200 | Setup Guide - Page 24
Installing an option card Your printer has one expansion card slot that supports a number of option cards. The following table describes their function. Card MarkNet internal print server Parallel 1284-B Interface Card Serial Interface Card Function Adds an - Lexmark 17S0200 | Setup Guide - Page 25
at the top of the access cover with the screws near the top of the printer. 2 Slide the cover up under the top cover lip as far as it will Option Added label The Option Added label alerts service personnel that additional options have been installed in your printer. To apply the label: 1 Remove the - Lexmark 17S0200 | Setup Guide - Page 26
C5, B5, otherf Envelopes 10 envelopes a Supported as selected paper with tray size sensing turned printer. Follow these instructions to load any of the 500-sheet trays. 1 Remove the tray from the printer and place it on a flat, level surface. 2 Squeeze the front guide lever and slide the guide - Lexmark 17S0200 | Setup Guide - Page 27
until it firmly touches the stack of paper. 7 Reinstall the tray. Make sure the tray is pushed completely into the printer. Maximum height guide Loading the 2000-sheet tray Follow these instructions to load a 2000-sheet tray. Do not load any print media other than paper in the 2000-sheet tray. See - Lexmark 17S0200 | Setup Guide - Page 28
the correct position for the size paper you are loading. 4 Slide the bottom support toward the front of the tray until it touches the front guide. LT.LG EX A5 B5 A4 LT.LG A5 EX B5 A4 Note: Do paper. 7 Close the tray. Make sure the tray is pushed completely into the printer. Load paper 28 - Lexmark 17S0200 | Setup Guide - Page 29
paper or specialty media before it prints. Follow these instructions to load the multipurpose feeder. 1 Open the multipurpose feeder. 2 Squeeze the paper guide lever and slide the guide all the way toward the front of the printer. Note: Do not exceed the maximum stack height. Overfilling - Lexmark 17S0200 | Setup Guide - Page 30
supports USB. A USB port requires a USB cable such as Lexmark part number 12A2405 (2 m [6.5 ft]). Be sure to match the USB symbol on the cable to the USB symbol on the printer card" on page 24 for hardware instructions. 802.11b wireless options: Your printer can be converted to wireless networking by - Lexmark 17S0200 | Setup Guide - Page 31
you see a message other than Ready on the display, refer to the User's Guide on the publications CD for instructions on clearing the message. Look for information about understanding printer messages. 4 Go to "Install drivers for local printing" on page 7. If you have a serial cable attached, launch - Lexmark 17S0200 | Setup Guide - Page 32
active, or your network cable may be malfunctioning. Consult your network support person for a solution, and then print another network setup page . 3 Print the documents. To print Help Menu pages stored in the printer: 1 Make sure the printer is on. 2 On the operator panel, press Menu until you see - Lexmark 17S0200 | Setup Guide - Page 33
is not using DHCP, then you must manually assign an IP address to the printer. One of the easiest ways is to printer has an optional Lexmark™ ImageQuick™ firmware card installed, you can configure for Pull Printing once an IP address is assigned to the printer. For detailed configuration instructions - Lexmark 17S0200 | Setup Guide - Page 34
the installation of a printer driver and the creation of a network printer port. Supported printer drivers • Windows system printer driver • Lexmark custom printer driver System drivers are built into Windows operating systems. Custom drivers are available on the drivers CD. Updated system and - Lexmark 17S0200 | Setup Guide - Page 35
custom printer driver and network port: 1 Launch the drivers CD. 2 Click Install Software. 3 Click Printer and Select your printer model from the list and then click Next. 8 Click Add Port. 9 Select Lexmark Enhanced TCP printing, refer to the User's Guide on the publications CD. Shared printing - Lexmark 17S0200 | Setup Guide - Page 36
) file and either create a desktop printer on the computer (Mac OS 8.6 to 9.x) or create a print queue in Print Center (Mac OS X). Refer to the User's Guide on the publications CD for information to install Macintosh drivers and to create a desktop printer icon for Macintosh 8.6-9.x. Configure for - Lexmark 17S0200 | Setup Guide - Page 37
name of the printer. Using IP Printing 1 Insert the drivers CD. 2 Double-click the installer package for your printer. 3 On printer DNS name in the Printer's Address box. 6 Choose Lexmark from the Printer Model pop-up menu. 7 Select the new printer from the list, and then click Add. 8 Verify printer - Lexmark 17S0200 | Setup Guide - Page 38
Web site at www.lexmark.com for a complete list of supported UNIX and Linux platforms. Lexmark provides a printer driver package for each supported UNIX and Linux platform. The User's Guide in each package gives detailed instructions for installing and using Lexmark printers in UNIX and Linux - Lexmark 17S0200 | Setup Guide - Page 39
CD contains all the necessary files to get your printer up and running. It may also contain printer utilities, screen fonts, and additional documentation. Visit our Web site at www.lexmark.com for updated printer drivers, utilities, and other printer documentation. You are now ready to use your new
-
 1
1 -
 2
2 -
 3
3 -
 4
4 -
 5
5 -
 6
6 -
 7
7 -
8
-
9
-
10
-
11
-
12
-
13
-
14
-
15
-
16
-
17
-
18
-
19
-
20
-
21
-
22
-
23
-
24
-
25
-
26
-
27
-
28
-
29
-
30
-
31
-
32
-
33
-
34
-
35
-
36
-
37
-
38
-
39
 |
 |

Setup Guide
June 2004
www.lexmark.com
Lexmark and Lexmark with diamond design are trademarks of Lexmark
International, Inc., registered in the United States and/or other countries.
© 2004 Lexmark International, Inc.
740 West New Circle Road
Lexington, Kentucky 40550
C760, C762