Lexmark 20R1000 Network Guide
Lexmark 20R1000 - X 6650 Color Inkjet Manual
 |
UPC - 734646080064
View all Lexmark 20R1000 manuals
Add to My Manuals
Save this manual to your list of manuals |
Lexmark 20R1000 manual content summary:
- Lexmark 20R1000 | Network Guide - Page 1
Networking Guide 2008 www.lexmark.com - Lexmark 20R1000 | Network Guide - Page 2
- Lexmark 20R1000 | Network Guide - Page 3
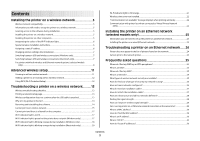
12 Troubleshooting a printer on a wireless network..........13 Wireless troubleshooting checklist...13 Printing a network setup page...13 Wireless configuration does not continue after the USB cable is attached 13 Why isn't my printer in this list?...14 Removing and reinstalling the software 14 - Lexmark 20R1000 | Network Guide - Page 4
How are IP addresses assigned?...31 What is a key index?...31 Notices 32 Edition notice...32 Networking glossary 33 Index 34 Contents 4 - Lexmark 20R1000 | Network Guide - Page 5
you will need to run the setup software on each computer to install the driver. Using Windows 1 Insert the installation software CD. 2 Wait for the Welcome screen to appear. If the Welcome screen does not appear after a minute, do one of the following: Installing the printer on a wireless network 5 - Lexmark 20R1000 | Network Guide - Page 6
CD or DVD drive. In Windows XP and earlier a Click Start. b Click Run. c Type D:\setup.exe, where D is the letter of your CD or DVD drive. 3 Follow the on-screen instructions for installing a configured printer on a new computer. Using Macintosh 1 Insert the installation software CD. 2 Wait for the - Lexmark 20R1000 | Network Guide - Page 7
reinstall the software, and then make the changes that you want. Using Macintosh 1 From the Finder desktop, double-click the printer folder. 2 Double-click Lexmark Wireless Setup Assistant. 3 Follow the instructions on the computer screen. Switching between USB and wireless connections (Windows only - Lexmark 20R1000 | Network Guide - Page 8
locally (using USB connection) 1 Do one of the following: • In Windows Vista, click . • In Windows XP and earlier, click Start. 2 Click All Programs or Programs, and then select the printer program folder from the list. 3 Click Tools Œ Lexmark Wireless Setup Utility. 4 Follow the instructions on the - Lexmark 20R1000 | Network Guide - Page 9
the printer is close enough to the computer for your USB cable to reach both. 3 From the Finder desktop, double-click the printer folder. 4 Double-click Lexmark Wireless Setup Assistant. 5 Follow the on-screen instructions for configuring the printer wirelessly. Installing the printer on a wireless - Lexmark 20R1000 | Network Guide - Page 10
jack. 2 Insert the software and installation CD into the computer you want to use to configure the printer. 3 Follow the on-screen instructions for configuring a printer on an Ethernet network. Note: You will need a USB cable to complete the configuration. Add the printer In Mac OS X version 10 - Lexmark 20R1000 | Network Guide - Page 11
network. 7 Close the Windows Control Panel and any remaining windows. 8 Insert the installation software CD, and follow the directions for wireless installation. Note: Do not connect the installation or network cables until instructed to do so by the setup software. 9 When the available networks - Lexmark 20R1000 | Network Guide - Page 12
supported by your router. Refer to your router documentation for instructions. Using Windows Vista For information on using Windows Vista to set up the printer using WPS, refer to the documentation that came with the operating system. Note: Lexmark recommends that you use the installation software - Lexmark 20R1000 | Network Guide - Page 13
information is very helpful when troubleshooting the network configuration of the printer. For more information on printing a network setup page, refer to the User's Guide on the installation software CD. Wireless configuration does not continue after the USB cable is attached Check the USB cable If - Lexmark 20R1000 | Network Guide - Page 14
a communications error message appears when you try to use the printer, then you may need to remove and reinstall the printer software. Using Windows 1 Do one of the following: • In Windows Vista, click . • In Windows XP and earlier, click Start. Troubleshooting a printer on a wireless network 14 - Lexmark 20R1000 | Network Guide - Page 15
for drivers or downloads. 3 Select your printer family. 4 Select your printer model. 5 Select your operating system. 6 Select the file that you want to download, and then follow the instructions on the computer screen. Cannot print over wireless network If you encountered problems while installing - Lexmark 20R1000 | Network Guide - Page 16
wireless network software. 2 Type your user name and password for the wireless access point when prompted. 3 Click OK. 4 On the main page, click Wireless base station In Mac OS X version wireless network, or contact the person who set up your wireless network. Troubleshooting a printer on a wireless - Lexmark 20R1000 | Network Guide - Page 17
and Faxes window and try printing again. SELECT THE WIRELESS PRINTER You may need to select the wireless printer from your computer to use the printer wirelessly. 1 Do one of the following: In Windows Vista a Click . b Click Control Panel. c Under Hardware and Sound, click Printer. Troubleshooting - Lexmark 20R1000 | Network Guide - Page 18
4 Close the Printers or Printers and Faxes window and try printing again. SELECT THE WIRELESS PORT If you have previously set up your printer as a locally attached printer, you may need to select the wireless printer to use the printer wirelessly. 1 Do one of the following: In Windows Vista a Click - Lexmark 20R1000 | Network Guide - Page 19
manually changed your WEP or WPA keys, channel, or other network settings; or the access point having been reset to factory defaults. Running the wireless setup again can also resolve issues due to misconfigurations that occurred when configuring the printer for wireless access. Troubleshooting - Lexmark 20R1000 | Network Guide - Page 20
Programs, and then select the printer program folder from the list. 3 Click Tools ΠLexmark Wireless Setup Utility. Note: You may be prompted to connect the printer to the computer again using the installation cable as part of the setup process. 4 Follow the instructions on the computer screen. Wi - Lexmark 20R1000 | Network Guide - Page 21
100. • The "Router" entry is typically the wireless access point. In Mac OS X version 10.4 and earlier a Click help resolve the problem. RUN THE WIRELESS SETUP AGAIN 1 From the Finder desktop, double-click the printer folder. 2 Double-click Lexmark Wireless Setup Assistant. 3 Follow the instructions - Lexmark 20R1000 | Network Guide - Page 22
signal on the printer network setup page. CHECK MAC ADDRESS If your network uses MAC address filtering, make sure that you include the MAC address of the printer in the MAC address filter list. This will allow the printer to operate on the network. Wireless print server not installed You may see - Lexmark 20R1000 | Network Guide - Page 23
the initial setup of the printer. • Your router is on, and your network is set up and working properly. • Your computer is connected to your router. 1 Insert the installation software CD. If the Welcome screen does not appear after a minute, do one of the following: In Windows Vista a Click - Lexmark 20R1000 | Network Guide - Page 24
SURE THE PRINTER HAS VALID NETWORK SETTINGS Print a network setup page from the printer and check the following. Refer to the User's Guide for instructions on how to print a network setup page. are turned on. UNINSTALL AND REINSTALL THE SOFTWARE Troubleshooting a printer on an Ethernet network 24 - Lexmark 20R1000 | Network Guide - Page 25
list of available wireless networks. You must enter the network information manually in this wirelessly, it must have a wireless print server attached or installed that lets it receive and transmit radio waves. What types of wireless network security are available? The wireless printer supports - Lexmark 20R1000 | Network Guide - Page 26
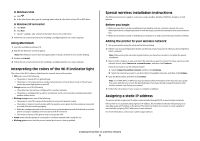
be connected by cables and/or have wireless network adapters built in or installed in them. There are many different ways a network can be set up. Five common examples appear below. Note: The printers in the following diagrams represent printers with internal print servers built in to them so that - Lexmark 20R1000 | Network Guide - Page 27
connection is used to set up the wireless settings of the printer. The installation cable connects to a rectangular USB port on the installing computer and the square USB port on the printer. How do I attach the installation cable? The installation cable attaches to a USB port on the computer and to - Lexmark 20R1000 | Network Guide - Page 28
each device Yes Yes Same SSID Yes, including the wireless Yes access point Lexmark recommends setting up a network in infrastructure mode using the installation CD that came with the printer. Infrastructure mode is the recommended setup method because it offers: • Increased network security - Lexmark 20R1000 | Network Guide - Page 29
carry information between the access point and the printer. To determine if the printer is receiving a strong signal from the access point, print a network setup page. The Quality field indicates the relative strength of the wireless signal the printer is receiving. Drops in signal strength can be - Lexmark 20R1000 | Network Guide - Page 30
point (router) and you want to add a printer to your network, the MAC address of the printer must be included in the MAC filter list. What is an IP address? An IP address is a unique number used by devices (such as a wireless printer, computer, or wireless access point) on an IP network to locate - Lexmark 20R1000 | Network Guide - Page 31
by the network using DHCP. Once the printer is set up on a computer, the computer sends all print jobs across the network to the printer using this address. If the IP address is not automatically assigned, you will be asked during wireless setup to manually enter an address and other network - Lexmark 20R1000 | Network Guide - Page 32
in conjunction with other products, programs, or services, except those expressly designated by the manufacturer, are the user's responsibility. For Lexmark technical support, visit support.lexmark.com. For information on supplies and downloads, visit www.lexmark.com. If you don't have access to - Lexmark 20R1000 | Network Guide - Page 33
AutoIP address BSS (Basic Service Set) channel DHCP (Dynamic Host Configuration Protocol) DHCP IP address DHCP server infrastructure mode installation cable internal wireless print server IP (Internet Protocol) address ipconfig MAC (Media Access Control) address MAC filtering network adapter/card - Lexmark 20R1000 | Network Guide - Page 34
on wireless network 5 USB 7 wireless 7 multiple WEP keys 31 N N9UF Box 6 network connection with USB 29 network printer installing 31 network printer does not show up in printer selection list during installation (Windows) 14 network security 26 network setup page printing 13 network troubleshooting - Lexmark 20R1000 | Network Guide - Page 35
changing after installation (Mac) 7 wireless setup information needed for 5 wireless signal strength 28 wireless signal absorption 29 wireless troubleshooting changing wireless settings after installation (Mac) 7 changing wireless settings after installation (Windows) 7 network printer does not
-
 1
1 -
 2
2 -
 3
3 -
 4
4 -
 5
5 -
 6
6 -
 7
7 -
8
-
9
-
10
-
11
-
12
-
13
-
14
-
15
-
16
-
17
-
18
-
19
-
20
-
21
-
22
-
23
-
24
-
25
-
26
-
27
-
28
-
29
-
30
-
31
-
32
-
33
-
34
-
35
 |
 |

Networking Guide
2008
www.lexmark.com