Lexmark 6500e Email Guide
Lexmark 6500e Manual
 |
View all Lexmark 6500e manuals
Add to My Manuals
Save this manual to your list of manuals |
Lexmark 6500e manual content summary:
- Lexmark 6500e | Email Guide - Page 1
glass. Note: Do not load postcards, photos, small items, transparencies, photo paper, or thin media (such as magazine clippings) into the ADF. Place these items on the scanner glass. 2 If you are loading a document into the ADF, then adjust the paper guides. 3 Press , enter the shortcut number using - Lexmark 6500e | Email Guide - Page 2
Size Sense, the scanner automatically determines the file size. Color This option sets the output color for the scanned image. Touch to enable or disable color. Content This option lets you specify the content type and source of the original document. Choose content type from Text, Text/Photo, Photo - Lexmark 6500e | Email Guide - Page 3
guide Page 3 of 4 • Photo/Film-Use when the original document is a photo or unknown printer. Darkness This option adjusts how file with multiple pages, viewable using an Internet Explorer-hosted viewer and the .NET Framework, or by downloading a third party standalone viewer Page Setup This option - Lexmark 6500e | Email Guide - Page 4
E-mail guide Page 4 of 4 • Edge Erase-This lets you eliminate smudges or information around the edges of a document. You can choose to eliminate an equal area around
-
 1
1 -
 2
2 -
 3
3 -
 4
4
 |
 |
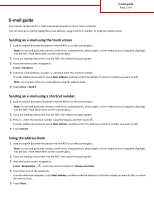
E-mail guide
The scanner can be used to e-mail scanned documents to one or more recipients.
You can send an e-mail by typing the e-mail address, using a shortcut number, or using the address book.
Sending an e-mail using the touch screen
1
Load an original document facedown into the ADF or on the scanner glass.
Note:
Do not load postcards, photos, small items, transparencies, photo paper, or thin media (such as magazine clippings)
into the ADF. Place these items on the scanner glass.
2
If you are loading a document into the ADF, then adjust the paper guides.
3
From the home screen, navigate to:
E-mail
>
Recipient
4
Enter the e-mail address, or press
and then enter the shortcut number.
To enter additional recipients, touch
Next Address
, and then enter the address or shortcut number you want to add.
Note:
You can also enter an e-mail address using the address book.
5
Touch
Done
>
Send It
.
Sending an e-mail using a shortcut number
1
Load an original document facedown into the ADF or on the scanner glass.
Note:
Do not load postcards, photos, small items, transparencies, photo paper, or thin media (such as magazine clippings)
into the ADF. Place these items on the scanner glass.
2
If you are loading a document into the ADF, then adjust the paper guides.
3
Press
, enter the shortcut number using the keypad, and then touch
.
To enter additional recipients, touch
Next address
, and then enter the address or shortcut number you want to add.
4
Touch
Send It
.
Using the address book
1
Load an original document facedown into the ADF or on the scanner glass.
Note:
Do not load postcards, photos, small items, transparencies, photo paper, or thin media (such as magazine clippings)
into the ADF. Place these items on the scanner glass.
2
If you are loading a document into the ADF, then adjust the paper guides.
3
From the home screen, navigate to:
E-mail
>
Recipient(s)
>
> enter the name of recipient >
Browse shortcuts
4
Touch the name of the recipients.
To enter additional recipients, touch
Next address
, and then enter the address or shortcut number you want to add, or search
the address book.
5
Touch
Done
.
E-mail guide
Page 1 of 4