Lexmark 935dtn User's Guide
Lexmark 935dtn - C Color Laser Printer Manual
 |
UPC - 734646023535
View all Lexmark 935dtn manuals
Add to My Manuals
Save this manual to your list of manuals |
Lexmark 935dtn manual content summary:
- Lexmark 935dtn | User's Guide - Page 1
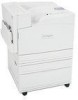
C935 Series User's Guide April 2007 www.lexmark.com Lexmark and Lexmark with diamond design are trademarks of Lexmark International, Inc., registered in the United States and/or other countries. All other trademarks are the property of their respective owners. © 2007 Lexmark International, Inc. - Lexmark 935dtn | User's Guide - Page 2
printer weighs 201 lbs (91.2 kg), and requires at least four people or a properly rated mechanical handling system to lift it safely. This product is designed, tested, and approved to meet strict global safety standards with the use of specific Lexmark in your operating instructions that discusses - Lexmark 935dtn | User's Guide - Page 3
card ...15 Installing a flash memory or firmware card 16 Installing a printer hard disk...17 Installing an internal print server or port interface card Changing a Custom Type name 33 Paper and specialty media guide 34 Paper guidelines...34 Paper characteristics ...34 Unacceptable paper ...35 - Lexmark 935dtn | User's Guide - Page 4
sizes, types, and weights 40 Paper sizes supported by the printer...40 Paper types and weights supported by the printer 41 Paper types and weights supported by the finisher 42 Supported finishing features...43 Printing...46 Installing printer software...46 Printing a document from Windows 46 - Lexmark 935dtn | User's Guide - Page 5
284-286 paper jams...65 289 staple jam...66 Understanding printer menus 70 Menus list...70 Supplies menu...71 Paper menu...72 menu...81 Setup menu ...81 Finishing menu ...85 Quality menu ...87 Utilities menu ...90 PDF menu ...92 PostScript menu ...93 PCL Emul menu ...93 PPDS menu...96 HTML menu... - Lexmark 935dtn | User's Guide - Page 6
...135 Replacing a toner cartridge ...137 Recycling Lexmark products...139 Moving the printer...140 Before moving the printer ...140 Moving the printer to another location ...140 Setting the printer up in a new location ...140 Shipping the printer ...141 Administrative support 142 Adjusting the - Lexmark 935dtn | User's Guide - Page 7
Using Secure mode...146 Troubleshooting...148 Checking an unresponsive printer 148 Door A will not shut properly...148 Solving printing problems...149 Multiple-language PDFs do not print ...149 Control panel display is blank or displays only diamonds 149 Error message about reading USB drive - Lexmark 935dtn | User's Guide - Page 8
...161 Toner specks ...161 Transparency print quality is poor ...161 Uneven print density...162 Solving color quality problems...162 FAQ about color printing...162 Contacting Customer Support...165 Notices...166 Edition notice...166 Industry Canada notices...167 Power consumption...173 Index...176 8 - Lexmark 935dtn | User's Guide - Page 9
Learning about the printer Printer configurations All printer models have standard network capability. Basic model 1 Standard exit bin 2 Control panel 3 Standard 520-sheet tray (Tray 1) 4 Multipurpose feeder 5 Duplex unit Configured models 1 Standard exit bin 2 Control panel 9 - Lexmark 935dtn | User's Guide - Page 10
3 Standard 520-sheet tray (Tray 1) 4-6 The High capacity feeder holds 2520 sheets and includes: • 4-520-sheet tray (Tray 2) • 5-867-sheet tray (Tray 3) • 6-1133-sheet tray (Tray 4) 7 Multipurpose feeder 8 Duplex unit 1 Standard exit bin 2 Control panel 3 Standard 520-sheet tray (Tray 1) 4-6 The - Lexmark 935dtn | User's Guide - Page 11
Fully configured model 1 Horizontal transport unit (HTU) 2 Control panel 3 Finisher 4 Finisher standard bin 5 Finisher bin 1 6 Finisher bin 2 (booklet-maker) 7 Standard 520-sheet tray (Tray 1) 8-10 The High capacity feeder includes: • 8-520-sheet tray (Tray 2) • 9-867-sheet tray (Tray 3) • 10-1133- - Lexmark 935dtn | User's Guide - Page 12
. Press or to scroll through values or text that roll to another screen. 5 Select Press to initiate action on a menu item. 6 Stop Stops all printer activity A list of options is offered once Stopped appears on the display. 7 Menu Opens the menu index Note: The menus are available only when the - Lexmark 935dtn | User's Guide - Page 13
continuing. If you have any other devices attached to the printer, turn them off as well and unplug any cables going to the printer. You can customize your printer connectivity and memory capacity by adding optional cards. The instructions in this section explain how to install the available cards - Lexmark 935dtn | User's Guide - Page 14
system board. a Turn the screws on the cover counterclockwise, and then remove them. b Gently pull the cover and system board away from the printer, and then remove it. 2 Use the illustration below to locate the appropriate connector. Warning: System board electrical components are easily damaged by - Lexmark 935dtn | User's Guide - Page 15
print server connector 4 Hard disk connector Installing a memory card CAUTION: If you are installing a memory card after setting up the printer, turn the printer off, and unplug the power cord from the wall outlet before continuing. Warning: System board electrical components are easily damaged by - Lexmark 935dtn | User's Guide - Page 16
may be installed, but the connectors are interchangeable. CAUTION: If installing a flash memory or firmware card after setting up the printer, turn the printer off, and unplug the power cord from the wall outlet before continuing. Warning: System board electrical components are easily damaged by - Lexmark 935dtn | User's Guide - Page 17
system board. • Be careful not to damage the connectors. 5 Reinstall the system board. Installing a printer hard disk CAUTION: If installing a printer hard disk after setting up the printer, turn the printer off, and unplug the power cord from the wall outlet before continuing. Warning: System board - Lexmark 935dtn | User's Guide - Page 18
Note: A #2 Phillips screwdriver is needed to attach the hard disk to the mounting plate. 1 Access the system board. 2 Remove the mounting plate, hard disk, ribbon cable, and attachment screws from the package. 3 Attach the ribbon cable to the hard disk. 4 Attach the mounting plate to the hard disk - Lexmark 935dtn | User's Guide - Page 19
the system board. The hard disk snaps into place. 7 Reinstall the system board. Installing an internal print server or port interface card CAUTION: Turn the printer off, and unplug the power cord from the wall outlet before continuing. If you have any other devices attached to the - Lexmark 935dtn | User's Guide - Page 20
to the local area network (LAN). An optional port interface card expands the ways the printer can connect to a computer or external print server. 1 Access the system board. 2 Unpack the internal print server or port interface card. 3 Remove the metal plate - Lexmark 935dtn | User's Guide - Page 21
: This operation requires a #2 Phillips screwdriver. 1 Gently insert the system board into the printer. 2 Replace the cover screws, and then turn them clockwise. 3 Tighten the screws firmly. Attaching cables Connect the printer to the computer using a USB cable or Ethernet cable. A USB port requires - Lexmark 935dtn | User's Guide - Page 22
1 USB port 2 Ethernet port 22 - Lexmark 935dtn | User's Guide - Page 23
guides in the tray for all trays except the multipurpose feeder. The Paper Size setting for the multipurpose feeder must be set manually manually for all trays that do not contain plain paper. 1 Make sure the printer Width • Feed Direction Note: The smallest supported Universal size is 100 x 148 mm - Lexmark 935dtn | User's Guide - Page 24
the Universal Setup menu. Specify the paper height and width Defining a specific height and width measurement for the Universal paper size (in the portrait orientation) allows the printer to support the size, including support for standard features such as duplex printing and printing multiple pages - Lexmark 935dtn | User's Guide - Page 25
-sheet trays The printer has a standard 520-sheet tray (Tray 1), and it may have one or more optional 520-sheet trays. All 520-sheet trays support the same paper . 2 Squeeze the width guide tabs together as shown, and move the width guide to the correct position for the paper size being loaded. 25 - Lexmark 935dtn | User's Guide - Page 26
the correct position for the paper size being loaded. Note: Use the size indicators on the bottom of the tray to help position the guides. 4 Flex the sheets back and forth to loosen them, and then fan them. Do not fold or crease the paper. Straighten the edges on a level - Lexmark 935dtn | User's Guide - Page 27
. From the Size Sensing menu, specify which size you want the printer to detect. Load either A5- or statement-size paper in the paper trays, but not both. Note: The multipurpose feeder does not use auto-size sensing and can support both A5- and statement-size print jobs. The Size Sensing setting - Lexmark 935dtn | User's Guide - Page 28
in appearance, they support the same paper sizes and types and require the same process for loading paper. Use these instructions to load paper in either tray: 1 Grasp the handle, and open the tray. 2 Squeeze the length guide tab inward as shown, and slide the guide - Lexmark 935dtn | User's Guide - Page 29
4 Load the paper stack with the recommended print side faceup. 5 Make sure the paper guides are secure against the edges of the paper. 6 Insert the tray into the printer. 7 If a different type of paper was loaded than the type previously loaded in the tray, change the Paper Type setting for the tray - Lexmark 935dtn | User's Guide - Page 30
1 Pull the multipurpose feeder tray down. 2 Grasp the extension, and gently pull it out until it is fully extended. 3 Prepare the paper for loading. • Flex sheets of paper back and forth to loosen them, and then fan them. Do not fold or crease the paper. Straighten the edges on a level surface. • - Lexmark 935dtn | User's Guide - Page 31
B4, folio, legal, and statement paper with the recommended print side facedown and the short edge of the paper entering the printer first. Notes: - Adjust the additional paper guide to accommodate SRA3 and 12 x 19 paper sizes. - Do not exceed the maximum stack height by forcing paper under the stack - Lexmark 935dtn | User's Guide - Page 32
the paper guides in each tray except the multipurpose feeder. The Paper Size setting for the multipurpose feeder must be set manually from the link. Only trays with the same custom names assigned will link. 1 Make sure the printer is on and Ready appears. 2 From the control panel, press . 3 Press - Lexmark 935dtn | User's Guide - Page 33
the Embedded Web Server: 1 Open a Web browser. Note: The computer must be connected to the same network as the printer. 2 In the address bar, type the IP address of the network printer (for example,192.264.263.17). 3 Press Enter. 4 From the navigation panel of the initial page, click Configuration - Lexmark 935dtn | User's Guide - Page 34
guide Paper guidelines Paper characteristics The following paper characteristics affect print quality and reliability. Consider these characteristics when evaluating new paper stock. Weight The printer Duplex is supported only for 63 problems. Curl can occur after the paper passes through the printer - Lexmark 935dtn | User's Guide - Page 35
appropriate paper prevents jams and helps ensure trouble-free printing. To help avoid jams and resistant inks designed for use in xerographic copiers. The ink Lexmark supports the use of recycled office paper produced specifically for use in laser (electrophotographic) printers. In 1998, Lexmark - Lexmark 935dtn | User's Guide - Page 36
and that paper meeting these guidelines may still cause paper feeding problems. Using letterhead Check with the manufacturer or vendor to determine whether the chosen preprinted letterhead is acceptable for laser printers. Page orientation is important when printing on letterhead. Use the following - Lexmark 935dtn | User's Guide - Page 37
, set the Paper Type to Transparency. • Feed transparencies from the standard tray or the multipurpose feeder. • Use transparencies designed specifically for laser printers. Check with the manufacturer or vendor to ensure transparencies are able to withstand temperatures up to 230°C (446°F) without - Lexmark 935dtn | User's Guide - Page 38
problems guide Lexmark Web site at www.lexmark.com/publications. When printing on labels: • From MarkVision Professional, Print Properties, or the control panel, set the Paper Type to Labels. • Use only letter, A4, or legal-size label sheets. • Use labels designed specifically for laser printers - Lexmark 935dtn | User's Guide - Page 39
also contaminate the printer and the cartridge with adhesive, and could void the printer and cartridge warranties. • Do 1.6 mm (0.06 in.) strip on the leading and driver edge, and use a non-oozing adhesive. • Portrait cause jams or other paper handling problems. • Check with the manufacturer or - Lexmark 935dtn | User's Guide - Page 40
that is unlisted, configure a Universal Paper Size. For information on card stock and labels, see the Card Stock & Label Guide. Paper sizes supported by the printer Paper size Dimensions 520-sheet trays (standard or optional) High capacity Multipurpose feeder feeder Duplex unit A3 297 x 420 - Lexmark 935dtn | User's Guide - Page 41
in.) and the maximum size is 297 x 432 mm (11.7 x 17 in.). Paper types and weights supported by the printer The printer engine supports 60-220 g/m2 (16-60 lb) paper weights. The duplex unit supports 63-170 g/m2 (17- 45 lb) paper weights. Paper type 520-sheet trays Plain Paper Bond Letterhead - Lexmark 935dtn | User's Guide - Page 42
in parentheses. Paper capacity estimations are calculated based on 75 g/m2 (20 lb) paper. The Finisher standard bin and Bin 1 support 60-220 g/m2 (16-60 lb) paper weights. Bin 2 (booklet-maker) supports 60-90 g/m2 (16-24 lb) paper weights plus one additional cover weighted up to 220 g/m2 (60 lb - Lexmark 935dtn | User's Guide - Page 43
. • All paper capacities are based on 75 g/m2 (20 lb) paper. Horizonal transport unit • The paper capacity is 50 sheets. • Finishing options are not supported in this bin. • Envelopes are routed here. • Universal paper is routed here when it is longer than 483 mm (19 in.) or shorter than 148 - Lexmark 935dtn | User's Guide - Page 44
Double staple-Two staples Double dual staple-Two sets of two staples. This setting is supported only for widths between 8 in. (203 mm) and 11.7 in. (297 mm short edge orientation. The short edge of the paper enters the printer first. Bi fold-Each page is individually folded and stacked separately - Lexmark 935dtn | User's Guide - Page 45
Universal X X X Envelopes (any size) X X X SEF-The paper is loaded in the short edge orientation. The short edge of the paper enters the printer first. Bi fold-Each page is individually folded and stacked separately. Booklet fold-A multiple-page job is folded along the center into a single - Lexmark 935dtn | User's Guide - Page 46
paper." Installing printer software A printer driver is software that lets the computer communicate with the printer. The printer software is typically installed during the initial printer setup. For more information, see the Setup sheet or Setup Guide that shipped with the printer or click Install - Lexmark 935dtn | User's Guide - Page 47
remains stored in memory. When you send a Reserve print job, the printer does not print the job immediately. It stores the job in memory so enter a four-digit PIN. 5 Click OK or Print, and then go to the printer to release the job. 6 From the control panel, press repeatedly until Held jobs appears, - Lexmark 935dtn | User's Guide - Page 48
, Repeat, or Verify), and then assign a user name. For a confidential job, also enter a four-digit PIN. 4 Click OK or Print, and then go to the printer to release the job. 5 From the control panel, press until Held jobs appears, and then press . 6 Press until appears next to your user name, and - Lexmark 935dtn | User's Guide - Page 49
device to print supported file types. Supported file types include: .pdf, .gif, .jpeg, .jpg, .bmp, .png, .tiff, .tif, .pcx, and .dcx. Many USB flash memory devices are tested and approved for use with the printer. For more information, visit the Lexmark Web site at www.lexmark.com. Notes: • Hi - Lexmark 935dtn | User's Guide - Page 50
USB flash memory device in the printer after leaving the initial USB menu screen, you can still print .pdf's from the USB flash memory device not be active, or the network cable may be malfunctioning. Consult a system support person for a solution, and then print another network setup page. Printing - Lexmark 935dtn | User's Guide - Page 51
prints, Ready appears. Printing the print quality test pages Print the print quality test pages to isolate print quality problems. 1 Turn the printer off. 2 Hold down and while turning the printer on. 3 Release the buttons when the clock appears, and wait for CONFIG MENU to appear. 4 Press until Prt - Lexmark 935dtn | User's Guide - Page 52
the Delete icon. Printing in black and white To print all text and graphics using only the black toner cartridge, set the printer to Black Only. Note: The printer driver is capable of overriding this setting. 1 From the control panel, press . 2 Press repeatedly until Settings appears, and then press - Lexmark 935dtn | User's Guide - Page 53
result in slower printing if the content of pages is mixed. To specify the setting: 1 Open a Web browser. 2 In the address bar, type the network printer or print server IP address, and then press Enter. 3 Click Configuration. 4 Click Print Settings. 5 Click Setup Menu. 6 From the - Lexmark 935dtn | User's Guide - Page 54
information, see the Card Stock & Label Guide available on the Lexmark Web site at www.lexmark.com/publications. • Do not load too much manual feeder while the printer is printing. Wait for Load Manual feeder with to appear. • Push all trays in firmly after loading paper. • Make sure the guides - Lexmark 935dtn | User's Guide - Page 55
Instructions Reload the multipurpose feeder. 4 Adjust the paper guides. 6 280-282 Cover F Open Cover F, jams, remove the sheets in the accumulator. Remove the staple cartridge, and then clear the staple jam. 8 284-286 Door of the printer might be hot. To reduce the risk of injury - Lexmark 935dtn | User's Guide - Page 56
lever down. 4 Close Door A. 5 Press . 230-231 paper jams 1 Open Door A by lifting the release latch and lowering the door. CAUTION: The inside of the printer might be hot. To reduce the risk of injury from a hot component, allow the surface to cool before touching it. 56 - Lexmark 935dtn | User's Guide - Page 57
2 Lift the green lever, and then pull the paper up and toward you. Note: Make sure all paper fragments are removed. 3 Push the green lever down. 4 Close Door A. 5 Pull the multipurpose feeder down, and then open Door B. 57 - Lexmark 935dtn | User's Guide - Page 58
6 Remove the jammed paper. 7 Close Door B. 8 Press . 241 paper jam 1 Open Door C. 2 Pull the paper down and toward you. Note: Make sure all paper fragments are removed. 3 Close Door C. 58 - Lexmark 935dtn | User's Guide - Page 59
4 Open Tray 1, and then remove any crumpled paper from the tray. 5 Close the tray. 6 Press . 242-244 paper jams 1 Open Door D. 2 Pull the paper down and away from the printer. 59 - Lexmark 935dtn | User's Guide - Page 60
Note: Make sure all paper fragments are removed. 3 Close Door D. 4 Clear any crumpled paper from Trays 2-4. a Open Tray 2, and then remove any crumpled paper. b Close Tray 2. c Open Tray 3, and then remove any crumpled paper. d Close Tray 3. 60 - Lexmark 935dtn | User's Guide - Page 61
e Open Tray 4, and then remove any crumpled paper. f Open the inside cover, and then remove any jammed paper. g Close the inside cover, and then close Tray 4. 5 Press . 250 paper jam 1 Remove the paper from the multipurpose feeder. 2 Flex the sheets of paper back and forth to loosen them, and then - Lexmark 935dtn | User's Guide - Page 62
3 Load the paper into the multipurpose feeder. 4 Slide the paper guide toward the inside of the tray until it lightly rests against the edge of the paper. 5 Press . 280-282 paper jams 1 Open Cover F. 2 Remove the - Lexmark 935dtn | User's Guide - Page 63
283-284 and 287-288 paper jams Covers, knobs, and handles located behind finisher Door G Cover, knob, or handle name 1 Cover G1 2 Cover G2 3 Knob G3 4 Cover G4 5 Cover G7 6 Knob G8 7 Handle G9 63 - Lexmark 935dtn | User's Guide - Page 64
1 Open Door G. 2 Lift both Cover G1 levers, and then remove any jammed paper. 3 Move Cover G2 to the right, and then remove any jammed paper. Note: If the paper is jammed in the rollers, rotate Knob G3 counterclockwise. 4 Move Cover G4 down, and then remove any jammed paper. 5 Move Cover G7 to the - Lexmark 935dtn | User's Guide - Page 65
7 Lift the inside cover. If the paper is jammed in the rollers, rotate Knob G8 clockwise, and then remove the jammed paper. 8 Close Door G. 9 Press . 284-286 paper jams 1 Open Door H. 2 Remove the jammed paper. 3 Close Door H. 4 Press . 65 - Lexmark 935dtn | User's Guide - Page 66
289 staple jam 1 Open Door G. 2 Slide the G5 stapler toward the front of the finisher. 3 Lift the lever, and then remove the staple cartridge. 66 - Lexmark 935dtn | User's Guide - Page 67
4 Open the staple cover. 5 Remove the jammed staple, and then close the cover. 6 Place the staple cartridge into the upper stapler. 67 - Lexmark 935dtn | User's Guide - Page 68
7 Open the lower staple drawer. 8 Remove the staple cartridge identified on the display. 9 Remove the jammed staples, and then place the staple cartridge into the stapler. 68 - Lexmark 935dtn | User's Guide - Page 69
10 Close the staple drawer. 11 Close Door G. 12 Press . 69 - Lexmark 935dtn | User's Guide - Page 70
of menus are available to make it easy for you to change printer settings: Supplies Menu Cyan Toner Magenta Toner Yellow Toner Black Toner Guide Supplies Guide Media Guide Menu Map Information Guide Connection Guide Moving Guide Settings Setup Menu Finishing Menu Quality Menu Utilities Menu PDF - Lexmark 935dtn | User's Guide - Page 71
OK Staples G5, Staples G11, or Staples G12 Low Empty Missing OK Hole Punch Box Full Missing OK Description Shows the status of the toner cartridges Shows the status of the cyan, yellow, and magenta photoconductor units Shows the status of the black photoconductor unit Shows the status of the waste - Lexmark 935dtn | User's Guide - Page 72
Paper menu Default Source menu Menu item Default Source Tray MP Feeder Manual Paper Manual Env Description Sets a default paper source for all print jobs Notes: • From the Paper menu, Configure MP must be set to Cassette in order for - Lexmark 935dtn | User's Guide - Page 73
Paper Size 11 x 17 A3 A4 A5 Executive Folio JIS B4 JIS B5 Legal Letter Statement Universal Specifies the size of the paper being manually loaded Note: Letter is the US factory default setting. A4 is the international factory default setting. Note: Only installed trays, drawers, and feeders are - Lexmark 935dtn | User's Guide - Page 74
: Only installed trays, drawers, and feeders are listed in this menu. Configure MP menu Menu item Configure MP Cassette Manual Description Determines when the printer selects paper from the multipurpose feeder Notes: • Cassette is the factory default setting. • The Cassette setting configures the - Lexmark 935dtn | User's Guide - Page 75
the relative texture of the card stock loaded in a specific tray Notes: • Normal is the factory default setting. • Settings appear only if card stock is supported. Specifies the relative texture of the transparencies loaded in a specific tray Note: Normal is the factory default setting. Specifies - Lexmark 935dtn | User's Guide - Page 76
in a specific tray Notes: • Normal is the factory default setting. • Settings appear only if the custom type is supported. Paper type Note: Off is the factory default setting. Notes: • Duplex sets the printer default to 2-sided printing for every print job unless 1-sided printing is selected - Lexmark 935dtn | User's Guide - Page 77
the paper type Notes: • Off is the factory default setting. • Custom Loading is available only if the custom type is supported. Notes: • Duplex sets the printer default to 2-sided printing for every print job unless 1-sided printing is selected from Print Properties. • If Duplex is selected - Lexmark 935dtn | User's Guide - Page 78
with the other paper size settings and includes similar options, such as support for duplex printing and printing multiple pages on one sheet. Menu item the portrait width Notes: • If the width exceeds the maximum, the printer uses the maximum width allowed. • 12 inches is the US factory default - Lexmark 935dtn | User's Guide - Page 79
paper type to an output bin. Selects an output bin for each supported paper type Available selections for each type are: Disabled Standard Bin Bin page prints when this item is selected. Prints a report containing printer statistics such as supply information and details about printed pages Note: - Lexmark 935dtn | User's Guide - Page 80
Note: The page prints when this item is selected. Prints a report containing NetWare-specific information about the network settings Notes: • This menu item appears only for printers with an internal print server installed. • The page prints when this item is selected. Prints a report of all the - Lexmark 935dtn | User's Guide - Page 81
into a reduced power state Notes: • Disabled does not appear unless Energy Conserve is set to Off. • The factory default setting depends on the printer model. Print a menu settings page to view the current setting. • Lower settings conserve more energy, but may require longer warm-up times. • Select - Lexmark 935dtn | User's Guide - Page 82
of the print job Notes: • 90 seconds is the factory default setting. • When the timer expires, any partially printed page still in the printer is printed, and then the printer checks to see if any new print jobs are waiting. • Print Timeout is available only when using PCL or PPDS emulation. This - Lexmark 935dtn | User's Guide - Page 83
Network Job Timeout 0-255 Print Recovery Auto Continue Disabled 5-255 Print Recovery Jam Recovery On Off Auto Print Recovery Page Protect On Off Printer Language PCL Emulation PS Emulation PPDS Emulation Description Sets the amount of time in seconds that a network print job can take before it - Lexmark 935dtn | User's Guide - Page 84
printable area Notes: • Normal is the factory default setting. When attempting to print data in the non-printable area defined by the Normal setting, the printer clips the image at the boundary. • The Whole Page setting allows the image to be moved into the non-printable area defined by the Normal - Lexmark 935dtn | User's Guide - Page 85
999 Blank Pages Do Not Print Print Collation On Off Description Returns the printer settings to the factory default settings Notes: • Do Not Restore is the factory default setting. • To specify the number of copies for a specific print job, from the software program, click File Œ Print, and then - Lexmark 935dtn | User's Guide - Page 86
are in portrait or landscape orientation. Specifies the orientation of a multiple-page sheet Notes: • Auto is the factory default setting. The printer chooses between portrait and landscape. • Long Edge uses landscape. • Short Edge uses portrait. Prints a border around each page image when using - Lexmark 935dtn | User's Guide - Page 87
menu Menu item Print Mode Color Black Only Color Correction Auto Off Manual Description Specifies the number and position of staples on a print default setting. Print jobs are not hole punched. • The On setting instructs the finisher to hole punch every print job. Specifies the number of holes - Lexmark 935dtn | User's Guide - Page 88
Notes: • 0 is the factory default setting. • -6 is the maximum decrease. 6 is the maximum increase. • This does not affect files where CMYK color specifications are being used. Adjusts contrast in color outputs Notes: • 0 is the factory default setting. • This does not affect files where CMYK color - Lexmark 935dtn | User's Guide - Page 89
Vivid Off-RGB US CMYK Euro CMYK Vivid CMYK Off-CMYK Manual Color RGB Image Vivid sRGB Display Display-True Black sRGB Vivid desired printed output. • From a browser window, type the IP address of the printer to access a complete list of color sample pages from the Embedded Web Server. Customizes - Lexmark 935dtn | User's Guide - Page 90
Menu item Manual Color CMYK Image US CMYK Euro CMYK Vivid CMYK Off CMYK Do Not Restore is the factory default setting. Do Not Restore keeps the user-defined settings. • All printer settings are returned to factory default settings except Display Language and the settings in the Parallel menu, Serial - Lexmark 935dtn | User's Guide - Page 91
must not be Read/Write or Write protected. • No cancels the format request. • Selecting Yes deletes all stored data and reformats the printer hard disk. Formats the printers hard disk Notes: • No is the factory default setting. • Selecting Yes will render all data on the hard disk unrecoverable even - Lexmark 935dtn | User's Guide - Page 92
PDF menu Menu item Scale to Fit Yes No Annotations Do Not Print Print Description Prints a list of all stored job statistics or deletes the information from the printer hard disk Notes: • A printer a print job problem Notes: • When Activate is selected, all data sent to the printer is printed in - Lexmark 935dtn | User's Guide - Page 93
• A formatted flash memory option card or printer hard disk must be installed in the printer and operating properly for this menu item to be downloaded into RAM. • All shows all fonts available to any option. Identifies a specific font and the option where it is stored Notes: • RO Courier is the - Lexmark 935dtn | User's Guide - Page 94
. Symbol sets support the different languages or specific programs such as math symbols for scientific text. Only the supported symbol sets are the US factory default setting. 64 is the international default setting. • The printer sets the amount of space between each line based on the Lines per Page - Lexmark 935dtn | User's Guide - Page 95
MP Feeder Off None 0-199 Assign Tray Off None 0-199 Assign Manual Paper Off None 0-199 Assign Man Env Off None 0-199 Tray Renumber Setting alterations are duplicated in the PPDS menu. Configures the printer to work with printer software or programs that use different source assignments for trays - Lexmark 935dtn | User's Guide - Page 96
are duplicated in the PCL Emulation menu. Sets the number of lines that print on each page Notes: • 64 is the factory default setting. • The printer sets the amount of space between each line based on the Lines per Page, Paper Size, and Orientation settings. Select the desired Paper Size and - Lexmark 935dtn | User's Guide - Page 97
feed (LF) control command Notes: • Off is the factory default setting. • Settings are duplicated in the PCL Emulation menu. Specifies whether the printer automatically performs a line feed (LF) after a carriage return (CR) control command Notes: • Off is the factory default setting. • Settings are - Lexmark 935dtn | User's Guide - Page 98
Menu item Scale 1-400% Orientation Portrait Landscape Margin Size 8-255 mm Backgrounds Do Not Print Print Image menu Menu item Auto Fit On Off Invert On Off Scaling Anchor Top Left Best Fit Anchor Center Fit Height/Width Fit Height Fit Width Orientation Portrait Landscape Rev Portrait Rev Landscape - Lexmark 935dtn | User's Guide - Page 99
are deleted. Limits the amount of time a confidential job stays in the printer before it is deleted Note: Off is the factory default setting. Network/Ports information. Note: This menu is available only for network models or printers attached to print servers. Menu item TCP/IP View Hostname TCP/IP - Lexmark 935dtn | User's Guide - Page 100
following menu items to view or set the Internet Protocol version 6 (IPv6) information. Note: This menu is available only for network models or printers attached to print servers. Menu item IPv6 Enable IPv6 Yes No IPv6 Auto Configuration On Off IPv6 View Hostname View Address View Router Address - Lexmark 935dtn | User's Guide - Page 101
Network menus Menu item PCL SmartSwitch On Off PS SmartSwitch On Off Description Sets the printer to automatically switch to PCL emulation when a print job requires it, regardless of the default printer language Notes: • On is the factory default setting. • When the Off setting is used, the - Lexmark 935dtn | User's Guide - Page 102
setting from the control panel and then exiting the menus causes the printer to restart. The menu selection is updated. Network Buffer Sets the . • The maximum size allowed depends on the amount of memory in the printer, the size of the other link buffers, and whether Resource Save is set - Lexmark 935dtn | User's Guide - Page 103
this setting from the control panel and then exiting the menus causes the printer to restart. The menu selection is updated. Sets the size of the USB . • The maximum size allowed depends on the amount of memory in the printer, the size of the other link buffers, and whether the Resource Save setting - Lexmark 935dtn | User's Guide - Page 104
from another input port. • Changing this setting from the control panel and then exiting the menus causes the printer to restart. The menu selection is updated. Sets the printer to process Macintosh binary PostScript print jobs Notes: • Auto is the factory default setting. • The Off setting filters - Lexmark 935dtn | User's Guide - Page 105
is the factory default setting. • When the On setting is used, the printer performs NPA processing. If the data is not in NPA format, it is increments. • The maximum size allowed depends on the amount of memory in the printer, the size of the other link buffers, and whether Resource Save is set to - Lexmark 935dtn | User's Guide - Page 106
the factory default setting. Sets the parity for serial input and output data frames Note: None is the factory default setting. Determines whether the printer uses the DSR Signal. DSR is a handshaking signal used by most serial cables. Notes: • Off is the factory default setting. • The serial port - Lexmark 935dtn | User's Guide - Page 107
Shows the assigned NetWare login name Shows the assigned NetWare print mode Shows the assigned NetWare network number Activates or deactivates NetWare support Note: On is the factory default setting. Enables the Ethernet 802.2 frame type setting Note: On is the factory default setting. Enables - Lexmark 935dtn | User's Guide - Page 108
a list of the paper sizes supported in trays, drawers, and feeders Provides a list of the control panel menus and settings Provides help in locating additional information Provides information about connecting the printer locally (USB) or to a network Provides instructions for safely moving the - Lexmark 935dtn | User's Guide - Page 109
, select Show Me. to print on the paper currently in the printer. Check guides The printer cannot determine the size of the paper. • Readjust the paper guides. Note: To learn how to adjust the paper guides, press press . • Check the tray configuration. repeatedly until Show Me appears - Lexmark 935dtn | User's Guide - Page 110
deactivated. Wait for the message to clear. Defragmenting Flash DO NOT POWER OFF Wait for the message to clear. Warning: Do not turn the printer off while this message appears on the display. Delete/Delete all/Delete all confidential jobs • Press • Press until Continue appears, and then press to - Lexmark 935dtn | User's Guide - Page 111
for the message to clear. Warning: Do not power off while the printer is formatting the printer hard disk. The percentage completed appears on the display. Formatting Flash DO of the paper in the tray or the position of the paper guides. Make sure the print job is requesting the correct paper size. - Lexmark 935dtn | User's Guide - Page 112
printer. For information about downloading code, see the User's Guide . Convert files to any of the following supported file types: .pdf, .gif, .jpeg, .jpg, .bmp printer. Note: Network code may be downloaded while this message appears on the display. Invalid PIN Enter a valid PIN. Load manual - Lexmark 935dtn | User's Guide - Page 113
learn how to replace the specified staple cartridge, press for the specified staple cartridge appears, and then press . repeatedly not supported. Convert files to any of the following supported file types: .pdf, .gif, .jpeg, .jpg, .bmp, .png, .tiff, .tif, .pcx, or .dcx. Power Saver The printer is - Lexmark 935dtn | User's Guide - Page 114
bin The specified output bin has reached its capacity. Remove paper from the specified bin to clear the message and continue printing. Resetting the printer Wait for the message to clear. Restore Held Jobs? • Press until Continue appears, and then press to restore all held jobs stored on the - Lexmark 935dtn | User's Guide - Page 115
y represents the total number of jobs to be restored. Serial The printer is using a serial cable connection. The serial port is the active communication Staples empty or misfed Load the specified staple cartridge into the finisher to clear the message and continue stapling. Staples low - Lexmark 935dtn | User's Guide - Page 116
cartridge, and then install a supported one. Note: To learn how to install a toner cartridge, press repeatedly until Show Me appears, and then press . 34 Incorrect paper type, check • Load the appropriate paper or other specialty media in the proper tray. • Check tray length and width guides - Lexmark 935dtn | User's Guide - Page 117
then press to clear the message. 38 Memory full • Press until Continue appears, and then press • Cancel the current print job. • Install additional printer memory. to clear the message. 39 Page is too complex to print • Press until Continue appears, and then press • Cancel the current print job - Lexmark 935dtn | User's Guide - Page 118
. 2 Unplug the power cord from the wall outlet. 3 Remove the unsupported optional interface card or internal print server from the printer system board. For more information, see the User's Guide on the Software and Documentation CD. 4 Connect the power cord to a properly grounded outlet. 5 Turn the - Lexmark 935dtn | User's Guide - Page 119
change, held jobs were not restored Press until Continue appears, and then press to clear the message. 58 Too many disks installed 1 Turn the printer power off. 2 Unplug the power cord from the wall outlet. 3 Remove the extra disks. 4 Connect the power cord to a properly grounded outlet. 5 Turn the - Lexmark 935dtn | User's Guide - Page 120
disk. If the error message remains, the hard disk may be defective and require replacing. 80 Scheduled maintenance Contact Customer Support, and report the message. The printer needs to have scheduled maintenance done. 82 Replace waste toner box The waste toner box is full. 1 Replace the waste - Lexmark 935dtn | User's Guide - Page 121
(s). Note: The printer has four photoconductors: faded, replace the toner cartridge. • To clear this message cartridge is exhausted. Replace the specified toner cartridge. Note: To learn how to replace a toner cartridge printing. 900-999 Service 1 Turn the printer off. 2 Unplug - Lexmark 935dtn | User's Guide - Page 122
1565 Emul Error Load Emul Option The printer automatically clears the message in 30 seconds and then disables the download emulator on the firmware card. To fix this, download the correct download emulator version from the Lexmark Web site at www.lexmark.com. 122 - Lexmark 935dtn | User's Guide - Page 123
may damage the finish of the printer. 4 Wipe only the outside of the printer, making sure to remove any ink residue that has accumulated on the paper exit tray. Warning: Using a damp cloth to clean the interior may cause damage to your printer. 5 Make sure the paper support and paper exit tray are - Lexmark 935dtn | User's Guide - Page 124
replace the specified toner cartridge. The recommended toner cartridges specifically designed for the printer are: Part name Part number Cyan High Yield Toner Cartridge C930H2CG Magenta High Yield Toner Cartridge C930H2MG Yellow High Yield Toner Cartridge C930H2YG Black High Yield Toner - Lexmark 935dtn | User's Guide - Page 125
appears, replace the specified staple cartridge. See the illustrations inside the stapler finisher door for more information. Part name Staple Cartridges-3 pack (Staples G5) Advanced Booklet waste toner box appears. The printer will not continue printing until the waste toner box is replaced. 125 - Lexmark 935dtn | User's Guide - Page 126
1 Waste toner box 2 Door E6 3 Door E 4 Printhead lens cleaner 5 E6 Door tab 1 Unpack the replacement waste toner box and accessories. 126 - Lexmark 935dtn | User's Guide - Page 127
2 Open Door E (front printer door). Warning: To avoid overexposing the photoconductors, do not leave the door open for more than 10 minutes. 3 Grasp the E6 Door tab, and then push the door down. 4 Remove the old printhead lens cleaner from Door E, and then discard it. 127 - Lexmark 935dtn | User's Guide - Page 128
5 Remove the waste toner box. 6 Place the plastic cover over the waste toner box. 7 Place the waste toner box in the recycling bag. 128 - Lexmark 935dtn | User's Guide - Page 129
8 Use the new printhead lens cleaner to clean the printhead lenses. 9 Insert the new waste toner box. 10 Place the new printhead lens cleaner in the notches of Door E. 129 - Lexmark 935dtn | User's Guide - Page 130
Door E6. 12 Close Door E. 13 Remove all paper from the printer paper path. Visit www.lexmark.com/recycling to learn how to recycle the waste toner box. Cleaning the printhead lenses Clean the printhead lenses when you replace the waste toner box or when you encounter print quality problems. 130 - Lexmark 935dtn | User's Guide - Page 131
1 Waste toner box 2 Door E6 3 Door E (front door) 4 Printhead lens cleaner 5 E6 Door tab 1 Open Door E (front door). Warning: To avoid overexposing the photoconductors, do not leave the door open for more than 10 minutes. 131 - Lexmark 935dtn | User's Guide - Page 132
2 Grasp the E6 Door tab, and then push the door down. 3 Remove the waste toner box. 4 Locate and remove the printhead lens cleaner from Door E. Note: If you are replacing the waste toner box, use the printhead lens cleaner that shipped with it. 132 - Lexmark 935dtn | User's Guide - Page 133
5 Insert the padded tip of the printhead lens cleaner into the first printhead lens opening. 6 Push the printhead lens cleaner all the way to the back of the lens, and then pull it out. 7 Clean the remaining three printhead lenses. 8 Insert the waste toner box. 133 - Lexmark 935dtn | User's Guide - Page 134
9 Place the printhead lens cleaner in the notches of Door E. 10 Close Door E6. 11 Close Door E. 134 - Lexmark 935dtn | User's Guide - Page 135
84 Replace black pc unit appears. Replace the cyan, magenta, and yellow photoconductors when 84 Replace color pc units appears. 1 Open Door E (front printer door). Warning: To avoid overexposing the photoconductors, do not leave the door open for more than 10 minutes. 2 Release the bar by pressing - Lexmark 935dtn | User's Guide - Page 136
4 Unpack the replacement photoconductor. 5 Align and insert the end of the photoconductor. 6 Remove the tape from the top of the photoconductor. 136 - Lexmark 935dtn | User's Guide - Page 137
bar in position. 9 Close Door E. Replacing a toner cartridge Replace the specified toner cartridge (cyan, magenta, yellow, or black) when 88 Replace toner appears. The printer will not continue printing until the specified cartridge is replaced. 1 Make sure the printer is on and Ready or 88 - Lexmark 935dtn | User's Guide - Page 138
3 Open Door E (front printer door). 4 Unlock the specified cartridge by turning the cartridge counterclockwise until the arrow-shaped handle points toward the unlock symbol. 5 Remove the cartridge by gently pulling it away from the printer. 138 - Lexmark 935dtn | User's Guide - Page 139
into the opening. 7 Lock the cartridge by turning the arrow-shaped cartridge handle clockwise until it points toward the lock symbol. 8 Close Door E. Recycling Lexmark products To return Lexmark products to Lexmark for recycling: 1 Visit our Web site at www.lexmark.com/recycle. 2 Find the product - Lexmark 935dtn | User's Guide - Page 140
used to move the options must have a surface able to support the dimensions of the options. • Keep the printer in an upright position. • Avoid severe jarring movements. Setting the printer up in a new location For a basic printer, or a printer with an optional finisher installed, allow the following - Lexmark 935dtn | User's Guide - Page 141
1 2 in. (50 mm) 2 2.7 ft (825 mm) 3 1.4 ft (418 mm) 4 4 in. (100 mm) 5 2.3 ft (693 mm) Shipping the printer When shipping the printer, use the original packaging or call the place of purchase for a relocation kit. 141 - Lexmark 935dtn | User's Guide - Page 142
repeatedly to decrease the setting or repeatedly to increase the setting, and then press . Disabling control panel menus Since many people often use a printer, a support person may choose to lock the control panel menus so that the settings cannot be changed from the control panel. 1 Make sure the - Lexmark 935dtn | User's Guide - Page 143
2-240 minutes. Note: Power Saver settings can also be adjusted by issuing a Printer Job Language (PJL) command. For more information, see the Technical Reference available on the Lexmark Web site at www.lexmark.com/publications. Restoring the factory default settings 1 From the control panel, press - Lexmark 935dtn | User's Guide - Page 144
3 Under Other Settings, click Security. 4 Click Printer Lockout PIN. Modifying confidential print settings You can modify confidential print settings using the Embedded Web Server. You can set a maximum number of PIN entry attempts. When a user exceeds a specific number of PIN entry attempts, all of - Lexmark 935dtn | User's Guide - Page 145
(Wi-Fi Protected Access) feature of wireless printers or print servers to provide WPA-Enterprise security support. Support for 802.1x requires the establishment of credentials for the printer, such as certificates. Certificates provide a way for the printer to be known to the Authentication Server - Lexmark 935dtn | User's Guide - Page 146
.1x Authentication. If a wireless internal print server is installed in the printer, click Wireless instead. Creating an administrative password Creating an administrative password allows a system support person to password-protect printer settings. Once a password is created, it must be entered to - Lexmark 935dtn | User's Guide - Page 147
the TCP and UDP network ports: • Disabled-Port is disabled and never allows network connections • Secure and Unsecure-Port is always open including when the printer is in Secure mode • Unsecured Only-Port is open only when - Lexmark 935dtn | User's Guide - Page 148
Troubleshooting Checking an unresponsive printer If your printer is not responding, make sure: • The power cord is plugged into the printer and you have checked each of these possibilities, turn the printer off and then back on. This often fixes the problem. Door A will not shut properly Make sure - Lexmark 935dtn | User's Guide - Page 149
Ready do not appear, turn the printer off and contact Customer Support. Error message about reading USB drive appears Make sure the USB drive is supported. For information regarding tested and approved USB flash memory devices, visit the Lexmark Web site at www.lexmark.com. Jobs do not print These - Lexmark 935dtn | User's Guide - Page 150
that the printer is connected to the network. For more information about installing a network printer, click View User's Guide and Documentation support person to make sure the network is functioning correctly. Copies of the printer software are also available on the Lexmark Web site at www.lexmark - Lexmark 935dtn | User's Guide - Page 151
matches the paper loaded in the tray. Incorrect characters print Make sure the printer is not in Hex Trace mode. If Ready Hex appears on the display, the same size and type of paper in each tray. • Move the paper guides to the correct positions for the paper size loaded in each tray. Are the - Lexmark 935dtn | User's Guide - Page 152
until the desired value appears, and then press . Solving option problems Option does not operate correctly or quits after it is installed These paper guides are aligned against the edges of the paper. 4 Make sure the paper tray closes properly. 5 Close the door. Reset the printer Turn the printer - Lexmark 935dtn | User's Guide - Page 153
with the finisher exit bins For more information about supported paper sizes, click View User's Guide and Documentation on the Software and Documentation CD. to the printer system board. • Make sure you are using the correct cable and that it is securely connected. Solving paper feed problems Paper - Lexmark 935dtn | User's Guide - Page 154
in the tray or on the multipurpose feeder. Check the paper guides Move the guides in the tray to the correct positions for the paper size -sheet tray. Make sure the paper size is supported by the booklet-maker bin (Bin 2) Use one of the following paper sizes supported by Bin 2: A3, A4, B4, folio - Lexmark 935dtn | User's Guide - Page 155
these suggestions do not correct the problem, contact Customer Support. You may have a printer part that requires adjustment or replacement. Isolating print quality problems To help isolate print quality problems, print the print quality test pages: 1 Turn the printer off. 2 Load letter- or A4-size - Lexmark 935dtn | User's Guide - Page 156
If you are using downloaded fonts, verify that the fonts are supported by the printer, the host computer, and the software program. Clipped images These are possible solutions. Try one or more of the following: Check the paper guides Move the guides in the tray to the correct positions for the paper - Lexmark 935dtn | User's Guide - Page 157
Incorrect margins Check the paper guides Move the guides in the tray to the correct positions for be dirty. A toner cartridge may be defective Replace the defective toner cartridge. Are the photoconductors defective? Replace the photoconductor(s). Note: The printer has four photoconductors: cyan, - Lexmark 935dtn | User's Guide - Page 158
loaded in the tray. Check the paper Avoid textured paper with rough finishes. Is the toner low? When 88 toner low appears, order a new cartridge. Print is too dark These are possible solutions. Try one or more of the following: Check the darkness, brightness, and contrast settings The Toner - Lexmark 935dtn | User's Guide - Page 159
may be defective Replace the toner cartridge. Print is too light These are possible solutions. Try one or more of the following: Check the darkness, may be set to On. Is the toner low? When 88 toner low appears, order a new cartridge. A toner cartridge may be defective Replace the toner - Lexmark 935dtn | User's Guide - Page 160
using paper that meets the printer specifications. Solid color pages The printer may need to be serviced. For more information, contact Customer Support. Toner fog or background shading appears on the page A toner cartridge may be defective Replace the toner cartridge. Are the photoconductors worn - Lexmark 935dtn | User's Guide - Page 161
more of the following: A toner cartridge may be defective Replace the toner cartridge. Is there toner in the paper path? Contact Customer Support. Transparency print quality is poor Check the transparencies Use only transparencies recommended by the printer manufacturer. Check the Paper Type setting - Lexmark 935dtn | User's Guide - Page 162
Quality Menu can be used to solve typical color problems. FAQ about color printing What is RGB color? is CMYK color? Cyan, magenta, yellow, and black inks or toners can be printed in various amounts to produce printer software? What settings should I use for the best color? The PostScript driver - Lexmark 935dtn | User's Guide - Page 163
color? This problem most commonly manual color correction is enabled, the printer employs user-selected color conversion tables to process objects. However, Color Correction must be set to Manual, or no user-defined color conversion will be implemented. Manual color correction settings are specific - Lexmark 935dtn | User's Guide - Page 164
correction to approximate the SWOP (Specifications for Web Offset Publishing) color color (such as a corporate logo)? From the printer Quality menu, nine types of Color Samples sets are color-matching problem depends on the Color Correction setting being used (Auto, Off, or Manual), the type - Lexmark 935dtn | User's Guide - Page 165
the detailed Color Samples set. Contacting Customer Support When you call Customer Support, describe the problem you are experiencing, the message on the display, and the troubleshooting steps you have already taken to find a solution. You need to know your printer model type and serial number. For - Lexmark 935dtn | User's Guide - Page 166
in conjunction with other products, programs, or services, except those expressly designated by the manufacturer, are the user's responsibility. For Lexmark technical support, visit support.lexmark.com. For information on supplies and downloads, visit www.lexmark.com. If you don't have access to - Lexmark 935dtn | User's Guide - Page 167
accordance with the instruction manual, may cause grounded cable such as Lexmark part number 1021231 for parallel notice is applicable if your printer has a wireless network card Canada radio interference statement Industry Canada (Canada) This device complies with Industry Canada specification - Lexmark 935dtn | User's Guide - Page 168
of Industry Canada. To prevent radio interference to the licensed service, this Canada technical specifications were met. Industry Canada (Canada) Cet appareil est conforme à la norme RSS-210 d'Industry Canada Director of Manufacturing and Technical Support, Lexmark International, S. A., Boigny, - Lexmark 935dtn | User's Guide - Page 169
vara er í samræmi við grunnkröfur og aðrar kröfur, sem gerðar eru í tilskipun 1999/5/EC. Italiano Con la presente Lexmark International, Inc. dichiara che questo questo prodotto è conforme ai requisiti essenziali ed alle altre disposizioni pertinenti stabilite dalla direttiva 1999/5/CE. Latviski - Lexmark 935dtn | User's Guide - Page 170
WEEE) directive The WEEE logo signifies specific recycling programs and procedures for electronic Lexmark Web site at www.lexmark.com for your local sales office phone number. Product disposal Do not dispose of the printer This equipment uses the RJ-11C Universal Service Order Code (USOC) jack. A - Lexmark 935dtn | User's Guide - Page 171
problem is resolved. This equipment contains no user serviceable parts. For repair and warranty information, contact Lexmark meets the applicable Industry Canada technical specifications. The Ringer Equivalence Number special conditions for the Facsimile User Instructions. The grant of a telepermit - Lexmark 935dtn | User's Guide - Page 172
's 111 Emergency Service. This equipment specifications: • There shall be no more than 10 call attempts to the same number within any 30 minute period for any single manual Lexmark poiché gli impulsi remoti sono presenti su tutte le linee analogiche in Svizzera. ENERGY STAR Laser notice The printer - Lexmark 935dtn | User's Guide - Page 173
label A laser notice label may be affixed to this printer as shown: Power consumption Product power consumption The following be substantially higher than the average. Values are subject to change. See www.lexmark.com for current values. Power Saver This product is designed with an energy-saving - Lexmark 935dtn | User's Guide - Page 174
with Lexmark user's guides, manuals, instructions or guidance -Unsuitable physical or operating environment -Maintenance by anyone other than Lexmark or a Lexmark authorized servicer -Operation of a product beyond the limit of its duty cycle -Use of printing media outside of Lexmark specifications - Lexmark 935dtn | User's Guide - Page 175
OR IMPLIED, WILL APPLY AFTER THIS PERIOD. ALL INFORMATION, SPECIFICATIONS, PRICES, AND SERVICES ARE SUBJECT TO CHANGE AT ANY TIME WITHOUT NOTICE. actual damages up to the limit set forth in the following paragraph. Lexmark's liability for actual damages from any cause whatsoever will be limited to - Lexmark 935dtn | User's Guide - Page 176
cartridge 116 34 Incorrect paper size, check 116 34 Incorrect paper type, check 116 35 Insufficient memory to support 88 Replace toner 121 900-999 Service 121 A Activating Menu Changes 109 guides 109 checking an unresponsive printer 148 cleaning exterior of the printer - Lexmark 935dtn | User's Guide - Page 177
printer cleaning 123 F factory defaults, restoring control panel menus 143 FAQ about color printing 162 FCC notices 167, 170 finisher finishing features 43 supported paper sizes 43 troubleshooting trays 32 Load with 112 Load manual feeder with 112 Load staples 113 loading 1133-sheet - Lexmark 935dtn | User's Guide - Page 178
PDF cartridges 125 toner cartridges troubleshooting message remains after jam is cleared 154 paper jams avoiding 54 Paper Loading menu 76 Paper Size/Type menu 72 paper sizes supported by the printer 40 Paper Texture menu 75 paper types duplex support 41 supported by finisher 42 supported by printer - Lexmark 935dtn | User's Guide - Page 179
cartridge 116 32 Replace unsupported cartridge 116 34 Incorrect paper size, check 116 34 Incorrect paper type, check 116 35 Insufficient memory to support 121, 137 900-999 Service 121 Activating src> guides 109 Clearing 112 Load manual feeder with 113 Printer locked, - Lexmark 935dtn | User's Guide - Page 180
Lexmark cartridges ordering 124 replacing 137 transparencies guidelines 37 loading 29 Tray Empty 115 Tray Low 115 Tray Missing 115 tray linking 32, 33 tray unlinking 32, 33 trays linking 32 unlinking 32 troubleshooting checking an unresponsive printer 148 contacting Customer Support - Lexmark 935dtn | User's Guide - Page 181
language PDFs do not print 149 paper curl 157 paper frequently jams 153 tray linking does not work 151 unexpected page breaks occur 151 troubleshooting, toner rubs off 161 toner specks 161 uneven print density 162 troubleshooting, printer options drawers 152 finisher 153 flash memory card 153 hard
-
 1
1 -
 2
2 -
 3
3 -
 4
4 -
 5
5 -
 6
6 -
 7
7 -
8
-
9
-
10
-
11
-
12
-
13
-
14
-
15
-
16
-
17
-
18
-
19
-
20
-
21
-
22
-
23
-
24
-
25
-
26
-
27
-
28
-
29
-
30
-
31
-
32
-
33
-
34
-
35
-
36
-
37
-
38
-
39
-
40
-
41
-
42
-
43
-
44
-
45
-
46
-
47
-
48
-
49
-
50
-
51
-
52
-
53
-
54
-
55
-
56
-
57
-
58
-
59
-
60
-
61
-
62
-
63
-
64
-
65
-
66
-
67
-
68
-
69
-
70
-
71
-
72
-
73
-
74
-
75
-
76
-
77
-
78
-
79
-
80
-
81
-
82
-
83
-
84
-
85
-
86
-
87
-
88
-
89
-
90
-
91
-
92
-
93
-
94
-
95
-
96
-
97
-
98
-
99
-
100
-
101
-
102
-
103
-
104
-
105
-
106
-
107
-
108
-
109
-
110
-
111
-
112
-
113
-
114
-
115
-
116
-
117
-
118
-
119
-
120
-
121
-
122
-
123
-
124
-
125
-
126
-
127
-
128
-
129
-
130
-
131
-
132
-
133
-
134
-
135
-
136
-
137
-
138
-
139
-
140
-
141
-
142
-
143
-
144
-
145
-
146
-
147
-
148
-
149
-
150
-
151
-
152
-
153
-
154
-
155
-
156
-
157
-
158
-
159
-
160
-
161
-
162
-
163
-
164
-
165
-
166
-
167
-
168
-
169
-
170
-
171
-
172
-
173
-
174
-
175
-
176
-
177
-
178
-
179
-
180
-
181
 |
 |

C935 Series
User's Guide
April 2007
www.lexmark.com
Lexmark and Lexmark with diamond design are trademarks of Lexmark International, Inc., registered in the United States and/or other countries.
All other trademarks are the property of their respective owners.
© 2007 Lexmark International, Inc.
All rights reserved.
740 West New Circle Road
Lexington, Kentucky 40550