Lexmark E260 Maintenance Guide
Lexmark E260 Manual
 |
View all Lexmark E260 manuals
Add to My Manuals
Save this manual to your list of manuals |
Lexmark E260 manual content summary:
- Lexmark E260 | Maintenance Guide - Page 1
Lexmark E260, E260d, and E260dn Series Maintenance Guide May 2008 www.lexmark.com - Lexmark E260 | Maintenance Guide - Page 2
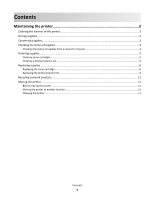
supplies...5 Ordering toner cartridges ...5 Ordering a photoconductor kit ...5 Replacing supplies...6 Replacing the toner cartridge ...6 Replacing the photoconductor kit ...8 Recycling Lexmark products...11 Moving the printer...11 Before moving the printer ...11 Moving the printer to another - Lexmark E260 | Maintenance Guide - Page 3
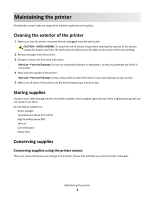
sunlight • Temperatures above 35°C (95°F) • High humidity above 80% • Salty air • Corrosive gases • Heavy dust Conserving supplies Conserving supplies using the printer menus There are some settings you can change in the printer menus that will help you conserve toner and paper. Maintaining the - Lexmark E260 | Maintenance Guide - Page 4
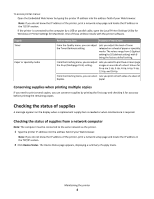
is connected to the computer by a USB or parallel cable, open the Local Printer Settings Utility for Windows or Printer Settings for Macintosh. One of these utilities installs with the printer software. Supply Toner Paper or specialty media Path to menu item Purpose of menu item From the Quality - Lexmark E260 | Maintenance Guide - Page 5
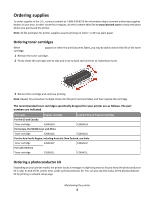
Australia, New Zealand, and India Toner cartridge E260A21P E260A11P For Latin America Toner cartridge E260A21L E260A11L Ordering a photoconductor kit Depending on your printer model, the printer issues a message or a light sequence to let you know the photoconductor kit is near its end of - Lexmark E260 | Maintenance Guide - Page 6
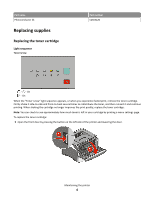
Part name Photoconductor kit Replacing supplies Replacing the toner cartridge Light sequence Toner is low Part number E260X22G • ‑ On • ‑ On When the "Toner is low" light sequence appears, or when you experience faded print, remove the toner cartridge. Firmly shake it side‑to‑side and front‑to‑ - Lexmark E260 | Maintenance Guide - Page 7
time. Extended light exposure can cause print quality problems. 4 Rotate the cartridge in all directions to distribute the toner. 5 Install the new toner cartridge by aligning the rollers on the toner cartridge with the arrows on the tracks of the photoconductor kit. Push the toner cartridge in as - Lexmark E260 | Maintenance Guide - Page 8
‑ Blinking ‑ On Replace photoconductor ‑ Blinking ‑ Blinking ‑ On When you first receive either light sequence, you should immediately order a new photoconductor kit. While the printer may continue to function properly after the photoconductor kit has reached its official end‑of‑life, print quality - Lexmark E260 | Maintenance Guide - Page 9
button on the base of the photoconductor kit. Pull the toner cartridge up and out using the handle. 4 Unpack the new photoconductor kit. Warning-Potential Damage: Be careful not to touch the photoconductor drum. Doing so may affect the print quality of future print jobs. Maintaining the printer 9 - Lexmark E260 | Maintenance Guide - Page 10
the toner cartridge with the tracks. Push the toner cartridge in until it clicks into place. 6 Install the unit into the printer by aligning the arrows on the guides of the unit with the arrows in the printer. Push the unit as far as it will go. 7 After you replace the photoconductor kit, reset the - Lexmark E260 | Maintenance Guide - Page 11
the list. 3 Follow the instructions on the computer screen. Moving the printer Before moving the printer CAUTION-POTENTIAL INJURY: Follow these guidelines to avoid personal injury or printer damage: • Turn the printer off using the power switch, and then unplug the power cord from the wall outlet
-
 1
1 -
 2
2 -
 3
3 -
 4
4 -
 5
5 -
 6
6 -
 7
7 -
8
-
9
-
10
-
11
 |
 |

Lexmark E260, E260d, and E260dn
Series
Maintenance Guide
May 2008
www.lexmark.com