Lexmark Monochrome Laser Maintenance Guide
Lexmark Monochrome Laser Manual
 |
View all Lexmark Monochrome Laser manuals
Add to My Manuals
Save this manual to your list of manuals |
Lexmark Monochrome Laser manual content summary:
- Lexmark Monochrome Laser | Maintenance Guide - Page 1
Lexmark E460dn, E460dw, and E462dtn Maintenance Guide January 2010 www.lexmark.com - Lexmark Monochrome Laser | Maintenance Guide - Page 2
Ordering toner cartridges ...4 Ordering a photoconductor kit ...5 Ordering a maintenance kit ...5 Replacing supplies...5 Replacing the toner cartridge ...5 Replacing the photoconductor kit ...7 Moving the printer...10 Moving the printer to another location...10 Shipping the printer ...10 Contents 2 - Lexmark Monochrome Laser | Maintenance Guide - Page 3
or detergents, as they may damage the finish of the printer. 4 Wipe only the outside of the printer. Warning-Potential Damage: Using a damp cloth to clean the interior may cause damage to your printer. 5 Make sure all areas of the printer are dry before beginning a new print job. Storing supplies - Lexmark Monochrome Laser | Maintenance Guide - Page 4
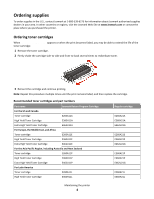
visit the Lexmark Web Site at www.lexmark.com or contact the place where you purchased the printer. Ordering toner cartridges When 88 Cartridge low appears or toner cartridges and part numbers Part name For the US and Canada Toner cartridge High Yield Toner Cartridge Extra High Yield Toner Cartridge - Lexmark Monochrome Laser | Maintenance Guide - Page 5
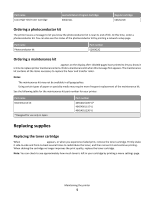
on the display after 120,000 pages have printed to let you know it is time to replace printer maintenance items. Order a maintenance kit for use only in Japan Part number 40X5402 (100 V)* 40X5400 (115 V) 40X5401 (230 V) Replacing supplies Replacing the toner cartridge When 88 Cartridge low appears - Lexmark Monochrome Laser | Maintenance Guide - Page 6
: 1 Open the front door by pressing the button on the left side of the printer and lowering the door. 2 Press the button on the base of the photoconductor kit, and then pull the toner cartridge out using the handle. 3 Unpack the new toner cartridge. Warning-Potential Damage: When replacing a toner - Lexmark Monochrome Laser | Maintenance Guide - Page 7
front door. Replacing the photoconductor kit The printer automatically notifies you before the photoconductor kit reaches a page maximum by showing 84 PC Kit life kit is one item only. 1 Turn the printer off. 2 Open the front door by pressing the button on the left side of the printer and lowering - Lexmark Monochrome Laser | Maintenance Guide - Page 8
Place the unit on a flat, clean surface. 4 Press the button on the base of the photoconductor kit. Pull the toner cartridge up and out using the handle. 5 Unpack the new photoconductor kit. Warning-Potential Damage: Be careful not to touch the photoconductor drum. Doing so may affect the print - Lexmark Monochrome Laser | Maintenance Guide - Page 9
toner cartridge with the tracks. Push the toner cartridge until it clicks into place. 7 Install the unit into the printer by aligning the arrows on the guides of the unit with the arrows in the printer. Push the unit as far as it will go. 8 After you replace the photoconductor kit, reset the - Lexmark Monochrome Laser | Maintenance Guide - Page 10
must have a surface able to support the dimensions of the options. • Keep the printer in an upright position. • Avoid severe jarring movements. Shipping the printer When shipping the printer, use the original packaging or call the place of purchase for a relocation kit. Maintaining the printer 10
-
 1
1 -
 2
2 -
 3
3 -
 4
4 -
 5
5 -
 6
6 -
 7
7 -
8
-
9
-
10
 |
 |

Lexmark E460dn, E460dw, and
E462dtn
Maintenance Guide
January 2010
www.lexmark.com