Linksys PPSX1 User Guide
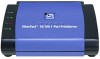
Linksys PPSX1 - EtherFast 10/100 PrintServer Manual
 |
UPC - 745883548842
View all Linksys PPSX1 manuals
Add to My Manuals
Save this manual to your list of manuals |
Linksys PPSX1 manual content summary:
- Linksys PPSX1 | User Guide - Page 1
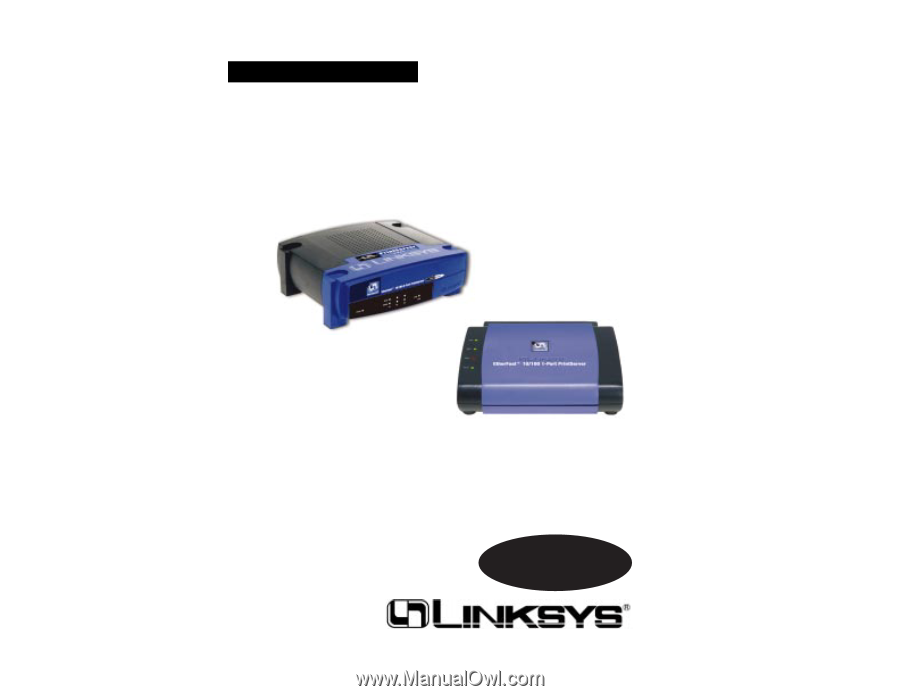
Instant EtherFast® Series EtherFast® 10/100 PrintServers Use this Guide to install the following products: EPSX3 ver. 2 EtherFast 10/100 3-Port PrintServer PPSX1 ver. 2 EtherFast 10/100 1-Port PrintServer User Guide - Linksys PPSX1 | User Guide - Page 2
/100 PrintServer is free from physical defects in material and workmanship for three years from the date of purchase, when used within the limits set forth in the Specifications section of this User Guide. If the product proves defective during this warranty period, call Linksys Technical Support in - Linksys PPSX1 | User Guide - Page 3
to Your Network 7 Chapter 5: Windows Driver Setup 9 Installing the Windows Drivers 9 Chapter 6: Bi-Admin: PrintServer Management 15 Installing the Bi-Admin Management Utility 15 Starting the Bi-Admin Management Utility 15 Using Bi-Admin 17 Setting the PrintServer's IP Address 19 - Linksys PPSX1 | User Guide - Page 4
Port in Windows NT 4.0, 2000, and XP 62 LPR Port Setup in Windows NT 4.0 62 LPR Port Setup in Windows 2000 and XP 63 Appendix E: Tips on Using the EtherFast® 10/100 PrintServer 64 Connecting to Other Switches and Hubs 64 About Bi-directional Printing 64 About the PrintServer Software - Linksys PPSX1 | User Guide - Page 5
3-Port PrintServer • One Setup Utility CD-ROM • One Power Adapter • One User Guide (not shown) • One Registration Card (not shown) Package Contents for the 1-Port PrintServer Figure 1-2 • One Linksys EtherFast® 10/100 1-Port PrintServer • One Setup Utility CD-ROM • One Power Adapter • One User Guide - Linksys PPSX1 | User Guide - Page 6
functions: to restore the factory default settings and to print a diagnostic test page containing all current settings. To reset the factory default settings: 1. Turn the PrintServer OFF. 2. Press and hold the Reset button. While pressing the button, switch the Print Server ON. 3. If you continue - Linksys PPSX1 | User Guide - Page 7
, the Default Name (SC number) may include letters as well as numbers. You can also find this using the Bi-Admin Utility. Connecting The PrintServer to Your Network The PrintServer does not have an ON/OFF power switch. Whenever its AC power adapter is plugged into a power supply, the PrintServer is - Linksys PPSX1 | User Guide - Page 8
Services Setup." EtherFast 10/100 PrintServers Chapter 5: Windows Driver Setup Installing the Windows Drivers Note: Make sure you have an IP address for the computer and an IP address for the PrintServer. If you need to assign an IP address to the PrintServer, go to Chapter 5: Bi-Admin: PrintServer - Linksys PPSX1 | User Guide - Page 9
configured. Check the box beside Configure Print Driver Now, and click the Finish button to continue. Figure 5-3 4. The following screen, shown in Figure 5-4, will assign a Program Folder to the Windows Taskbar. The default Program Folder is the Linksys PrintServer Driver. If you would like to use - Linksys PPSX1 | User Guide - Page 10
PrintServers 9. The Add Printer Wizard screen will come up at this point. Follow the standard procedure for adding printers under Windows. If you have any questions on adding printers, please refer to your printer's documentation. Figure 5-7 8. This will display the Configure Printer Port screen - Linksys PPSX1 | User Guide - Page 11
Bi-Admin on the PrintServer CD. Fully compatible with Windows 95, 98, Millennium, NT, 2000, and XP, Bi-Admin allows you to change the PrintServer's internal settings, check on the unit's status, and perform basic diagnostic tests. Note that the BiAdmin program must only be installed on the network - Linksys PPSX1 | User Guide - Page 12
Figure 6-1 3. When the Bi-Admin program appears, it will automatically scan the network for available Linksys PrintServer hardware. Any hardware found on the network will appear in the Default Name, Device Name, and Printer Port categories on the right hand side of window. Default Name is the SC - Linksys PPSX1 | User Guide - Page 13
For example, with this model, only two parallel port icons will show. Because Linksys PrintServers do not support serial printing, the serial port icon will always remain gray and inaccessible. Setting the PrintServer's IP Address The PrintServer's IP address can be easily changed at any time. Click - Linksys PPSX1 | User Guide - Page 14
via a router. To attach Bi-Admin to a remote Linksys PrintServer located on a remote network, click on Init Device and select Attach. The Add Cross Segment PrintServer window will appear. Enter the IP address of the remote unit and click the Set button. The remote PrintServer will appear in the list - Linksys PPSX1 | User Guide - Page 15
web browser and type http:// followed by the PrintServer's IP address in the browser's Address box. Use the Bi-Admin software to find the IP address. Then, press the Enter key. Figure 7-1 The Password Screen will appear. Leave the User Name field blank. The Password field will be blank as well. If - Linksys PPSX1 | User Guide - Page 16
to the network. You can also specify the number of times that the PrintServer will attempt to make a connection. Enter your chosen values in the boxes provided. If you want to reset the settings for this screen, you can click the Retrieve Defaults button to return to the factory default settings. If - Linksys PPSX1 | User Guide - Page 17
any changes you have made, click the Save button to implement the changes. Note: Linksys does not support its products in an Apple networking environment. If you encounter trouble, consult your printer documentation for possible help with settings. EtherFast 10/100 PrintServers Figure 8-1 26 27 - Linksys PPSX1 | User Guide - Page 18
you have made, click the Save button to implement the changes. Note: Linksys does not provide any technical support for logical printers configuration. 28 Figure 8-3 Click the NetBEUI tab to view or change the PrintServer's NetBEUI connection settings. Enter the name of the domain that you want the - Linksys PPSX1 | User Guide - Page 19
default, all frame types are enabled. Remote Printer Mode Novell Printer Server for P1 NetWare print server to service the PrintServer's parallel port 1. Novell Printer Server for P2 NetWare print server to service the PrintServer's parallel port 2. Note: Linksys does not provide technical support - Linksys PPSX1 | User Guide - Page 20
Figure 8-5 Click the SNMP tab to view or change the PrintServer's SNMP settings. The Print Server supports SNMP (Simple Network Management Protocol). This allows network supervisors to monitor and control the Print Server using network management platforms such as HP OpenView, IBM SystemView, etc - Linksys PPSX1 | User Guide - Page 21
the IPP Server's correct URL or IP Address. To use a URL rather than an IP Address, you need to register its domain name. · Unless clients are using Windows 2000 or XP, you must provide your clients with the supplied IPP Client software. If it is not convenient to provide the CD-ROM, supply the IPP - Linksys PPSX1 | User Guide - Page 22
10/100 PrintServers 3. Click the Port Settings or Configure Port button (Details or Port tab, depending on your version of Windows). The Configure IPP Port screen (shown in Figure 8-3) will appear. Figure 9-2 6. Perform one of these steps. Select an existing printer to use the new port, and click - Linksys PPSX1 | User Guide - Page 23
. · The Server's IP Address has changed. · The Internet connection for the IPP Server is down. · Network congestion causes the connection attempt to time out. If using the supplied IPP Client software, there are two settings-Retry Interval and Retry Count-that can be adjusted if you have problems - Linksys PPSX1 | User Guide - Page 24
PrintServer, install Bi-Admin first, and then install DHCP. Install the printer driver last. These instructions set up the PrintServer to work in a pure IP NetWare 5.x environment. Consider the following example: Tree Name: Novell Organization: TeSupp CN: Admin.TeSupp Server Name: TECH_50 CD - Linksys PPSX1 | User Guide - Page 25
Instant EtherFast® Series To enable printing from the PrintServer on a pure IP NetWare 5.x network: • First, create an NDPS Manager on your server. This only needs to be done once, even if you create more than one NDPS printer. • Create NDPS printers with NetWare Administrator. • Configure Public - Linksys PPSX1 | User Guide - Page 26
5.x, 4.x and 3.x Print Server Mode To set up the PrintServer under NetWare using the IPX/SPX protocol for NetWare 5.x, use an application called Quickset.exe, which is found in the D:\Utility\DOS directory on your PrintServer CD. 1. Log in to the NDS network as an Administrator or as a user with - Linksys PPSX1 | User Guide - Page 27
the DHCP server. Reset the PrintServer so it will obtain a new IP Address. This problem also arises if you assigned a static IP Address within the range used by the DHCP server. If so, use another address NOT within the range used by the DHCP server. General Printing Issues 1. A printer connected to - Linksys PPSX1 | User Guide - Page 28
Status. Set "Allow service by current print servers" to YES. 2. The PrintServer does not appear in the Active Device List of the PSCONFIG program. • Make sure that the PrintServer is on the same network segment as your PC. • Load the NetBEUI or TCP/IP protocol on your PC, so that Bi-Admin can try - Linksys PPSX1 | User Guide - Page 29
No file server: Assign a master file server using PSCONFIG or Bi-Admin Connecting to Server: Wait and check if the file server exists Password Mismatch Clear the NetWare password with PCONSOLE, or set the correct password for the PrintServer using PSCONFIG or Bi-Admin. Print Server Not Defined - Linksys PPSX1 | User Guide - Page 30
Set to NetWare Remote Printer Mode. Enter the correct NetWare print server names in the print server name fields and select Execute Setup. Windows Printing Issues 1. When printing from some software applications, such as PowerPoint, it takes a long time and the printout is incorrect. • The problem - Linksys PPSX1 | User Guide - Page 31
link light on the hub and PrintServer. You can also restore the factory default using Bi-Admin's configuration menu. EtherFast 10/100 PrintServers 6. Some DOS-based programs do not work on a Windows 95/98 peer-to-peer network. • Some DOS application require an LPT port to print. You can enable the - Linksys PPSX1 | User Guide - Page 32
section on Windows Driver Setup. Note: For help with the Internet Mail Printing Configuration features, see the guide in the D:\Not_supp\Manual directory on the PrintServer Setup CD. Linksys does not provide technical support for this option. 56 EtherFast 10/100 PrintServers Appendix C: Setting Up - Linksys PPSX1 | User Guide - Page 33
, choose No. 5. If asked to supply your Windows NT CD, do so. NT will copy the necessary files to your system. You may have to switch between your PrintServer Setup CD and the NT CD. 6. When TCP/IP appears in the Network Protocols window, click the Bindings tab. Windows will store your new bindings - Linksys PPSX1 | User Guide - Page 34
Protocol has now been successfully installed. TCP/IP Setup for Windows XP 1. Click the Start button and select the Control Panel. At the Control Panel, select Network Connection. 2. If the Internet Protocol (TCP/IP) is listed for your network adapter, click the Cancel button. Otherwise, right click - Linksys PPSX1 | User Guide - Page 35
address and the printer or print queue name, e.g., 10.0.0.1:L1. 9. Your LPR Port setup is now complete. 62 EtherFast 10/100 PrintServers Standard TCP/IP Print Port Setup in Windows 2000 and XP 1. Click the Start button, select Printers and choose Faxes. 2. Right click on the printer you want to set - Linksys PPSX1 | User Guide - Page 36
network in order to print after the PrintServer has been configured. NetWare 5.x supports the use of both IPX/SPX and TCP/IP. Instructions for the setup and configuration of IPX/SPX are provided in the NetWare 5.x section of this user guide. TCP/IP instructions are provided in "Appendix C: Setting - Linksys PPSX1 | User Guide - Page 37
only. Linksys will not provide technical support for the configuration and troubleshooting of the TCP/IP protocol. For full instructions on using TCP/IP, consult your operating system's documentation. 66 EtherFast 10/100 PrintServers Appendix F: Specifications for the 3-Port PrintServer Model - Linksys PPSX1 | User Guide - Page 38
® Series Appendix G: Specifications for the 1-Port PrintServer Model Number Standards Protocol Topology Ports Port Speed (Mbps) Memory Cabling Type LEDs Button Environmental PPSX1 ver. 2 IEEE 802.3, IEEE 802.3u CSMA/CD Star One DMA-Equipped Bi-directional Printer Ports, One Auto-Sensing RJ-45 10 - Linksys PPSX1 | User Guide - Page 39
, and will not provide phone or online support for these features. In the Not_supp directory on your PrintServer Setup CD, you'll find software, drivers and informative how-to guides covering the installation of the unsupported functions. The User Guides provided in the Not_supp directory (PDF or - Linksys PPSX1 | User Guide - Page 40
http://www.linksys.com © Copyright 2002 Linksys, All Rights Reserved.
-
 1
1 -
 2
2 -
 3
3 -
 4
4 -
 5
5 -
 6
6 -
 7
7 -
8
-
9
-
10
-
11
-
12
-
13
-
14
-
15
-
16
-
17
-
18
-
19
-
20
-
21
-
22
-
23
-
24
-
25
-
26
-
27
-
28
-
29
-
30
-
31
-
32
-
33
-
34
-
35
-
36
-
37
-
38
-
39
-
40
 |
 |
Instant EtherFast
®
Series
EtherFast
®
10/100
PrintServers
Use this Guide to install the following products:
EPSX3 ver. 2 EtherFast 10/100 3-Port PrintServer
PPSX1 ver. 2 EtherFast 10/100 1-Port PrintServer
User Guide