Logitech Harmony 610 User Manual
Logitech Harmony 610 Manual
 |
View all Logitech Harmony 610 manuals
Add to My Manuals
Save this manual to your list of manuals |
Logitech Harmony 610 manual content summary:
- Logitech Harmony 610 | User Manual - Page 1
User Manual User Manual VVeerrssiioonn 11..10 610 - Logitech Harmony 610 | User Manual - Page 2
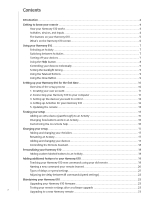
user account 11 2. Connecting your Harmony 610 to your computer 11 3. Setting up the devices you want to control 12 4. Setting up Activities for your Harmony 610 12 5. Updating the remote...13 Testing your setup...14 Adding an extra device (passthrough) to an Activity 15 Changing how buttons - Logitech Harmony 610 | User Manual - Page 3
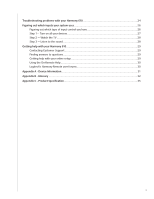
your Harmony 610 29 Contacting Customer Support 29 Finding answers to questions 29 Getting help with your online setup 29 Using the On-Remote Help 30 Logitech's Harmony Remote user forums 30 Appendix A - Device Information 31 Appendix B - Glossary...32 Appendix C - Product Specification 35 - Logitech Harmony 610 | User Manual - Page 4
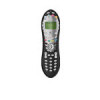
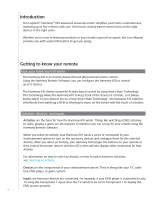
The Logitech® Harmony® 610 advanced universal remote simplifies your home entertainment, replacing up to five remotes with one. One-touch, activity-based control turns on the right devices in the right order. Whether you're new to Harmony products or you consider yourself an expert, this User Manual - Logitech Harmony 610 | User Manual - Page 5
turns off all the devices in the current Activity. The Harmony 610 buttons may have different functions or control different devices depending on which Activity you're in. For more information, see Changing how buttons work in an Activity. The arrow keys help you page through items on the screen - Logitech Harmony 610 | User Manual - Page 6
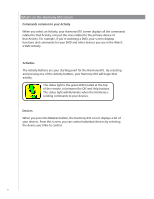
top of the remote, in between the Off and Help buttons. The status light will illuminate when the Harmony is sending commands to your devices. Devices When you press the Devices button, the Harmony 610 screen displays a list of your devices. From this screen, you can control individual devices by - Logitech Harmony 610 | User Manual - Page 7
have created for the remote. You can start an Activity by selecting the activity you want to start and pressing corresponding Activity button. Switching between Activities To select a new Activity, press the Activities button, and select the Activity you want to enjoy. The Harmony 610 will take care - Logitech Harmony 610 | User Manual - Page 8
from the system when you start an Activity), your Harmony 610 can become "out of sync" with your devices. To fix the problem, use the help feature on your Harmony 610. 1. On the remote, press the Help button. 2. Answer the questions on the Harmony 610 screen by selecting Yes or No by pressing the - Logitech Harmony 610 | User Manual - Page 9
optimal control of your entertainment system. Setting the backlight timing To set the length of time the backlight stays on, follow these steps: From your Harmony Remote Software: 1. Select Remote Settings. 2. Select Display Settings. Using the Coloured Buttons (Teletext) If your TV is programmed to - Logitech Harmony 610 | User Manual - Page 10
guides you through five steps in which you answer a series of questions about how your entertainment system is set up. 1. Create Account: the setup walks you through creating a user account on the Harmony Remote Software. 2. Check connection: the software ensures your computer and Harmony 610 - Logitech Harmony 610 | User Manual - Page 11
Devices, as well as change the settings on your remote. Whether you want to add a new Activity or device, troubleshoot a problem with an Activity, or customize remote buttons, the Harmony Remote Software home page is the place to start. 2. Connecting your Harmony 610 to your computer To connect your - Logitech Harmony 610 | User Manual - Page 12
see Adding and changing your devices. Guided online setup 4. Setting up Activities for your Harmony 610 To set up Activities, you need to enter the information related to the Activities you will be using on your Harmony 610. The Harmony Remote Software shows you a selection of recommended Activities - Logitech Harmony 610 | User Manual - Page 13
After you enter your device and Activity information, the software saves your information. It also transfers the information to your Harmony 610. After the software updates your remote, you're ready to test your setup. For specific details about testing your setup, see the chapter on Testing your - Logitech Harmony 610 | User Manual - Page 14
to check while you're testing your setup. If you run into specific issues while testing your remote, refer to the Troubleshooting section of this manual for suggestions and possible fixes for your problems. The process of testing your Harmony 610 is straightforward. It involves simply trying the - Logitech Harmony 610 | User Manual - Page 15
page: 1. Select the Activities tab. 2. Click Settings next to the appropriate Activity. 3. Select Review the settings for this Activity. 4. Select Yes, but I want to add more control of options and devices for this Activity. 5. Click Next. 6. Follow the online instructions to complete the setup. 15 - Logitech Harmony 610 | User Manual - Page 16
a button, click Customize Buttons. 3. Follow the online instructions. Customizing the on-remote help Using the Harmony Remote Software, you can customize the Harmony 610 on-remote help by selecting between two types of help: Smart Help • Asks questions about the devices that are on during a specific - Logitech Harmony 610 | User Manual - Page 17
or want to change the behavior of some buttons, you may need to make changes to your Harmony 610 setup. The following sections provide you with the information to help you with these tasks. Adding and changing your Activities In the Harmony Remote Software, select the Activities tab. • To add an - Logitech Harmony 610 | User Manual - Page 18
the Remote Settings tab. 2. Click Display Settings. 3. Follow the instructions online. Personalizing your Harmony 610 You can personalize your Harmony 610 to make the screen look and act the way you want. Adding custom-labeled buttons to an Activity If you want a button to do something specific, or - Logitech Harmony 610 | User Manual - Page 19
, or there's a button you want to use that's missing from the device configuration. To use the Harmony 610 learning feature, go to the Harmony Remote Software. 1. Select the Devices tab. 2. Click Learn IR located next to the device you want to control. 3. Follow the online instructions. 5-10 cm - Logitech Harmony 610 | User Manual - Page 20
Harmony Remote Software. Logitech recommends you use the default names listed on the Learn IR page. By using the default names, you minimize the chance of a button being assigned incorrectly on the Harmony 610 , or on the remote control (for example, InputAux, InputVideo1, InputTape, InputDVD). 20 - Logitech Harmony 610 | User Manual - Page 21
from a remote control. To accommodate these differences in your devices, the Harmony 610 uses several types of delays, or speed settings, to control your devices. the TV is already on. The Help button fixes it each time, but I don't want to use the Help button every time. Inter-Key Delay The Inter- - Logitech Harmony 610 | User Manual - Page 22
that is reacting too slowly. The Harmony 610 uses several different delays to control your devices. For more information on which delay you need to adjust, see Types of delays or speed settings. To adjust the delay between IR commands, go to the Harmony Remote Software: 1. Click the Devices tab - Logitech Harmony 610 | User Manual - Page 23
manually. To upgrade your Harmony 610 firmware: 1. Connect your Harmony to your computeTrhuesiHngartmheonUySoBnceabislea.lways learning new tricks! 2. Start the Harmony Remote Software. 3. Click Downloads. 4. Click Firmware. 5. Follow the online instructions. Testing your remote settings - Logitech Harmony 610 | User Manual - Page 24
Harmony Remote Software, check your Activity to ensure the Activity is set up to use the correct input your TV needs to be set on to get a picture. Next, check that the inputs are in the correct order for the Harmony 610 to know how to cycle through each input. If you're still experiencing trouble - Logitech Harmony 610 | User Manual - Page 25
the command, the Harmony 610 can learn it from your original remote. For more information, see Teaching your Harmony 610 new commands using your old remote. The Harmony Remote software in unable to communicate with the Harmony 610. • Try disabling any Internet security software you might have - Logitech Harmony 610 | User Manual - Page 26
parts to creating your Activities for your Harmony 610 using the Harmony Remote Software. Figuring out which type of input control you remote and see which option fits. Option 1 - One source button In this case, your remote has only one source or input select button. When you press the source button - Logitech Harmony 610 | User Manual - Page 27
button on the remote that selects the input you want. In this option, there's no menu from which to choose (Option 3) and you don't have to cycle through all inputs to get to the one you want (Option 1). Step 1- Turn on all your devices To determine which devices are using which inputs, Logitech - Logitech Harmony 610 | User Manual - Page 28
TV to your stereo so the sound comes out of your stereo speakers. You must use your AV Receiver's original remote control to switch between inputs. 1. Using your AV Receiver's original remote, select each input one-at-a-time. 2. For each input, note which device appears to be connected to that input - Logitech Harmony 610 | User Manual - Page 29
Remote Software Provides instructional help to guide you through a series of questionand-answer steps to accomplish a task. FAQs (Frequently Asked Questions) A searchable list of customer questions with answers provided by the Logitech Harmony support center. More Help button Provides specific - Logitech Harmony 610 | User Manual - Page 30
inputs correctly, you can use the Help button on the remote for simple troubleshooting. Answer the questions on your Harmony One to re-synchronize it with your entertainment system. See Using the Help button. Logitech's Harmony Remote user forums You can also access the user forums to see what other - Logitech Harmony 610 | User Manual - Page 31
In the Add Devices step of the setup software, you will need to enter information about the components in your entertainment system. Fill out this worksheet to use as your guide. List the entertainment components below that you would like your new remote to control. Device Type example: DVD Player - Logitech Harmony 610 | User Manual - Page 32
, or more than five times the video information than that of a TV set, creating a much crisper, more detailed picture. Light controller A device that is connected to a set of lights and allows the lights to be powered or dimmed remotely. Mini-system A single unit that is some combination of the - Logitech Harmony 610 | User Manual - Page 33
A video format that is used in the UK, and parts of Europe and Asia. A device that routes video or services and have PVRs included in some of their set-top boxes. Pre-amplifier A control RF (Radio Frequency) Used by some remote controls, to control devices that are out of sight (e.g. - Logitech Harmony 610 | User Manual - Page 34
reproduction than the compact disc. Satellite Radio A service in the United States that provides digital programming directly from satellites. Currently the 2 main providers for service are XM and Sirrus. SDTV Standard Definition Television One mode of operation of digital television where the - Logitech Harmony 610 | User Manual - Page 35
Appendix C - Product Specification LCD Size LCD Resolution LCD Screen Power Source Power Type Brands Supported Devices Supported Maximum number of devices per account Backlit keypad Backlight Color IR Learning IR Transmit Learning Capabilities IR Transmitters IR Transmission Range Memory Type - Logitech Harmony 610 | User Manual - Page 36
© 2008 Logitech Inc. All rights reserved. Logitech's trademarks are either registered trademarks or trademarks of Logitech in the US and other countries. All other trademarks are the property of their respective owners. 36
-
 1
1 -
 2
2 -
 3
3 -
 4
4 -
 5
5 -
 6
6 -
 7
7 -
8
-
9
-
10
-
11
-
12
-
13
-
14
-
15
-
16
-
17
-
18
-
19
-
20
-
21
-
22
-
23
-
24
-
25
-
26
-
27
-
28
-
29
-
30
-
31
-
32
-
33
-
34
-
35
-
36
 |
 |

User
Manual
Version 1.0
User
Manual
Version 1.1
610