MSI GX711 User Manual
MSI GX711 Manual
 |
View all MSI GX711 manuals
Add to My Manuals
Save this manual to your list of manuals |
MSI GX711 manual content summary:
- MSI GX711 | User Manual - Page 1
Chapter 1 Chapter 2 Chapter 3 Chapter 4 Preface General Introductions Getting Started Customizing this Notebook BIOS setup - MSI GX711 | User Manual - Page 2
installation. This equipment generates, uses and can radiate radio frequency energy and, if not installed and used in accordance with the instructions, may cause harmful interference to radio communications. However, there is no guarantee that interference will not occur in a particular installation - MSI GX711 | User Manual - Page 3
Preface FCC Conditions This device complies with part 15 of the FCC Rules. Operation is subject to the following two conditions: 1. This device may not cause harmful interference. 2. This device must accept any interference received, including interference that may cause undesired operation. III - MSI GX711 | User Manual - Page 4
Replace only with the same or equivalent type recommended by the equipment manufacturer. Discard used batteries according to manufacturer's instructions Finnish) VAROITUS: Paristo voi räjähtää, jos se on virheellisesti asennettu. Vaihda paristo ainoastaan valmistajan suosittelemaan tyyppiin. Hävit - MSI GX711 | User Manual - Page 5
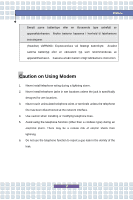
batteribyte. Använd samma batterityp eller en ekvivalent typ som rekommenderas av apparattillverkaren. Kassera använt batteri enligt fabrikantens instruction. Caution on Using Modem 1. Never install telephone wiring during a lightning storm. 2. Never install telephone jacks in wet locations unless - MSI GX711 | User Manual - Page 6
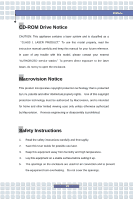
instruction manual carefully and keep this manual for your future reference. In case of any trouble with this model, please contact your nearest "AUTHORIZED service station prohibited. Safety Instructions 1. Read the safety instructions carefully and thoroughly. 2. Save this User Guide for possible - MSI GX711 | User Manual - Page 7
If any of the following situations arises, get the equipment checked by a service personnel: w The power cord or plug is damaged. w Liquid has has not worked well or you can not get it work according to User's Manual. w The equipment was dropped and damaged. w The equipment has obvious signs - MSI GX711 | User Manual - Page 8
Preface WEEE Statement (English) Under the European Union ("EU") Directive on Waste Electrical and Electronic Equipment, Directive 2002/96/EC, which takes effect on August 13, 2005, products of "electrical and electronic equipment" cannot be discarded as municipal waste anymore and manufacturers of - MSI GX711 | User Manual - Page 9
Preface Español) Bajo la directiva 2002/96/EC de la Unión Europea en materia de desechos y/o equipos electrónicos, con fecha de rigor desde el 13 de agosto de 2005, los productos clasificados como "eléctricos y equipos electrónicos" no pueden ser depositados en los contenedores habituales de su - MSI GX711 | User Manual - Page 10
Preface momencie gdy produkt jest wycofywany z użycia. (TÜRKÇE) Avrupa Birliği (AB) Kararnamesi Elektrik ve Elektronik Malzeme Atığı, 2002/96/EC Kararnamesi altında 13 Ağustos 2005 tarihinden itibaren geçerli olmak üzere, elektrikli ve elektronik malzemeler diğer atıklar gibi çöpe atılamayacak ve bu - MSI GX711 | User Manual - Page 11
trademarks of Microsoft Corporation. w AMI® is a registered trademark of American Megatrends Inc. w PCMCIA and CardBus are registered trademarks of the Personal Notebook Memory Card International Association. Release History Version 1.0 Revision Note First Release Date February 2007 XI - MSI GX711 | User Manual - Page 12
Statement II FCC Conditions III Safety Guideline for Using Lithium Battery IV Caution on Using Modem V CD-ROM Drive Notice VI Macrovision Notice VI Safety Instructions VI WEEE Statement VIII Trademarks ...XI Release History XI Introductions How to Use This - MSI GX711 | User Manual - Page 13
Preface Getting Started Specification ...2-2 Product Overview 2-6 Top-open View 2-6 Front View 2-9 Right-side View 2-11 Left-side View 2-13 Rear View 2-14 Bottom View 2-15 Power Management 2-16 AC Adapter 2-16 Battery Pack 2-18 Using the Battery Pack 2-21 Basic Operations 2-23 Safety and - MSI GX711 | User Manual - Page 14
Preface Customizing this Notebook Connecting the External Devices 3-2 Connecting the Peripheral Devices 3-3 Connecting the Communication Devices 3-6 PC Card Installation 3-7 Installing the PC card 3-7 Removing the PC card 3-8 Express PC Card Installation 3-9 Installing the Express card 3-9 - MSI GX711 | User Manual - Page 15
Chapter 1 Chapter 2 Chapter 3 Chapter 4 Preface General Introductions Getting Started Customizing this Notebook BIOS setup - MSI GX711 | User Manual - Page 16
to tell our users that this notebook is thoroughly tested and certified by our reputation for unsurpassed dependability and customer satisfaction. How to Use This Manual This User's Manual provides instructions and illustrations on how to operate this notebook. It is recommended to read this - MSI GX711 | User Manual - Page 17
General Introductions Chapter 3, Customizing this Notebook, gives instructions not only in connecting the mouse, keyboard, webcam, printer, external monitor, IEEE 1394 devices, and communication devices, but also in installing and removing the PC - MSI GX711 | User Manual - Page 18
you need to ship the unit in the future. The package should contain the following items: w Notebook w User's Manual or Quick Start Guide w All-in-one application disk, containing the drivers, utilities, and optional recovery function. w High-capacity Li-ion battery pack w AC adapter and power cord - MSI GX711 | User Manual - Page 19
Chapter 1 Chapter 2 Chapter 3 Chapter 4 Preface General Introductions Getting Started Customizing this Notebook BIOS setup - MSI GX711 | User Manual - Page 20
x 26.5~34.9mm(H) Weight 3.6kg with 6 cell battery CPU Processor Type Socket S1 (638-pins, uPGA) Turion 64 bit Taylor/Tyler dual core & Support Processor Sempron 64 bit Keene 90nm & 65nm for AMD F & G version L1 Cache 128KB L2 Cache 256KB/512KB Socket 638 pins, uPGA FSB Speed 800MHz - MSI GX711 | User Manual - Page 21
DVD multi (super multi) I/O Port Monitor(VGA) 15 pin Mini D-Sub x 1 USB x 3 (USB version 2.0) Mic-In x 1 Lin-In x 1 Internal Microphone x 1 Webcam x 1 (1.3M pixel, optional) Headphone/SPDIF Out x 1 RJ11 x 1 RJ45 x 1 IEEE 1394 x 1 DVBT Antenna x 1 (optional) TV-Out x 1 (HDMI - MSI GX711 | User Manual - Page 22
PTT Approval --- Yes (FCC/CTR21/JATE) PCI-E LAN 10/100/1000 Base on board LAN Wake on LAN --- Support on S3/S4/S5 state LAN Boot --- Yes Wfm --- Wfm 2.0 support IEEE 802.11b/g Support (optional) 17" WXGA + Glare/non-Glare Type or 17" WSXGA + Glare/non-Glare Type Brightness controlled by K/B hot - MSI GX711 | User Manual - Page 23
Getting Started HDTV Audio Sound Codec chip Internal Speaker Sound Volume Software & BIOS USB Flash Boot BIOS Others Kensington Lock Hole 1152 x 768, max 32bit color 1280 + 1 Subwoofer Adjust by volume button, K/B hot-key & SW Yes, USB floppy boot up DOS only Fast Boot Support --- Yes x 1 2-5 - MSI GX711 | User Manual - Page 24
Getting Started Product Overview This section provides you the description of basic aspects of your Notebook. It will help you to know more about the appearance of this Notebook before using it. Top-open View Press the Cover Latch to open the top cover (LCD Panel). The figure of top-open view and - MSI GX711 | User Manual - Page 25
1. Cover Latch (Internal View) It is a bounce-back device to lock the cover with the deck when closing your Notebook PC. 2. Rubber Pads Protect your Notebook PC from random closing. 3. Stereo Speakers Make high quality sound blaster with stereo system and Hi-Fi function supported. 4. Quick - MSI GX711 | User Manual - Page 26
of the computer. 7. Webcam This camera takes pictures every few minutes and updates those pictures to a Web page where everyone can watch. 8. Internal Microphone There is built-in microphone and its function is the same with microphone. 9. Status LED Num Lock: Glowing Blue when the Num Lock - MSI GX711 | User Manual - Page 27
such as the DV (digital video camera). 3. Audio Port Connectors Make high quality sound blaster with stereo system and Hi-Fi function supported. Headphones/SPDIF Out: A connector for speakers or headphones. Line In: Used for an external audio device. Microphone: Used for an external microphone - MSI GX711 | User Manual - Page 28
Blue when Bluetooth function of the computer is enabled. LED goes out when Bluetooth function is disabled. 5. 5 in 1 Card Reader The built-in card reader supports MMC (multi-media card), SD (secure digital), MS (memory stick) , MS Pro and XD cards. 2-10 - MSI GX711 | User Manual - Page 29
technology takes advantage of the scalable, high-bandwidth serial PCI Express and USB 2.0 interfaces. 2. PC Card Slot The computer provides a PC card slot to support one Type-II PC card for expansion functions, such as LAN/WLAN card, modem card, memory card, etc. 3. USB Port The USB 2.0 port allows - MSI GX711 | User Manual - Page 30
Getting Started 5. Ventilator The ventilator is designed to cool the system. DO NOT block the ventilator for air circulation. 6. VGA Port The 15-pin-D-sub VGA port allows you to connect an external monitor or other standard VGA-compatible device (such as a projector) for a great view of the Notebook - MSI GX711 | User Manual - Page 31
Getting Started Left-side View w v uu 1. USB Port The USB 2.0 port allows you to connect USB-interface peripheral devices, such as the mouse, keyboard, modem, portable hard disk module, printer and more. 2. Optical Storage Device A slim super-multi drive is available in the computer, depending - MSI GX711 | User Manual - Page 32
Rear View Getting Started uw y z xv 1. Kensington Lock This port is used to lock the computer to location for security. 2. Power Connector To connect the AC adapter and supply power for the computer. 3. RJ-11 Connector The computer provides a built-in modem that allows you to connect an FJ-11 - MSI GX711 | User Manual - Page 33
Bottom View uv w Getting Started 1. Battery Release Button It is a bounce-back device as a preparation for releasing the battery pack. Press it with one hand and pull the battery pack carefully with the other. 2. Battery Lock/Unlock Button Battery cannot be moved when the button is positioned on - MSI GX711 | User Manual - Page 34
Getting Started Power Management AC Adapter Please be noted that it is strongly recommended to connect the AC adapter and use the AC power while using this Notebook for the first time. When the AC adapter is connected, the battery is being charged immediately. NOTE that the AC adapter included in - MSI GX711 | User Manual - Page 35
Getting Started Disconnecting the AC Power When you disconnect the AC adapter, you should: 1. Unplug the power cord from the electrical outlet first. 2. Unplug the connector from the Notebook. 3. Disconnect the power cord and the connector of AC adapter. 4. When unplugging the power cord, always - MSI GX711 | User Manual - Page 36
Getting Started Battery Pack This Notebook is equipped with a high-capacity Battery pack. The rechargeable Li-ion battery pack is an internal power source of the Notebook. Releasing the Battery Pack It's a better way to have extra battery for enough power supply, so you don't have to - MSI GX711 | User Manual - Page 37
Getting Started y y x v 2-19 - MSI GX711 | User Manual - Page 38
Getting Started Replacing the Battery Pack 1. Insert the right side of battery pack into the compartment. 2. Slightly slide and press the battery pack into the right place. 3. After the right side of the battery pack fitting the right track, then slightly press the left side of battery pack into the - MSI GX711 | User Manual - Page 39
Getting Started Using the Battery Pack Battery Safety Tips Replacing or handling the battery incorrectly may present a risk of fire or explosion, which could cause serious injury. w Only replace the main battery pack with the same or equivalent type of battery. w Do not disassemble, short-circuit or - MSI GX711 | User Manual - Page 40
Getting Started Charging the Battery Pack The battery pack can be recharged while it is installed in the Notebook. Please pay attention to the following tips before recharging the battery: w If a charged battery pack is not available, save your work and close all running programs and shut down the - MSI GX711 | User Manual - Page 41
and chair and adjust their height to fit your posture when operating. w When sitting on the chair and adjust the chair's back (if available) to support your back comfortably. w Place you feet flat and naturally on the floor, so that your knees and elbows have the proper position (about 90-degree - MSI GX711 | User Manual - Page 42
Adjust the angle and position of LCD panel. Keep your hands and feet with optimal comfort. Getting Started Sit straight and keep a good posture. Adjust the desk's height. Adjust the chair's height. Have a Good Work Habit Have a good work habit is important if you have to work with your Notebook - MSI GX711 | User Manual - Page 43
Getting Started Knowing the Keyboard The Notebook's keyboard provides all the functions of a full-sized keyboard and an additional [Fn] key for specific functions on the Notebook. The keyboard can be divided into four categories: Typewriter keys, Cursor keys, Numeric keys and Function keys. 2-25 - MSI GX711 | User Manual - Page 44
Typewriter Keys Getting Started Typewriter Keys The function of these Typewriter keys is the major function of the keyboard, which is similar to the keys on a typewriter. It also provides several keys for special purposes, such as the [Ctrl], [Alt] and [Esc] key. When the lock keys are pressed, - MSI GX711 | User Manual - Page 45
Cursor Keys The keyboard provides four cursor (arrow) keys and [Home], [PgUp], [PgDn], [End] keys at the lower right corner, which are used to control the cursor movement. Cursor Keys Getting Started Move the cursor left for one space. Move the cursor right for one space. Move the cursor up for - MSI GX711 | User Manual - Page 46
Getting Started The Backspace key, [Ins] and [Del] keys at upper right corner are use for editing purpose. This key is used to switch the typing mode between "insert" and "overtype" modes. Press this key to delete one character to the right of the cursor and move the following text left for one - MSI GX711 | User Manual - Page 47
, such as opening the Start menu and launching the shortcut menu. For more information of the two keys, please refer to your Windows manual or online help. n [Fn] Key Switch the display output mode between the + LCD, external monitor and Both. Disable/enable Touchpad. + Decrease the LCD - MSI GX711 | User Manual - Page 48
Getting Started Knowing the Touchpad The touchpad integrated in your Notebook is a pointing device that is compatible with standard mouse, allowing you to control the Notebook by pointing the location of the cursor on the screen and making selection with its two buttons. u v w 1. Cursor Movement - MSI GX711 | User Manual - Page 49
Getting Started Using the Touchpad Read the following description to learn how to use the touchpad: n Positioning and Moving Place your finger on the touchpad (usually using the forefinger), and the rectangular pad will act as a miniature duplicate of your display. When you move your fingertip - MSI GX711 | User Manual - Page 50
Getting Started desired location; finally, release the left button to finish the drag-and-drop operation. Move the cursor by sliding your fingertip. Using the Touchpad Put your wrist on the desk comfortably. 2-32 - MSI GX711 | User Manual - Page 51
, moving speed and other advanced features of the cursor on the screen. To configure the touchpad, you can use the standard Microsoft or IBM PS/2 driver in your Windows operating system. The Mouse Properties in Control Panel allows you to change the configuration. Mouse Properties Window 2-33 - MSI GX711 | User Manual - Page 52
install the hard disk drive when the Notebook is turned on. The replacement of hard disk drive should be done by an authorized retailer or service representative. 2-34 - MSI GX711 | User Manual - Page 53
Getting Started Using the Optical Storage Your Notebook is equipped with an optical storage device, which is known as the Super Multi drive. The actual device installed in your Notebook depends on the model you purchased. n Super Multi Drive: A multi format recorder, allows you to record the -R/RW, - MSI GX711 | User Manual - Page 54
Getting Started Inserting the CD The following instruction describes the general procedure when operating the optical storage device, including the DVD-ROM drive. 1. Confirm that the Notebook is turned on. 2. Press the Eject - MSI GX711 | User Manual - Page 55
Getting Started Removing the CD 1. Press the Eject Button on the drive's panel and the CD tray will slide out partially. Then, gently pull the tray out until fully extended. 2. Hold the CD by its edge with your fingers and lift it up from the tray. 3. Push the tray back into the drive. 1. Confirm - MSI GX711 | User Manual - Page 56
Getting Started 2-38 - MSI GX711 | User Manual - Page 57
Chapter 1 Chapter 2 Chapter 3 Chapter 4 Preface General Introductions Getting Started Customizing this Notebook BIOS Einstellung - MSI GX711 | User Manual - Page 58
Customizing this Notebook Connecting the External Devices The I/O (input/output) ports on the Notebook allow you to connect peripheral devices. IEEE 1394 Device LAN Modem Microphone Speakers/ Earphones Mouse/ Keyboard Printer Monitor WebCam Television 3-2 - MSI GX711 | User Manual - Page 59
. 2. Connect your mouse to the Notebook. 3. The Notebook may auto detect your mouse driver and enable the mouse function. If there is no detection of you mouse you can manually enable the mouse by going to Start Menu à Control Panel à Add Hardware to add the new device. Connecting the Keyboard You - MSI GX711 | User Manual - Page 60
the printer. 3. Connect the power cord and turn on the printer. 4. Turn on the Notebook and the system will detect a new device. Install the required driver. For further instructions, please refer to your printer's manual. 3-4 - MSI GX711 | User Manual - Page 61
you to connect many high-end peripheral devices and consumer electronic appliances, such as the DV (digital video camera). The IEEE 1394 standard interface supports "plug-and-play" technology, so that you can connect and remove the IEEE 1394 devices without turning off the Notebook. To connect the - MSI GX711 | User Manual - Page 62
1000 Base-T LAN module supports data transfer rate up to 1000Mbps. For more instructions or detailed steps on service provider (ISP) for help. 1. To reduce the risk of fire, use only No. 26 AWG or larger telecommunication lone cord. 2. You are strongly recommended to install the modem driver - MSI GX711 | User Manual - Page 63
that support various functions for your necessary, including the LAN/WLAN card, modem card and memory card. The following instruction provides you with a basic installation for the PC card, including how to install and remove it. For more information, please refer to the manual - MSI GX711 | User Manual - Page 64
Customizing this Notebook Removing the PC card 1. Press the Eject Button to make it stretch out. 2. Push the Eject Button and the PC card will slide out. Pull it out of the slot. 1. Do not hold the "golden finger" when installing the PC card; otherwise, it may cause interference or damage to the PC - MSI GX711 | User Manual - Page 65
high-bandwidth serial PCI Express and USB 2.0 interfaces. The following instruction provides you with a basic installation for the Express Card, how to install and remove it. For more information, please refer to the manual of your Express Card. Installing the Express Card 1. Locate the Express Card - MSI GX711 | User Manual - Page 66
Customizing this Notebook Safely Remove Hardware If you connect any peripheral device to your system, the Safely Remove Hardware icon will appear on the taskbar. Double-click the icon to bring up the Safely Remove Hardware dialog box. You can see all connected peripheral devices here. If you - MSI GX711 | User Manual - Page 67
Chapter 1 Chapter 2 Chapter 3 Chapter 4 Preface General Introductions Getting Started Customizing this Notebook BIOS setup - MSI GX711 | User Manual - Page 68
BIOS Setup About BIOS Setup When to Use BIOS Setup? You may need to run the BIOS Setup when: w An error message appears on the screen during the system booting up and requests you to run SETUP. w You want to change the default settings for customized features. w You want to reload the default BIOS - MSI GX711 | User Manual - Page 69
BIOS Setup Control Keys You can use only the keyboard to control the cursor in the BIOS Setup Utility. Press left arrow to select one menu title. Press right arrow to select one menu title. Press up arrow to select one item under the menu title. Press down arrow to select one item under the menu - MSI GX711 | User Manual - Page 70
BIOS Setup BIOS Setup Menu Once you enter the BIOS Setup Utility, the Main menu will appear on the screen. The Main menu displays the system information, including the basic configuration. Main menu Show System Overview information about BIOS version, CPU features, Memory size and setting of System - MSI GX711 | User Manual - Page 71
Main menu BIOS Setup System Overview System Overview will show you BIOS version and other information about its build date and update notes. Following is CPU's information about its Type and Speed. System Time This item allows you to set the system time. The system clock will go on no matter you - MSI GX711 | User Manual - Page 72
BIOS Setup System Date This item allows you to set the system date. The date format is [day:month:date:year]. Day Day of the week, from Sun to Sat, which is determined by BIOS (read-only). Month The month from 01 (January) to 12 (December). Date The date from 01 to 31. Year The year can be - MSI GX711 | User Manual - Page 73
and applications. Default setting is set to Enabled. PCI Latency Timer Value in units of PCI clocks for PCI device latency timer register. Legacy USB Support If you want to use USB device, such as mouse, keyboard, portable disk, in DOS system or boot your system by USB device, you should - MSI GX711 | User Manual - Page 74
Boot menu BIOS Setup Boot Settings Configuration Configure settings during system boot. Boot Device Priority --1st, 2nd, and 3rd Boot Device The three items allow you to set the sequence of boot devices where BIOS attempts to load the disk operating system. 4-8 - MSI GX711 | User Manual - Page 75
Security menu BIOS Setup Security Settings Change Supervisor/User Password When you select the function, a message box will appear on the screen as below: Enter New Password Type the password you want, up to six characters in length and press [Enter]. The password typed now will replace any - MSI GX711 | User Manual - Page 76
BIOS Setup When the Supervisor Password is set, the new item User Access Level and Password Check will be added in the menu. You can make further settings of access right in the User Access Level item. Setting options: No Access, View Only, Limited and Full Access. The Password Check item is used to - MSI GX711 | User Manual - Page 77
Exit menu BIOS Setup Exit & Save Changes Save the changes you have made and exit the utility. Exit & Discard Changes Exit the utility without saving the changes you have made. Discard Changes Abandon your changes and reload the previous configuration before running the utility. Load Setup Defaults - MSI GX711 | User Manual - Page 78
BIOS Setup 4-12
-
 1
1 -
 2
2 -
 3
3 -
 4
4 -
 5
5 -
 6
6 -
 7
7 -
8
-
9
-
10
-
11
-
12
-
13
-
14
-
15
-
16
-
17
-
18
-
19
-
20
-
21
-
22
-
23
-
24
-
25
-
26
-
27
-
28
-
29
-
30
-
31
-
32
-
33
-
34
-
35
-
36
-
37
-
38
-
39
-
40
-
41
-
42
-
43
-
44
-
45
-
46
-
47
-
48
-
49
-
50
-
51
-
52
-
53
-
54
-
55
-
56
-
57
-
58
-
59
-
60
-
61
-
62
-
63
-
64
-
65
-
66
-
67
-
68
-
69
-
70
-
71
-
72
-
73
-
74
-
75
-
76
-
77
-
78
 |
 |

General Introductions
Chapter 1
Getting Started
Chapter 2
Customizing this Notebook
Chapter 3
BIOS setup
Chapter 4
Preface