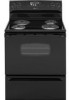
Maytag MER4351AAB Use and Care Manual
Maytag MER4351AAB Manual
 |
View all Maytag MER4351AAB manuals
Add to My Manuals
Save this manual to your list of manuals |
Maytag MER4351AAB manual content summary:
- Maytag MER4351AAB | Use and Care Manual - Page 1
Controls Clock Baking Timer Broiling Manual Clean Oven Knob Control Baking Broiling Self-Clean Oven Controls Clock Timer Baking Keep Warm Cook & Hold Broiling Delay Oven Racks Warranty & Service 19 Form No. A/01/08 Part No. 8113P695-60 ©2006 Maytag Appliances Sales Co. All rights - Maytag MER4351AAB | Use and Care Manual - Page 2
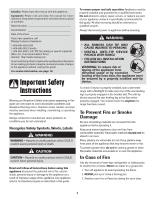
Do not attempt to adjust, repair, service, or replace any part of your appliance unless it is specifically recommended in this guide. All other servicing should be referred to a qualified servicer. Always disconnect power to appliance before servicing. WARNING • ALL RANGES CAN TIP AND CAUSE INJURIES - Maytag MER4351AAB | Use and Care Manual - Page 3
ignite or get caught on appliance parts. Wear proper apparel. guide can create serious safety hazards, result in performance problems, and reduce the life of the components of the appliance service without breaking due to the sudden change in temperature. Follow utensil manufacturer's instructions - Maytag MER4351AAB | Use and Care Manual - Page 4
soak or clean in a dishwasher or self-clean oven. as suggested in the manual. Improper installation of Hoods Clean range hood and all controls and wait for appliance parts to cool before touching or parts listed in this guide. Self-Clean Oven (select models) Instructions for Future Reference 3 - Maytag MER4351AAB | Use and Care Manual - Page 5
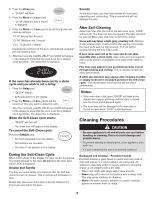
Care & Cleaning Self-Clean Oven (select models) Important: For manual clean oven, see page 6. CAUTION • It is normal for parts of the range to become hot during a self-clean cycle. • To prevent personal injury and damage to the oven door do not attempt to open door when "LOCK" - Maytag MER4351AAB | Use and Care Manual - Page 6
and do not slide smoothly after a clean cycle, wipe racks and rack supports with a small amount of vegetable oil to make them easier to move. burns. • To prevent staining or discoloration, clean appliance after each use. • If a part is removed, be sure it is correctly replaced. finish of range. 5 - Maytag MER4351AAB | Use and Care Manual - Page 7
can be cleaned in dishwasher. Clock and Control Pad remove from range, place instructions on page 4-5 to set a self-clean cycle. Manual support with a small amount of vegetable oil to restore ease of movement, then wipe off excess oil. Stainless Steel (select models Magic Spray (Part No. 20000008)**. - Maytag MER4351AAB | Use and Care Manual - Page 8
removing wire BULB COVER retainer. 2. Remove bulb cover and light bulb. 3. Replace with a 40-watt appliance bulb. WIRE RETAINER 4. Replace bulb cover and secure with wire retainer. 5. Reconnect power to range. Reset clock. Leveling Legs CAUTION Be sure the anti-tip bracket secures one of the - Maytag MER4351AAB | Use and Care Manual - Page 9
the backguard. Troubleshooting For most concerns, try these first. • Check if oven controls have been properly set. • Check to be sure plug is securely inserted into receptacle. • Check or re-set circuit breaker. Check or replace fuse. • Check power supply. Part or all of appliance does not work - Maytag MER4351AAB | Use and Care Manual - Page 10
As the oven heats and cools, you may hear sounds of metal parts expanding and contracting. This is normal and will not damage your appliance. There are no beeps and no display. • Control may be in Sabbath Mode (select models). See page 16. "SAb" flashing and then displayed continuously. • Oven is in - Maytag MER4351AAB | Use and Care Manual - Page 11
. To prevent damage to range, never operate surface unit the appliance. • NEVER touch cooktop until it has cooled. Expect some parts of , use the Canning Element (Model CE1). Contact your Maytag dealer for details or call Insert element terminals into receptacle. Guide the element into place. Press - Maytag MER4351AAB | Use and Care Manual - Page 12
Oven Cooking Manual Clean Oven Control (select models) Bake Broil Timer Clock CANCEL More+ or Less- Use the oven is preheated. • Allow 10 to 15 minutes for the oven to preheat. • To recall preset temperature during preheat, press the Bake pad. The temperature will be displayed for three seconds. - Maytag MER4351AAB | Use and Care Manual - Page 13
OFF. Remove the broiler pan from the oven. Self-Clean Oven Control (select models) Broil Bake More+ or LessTimer Cook & Hold Clean Delay Clock Keep Warm in oven. Cancels all operations except Timer and Clock. Manual Clean Oven Knob Control (select models) Oven Temp Knob The Oven Temp Knob is used - Maytag MER4351AAB | Use and Care Manual - Page 14
when the controls are locked. To recall the time of day when another problem. If BAKE or LOCK flash in the display, press CANCEL pad. If BAKE or LOCK continue to flash, disconnect power to the appliance continues, disconnect power to the appliance and call an authorized servicer. Baking To set Bake: - Maytag MER4351AAB | Use and Care Manual - Page 15
4. Allow the oven to preheat for 8-15 minutes. • When the set oven temperature is reached, one long beep will sound. • To recall the set temperature during preheat, press the Bake pad. 5. Place food in center of oven, allowing a minimum of two inches between utensil and oven walls. 6. - Maytag MER4351AAB | Use and Care Manual - Page 16
When the Delay time has expired: • "DELAY" will turn off. • Baking time is displayed. • "BAKE" and "HOLD" are displayed. To set a Delay when Cook & Hold has already been programmed: 1. Press the Delay pad. • "DELAY" flashes. • 00:00 appears in the display. 2. Press the More+ or Less- pad to set the - Maytag MER4351AAB | Use and Care Manual - Page 17
carefully tested for accuracy at the factory. It is normal to notice some baking or browning differences between a new oven and an old one. As ranges get older, the oven temperature can shift. You may adjust the oven temperature if you think the oven is not baking or browning correctly. To - Maytag MER4351AAB | Use and Care Manual - Page 18
• Expect broil times to increase and browning to be slightly lighter if appliance is installed on a 208-volt circuit. • HI is used for most Flaky Flaky * The top rack position is #5. Important: This chart is a suggested guide. The times may vary with the food being cooked. TOTAL COOK TIME 15 - 18 - Maytag MER4351AAB | Use and Care Manual - Page 19
area near the vent may become hot enough to cause burns. Never block the vent opening. OVEN VENT To replace: 1. Place rack on the rack support in the oven 2. Tilt the front end up slightly. Slide rack back until it clears the lock-stop position. 3. Lower front and slide back into - Maytag MER4351AAB | Use and Care Manual - Page 20
Use & Care Guide. After checking "Troubleshooting," you may find additional help by checking the "Assistance or Service" section or by calling Maytag. In the U.S.A., call 1-800-688-9900. In Canada, call 1-800-807-6777. 9/07 Form No. A/01/08 Part No. 8113P695-60 ©2006 Maytag Appliances Sales Co
-
 1
1 -
 2
2 -
 3
3 -
 4
4 -
 5
5 -
 6
6 -
 7
7 -
8
-
9
-
10
-
11
-
12
-
13
-
14
-
15
-
16
-
17
-
18
-
19
-
20
 |
 |

Electric Range - Coil
Safety
..........................................
1-3
Care & Cleaning
.......................
4-6
Self-Clean Oven
Cleaning Procedures
Maintenance
.............................
7-8
Oven Window
Oven Light
Troubleshooting
.......................
8-9
Surface Cooking
....................
9-10
Controls
Coil Elements
Table of Contents
Oven Cooking
.......................
11-18
Manual Clean Oven Controls
Clock
Baking
Timer
Broiling
Manual Clean Oven Knob Control
Baking
Broiling
Self-Clean Oven Controls
Clock
Timer
Baking
Keep Warm
Cook & Hold
Broiling
Delay
Oven Racks
Warranty & Service
....................
19
Use and Care Guide
®
Form No. A/01/08
Part No. 8113P695-60
©2006 Maytag Appliances Sales Co.
All rights reserved.
Litho U.S.A .