Maytag MET8776BS Installation Guide
Maytag MET8776BS Manual
 |
View all Maytag MET8776BS manuals
Add to My Manuals
Save this manual to your list of manuals |
Maytag MET8776BS manual content summary:
- Maytag MET8776BS | Installation Guide - Page 1
pièces 17 Exigences d'emplacement 17 Spécifications électriques 19 INSTRUCTIONS D'INSTALLATION 19 Déballage de la cuisinière 19 Réglage des are very important. We have provided many important safety messages in this manual and on your appliance. Always read and obey all safety messages. This - Maytag MET8776BS | Installation Guide - Page 2
and engaged. Failure to follow these instructions can result in death or serious burns specified on the model/serial rating plate. The model/serial rating Home Installations, ANSI A225.1/NFPA 501A or with local codes. Mobile home installations require: ■ When this range is installed in a mobile home - Maytag MET8776BS | Installation Guide - Page 3
the range hood or microwave hood combination installation instructions for dimensional clearances above the cooktop surface. *Range can be raised approximately 1" (2.5 cm) by adjusting the leveling legs. **Model/serial/rating plates may be rotated up from behind the control panel for viewing from - Maytag MET8776BS | Installation Guide - Page 4
using and follow the instructions provided for it here. NEC); mobile homes; and recreational is less than the total connected load listed on the model/serial/rating plate. **If connecting to a 50- the line so that the range can be moved if servicing is ever necessary. ■ A UL listed conduit connector - Maytag MET8776BS | Installation Guide - Page 5
less than the total connected load listed on the model/serial/rating plate. **If connecting to a 50-amp not use an extension cord. INSTALLATION INSTRUCTIONS Unpack Range WARNING Excessive Weight Hazard Use the range on its back or with the range supported on 2 legs after the range has been placed - Maytag MET8776BS | Installation Guide - Page 6
bracket. Re-engage anti-tip bracket if range is moved. Do not operate range without anti-tip bracket installed and engaged. Failure to follow these instructions can result in death or serious burns to children and adults. 1. Remove the anti-tip bracket that is taped inside the upper oven with the - Maytag MET8776BS | Installation Guide - Page 7
cover down and toward you to remove cover. Electrical Shock Hazard Disconnect power before servicing. Use 8 gauge copper or 6 gauge aluminum wire. Electrically ground range. Failure to follow these instructions can result in death, fire, or electrical shock. Style 1: Power supply cord strain relief - Maytag MET8776BS | Installation Guide - Page 8
panel and screws on rear of range. 6. Complete installation following instructions for your type of electrical connection: 4-wire (recommended) 3- wire (if 4-wire is not available) Electrical Connection Options If your home has: And you will be Go to Section: connecting to: 4-wire receptacle - Maytag MET8776BS | Installation Guide - Page 9
4-wire connection: Power Supply Cord Use this method for: ■ New branch-circuit installations (1996 NEC) ■ Mobile homes ■ Recreational vehicles ■ In an area where local codes prohibit grounding through the neutral 1. Part of metal ground strap must be cut out and removed. 5. Use ³⁄₈" - Maytag MET8776BS | Installation Guide - Page 10
cm) from the end of each wire. 1" (2.5 cm) 4-wire Connection: Direct Wire Use this method for: ■ New branch-circuit installations (1996 NEC) ■ Mobile homes ■ Recreational vehicles ■ In an area where local codes prohibit grounding through the neutral 1. Part of metal ground strap must be cut out and - Maytag MET8776BS | Installation Guide - Page 11
4. Attach terminal lugs to line 1 (black), neutral (white), and line 2 (red) wires. Loosen (do not remove) the setscrew on the front of the terminal lug and insert exposed wire end through bottom of terminal lugs. Securely tighten setscrew to XX lbs-in. torque. See Bare Wire Torque Specifications - Maytag MET8776BS | Installation Guide - Page 12
the range without anti-tip bracket installed and engaged. Please reference the "Assistance or Service" section of the Use and Care Guide, or the cover or "Warranty" section of the User Instructions, to contact service. Level Range 1. Place a rack in oven. 2. Place level on rack and check levelness - Maytag MET8776BS | Installation Guide - Page 13
instruction on range operation. If range does not operate, check the following: ■ Household fuse is intact and tight; or circuit breaker has not tripped. ■ Range is plugged into a grounded outlet. ■ Electrical supply is connected. ■ See "Troubleshooting" in the Use and Care Guide before servicing. - Maytag MET8776BS | Installation Guide - Page 14
Notes 14 - Maytag MET8776BS | Installation Guide - Page 15
Notes 15 - Maytag MET8776BS | Installation Guide - Page 16
Fixer la bride antibasculement au plancher ou au mur, conformément aux instructions d'installation. Faire glisser de nouveau la cuisinière de façon à antibasculement n'est pas installée et engagée. Le non-respect de ces instructions peut causer un décès ou des brûlures graves aux enfants et aux - Maytag MET8776BS | Installation Guide - Page 17
d'entreprendre l'installation. Lire et observer les instructions fournies avec chacun des outils de la conçu pour l'utilisation avec une cuisinière. Pour service 250 volts minimum, 40 A ou 50 A, compatible critères de la norme Standard for Manufactured Home Installations, ANSI A225.1/NFPA 501A ou aux - Maytag MET8776BS | Installation Guide - Page 18
cm) de hauteur. IMPORTANT :En cas d'installation d'une hotte ou d'un ensemble hotte/micro-ondes au-dessus de la cuisinière, suivre les instructions fournies avec la hotte concernant les dimensions de dégagement à respecter au-dessus de la surface de la table de cuisson. Une cuisinière autoportante - Maytag MET8776BS | Installation Guide - Page 19
à portée de la position de service finale de la cuisinière. ■ Ne pas utiliser de câble de rallonge. INSTRUCTIONS D'INSTALLATION Déballage de la cuisini plancher dans le sens de la longueur derrière la cuisinière en guise de support lorsque la cuisinière est placée sur sa partie postérieure. 4. À - Maytag MET8776BS | Installation Guide - Page 20
Fixer la bride antibasculement au plancher ou au mur, conformément aux instructions d'installation. Faire glisser de nouveau la cuisinière de façon bride antibasculement n'est pas installée et engagée. Le non-respect de ces instructions peut causer un décès ou des brûlures graves aux enfants et aux - Maytag MET8776BS | Installation Guide - Page 21
re et la paroi de montage. Pour assistance ou dépannage, consulter la section "Assistance ou Service" du guide d'utilisation et d'entretien, la couverture ou la section "Garantie" des instructions d'utilisation pour obtenir les coordonnées des personnes à contacter. 6. Répéter les étapes 1 et 2 pour - Maytag MET8776BS | Installation Guide - Page 22
déformés. 8. Mettre l'appareil sous tension. Mettre en marche les éléments de surface et le four. Pour des instructions spécifiques concernant l'utilisation de la cuisinière, consulter le Guide d'utilisation et d'entretien. Si la cuisinière ne fonctionne pas, contrôler ce qui suit : ■ Les fusibles - Maytag MET8776BS | Installation Guide - Page 23
Notes 23 - Maytag MET8776BS | Installation Guide - Page 24
W10430958A © 2012. All rights reserved. Tous droits réservés. 1/12 Printed in U.S.A. Imprimé aux É.-U.
-
 1
1 -
 2
2 -
 3
3 -
 4
4 -
 5
5 -
 6
6 -
 7
7 -
8
-
9
-
10
-
11
-
12
-
13
-
14
-
15
-
16
-
17
-
18
-
19
-
20
-
21
-
22
-
23
-
24
 |
 |

INSTALLATION INSTRUCTIONS
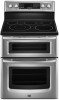
FREESTANDING ELECTRIC RANGE WITH DOUBLE OVENS
INSTRUCTIONS D'INSTALLATION POUR CUISINIÈRE
ÉLECTRIQUE AUTOPORTANTE AVEC FOURS DOUBLES
RANGE SAFETY
Table of Contents
Table des matières
RANGE SAFETY
....................................................................................
1
INSTALLATION REQUIREMENTS
.......................................................
2
Tools and Parts
...................................................................................
2
Location Requirements
......................................................................
2
Electrical Requirements - U.S.A. Only
...............................................
4
Electrical Requirements - Canada Only
.............................................
5
INSTALLATION INSTRUCTIONS
.........................................................
5
Unpack Range
....................................................................................
5
Adjust Leveling Legs
..........................................................................
5
Install Anti-Tip Bracket
.......................................................................
6
Electrical Connection - U.S.A. Only
...................................................
7
Verify Anti-Tip Bracket Is Installed and Engaged
.............................
12
Level Range
......................................................................................
12
Complete Installation
........................................................................
13
Moving the Range
............................................................................
13
SÉCURITÉ DE LA CUISINIÈRE
........................................................
16
EXIGENCES D’INSTALLATION
........................................................
17
Outils et pièces
................................................................................
17
Exigences d'emplacement
..............................................................
17
Spécifications électriques
...............................................................
19
INSTRUCTIONS D'INSTALLATION
..................................................
19
Déballage de la cuisinière
...............................................................
19
Réglage des pieds de nivellement
..................................................
19
Installation de la bride antibasculement
.........................................
20
Vérifier que la bride anti-basculement est bien
installée et engagée
........................................................................
20
Réglage de l'aplomb de la cuisinière
..............................................
21
Achever l’installation
.......................................................................
22
Déplacement de la cuisinière
..........................................................
22
W10430958A
IMPORTANT:
Save for local electrical inspector's use.
IMPORTANT :
À conserver pour consultation par l'inspecteur local des installations électriques.
You can be killed or seriously injured if you don't immediately
You
can be killed or seriously injured if you don't follow
All safety messages will tell you what the potential hazard is, tell you how to reduce the chance of injury, and tell you what can
happen if the instructions are not followed.
Your safety and the safety of others are very important.
We have provided many important safety messages in this manual and on your appliance. Always read and obey all safety
messages.
This is the safety alert symbol.
This symbol alerts you to potential hazards that can kill or hurt you and others.
All safety messages will follow the safety alert symbol and either the word “DANGER” or “WARNING.”
These words mean:
follow instructions.
instructions.
DANGER
WARNING