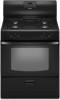
Maytag MGR5605WB Installation Instructions
Maytag MGR5605WB Manual
 |
UPC - 883049206646
View all Maytag MGR5605WB manuals
Add to My Manuals
Save this manual to your list of manuals |
Maytag MGR5605WB manual content summary:
- Maytag MGR5605WB | Installation Instructions - Page 1
A GAS DE 30" (76,2 CM) Table of Contents/Índice RANGE SAFETY 2 INSTALLATION REQUIREMENTS 3 Tools and Parts 3 Location Requirements 3 Electrical Requirements 5 Gas Supply Requirements 5 INSTALLATION INSTRUCTIONS 6 Unpack Range 6 Install Anti-Tip Bracket 7 Verify Anti-Tip Bracket Location - Maytag MGR5605WB | Installation Instructions - Page 2
RANGE SAFETY Your safety and the safety of others are very important. We have provided many important safety messages in this manual and on your appliance smell gas" instructions. In the State of Massachusetts, the following installation instructions apply: ■ Installations and repairs must be - Maytag MGR5605WB | Installation Instructions - Page 3
-tip bracket to rear range foot. Reconnect the anti-tip bracket, if the range is moved. Failure to follow these instructions can result in death or serious burns to children and adults. INSTALLATION REQUIREMENTS Tools and Parts Gather the required tools and parts before starting installation. Read - Maytag MGR5605WB | Installation Instructions - Page 4
extend beyond cabinet fronts by ½" (13.0 mm) minimum. IMPORTANT: If installing a range hood or microwave hood combination above the range, follow the range hood or microwave hood combination installation instructions for dimensional clearances above the cooktop surface. A. 18" (45.7 cm) upper side - Maytag MGR5605WB | Installation Instructions - Page 5
extension cord. Failure to follow these instructions can result in death, fire, or electrical shock. IMPORTANT: The range must be electrically grounded in accordance with must be done by a qualified service technician. No attempt shall be made to convert the appliance from the gas specified on the - Maytag MGR5605WB | Installation Instructions - Page 6
metal appliance connector may be used for connecting range to manual shutoff valve during any pressure testing of the gas supply piping system at test pressures equal to or less than ½ psi (3.5 kPa). INSTALLATION INSTRUCTIONS Unpack Range WARNING Excessive Weight Hazard 4. To place range - Maytag MGR5605WB | Installation Instructions - Page 7
Anti-Tip Bracket WARNING Tip Over Hazard A child or adult can tip the range and be killed. Connect anti-tip bracket to rear range foot. Reconnect the anti-tip bracket, if the range is moved. Failure to follow these instructions can result in death or serious burns to children and adults. 6. Tap - Maytag MGR5605WB | Installation Instructions - Page 8
heating personnel, authorized gas company personnel, and authorized service personnel. Failure to do so can result in death range. B D C E F G H A. Pressure regulator connection fitting B. Use pipe-joint compound C. Adapter D. Flexible connector E. Adapter F. Use pipe-joint compound G. Manual - Maytag MGR5605WB | Installation Instructions - Page 9
the inner cone. A B 3. Continue installing your range using the follwing installation instructions. Level Range 1. Place rack in oven. 2. Place level on rack and check levelness of range, first side to side; then front to back. 3. If range is not level, pull range forward until rear leveling leg is - Maytag MGR5605WB | Installation Instructions - Page 10
and Care Guide for specific instruction on range operation. If range does not operate, check the following: ■ Household fuse is intact and tight, or circuit breaker has not tripped. ■ Range is plugged into a grounded 3 prong outlet. ■ Electrical supply is connected. ■ See "Troubleshooting" in the - Maytag MGR5605WB | Installation Instructions - Page 11
service personnel range is moved. Failure to follow these instructions can result in death or serious burns to children and adults. 6. Reinstall the cap. A. Cap To Convert Surface Burners 1. Remove burner grate, burner caps and burners. A To Convert Gas Pressure Regulator 1. Turn manual - Maytag MGR5605WB | Installation Instructions - Page 12
stamped with "56" 6. Place Natural gas oven burner spud in plastic parts bag along with Natural gas cooktop burner spuds for future use and keep "Make Gas Connection" section for properly connecting the range to the gas supply. 2. Turn the manual shutoff valve in the gas supply line to the open - Maytag MGR5605WB | Installation Instructions - Page 13
is moved. Failure to follow these instructions can result in death or serious burns to children and adults. To Convert Gas Pressure Regulator 1. Turn manual shutoff valve to the "closed" position. 2. Unplug range or disconnect power. B A C A. To range B. Manual shutoff valve "closed" position C. Gas - Maytag MGR5605WB | Installation Instructions - Page 14
Std Burner 149 Std Burner 149 5. Place LP gas orifice spuds in the parts bag for future use and keep with the bag containing literature. 6. Reinstall burners Make Gas Connection" section for properly connecting the range to the gas supply. 2. Turn the manual shutoff valve in the gas supply line to - Maytag MGR5605WB | Installation Instructions - Page 15
SEGURIDAD DE LA ESTUFA Su seguridad y la seguridad de los demás es muy importante. Hemos incluido muchos mensajes importantes de seguridad en este manual y en su electrodoméstico. Lea y obedezca siempre todos los mensajes de seguridad. Este es el símbolo de advertencia de seguridad. Este símbolo le - Maytag MGR5605WB | Installation Instructions - Page 16
Cinta para medir ■ Destornillador de hoja plana ■ Destornillador Phillips ■ Taladro manual o eléctrico ■ Llave de tuerca o pinzas ■ Llave de combinaci instalaciones empotradas deberán proveer un recinto cerrado de los lados y la parte posterior de la estufa. ■ Para eliminar el riesgo de quemaduras - Maytag MGR5605WB | Installation Instructions - Page 17
mostrador B. 13" (33 cm) profundidad máxima del armario superior C. 30" (76,2 cm) ancho mínimo de la abertura D. Para ver el espacio mínimo hasta la parte superior de la superficie de cocción, vea la NOTA*. E. 30¹⁄₈" (76,5 cm) ancho mínimo de la abertura F. Se recomienda esta área sombreada para la - Maytag MGR5605WB | Installation Instructions - Page 18
encendido electrónico que no funcionará si se enchufa en un contacto que no está debidamente polarizado. ■ El diagrama de cableado está ubicado en la parte posterior de la estufa, en una bolsa de plástico transparente. NOTA: El armazón de metal de la estufa deberá conectarse a tierra para que - Maytag MGR5605WB | Installation Instructions - Page 19
para que la estufa esté nivelada y alineada. ■ Debe tener una válvula de cierre: La línea de suministro deberá equiparse con una válvula de cierre manual. Esta válvula deberá estar ubicada en la misma habitación pero fuera de la estufa. Deberá estar en una ubicación que permita un fácil acceso para - Maytag MGR5605WB | Installation Instructions - Page 20
de cartón debajo de la estufa. 3. Saque las parrillas del horno y el paquete de piezas del interior del horno. 4. Para colocar la estufa sobre su parte posterior, tome los 4 esquinales de cartón de la caja. Apile un esquinal de cartón sobre el otro. Repita con los otros 2 esquinales. Colóquelos a lo - Maytag MGR5605WB | Installation Instructions - Page 21
el suministro de gas a la estufa. B C A D E F G A. Accesorio de conexión del regulador de presión B. Codo de 90° C. Tubería de hierro negro D. Unión E. Niple F. Válvula de cierre manual G. Tubo de gas de ½" ó ¾" 21 - Maytag MGR5605WB | Installation Instructions - Page 22
ón es adecuado en tanto cumpla con las normas indicadas en la sección "Requisitos de ubicación". Vista frontal Parte frontal Vista lateral Válvula de cierre Posición "ON" (Abierto) 3. Abra la válvula de cierre manual de la línea de suministro de gas. La válvula está abierta cuando la manija est - Maytag MGR5605WB | Installation Instructions - Page 23
5. Verifique que la pata niveladora trasera esté enganchada en el soporte anti-vuelco. NOTA: La estufa debe estar nivelada para obtener un horneado satisfactorio. Verifique el funcionamiento Sistema de encendido electrónico Encendido inicial y ajustes de la llama de gas Los quemadores de la - Maytag MGR5605WB | Installation Instructions - Page 24
conectada en un contacto de 3 terminales con conexión a tierra. ■ Que el suministro eléctrico esté conectado. ■ Vea "Solución de problemas" en el Manual de uso y cuidado. 8. Cuando la estufa haya estado funcionando por 5 minutos, sienta si hay calor. Si no siente calor, apague la estufa y verifique - Maytag MGR5605WB | Installation Instructions - Page 25
gas natural a gas L.P. o de gas L.P. a gas natural deberán ser hechas por un instalador calificado. Conversión de gas L.P. A. A la estufa B. Válvula de cierre manual en la posición "cerrada" C. Línea de suministro de gas 3. Abra la puerta del asador y saque la charola para asar. El regulador de la - Maytag MGR5605WB | Installation Instructions - Page 26
Cómo convertir los quemadores de superficie 1. Saque la parrilla, las tapas del quemador y los quemadores. A Para los modelos con 3 quemadores estándar y 1 quemador de potencia: Quemador estándar 88 Quemador estándar 88 B Quemador de potencia 96 Quemador estándar 88 A. Tapa del quemador B. - Maytag MGR5605WB | Installation Instructions - Page 27
conversión 1. Vea la sección "Conexión del suministro de gas" para conectar la estufa debidamente al suministro de gas. 2. Gire la válvula de cierre manual en la línea de suministro de gas a la posición abierta. 3. Vea la sección "Verifique el funcionamiento" para los ajustes apropiados de encendido - Maytag MGR5605WB | Installation Instructions - Page 28
conversión 1. Vea la sección "Conexión del suministro de gas" para conectar la estufa debidamente al suministro de gas. 2. Gire la válvula de cierre manual en la línea de suministro de gas a la posición abierta. 3. Vea la sección "Verifique el funcionamiento" para los ajustes apropiados de encendido
-
 1
1 -
 2
2 -
 3
3 -
 4
4 -
 5
5 -
 6
6 -
 7
7 -
8
-
9
-
10
-
11
-
12
-
13
-
14
-
15
-
16
-
17
-
18
-
19
-
20
-
21
-
22
-
23
-
24
-
25
-
26
-
27
-
28
 |
 |

INSTALLATION INSTRUCTIONS
30" (76.2 CM) FREESTANDING GAS RANGES
INSTRUCCIONES DE INSTALACIÓN
ESTUFA AUTÓNOMA A GAS DE 30" (76,2 CM)
W10153329B
Table of Contents/Índice
RANGE SAFETY
.........................................................................................
2
INSTALLATION REQUIREMENTS
...........................................................
3
Tools and Parts
.......................................................................................
3
Location Requirements
...........................................................................
3
Electrical Requirements
..........................................................................
5
Gas Supply Requirements
......................................................................
5
INSTALLATION INSTRUCTIONS
.............................................................
6
Unpack Range
........................................................................................
6
Install Anti-Tip Bracket
............................................................................
7
Verify Anti-Tip Bracket Location
.............................................................
8
Level Range
............................................................................................
8
Make Gas Connection
............................................................................
8
Check Operation
.....................................................................................
9
Complete Installation
............................................................................
10
GAS CONVERSIONS
...............................................................................
11
LP Gas Conversion
...............................................................................
11
Complete Conversion
...........................................................................
12
Natural Gas Conversion
........................................................................
13
Complete Conversion
...........................................................................
14
SEGURIDAD DE LA ESTUFA
.................................................................
15
REQUISITOS DE INSTALACIÓN
............................................................
16
Piezas y herramientas
...........................................................................
16
Requisitos de ubicación
.......................................................................
16
Requisitos eléctricos
............................................................................
18
Requisitos del suministro de gas
.........................................................
18
INSTRUCCIONES DE INSTALACIÓN
....................................................
20
Desempaque la estufa
..........................................................................
20
Instalación del soporte anti-vuelco
......................................................
20
Verificación de la ubicación del soporte anti-vuelco
...........................
21
Nivelación de la estufa
..........................................................................
21
Conexión del suministro de gas
...........................................................
22
Verifique el funcionamiento
..................................................................
23
Complete la instalación
........................................................................
24
CONVERSIONES DE GAS
......................................................................
25
Conversión de gas L.P
. ........................................................................
25
Complete la conversión
........................................................................
27
Conversión de gas natural
....................................................................
27
Complete la conversión
........................................................................
28
IMPORTANT:
Installer:
Leave installation instructions with the homeowner.
Homeowner:
Keep installation instructions for future reference.
IMPORTANTE:
Instalador:
Deje las instrucciones de instalación con el propietario.
Propietario:
Conserve las instrucciones de instalación para referencia futura.