Maytag MGR6875ADS Use and Care Guide
Maytag MGR6875ADS - 30 Inch Gas Range Manual
 |
UPC - 719881143743
View all Maytag MGR6875ADS manuals
Add to My Manuals
Save this manual to your list of manuals |
Maytag MGR6875ADS manual content summary:
- Maytag MGR6875ADS | Use and Care Guide - Page 1
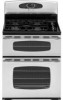
Gas Double Oven Range ® Precision Touch 850 Series Use & Care Guide Table of Contents Important Safety Instructions 1-5 Surface Cooking 6-7 Controls Sealed Gas Burners Oven Cooking 8-17 Control Panel Baking Cook & Hold Delay Broiling Keep Warm Favorite Oven Racks Form No. A/01/08 Part - Maytag MGR6875ADS | Use and Care Guide - Page 2
in this guide. General Instructions To ensure proper and safe operation: Appliance must be properly installed and grounded by a qualified technician. Do not attempt to adjust, repair, service, or replace any part of your appliance unless it is specifically recommended in this guide. All other - Maytag MGR6875ADS | Use and Care Guide - Page 3
INSTALL ANTI-TIP DEVICE PACKED WITH RANGE • FOLLOW ALL INSTALLATION INSTRUCTIONS WARNING: To reduce risk of tipping of the appliance from abnormal usage or by excessive loading of the oven doors, the appliance must be secured by a properly installed ignite heat. Keep plastics away from parts - Maytag MGR6875ADS | Use and Care Guide - Page 4
bulb to avoid electrical shock. Do not use the cooktop or oven as a parts of the unit. Cooking Safety Always place a pan on a surface burner before turning it on. Be sure you know which knob controls which surface burner. Make sure the correct burner is turned on and that the burner has ignited - Maytag MGR6875ADS | Use and Care Guide - Page 5
oven convection systems. The use of devices or accessories that are not expressly recommended in this manual can create serious safety hazards, result in performance problems, and reduce the life of the components of the appliance. Cleaning Safety Turn off all controls and wait for appliance parts - Maytag MGR6875ADS | Use and Care Guide - Page 6
Important Safety Instructions these substances can be minimized by properly venting the oven to the outdoors by opening kitchen could reach. Birds have a very sensitive respiratory system. Fumes released during an oven self-cleaning cycle may be harmful or fatal to birds. Fumes released due to - Maytag MGR6875ADS | Use and Care Guide - Page 7
window and wait five minutes before relighting the burner. • Be sure all surface controls are set in the OFF position prior to supplying gas to the range. • NEVER touch cooktop until it has cooled. Expect some parts of the cooktop, especially around the burners, to become warm or hot during cooking - Maytag MGR6875ADS | Use and Care Guide - Page 8
* flame for delicate sauces or melting chocolate. * BTU ratings will vary when using LP gas. Do not operate the burners without a pan on the grate. The grate's porcelain finish may chip without a pan to absorb the heat from the burner flame. Use care when stirring food in a pot/pan sitting on the - Maytag MGR6875ADS | Use and Care Guide - Page 9
time of day, timer and oven functions. Control panel shown includes Convect and other model specific features. (Styling may vary depending on model.) A Bake B Broil C Clean D Keep Warm E Oven Light F Number Pads G CANCEL H Convect Roast I Convect Bake J Timer 1 or 2 K Clock L Cook & Hold M Delay - Maytag MGR6875ADS | Use and Care Guide - Page 10
when locked. 4. If the Autoset pad is not pressed within 30 seconds, the control will return to the existing setting. Changing Temp °F/°C The factory default setting for temperature is Fahrenheit. To change the setting: If the oven is currently in use, the touchpads and door cannot be locked - Maytag MGR6875ADS | Use and Care Guide - Page 11
To Factory Default Settings The control can be reset to the factory default settings. To return to the default settings: 1. Press and hold upper oven Keep Warm and CANCEL pads for 3 seconds. A single beep will sound and 12:00 will appear in the display. 2. Reset the clock to the current time of - Maytag MGR6875ADS | Use and Care Guide - Page 12
pad is pressed. • Press any pad to recall the cook time remaining. 7. When cooking is finished, press CANCEL pad. 8. Remove food from the oven. (lower oven only) When convection roasting, enter your normal roasting time and temperature. The control will automatically prompt you to check the food - Maytag MGR6875ADS | Use and Care Guide - Page 13
Cooking Cook & Hold When using the Cook & Hold option, the oven begins to heat immediately after the control has been set. Then, the oven cooks for a specified length of time. When that time has elapsed, the oven will keep the food warm for up to one hour then automatically turn off. To set Cook - Maytag MGR6875ADS | Use and Care Guide - Page 14
broiler pan on the oven bottom. • If more than 30 seconds elapse between pressing the Broil pad and the Autoset pad, the oven will not be set and the display will return to the previous display. • Most foods should be turned halfway through broiling time. • For a browned/seared exterior and rare - Maytag MGR6875ADS | Use and Care Guide - Page 15
& Hold Bake, Cook & Hold Convect Bake or Cook & Hold Convect Roast (lower oven only) cycle. To set a Favorite cycle, a Cook & Hold function must be & Hold setting will be saved. • A double then a single beep will sound to indicate that the control has accepted the Favorite setting. To start a - Maytag MGR6875ADS | Use and Care Guide - Page 16
To cancel the 12-hour shut-off and run the oven continuously for 72 hours: 1. Press and hold the Clock pad for three seconds • "SAb" will be pad will cancel a Bake cycle, however the control will stay in the Sabbath Mode. • If power fails, the ovens will power up in Sabbath Mode with 72 hours - Maytag MGR6875ADS | Use and Care Guide - Page 17
Ignition Your range is equipped with pilotless ignition. With this type of ignition system, the gas automatically shuts off and the oven will not operate during a power failure. A lighted match will not light the oven burner. No attempt should be made to operate the oven during a power failure. Oven - Maytag MGR6875ADS | Use and Care Guide - Page 18
Half Rack Accessory (Lower oven only) A half rack, to increase oven capacity, is available as an accessory. It fits in the left, upper portion of the oven and provides space for a vegetable dish when a large roaster is on the lower rack. Contact your Maytag dealer for the "HALFRACK" Accessory Kit or - Maytag MGR6875ADS | Use and Care Guide - Page 19
is displayed. • Avoid touching doors, windows or oven vent area during a clean cycle. • Do not use commercial oven cleaners on the oven finish or around any part of the ovens. They will damage the finish or parts. • Do not leave baking/pizza stone in the oven during self-clean. The self-clean cycle - Maytag MGR6875ADS | Use and Care Guide - Page 20
cycle. If oven racks were left in the oven and do not slide smoothly after a clean cycle, wipe racks and rack supports with a oven. Sounds As the oven heats, you may hear sounds of metal parts expanding and contracting. This is normal and will not damage the oven. Self-Clean Notes: • If the oven - Maytag MGR6875ADS | Use and Care Guide - Page 21
Cleaning Creme* (Part #20000001)** and a sponge. If soil remains, reapply Cooktop Cleaning Creme, cover with a damp paper towel and soak for 30 minutes. Scrub again, rinse and dry. • Do not clean in the dishwasher or self-cleaning oven. Clock and Control Pad Area • To activate "Control Lock" for - Maytag MGR6875ADS | Use and Care Guide - Page 22
Follow instructions on page 18-19 to set a self-clean cycle. Oven Racks supports with a small amount of vegetable oil to restore ease of movement, then wipe off excess oil. Stainless Steel (select models , follow with Stainless Steel Magic Spray* (Part No. 20000008)**. • Moderate/Heavy Soil -- - Maytag MGR6875ADS | Use and Care Guide - Page 23
door handle to lift door. 3. Lift up evenly until door clears hinge arms. Oven Windows To protect the oven door windows: Maytag. Call 1-877-232-6771 USA and 1-800-688-8408 Canada, ask for part number 74009925 - halogen bulb. To replace oven light bulbs: 1. Disconnect power to the range. 2. When oven - Maytag MGR6875ADS | Use and Care Guide - Page 24
this gas appliance for cleaning or to relocate. If this appliance has to be moved and/or removed for servicing, follow the procedure described in the installation instructions. For information, contact Maytag Customer Assistance at 1-800-688-9900 USA or 1800-688-2002 Canada. To prevent range from - Maytag MGR6875ADS | Use and Care Guide - Page 25
ignitor doesn't click, turn control knob OFF. • Burner ports may be clogged. The flame is uneven. • Burner ports may be clogged. Surface burner flame lifts off ports. • Check to be sure a pan is sitting on the grate above. Clock, icons and/or lights operate but oven does not heat. • Oven may - Maytag MGR6875ADS | Use and Care Guide - Page 26
cycle. If the fault code reappears, contact an authorized servicer. Noises may be heard. • The oven makes several low level noises. You may hear the oven relays as they go on and off. This is normal. • As the oven heats and cools, you may hear sounds of metal parts expanding and contracting. This - Maytag MGR6875ADS | Use and Care Guide - Page 27
Notes 26 - Maytag MGR6875ADS | Use and Care Guide - Page 28
and maintained according to instructions attached to or furnished with the product, Maytag brand of Whirlpool Corporation or Whirlpool Canada LP (hereafter "Maytag") will pay for factory specified parts and repair labor to correct defects in materials or workmanship. Service must be provided by - Maytag MGR6875ADS | Use and Care Guide - Page 29
Cuisinière à gaz à deux fours Precision Touch ® Maytag Série 850 Guide d'Utilisation et d'Entretien Table des matières Instructions de sécurité importantes 29-32 Cuisson sur la surface ........ appareil à gaz Recherche des pannes ....... 52-53 Garantie et service 55 Guía de Uso y Cuidado 56 - Maytag MGR6875ADS | Use and Care Guide - Page 30
: Service à la clientèle 1-800-688-9900 aux É-U 1-800-688-2002 au Canada (lundi au vendredi, 8 h à 20 h, heure de l'Est) Internet : http://www.maytag.com ce guide. • INSTALLEZ LA BRIDE ANTIBASCULEMENT FOURNIE AVEC CETTE CUISINIÈRE. • RESPECTEZ TOUTES LES INSTRUCTIONS D'INSTALLATION. AVERTISSEMENT - Maytag MGR6875ADS | Use and Care Guide - Page 31
Instructions de sécurité importantes Utilisez une lampe torche pour déterminer si la bride antibasculement est convenablement installée sous la laissez JAMAIS des enfants seuls ou sans supervision lorsque l'appareil est en service ou encore chaud. NE laissez JAMAIS un enfant s'asseoir ou se . 30 - Maytag MGR6875ADS | Use and Care Guide - Page 32
risque de choc électrique ou d'incendie, ou une autre détérioration de l'appareil. Utilisez de la feuille d'aluminium uniquement selon les instructions de ce guide. NE laissez JAMAIS un brûleur de surface allumé sans surveillance, particulièrement avec une puissance de chauffage élevée Ustensiles - Maytag MGR6875ADS | Use and Care Guide - Page 33
sous l'effet du choc thermique. Observez les instructions du fabricant lors de l'utilisation d'un Nettoyez uniquement les pièces mentionnées dans ce guide. Ne nettoyez pas le joint de porte. Le faible concentration de certaines substances figurant dans la liste mentionnée ci-dessus, dont benzène, - Maytag MGR6875ADS | Use and Care Guide - Page 34
Cuisson sur la surface Réglages suggérés de la puissance de chauffage Low (Basse) : S'utilise pour le mijotage ou le maintien de la température d'un mets, ou pour la fusion de chocolat ou beurre. Lorsque le plat ou l'ustensile est couvert, un début de cuisson peut se produire avec la puissance de - Maytag MGR6875ADS | Use and Care Guide - Page 35
enlève facilement pour être nettoyé. (Voyez les instructions de nettoyage à la page 48.) Ne faites pas ou la fusion du chocolat. * La puissance thermique (BTU) des brûleurs est différente lors de l' la périphérie de l'ustensile. Une mauvaise installation ou dépose des grilles peut égratigner ou é - Maytag MGR6875ADS | Use and Care Guide - Page 36
appuie sur une touche. • Le four produit un bip double en cas d'erreur de programmation. REMARQUE : Quatre secondes seront automatiquement entrées. Si plus de 30 secondes s'écoulent entre la pression sur une 3. Programmez l'heure en suivant les instructions données dans la section « Réglage de - Maytag MGR6875ADS | Use and Care Guide - Page 37
heure avant l'interruption de courant va clignoter. Pour rappeler l'heure du jour lorsqu'une autre fonction de durée s'affiche, appuyez sur la touche Clock. Annulation de l'affichage de l'heure : Si l'on ne désire pas l'affichage de l'heure du jour : Appuyez et maintenez les touches CANCEL supérieur - Maytag MGR6875ADS | Use and Care Guide - Page 38
ou baisser le niveau de bruit. 3. Attendez quatre secondes pour l'acceptation du nouveau réglage. 4. Si la touche Autoset n'est pas appuyée dans les 30 secondes, la commande reviendra au réglage existant. Changement de la température °F/°C Le réglage par défaut de l'usine pour la température est en - Maytag MGR6875ADS | Use and Care Guide - Page 39
Cuisson au four 7. Lorsque la cuisson est terminée, appuyez sur la touche CANCEL (ANNULER). 8. Retirez la nourriture du four. Différences de cuisson entre l'ancien four et le nouveau Il est normal de remarquer quelques différences dans la durée de cuisson entre un four neuf et un four ancien. Voyez - Maytag MGR6875ADS | Use and Care Guide - Page 40
vérifier l'état de la cuisson. Cuisez plus longtemps au besoin. • La lampe du four reste allumée jusqu'à ce que l'on appuie sur la touche Oven Light (Lampe du four). • Appuyez sur n'importe quelle touche pour rappeler la durée de cuisson restante. 7. Lorsque la cuisson est terminée, appuyez sur la - Maytag MGR6875ADS | Use and Care Guide - Page 41
Cuisson au four 4. Appuyez à nouveau sur la touche de fonction désirée OU attendez quatre secondes. • Le mot correspondant à la fonction désirée reste allumé. • La durée de cuisson paraît à l'afficheur. • L'icône PREHEAT (PRÉCHAUFFAGE) paraît à l'afficheur. • La température réelle du four sera - Maytag MGR6875ADS | Use and Care Guide - Page 42
être faite sur la grille du four ou enlevez la grille du four et placez la lèchefrite sur la sole du four. • Si plus de 30 secondes s'écoulent entre la pression sur la touche Broil et la touche Autoset, le four ne sera pas programmé et l'afficheur reviendra à l'information précédente - Maytag MGR6875ADS | Use and Care Guide - Page 43
et maintenez-la ainsi pendant trois secondes. • Le cycle cuisson et maintien nouvellement programmé ou en cours de fonctionnement sera sauvegardé. • Un bip double et un bip simple se feront entendre pour indiquer que le régulateur a accepté le réglage Favorite. Démarrage d'un cycle programmé dans - Maytag MGR6875ADS | Use and Care Guide - Page 44
é si un cycle de cuisson est utilisé alors que le four est en mode Sabbat. • Toutes les touches sont inactives sauf CANCEL (ANNULER) et Clock. Toutes les autres fonctions SAUF BAKE (Minuterie, Maintien au chaud, Nettoyage, etc.) sont verrouillées pendant le mode Sabbat. Annulation du mode Sabbat - Maytag MGR6875ADS | Use and Care Guide - Page 45
porte est ouverte. Lorsque la porte est fermée, appuyez sur Oven Light (Lampe du four) pour allumer ou éteindre la lampe. Le four grille. Pour remettre les grilles en place : • Mettez la grille sur le support de grille du four; relevez légèrement le rebord avant; poussez la grille jusqu'à ce - Maytag MGR6875ADS | Use and Care Guide - Page 46
mettre un plat de légumes à cuire lorsqu'une pièce plus importante est en train de rôtir sur le niveau inférieur. Contactez le revendeur Maytag pour se procurer la demi-grille (« HALFRACK ») ou appelez 1-877-232-6771 aux É.-U. ou 1-800-688-8408 au Canada pour passer commande. 45 - Maytag MGR6875ADS | Use and Care Guide - Page 47
commence. • Si la porte n'est pas fermée, des bips retentiront et «door» sera affiché. Si la porte n'est pas refermée dans les 30 secondes, l'autonettoyage sera annulé et l'heure sera de nouveau affichée. • CLEAN paraîtra à l'afficheur. • LOCK clignote à l'afficheur. Une fois que la porte - Maytag MGR6875ADS | Use and Care Guide - Page 48
le cycle d'autonettoyage et qu'elles glissent mal sur leurs supports, enduisez-les, ainsi que les supports, d'une fine couche d'huile végétale. De fines lignes n'appuyez pas de nouveau sur la touche Clean. • Si plus de 30 secondes s'écoulent entre le moment où vous appuyez sur la touche Clean et - Maytag MGR6875ADS | Use and Care Guide - Page 49
essuie-tout humide, et laissez tremper pendant 30 minutes. Frottez de nouveau, rincez et faites four autonettoyant. • Pour utiliser la fonction « Control Lock » (Verrouillage des commandes) pour le nettoyage vérifier que le bouton a été correctement réinstallé. L'émail vitrifié est du verre lié au - Maytag MGR6875ADS | Use and Care Guide - Page 50
nettoyants en poudre qui risqueraient de rayer le verre. • Exécutez les instructions présentées aux pages 46-47 pour l'autonettoyage du four. Grilles appliquez par essuyage un peu d'huile végétale sur la grille et ses supports en relief pour faciliter le mouvement, et enlevez l'excès d'huile. Acier - Maytag MGR6875ADS | Use and Care Guide - Page 51
vous que le cabochon et l'ampoule sont froids avant de les toucher. Réinstallation : 1. Saisissez la porte de chaque côté. 2. Alignez les fentes de de l'ampoule par une ampoule appropriée, commandez-la auprès du service-clients de Maytag. Appelez le 1-877-232-6771 aux É.-U. et le 1-800- - Maytag MGR6875ADS | Use and Care Guide - Page 52
Si cet appareil doit être déménagé et/ou enlevé pour être réparé, suivez la méthode décrite dans les instructions d'installation. Pour toute information, prenez contact avec le service à la clientèle de Maytag au 1-800-688-9900 aux É.-U. ou au 1-800-688-2002 au Canada. Il faut que le pied arrière de - Maytag MGR6875ADS | Use and Care Guide - Page 53
qu'il remplace. Avec l'âge des fours, la température est souvent décalée dans un sens ou dans l'autre. Voyez page 43 pour obtenir les instructions sur le réglage de la température des fours. Remarque : Il n'est pas recommandé de régler la température si cela concerne une ou deux - Maytag MGR6875ADS | Use and Care Guide - Page 54
enlever fumée et odeur. • Saleté importante sur la sole. Exécutez une opération d'autonettoyage. Codes d'anomalie • « BAKE » ou « LOCK » peut clignoter rapidement pour vous avertir d'une erreur ou d'un problème. or a problem. Si tel est le cas, appuyez sur la touche CANCEL. Si les mots « BAKE » ou - Maytag MGR6875ADS | Use and Care Guide - Page 55
Remarques 54 - Maytag MGR6875ADS | Use and Care Guide - Page 56
et soient signalés à Maytag dans les 30 jours suivant la date d' service d'entretien Maytag autorisé n'est pas disponible. 10. La dépose et la réinstallation de votre gros appareil si celui-ci est installé dans un endroit inaccessible ou n'est pas installé conformément aux instructions d'installation - Maytag MGR6875ADS | Use and Care Guide - Page 57
de Materias Instrucciones Importantes sobre Seguridad 57-60 Cocción en la Cubierta ....... 61-62 Controles Quemadores Sellados a Gas Cocción en el Horno 63-73 Panel de Control Horneado 'Cook & Hold' (Cocinar y Mantener Caliente) 'Delay' (Diferir) 'Broiling' (Asado) 'Keep Warm' (Mantener Caliente - Maytag MGR6875ADS | Use and Care Guide - Page 58
00 a.m. - 8:00 p.m. Hora del Este) Internet: http://www.maytag.com En nuestro continuo afán de mejorar la calidad y rendimiento ubicación de la válvula de cierre del gas y cómo cerrarla en caso de emergencia. Y CAUSAR LESIONES PRECAUCIÓN PERSONALES • INSTALE EL DISPOSITIVO ATENCIÓN - Peligros o - Maytag MGR6875ADS | Use and Care Guide - Page 59
caliente. NUNCA permita que los niños se sienten o se paren en ninguna parte del electrodoméstico pues se pueden lesionar o quemar. Se le debe enseñar juguete. No se debe permitir que los niños jueguen con los controles u otras piezas de la cubierta. Información sobre su Electrodoméstico - Maytag MGR6875ADS | Use and Care Guide - Page 60
durante la cocción, elimine el alimento y el envase. El alimento puede estar contaminado. NUNCA use papel de aluminio para cubrir las parrillas o la parte inferior de los hornos. Esto puede crear riesgos de choque eléctrico, incendio o daños al electrodoméstico. Use el papel de aluminio solamente - Maytag MGR6875ADS | Use and Care Guide - Page 61
gire las manijas hacia un lado o hacia la parte trasera del electrodoméstico, y no hacia la Información de Seguridad sobre la Limpieza Apague todos los controles y espere hasta que las piezas del electrodoméstico se de los combustibles de gas natural o gas licuado (LP). Los quemadores ajustados - Maytag MGR6875ADS | Use and Care Guide - Page 62
a fuego lento, mantener alimentos calientes y para derretir chocolate o mantequilla. Parte de la cocción puede realizarse en el ajuste 'Low' (Bajo) si . • Asegúrese de que todos los controles superiores estén en la posición 'OFF' (Apagado) antes de suministrar gas a la estufa. 2. Oprima y gire la - Maytag MGR6875ADS | Use and Care Guide - Page 63
velocidad de 16.000 BTU* y se encuentra en la posición delantera izquierda de la cubierta. Hay un quemador de 12.000 BTU* ubicado en la posici delicadas o para derretir chocolate. * La potencia varía cuando se usa gas LP. Rejillas de los Quemadores Las rejillas deben estar en la posición correcta - Maytag MGR6875ADS | Use and Care Guide - Page 64
Panel de Control A BC D E F G H I J K L M N O El panel de control está diseñado para una programación sencilla. El indicador visual del panel de control muestra la hora del día, el temporizador y las funciones del horno. El panel de control . E 'Oven Light' (Luz 2) K 'Clock' (Reloj) Use - Maytag MGR6875ADS | Use and Care Guide - Page 65
: Oprima y mantenga oprimidas las teclas 'CANCEL' (Anular) del horno superior y 'Clock' (Reloj) durante tres segundos. La hora del día desaparecerá del indicador visual. y oprima el número '0' en el teclado numérico. Bloqueo del Control y de las Puertas de los Hornos El teclado y las puertas de - Maytag MGR6875ADS | Use and Care Guide - Page 66
de sonido. 3. Espere 4 segundos para guardar el nuevo ajuste. 4. Si no se oprime la tecla 'Autoset' (Autoajuste) dentro de los siguientes 30 segundos, el control regresará al ajuste existente. Cambio de la temperatura de °F/°C El ajuste de fábrica de la medida de temperatura es Fahrenheit. Para - Maytag MGR6875ADS | Use and Care Guide - Page 67
página 71. Horneado con Convección (horno inferior únicamente) Cuando use el horneado por convección, programe la temperatura normal de horneado. El control reducirá automáticamente la temperatura del horno en 25°F (14°C). (Sin embargo, se mostrará la temperatura normal de horneado en el indicador - Maytag MGR6875ADS | Use and Care Guide - Page 68
ase por convección, programe el tiempo y temperaturas normales de asado. El control le avisará cuando un 75% del tiempo de cocción haya pasado para • La luz del horno permanecerá encendida hasta que se oprima la tecla 'Oven Light' (Luz del Horno). • Oprima cualquier tecla para mostrar el tiempo - Maytag MGR6875ADS | Use and Care Guide - Page 69
Cocción en el Horno 2. Seleccione la cantidad de tiempo de cocción deseado usando las teclas numéricas. • 'HOLD' (Mantener Caliente) continuará destellando. • El tiempo se desplegará en el indicador visual. • Se puede programar el tiempo de cocción entre 00:10 y 11:59. 3. Oprima la tecla 'Bake' ( - Maytag MGR6875ADS | Use and Care Guide - Page 70
debajo. • El asado se puede realizar en la parrilla del horno o se puede retirar la parrilla y colocar la asadera en la parte inferior del horno. • Si pasan más de 30 segundos entre la activación de la tecla 'Broil' (Asar) y la activación de la tecla 'More+' (Más+) o 'Less-' (Menos-), el horno no - Maytag MGR6875ADS | Use and Care Guide - Page 71
. • El ciclo de Cocinar y Mantener Caliente recién programado o activo se guardará. • Escuchará sonora doble y luego una sencillal que indican que el control ha guardado el ajuste del favorito. Para iniciar un ciclo programado como favorito: 1. Oprima la tecla 'Favorite' (Favorito). • El tiempo y la - Maytag MGR6875ADS | Use and Care Guide - Page 72
manera continua durante 72 horas: 1. Oprima y mantenga oprimida la tecla 'Clock' (Reloj) durante tres segundos. • 'SAb' se desplegará en el oprime la tecla 'CANCEL' (Anular) se detendrá el ciclo de horneado, pero el control permanecerá en Modo Sabático. • Si ocurre una falla eléctrica, los hornos se - Maytag MGR6875ADS | Use and Care Guide - Page 73
de encendido sin piloto. Con este tipo de sistema de ignición, el gas se apaga automáticamente y el horno dejará de funcionar durante una falla que oprima la tecla 'Oven Light' (Luz del Horno) escuchará una señal sonora. Parte Inferior del Horno Proteja la parte inferior de los hornos contra - Maytag MGR6875ADS | Use and Care Guide - Page 74
del horno proporciona espacio adicional para un plato de verduras cuando hay un asado grande en la parrilla inferior. Póngase en contacto con su distribuidor Maytag para obtener el Kit del Accesorio "Media Parrilla" ('HALFRACK') o llame al 1-877232-6771 en EE.UU. y Canadá para hacer un pedido. 73 - Maytag MGR6875ADS | Use and Care Guide - Page 75
de autolimpieza. 5. Limpie el exceso de grasa o los derrames de la parte inferior del horno. Esto evita el humo excesivo, las llamas y las en el indicador visual. Si no se cierra la puerta dentro de los siguientes 30 segundos, la función de autolimpieza se anulará y el indicador visual mostrará - Maytag MGR6875ADS | Use and Care Guide - Page 76
visual y escuchará una señal sonora hasta que se cierre la puerta y se presione la tecla 'Clean' (Limpieza) nuevamente. • Si pasan más de 30 segundos entre la activación de la tecla 'Clean' (Limpieza) y la activación de la tecla 'Autoset' (Autoajuste), el programa regresará automáticamente al - Maytag MGR6875ADS | Use and Care Guide - Page 77
e Inserto Tapas de los Quemadores y Quemadores Sellados a Gas Rejillas de los Quemadores Porcelana sobre Hierro Fundido Reloj y Área de las de Control Perillas de Control Cubierta y Panel de Control Porcelana Esmaltada Paneles Laterales, y Puerta Manijas Esmalte Pintado PROCEDIMIENTO Nunca cubra - Maytag MGR6875ADS | Use and Care Guide - Page 78
Cuidado y Limpieza PIEZA PROCEDIMIENTO Ventanilla y Puerta del Horno - Vidrio • Evite usar cantidades excesivas de agua, ya que puede escurrirse debajo o detrás del vidrio y mancharlo. • Lave con agua y jabón. Enjuague con agua limpia y seque. Se pueden usar limpiadores de vidrio si se rocía en - Maytag MGR6875ADS | Use and Care Guide - Page 79
las puertas. • Nunca coloque los dedos entre la bisagra y la parte delantera del marco del horno. Los brazos de las bisagras están instalados antes de tocarlos. Para asegurarse de instalar el foco de repuesto correcto, pida un foco de Maytag. Llame al 1-877-232-6771 en EE.UU. y al 1-800-688-8408 en - Maytag MGR6875ADS | Use and Care Guide - Page 80
ón de un Electrodoméstico a Gas Los conectores que se usan para conectar los electrodomésticos a gas al suministro de gas no están diseñados para en las instrucciones de instalación. Para obtener información, póngase en contacto con Maytag Customer Assistance llamando al 1-800-688-9900 en EE.UU. o al - Maytag MGR6875ADS | Use and Care Guide - Page 81
o reemplace el fusible. • Verifique el suministro eléctrico o de gas. • Asegúrese de que el electrodoméstico esté debidamente conectado al una función de Cocinar y Mantener Caliente diferida. • El bloqueo de los controles puede estar activado. Vea la página 64. • Verifique la temperatura programada - Maytag MGR6875ADS | Use and Care Guide - Page 82
'Lock' (Bloqueado) no se muestre en el indicador visual. • El control y las puertas pueden estar bloqueados. Vea la página 64. La humedad se a eliminar el humo y/u olor. • Hay suciedad de alimentos excesiva en la parte inferior del horno. Use un ciclo de autolimpieza. Códigos de fallas • 'BAKE - Maytag MGR6875ADS | Use and Care Guide - Page 83
Notas 82 - Maytag MGR6875ADS | Use and Care Guide - Page 84
Maytag de Whirlpool Corporation o Whirlpool Canada LP (en lo sucesivo denominado "Maytag obra y se le informe a Maytag en un lapso de 30 días a partir de la fecha Maytag para determinar si corresponde otra garantía. Si necesita servicio, consulte primero la sección "Solución de problemas" del Manual
-
 1
1 -
 2
2 -
 3
3 -
 4
4 -
 5
5 -
 6
6 -
 7
7 -
8
-
9
-
10
-
11
-
12
-
13
-
14
-
15
-
16
-
17
-
18
-
19
-
20
-
21
-
22
-
23
-
24
-
25
-
26
-
27
-
28
-
29
-
30
-
31
-
32
-
33
-
34
-
35
-
36
-
37
-
38
-
39
-
40
-
41
-
42
-
43
-
44
-
45
-
46
-
47
-
48
-
49
-
50
-
51
-
52
-
53
-
54
-
55
-
56
-
57
-
58
-
59
-
60
-
61
-
62
-
63
-
64
-
65
-
66
-
67
-
68
-
69
-
70
-
71
-
72
-
73
-
74
-
75
-
76
-
77
-
78
-
79
-
80
-
81
-
82
-
83
-
84
 |
 |
Important Safety
Instructions
...............................
1-5
Surface Cooking
......................
6-7
Controls
Sealed Gas Burners
Oven Cooking
.........................
8-17
Control Panel
Baking
Cook & Hold
Delay
Broiling
Keep Warm
Favorite
Oven Racks
Table of Contents
®
Care & Cleaning
...................
18-21
Self-Clean Oven
Cleaning Procedures
Maintenance
.........................
22-23
Oven Doors, Windows & Lights
Removal of Gas Appliance
Troubleshooting
...................
24-25
Warranty & Service
....................
27
Guide d’utilisation
et d’entretien
...............................
28
Guía de Uso y Cuidado
.............
56
©2006 Maytag Appliances Sales Co.
Litho U.S.A .
Maytag Gas
Precision Touch 850 Series
Use & Care Guide
Form No. A/01/08
Part No. 8113P740-60
Double Oven Range