Memorex Mi3005BLK Manual
Memorex Mi3005BLK - iMove Boombox Manual
 |
UPC - 749720007905
View all Memorex Mi3005BLK manuals
Add to My Manuals
Save this manual to your list of manuals |
Memorex Mi3005BLK manual content summary:
- Memorex Mi3005BLK | Manual - Page 1
Mi3005 Suffix A User's Guide iMove with AM/FM Radio Before operating this product, please read these instructions completely. - Memorex Mi3005BLK | Manual - Page 2
REMOVE COVER (OR BACK). NO USERSERVICEABLE PARTS INSIDE. REFER SERVICING TO QUALIFIED SERVICE PERSONNEL. DANGEROUS VOLTAGE: The lightning flash with arrowhead interference unless the modifications are expressly approved in the instruction manual. The user could lose the authority to operate this - Memorex Mi3005BLK | Manual - Page 3
and, if not installed and used in accordance with the instructions, may cause harmful interference to radio communications. However, SURGE PROTECTORS: It is recommended to use a surge protector for AC connection. Lightning and power surges ARE NOT covered under warranty for this product. This Class - Memorex Mi3005BLK | Manual - Page 4
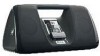
CONTROLS 1. FM Antenna 2. Left Speaker 3. iPod® Dock with Connector & Interchangeable Holders 4. VOLUME Up/Down Buttons 5. Power Button 6. Display 7. MODE Button 8. Battery Compartment (Rear of Unit) 9. Carrying Handle 10.Right Speaker 11. TUNE Up/Down/Skip n / o Buttons 12.PRESET Button 13.Remote - Memorex Mi3005BLK | Manual - Page 5
OF CONTROLS (CONTINUED) REMOTE 1. Battery Compartment (Side of Unit) 2. TUNE Down/Skip o Button 3. VOLUME Down Button 4. MODE Button 5. VOLUME Up Button 6. PRESET Button 7. Power/PLAY/PAUSE (®p) Button 8. TUNE Up/Skip n Button 9. Belt Clip NOTES: • To turn on the unit, press the Power/PLAY - Memorex Mi3005BLK | Manual - Page 6
REMOTE CONTROL REMOTE BATTERY INSTALLATION 1. Remove the Battery Compartment by pressing in on the tab and then sliding the compartment out. 2. Install a CR2025 battery, paying attention to the polarity diagram in the Battery Compartment (positive side up). 3. Replace the Battery Compartment. - Memorex Mi3005BLK | Manual - Page 7
AC adapter into the POWER IN jack (located on the rear of the unit). Connect the AC cord to the adapter and connect the other end to a wall outlet having 120V AC, 60 Hz. AC Outlet AC Plug NOTES: • Only use the supplied AC adapter which has the following specs: DC 12V Z • The AC adapter supplied - Memorex Mi3005BLK | Manual - Page 8
the Mi3005's speakers. NOTES: • If the unit is already turned ON and in AM/FM mode, if you insert the iPod® iPod/LINE IN mode, if there is no device or iPod® connected to the LINE IN jack or the iPod® dock.) To turn off the unit, press the Power button. • BACKLIGHT: When using an AC adapter - Memorex Mi3005BLK | Manual - Page 9
WITH THIS UNIT 1 2 With an iPod® connected (see previous page), turn the Mi3005 on by pressing the Power button (if it is not on already). 3 Operate the iPod® as per its owner's manual and the sound will be heard through the Mi3005's speak1ers. Adjust the volume as desired by pressing the Volume - Memorex Mi3005BLK | Manual - Page 10
Mi3005 on by pressing the Press the MODE button to select Power button; the display will light. the desired band (AM or FM). 3 1 4 1 Repeatedly press the TUNE Up/Down/Skip n / o buttons to manually jack on the rear of the Mi3005. The speakers will be disconnected when headphones are plugged - Memorex Mi3005BLK | Manual - Page 11
a band. Press the PRESET button repeatedly to retrieve the desired Preset (P1-P5). NOTE: • The preset memories will be erased if the unit is without power (no batteries/AC adapter isn't connected) for a long period of time. 10 - Memorex Mi3005BLK | Manual - Page 12
shown on the next page) to match with your iPod®. Insert the corresponding holder and your iPod® into the unit as described on page 7. iPod® Type Memory Holder No. Fourth Generation iPod® 10 to 15GB No. 3 30GB No. 4 iPod® Photo 30GB No. 5 40 to 60GB No. 6 iPod® mini 4 to 6GB No. 7 11 - Memorex Mi3005BLK | Manual - Page 13
® nano Memory Holder No. 2 to 4GB No. 8 Fifth Generation iPod® (w/Video) 30GB 60GB No. 9 No. 10 NOTE: • The 8 holders provided with this unit are for use with this unit only; they are not Universal Docks. - Memorex Mi3005BLK | Manual - Page 14
TROUBLESHOOTING GUIDE If you experience a problem with this unit, check the chart below before calling for service. SYMPTOM CAUSE SOLUTION No sound. Volume is Increase volume. set to minimum. AM or FM, no sound. Power is not on. Press the Power button, then the MODE button to select AM/ - Memorex Mi3005BLK | Manual - Page 15
for longer life DC IN 12V Adapter (Center Positive) Speaker 2 x 4 ohms Output Power 2 x 10W RADIO SECTION: SERVICE AT (954) 660-7100. PLEASE KEEP ALL PACKAGING MATERIAL FOR AT LEAST 90 DAYS IN CASE YOU NEED TO RETURN THIS PRODUCT TO YOUR PLACE OF PURCHASE OR MEMOREX. FOR PARTS AND ACCESSORIES - Memorex Mi3005BLK | Manual - Page 16
Memcorp, Inc. Weston, FL Printed in Hong Kong Visit our website at www.memorexelectronics.com - Memorex Mi3005BLK | Manual - Page 17
Mi3005 Suffix/Sujijo A User's Guide Guía del Usario iMove with AM/FM Radio iMove con Radio AM/FM Before operating this product, please read these instructions completely. Antes de operar este producto, sírvase leer este instructivo en su totalidad. - Memorex Mi3005BLK | Manual - Page 18
radial. Cualquier cambio o modificación al equipo, puede causar interferencia nociva, a menos que estas modificaciones esten expresamente indicadas en el manual de instrucciones. El usuario puede perder el derecho de operar este equipo si efectuara un cambio o modificación no autorizadas. ATTENTION - Memorex Mi3005BLK | Manual - Page 19
digital de Clase B cumple con la norma ICES-003 de Canadá. Cet appareil numérique de la classe B est conforme à la norme NMB-003 du Canada. 2 - Memorex Mi3005BLK | Manual - Page 20
UBICACIÓN DE LOS CONTROLES 1. Antena FM 2. Bocina izquierda 3. Puerto para iPod® con conector y portadores intercambiables 4. Botones de aumentar/ disminuir volumen 5. Botón de encendido 6. Display 7. Botón de Modo 8. Compartimiento de pilas (atrás en la unidad) 9. Asa 10. - Memorex Mi3005BLK | Manual - Page 21
UBICACIÓN DE LOS CONTROLES (CONTINÚA) CONTROL REMOTO 1. Compartimiento de pilas (lado de unidad) 2. Botón Sintonizar Abajo/Brincar o 3. Botón de Disminuir volumen 4. Botón de Modo 5. Botón de Aumentar volumen 6. Botón PRESET [predefinir] 7. - Memorex Mi3005BLK | Manual - Page 22
hechas para este fín, ya que pueden recalentarse y explotar. (Siga las instrucciones del fabricante de las baterías). DISTANCIA EFICAZ DEL TRANSMISOR DEL CONTROL REMOTO 30 30 NOTAS: • Cuando haya un obstáculo entre la unidad y el transmisor, es posible que el transmisor no funcione. • Cuando - Memorex Mi3005BLK | Manual - Page 23
atrás en la unidad). Conecte el cable de corriente alterna a un adaptador y conecte el otro extremo a un contacto de pared de 120V AC, 60 Hz. CoAnCtaOcuttoletde corriente alterna EAnCchPulufge de corriente alterna NOTAS: • Use únicamente el adaptador de corriente alterna incluido, que tenga las - Memorex Mi3005BLK | Manual - Page 24
el portador hacia abajo como se muestra. 4 Si utiliza el puerto: Con el iPod® y Mi3005 desactivados, inserte el iPod® en el portador. Empújelo suavemente para que el conector en el iPod® se deslice sobre el conector en el Mi3005. Presione el botón de encendido (como se muestra en el Paso 1 en la - Memorex Mi3005BLK | Manual - Page 25
OPERACIÓN USAR UN IPOD® CON ESTA UNIDAD 1 2 Con el iPod® conectado (ver página previa), encienda la unidad Mi3005 presionando el botón de encendido (si no lo ha hecho). 3 Opere el iPod® como indica el manual del propietario y escuchará el sonido a través de las bocinas del Mi13005. Ajuste el - Memorex Mi3005BLK | Manual - Page 26
los botones de Aumentar/Disminuir Volumen. Para escuchar en privado, conecte los audífonos al en1chufe de los audífonos en la parte posterior del Mi3005. Las bocinas se desconectan al conectar los audífonos. Consejos para una mejor recepción AM: La antena AM de barra de ferrita se ubica dentro - Memorex Mi3005BLK | Manual - Page 27
OPERACIÓN (CONTINÚA) CONFIGURAR PREDEFINIDOS DE LA RADIO (5 POR BANDA) 1 2 1 2 Siga los pasos 1 a 3 en la página anterior para sintonizar una estación. Presione el botón SET [configurar]; "P1" pa1rpadeará (si nunca ha configurado un predefinido). Presione los botones Sintonizar Arriba/ Abajo/ - Memorex Mi3005BLK | Manual - Page 28
gina) que corresponde con su iPod®. Inserte el portador correspondiente así como su iPod® en la unidad como se describe en la página 7. iPod® Tipo Memoria N° portador Fourth Generation iPod® 10 a 15GB No. 3 30GB No. 4 iPod® Photo 30GB No. 5 40 a 60GB No. 6 iPod® mini 4a 6GB No. 7 11 - Memorex Mi3005BLK | Manual - Page 29
Memoria N° portador 2a 4GB No. 8 Fifth Generation iPod® (c/Video) 30GB 60GB No. 9 No. 10 NOTA: • Los ocho portadores provistos con la unidad solamente funcionan con esta unidad; no son puertos universales. IMPORTANTE! El nú - Memorex Mi3005BLK | Manual - Page 30
á Gire la unidad hasta colocada correctamente. obtener la mejor recepción. Modo iPod®, sin Incorrectamente conectado. Revise la conexión. sonido. No en modo iPod®. Press the MODE button to select iPod® mode. Modo iPod®, no No está usando el Debe usar el adaptador. carga pila. adaptador - Memorex Mi3005BLK | Manual - Page 31
AL CLIENTE AL (954) 660-7100. CONSERVE LOS MATERIALES DE EMPAQUE AL MENOS DURANTE 90 DÍAS POR SI ACASO NECESITARA REGRESAR EL PRODUCTO A SU DISTRIBUIDOR O A MEMOREX. PARA OBTENER PARTES Y ACCESORIOS, COMUNÍQUESE CON FOX INTERNATIONAL AL 1-800-321-6993. 14 - Memorex Mi3005BLK | Manual - Page 32
Memcorp, Inc. Weston, FL Impreso en Hong Kong Visite nuestro sitio web en www.memorexelectronics.com
-
 1
1 -
 2
2 -
 3
3 -
 4
4 -
 5
5 -
 6
6 -
 7
7 -
8
-
9
-
10
-
11
-
12
-
13
-
14
-
15
-
16
-
17
-
18
-
19
-
20
-
21
-
22
-
23
-
24
-
25
-
26
-
27
-
28
-
29
-
30
-
31
-
32
 |
 |

User’s Guide
iMove with AM/FM Radio
Mi3005 Suffix A
Before operating this product,
please read these instructions completely.