NEC NP-VE281X Users Manual
NEC NP-VE281X Manual
 |
View all NEC NP-VE281X manuals
Add to My Manuals
Save this manual to your list of manuals |
NEC NP-VE281X manual content summary:
- NEC NP-VE281X | Users Manual - Page 1
Portable Projector VE280X/VE281X/VE282X/ VE280/VE281/VE282 User's Manual The VE280X, VE282X, VE280 and VE282 are not distributed in North America. Model No.: NP-VE280X, NP-VE281X, NP-VE282X NP-VE280, NP-VE281, NP-VE282 - NEC NP-VE281X | Users Manual - Page 2
.1/07/12 • DLP is a trademark of this user's manual may not be reprinted in part or whole without permission. (2) The contents of this user's manual are user's manual; however, should you notice any questionable points, errors or omissions, please contact us. (4) Notwithstanding article (3), NEC - NEC NP-VE281X | Users Manual - Page 3
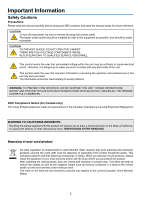
Cautions Precautions Please read this manual carefully before using your NEC projector and keep the manual handy for future reference. CAUTION ARE HIGH-VOLTAGE COMPONENTS INSIDE. REFER SERVICING TO QUALIFIED SERVICE PERSONNEL. This symbol warns the user that uninsulated voltage within the unit may - NEC NP-VE281X | Users Manual - Page 4
NEC Display Solutions of America, Inc. in this manual. Failure to comply with this government regulation could void your right to operate this equipment. This equipment has been tested and found to comply with the limits for a Class B digital ceiling must be strong enough to support the projector - NEC NP-VE281X | Users Manual - Page 5
projector should not exceed 5 degrees, nor should the projector be installed in any way other than the desktop and ceiling mount, otherwise lamp wet hands. • Turn off the projector, unplug the power cord and have the projector serviced by a qualified service personnel under the following conditions: - NEC NP-VE281X | Users Manual - Page 6
does not operate normally when you follow the instructions described in this user's manual. - If the projector has been dropped or the cabinet has been damaged. - If the projector exhibits a distinct change in performance, indicating a need for service. • Disconnect the power cord and any other - NEC NP-VE281X | Users Manual - Page 7
lamp in this product contains mercury. Please dispose according to Local, State or Federal Laws. Health precautions to users viewing 3D images Before viewing, be sure to read health care precautions that may be found in the user's manual note that using this projector for the purpose of commercial - NEC NP-VE281X | Users Manual - Page 8
the Projector 2 Congratulations on Your Purchase of the Projector 2 Features you'll enjoy 2 About this user's manual 3 Part Names of the Projector 4 (VE281X/VE281/VE282X/VE282 only 15 Connecting the Supplied Power Cord 16 3. Projecting an Image (Basic Operation 17 Turning on the Projector 17 - NEC NP-VE281X | Users Manual - Page 9
31 Using the Computer Cable (VGA) to Operate the Projector (Virtual Remote Tool).......33 Viewing 3D Images...39 5. Using On-Screen Menu 43 Using the and the Lens 65 Replacing the Lamp...66 7. Appendix...67 Troubleshooting...67 Indicator Messages 67 Specifications...70 Cabinet Dimensions...72 Pin - NEC NP-VE281X | Users Manual - Page 10
. Projector Power cord (US: 7N080236) (Asia: 7N080022) (Brazil: 7N080520) Computer cable (VGA) (7N520073) Remote control (7N900924) Batteries (AAAx2) For North America only Limited warranty Quick Setup Guide (7N8N3101) Important Information (7N8N3091) NEC Projector CD-ROM User's manual - NEC NP-VE281X | Users Manual - Page 11
only) The HDMI input provides HDCP compatible digital signals. The HDMI input also supports audio signal. • DLP® projector with high resolution and high brightness High resolution display - up to UXGA compatible, XGA (VE280X/VE281X/VE282X)/ SVGA (VE280/VE281/VE282) native resolution. • AUTO POWER ON - NEC NP-VE281X | Users Manual - Page 12
. • 3D images supported The projector provides 3D images to a user wearing optional DLP® Link LCD shutter eyeglasses, NP02GL About this user's manual The fastest way to get started is to take your time and do everything right the first time. Take a few minutes now to review the user's manual. This - NEC NP-VE281X | Users Manual - Page 13
Part Names of the Projector Front/Top Zoom Lever (→ page 22) Focus Ring (→ page 22) Remote Built-in Security Slot ( )* Monaural Speaker (7W) Rear Foot (→ page 21) * This security slot supports the MicroSaver ® Security System. 4 Exhaust Vent Spacer (black rubber) To fine-adjust the height of the - NEC NP-VE281X | Users Manual - Page 14
Top Features 1. Introduction 56 1 23 4 1. POWER Button (ON / STAND BY) ( ) (→ page 17, 26) 2. POWER Indicator (→ page 16, 17, 26, 67) 3. STATUS Indicator (→ page 67) 4. LAMP Indicator (→ page 66, 67) 5. AUTO ADJ. Button (→ page 25) 6. SOURCE Button (→ page 19) 5 - NEC NP-VE281X | Users Manual - Page 15
6 2 (VE282X/VE282 only) (VE281X/VE281 only) 1. COMPUTER IN/ Component Input Connector (Mini D-Sub 15 Pin) (→ page 12, 13) 2. PC CONTROL Port (D-Sub 9 Pin) (→ page 75) Use this port to connect a PC or control system. This enables you to control the projector using serial communication protocol. If - NEC NP-VE281X | Users Manual - Page 16
10 12. NETWORK Button 9 15 (not available on this series of projectors) 11 14 17 13 13. USB DISPLAY Button 12 (not available on this series of projectors) 14. ID SET Button 16 (not available on this series of projectors.) 18 19 15. Numeric Keypad Button/CLEAR Button 20 (not available - NEC NP-VE281X | Users Manual - Page 17
signal operates by line-of-sight up to a distance of about 22 feet/7 m and within a 60-degree angle of the remote sensor on the projector cabinet. • The projector will not respond if there are objects between the remote control and the sensor, or if strong light falls on the sensor. Weak batteries - NEC NP-VE281X | Users Manual - Page 18
(1.3 m) from the wall or screen. The largest the image can be is 300" (7.6 m) when the projector is about 493 inches (12.5 m) from the wall or screen. Use the chart below as a rough guide. Screen Size (Unit: cm/inch) 609.6(W) x 457.2(H) / 240(W) x 180(H) 300" Screen Size (diagonal: inch) 487 - NEC NP-VE281X | Users Manual - Page 19
and Screen Size The following shows the proper relative positions of the projector and screen. Refer to the table to determine the position of between lens center and bottom of screen(top of screen for ceiling application) α = Throw angle NOTE: The values in the tables are design values and may vary. - NEC NP-VE281X | Users Manual - Page 20
WARNING * Installing your projector on the ceiling must be done by a qualified technician. Contact your NEC dealer for more information. * Do not attempt to install the projector yourself. • Only use your projector on a solid, level surface. If the projector falls to the ground, you can be injured - NEC NP-VE281X | Users Manual - Page 21
12 function keys gets the external display to come on or off. For example, NEC laptops use Fn + F3, while Dell laptops use Fn + F8 key combinations to toggle through external display selections. VE280X/VE280 AUDIO IN COMPUTER IN HDMI IN VE281X/VE281/VE282X/VE282 COMPUTER IN AUDIO IN Computer - NEC NP-VE281X | Users Manual - Page 22
Player with Component Output Use audio equipment for stereo sound. The projector's built-in speaker is monaural. AUDIO IN 2. Installation and Connections cable (not supplied) NOTE: Refer to your DVD player's owner's manual for more information about your DVD player's video output requirements. 13 - NEC NP-VE281X | Users Manual - Page 23
(not supplied) VCR Audio equipment Audio cable (not supplied) NOTE: Refer to your VCR owner's manual for more information about your equipment's video output requirements. NOTE: An image may not be displayed correctly when a Video source is played back in fast-forward or fast-rewind via a scan - NEC NP-VE281X | Users Manual - Page 24
Installation and Connections Connecting HDMI Input (VE281X/VE281/VE282X/VE282 only) You can connect the HDMI output of your DVD player, hard disk player, Blu-ray player, or notebook type PC to the HDMI IN connector of your projector. NOTE: The HDMI IN connector supports Plug & Play (DDC2B). HDMI IN - NEC NP-VE281X | Users Manual - Page 25
MODE]. To wall outlet Make sure that the prongs are fully inserted into both the power plug and the wall outlet. CAUTION: Parts of the projector may become temporarily heated if the projector is turned off with the POWER button or if the AC power supply is disconnected during normal - NEC NP-VE281X | Users Manual - Page 26
and the projector will become ready to use. NOTE: When the projector is turned on, it may take some time before the lamp light becomes bright is available, the NEC logo (default), blue, or black screen will be displayed. After a lapse of 45 seconds from when the projector displays a blue, black - NEC NP-VE281X | Users Manual - Page 27
immediately after turning it on and displaying an image. • Immediately after turning on the projector, screen flicker may occur. This is normal. Wait 3 to 5 minutes until the lamp lighting is stabilized. • If you turn on the projector immediately after the lamp is turned off or when the temperature - NEC NP-VE281X | Users Manual - Page 28
Automatically Press the SOURCE button once. The projector will search for the available input source and display it. The input source will change as follows: VE280X/VE280: COMPUTER → VIDEO → COMPUTER → ... VE281X/VE281/VE282X/VE282 VE281X/VE281/VE282X/VE282: COMPUTER → VIDEO → HDMI → COMPUTER - NEC NP-VE281X | Users Manual - Page 29
3. Projecting an Image (Basic Operation) Adjusting the Picture Size and Position Use the adjustable tilt foot, the zoom lever or the focus ring to adjust the picture size and position. In this chapter drawings and cables are omitted for clarity. Adjusting the throw angle (the height of an image) [ - NEC NP-VE281X | Users Manual - Page 30
-foot for purposes other than originally intended. Misuses such as using the tilt foot to carry or hang (from the wall or ceiling) the projector can cause damage to the projector. Adjusting the left and right tilt of an image [Rear foot] 1. Remove the spacer (black rubber) from the rear foot. Keep - NEC NP-VE281X | Users Manual - Page 31
3. Projecting an Image (Basic Operation) Zoom Use the ZOOM lever to adjust the image size on the screen. Zoom Lever Focus Use the FOCUS ring to obtain the best focus. Focus Ring 22 - NEC NP-VE281X | Users Manual - Page 32
3. Projecting an Image (Basic Operation) Correcting Keystone Distortion Correcting Keystone Distortion If the screen is tilted vertically, keystone distortion becomes large. Proceed with the following steps to correct keystone distortion NOTE: • The Keystone correction can cause an image to be - NEC NP-VE281X | Users Manual - Page 33
control 1. Press the KEYSTONE button. The Keystone bar will be displayed. 3. Projecting an Image (Basic Operation) 2. Use the or correction range will also be smaller when 3D mode is enabled. • The range of keystone correction is not the maximum tilt angle of projector. • The left and right ( - NEC NP-VE281X | Users Manual - Page 34
or may not be displayed correctly. • The Auto Adjust function will work for computer (RGB) signal only. • If the Auto Adjust operation cannot optimize the computer signal, try to adjust [HORIZONTAL], [VERTICAL], [CLOCK], and [PHASE] manually. (→ page 49, 50) Turning Up or Down Volume Sound level - NEC NP-VE281X | Users Manual - Page 35
on the projector cabinet, or the ENTER button or the POWER OFF button on the remote control. The lamp will turn off and the projector will go immediately after turning it on and displaying an image. • Do not disconnect the AC power supply to the projector within 10 seconds of making adjustment - NEC NP-VE281X | Users Manual - Page 36
3. Projecting an Image (Basic Operation) After Use Preparation: Make sure that the projector is turned off. 1. Disconnect any other cables. 2. Retract adjustable tilt foot if extended. 27 - NEC NP-VE281X | Users Manual - Page 37
. Each time the D-ZOOM (−) button is pressed, the image is reduced. NOTE: • The image will be enlarged or reduced at the center of the screen. • Displaying the menu will cancel the current magnification. 28 - NEC NP-VE281X | Users Manual - Page 38
the [ECO MODE] [ON] condition for 90 seconds immediately after the projector is turned on. The lamp condition will not be affected even when [ECO MODE] is changed within this time period. • After a lapse of 45 seconds from when the projector displays a blue, black or logo screen, [ECO MODE] will - NEC NP-VE281X | Users Manual - Page 39
show energy-saving effect in terms of CO2 emission reduction (kg) when the projector's [ECO MODE] is set to [ON]. This feature is called [CARBON power-on and the time of power-off. The [CARBON SAVINGSSESSION] message will be displayed in the [POWER OFF/ ARE YOU SURE?] message at the time of power- - NEC NP-VE281X | Users Manual - Page 40
4. Convenient Features Using the Optional Remote Mouse Receiver (NP01MR) The optional remote mouse receiver enables you to operate your computer's mouse functions from the remote control. It is a great convenience for clicking through your computer-generated presentations. Connecting the remote - NEC NP-VE281X | Users Manual - Page 41
right button. NOTE: • When you operate the computer using the or button with the menu displayed, both the menu and the mouse pointer will be affected. Close the menu and perform the the Windows. For more information, see the user documentation or online help supplied with your computer. 32 - NEC NP-VE281X | Users Manual - Page 42
communication between display/projector and computer. • Virtual Remote Tool can be used with a USB connection. Virtual Remote Tool will support the control via a USB cable in October 2012. Updated Virtual Remote Tool can be downloaded from our website: URL: http://www.nec-display.com/dl - NEC NP-VE281X | Users Manual - Page 43
Remote Tool on the computer Supported OS Virtual Remote Tool will To install Virtual Remote Tool, the Windows user account must have "Administrator" privilege (Windows NEC Projector CD-ROM into your CD-ROM drive. The folders in NEC Projector CD-ROM will be displayed. If the folders are not displayed - NEC NP-VE281X | Users Manual - Page 44
4 Click "Next". "END USER LICENSE AGREEMENT" screen will be displayed. 4. Convenient Features Read "END USER LICENSE AGREEMENT" carefully. 5 If you agree, click "I accept the terms in the license agreement" and then click "Next". • Follow the instructions on the installer screens to complete the - NEC NP-VE281X | Users Manual - Page 45
uninstalling. To uninstall Virtual Remote Tool, the Windows user account must have "Administrator" privilege (Windows 7 displayed. 3 Click Virtual Remote Tool from the list and then click "Remove". Follow the instructions on the screens to complete the uninstallation. Step 2: Connect the projector - NEC NP-VE281X | Users Manual - Page 46
menu • Click [Start] → [All Programs] or [Programs] → [NEC Projector User Supportware] → [Virtual Remote Tool] → [Virtual Remote Tool]. When Virtual Remote Tool starts for the first time, "Easy Setup" window will be displayed. Follow the instructions on the screens When "Easy Setup" is completed - NEC NP-VE281X | Users Manual - Page 47
Remote Tool is running. The pop-up menu will be displayed. 2. Click "Help". The Help screen will be displayed. • Displaying the help file using the Start Menu. 1. Click "Start". "All programs" or "Programs". "NEC Projector User Supportware". "Virtual Remote Tool". and then "Virtual Remote Tool - NEC NP-VE281X | Users Manual - Page 48
procedure to turn on the 3D mode, refer to "On-screen menu for 3D images" on the following page. 3. Play your 3D compatible content and use the projector to display the image. 4. Put on your LCD shutter eyeglasses to view 3D images. Also refer to the user's manual accompanied with your LCD shutter - NEC NP-VE281X | Users Manual - Page 49
. 2. Press the button twice, and then press the The [SETUP] menu will be displayed. button. 4. Convenient Features 3. Press the button five times. The [3D] menu will be displayed [VE280X/VE280] [VE281X/VE281/VE282X/VE282] 4. Press the button to select a signal and press the ENTER button. 5. Press - NEC NP-VE281X | Users Manual - Page 50
source is selected. - Display [INFO.] → [SOURCE (2)] → [3D SIGNAL] and make sure that "SUPPORTED" is displayed. NOTE: • The maximum distance for viewing 3D images is 15 m/590 inches from the lens surface under the following restrictions: - Brightness on the projector: 2000 lumens or greater - Screen - NEC NP-VE281X | Users Manual - Page 51
4. Convenient Features Troubleshooting on viewing 3D images If images will not be displayed in 3D or 3D images appear as 2D, check the following table. Also refer to the user's manual accompanied with your 3D content or LCD shutter eyeglasses. Possible causes Solutions • The content you are - NEC NP-VE281X | Users Manual - Page 52
control. 6. Repeat steps 2 -5 to adjust an additional item, or press the EXIT button on the remote control to quit the menu display. NOTE: When a menu or message is displayed, several lines of information may be lost, depending on the signal or settings. 7. Press the MENU button to close the menu - NEC NP-VE281X | Users Manual - Page 53
adjustment. Press the or button on the remote control. ENTER icon Indicates further choices are available. Press the ENTER button on the remote control to display further menu items. 44 - NEC NP-VE281X | Users Manual - Page 54
(VE281X/VE281/ VE282X/VE282) LAMP HOURS USED TOTAL CARBON SAVINGS RESOLUTION HORIZONTAL FREQUENCY VERTICAL FREQUENCY SYNC TYPE SYNC POLARITY SCAN TYPE SIGNAL TYPE VIDEO TYPE BIT DEPTH (VE281X/VE281/VE282X/ VE282) VIDEO LEVEL (VE281X/VE281/VE282X/ VE282) 3D SIGNAL FIRMWARE DATA MODEL NO - NEC NP-VE281X | Users Manual - Page 55
When the component input signal is connected to the COMPUTER IN connector, select [COMPUTER]. • The projector will determine if the input signal is RGB or component signal. HDMI (VE281X/VE281/VE282X/VE282) Selects the HDMI compatible equipment connected to your HDMI IN connector. VIDEO Selects what - NEC NP-VE281X | Users Manual - Page 56
MOVIE Recommended for movies. GRAPHIC Recommended for graphics. sRGB Standard color values [CONTRAST] Adjusts the intensity of the image according to Yes Yes SHARPNESS Yes Yes Yes COLOR No Yes Yes HUE No Yes Yes HDMI: VE281X/VE281/VE282X/VE282 only Yes = Adjustable, No = Not adjustable - NEC NP-VE281X | Users Manual - Page 57
, the [DYNAMIC CONTRAST] cannot be chosen. • When [PRESET] is not [HIGH-BRIGHT]. • When [ECO MODE] is [ON]. • When [FAN MODE] is not [AUTO]. • When [WALL COLOR] is not [OFF]. • When [CLOSED CAPTION] is [ON]. 48 - NEC NP-VE281X | Users Manual - Page 58
[IMAGE OPTIONS] 5. Using On-Screen Menu Adjusting Clock and Phase [CLOCK/PHASE] This allows you to manually adjust CLOCK and PHASE. CLOCK Use this item to fine tune the computer image or to remove any vertical banding that might appear. This function - NEC NP-VE281X | Users Manual - Page 59
a malfunction. - Your manual adjustments for [CLOCK], [PHASE projector automatically determines the incoming signal and displays it in its appropriate aspect ratio. • This table shows typical resolutions and aspect ratios that most computers support. Resolution VGA 640 x 480 SVGA 800 x 600 XGA - NEC NP-VE281X | Users Manual - Page 60
lower resolution than the projector's native resolution. [Example 1] When the incoming signal with the resolution of 800 x 600 is displayed on the VE280/VE281/ VE282: [Example 2] When the incoming signal with the resolution of 800 x 600 is displayed on the VE280X/VE281X/ VE282X: NOTE: • When a non - NEC NP-VE281X | Users Manual - Page 61
[15:9], or [16:10] is selected in [ASPECT RATIO], the image is displayed with black borders on the top and bottom. You can adjust the vertical position from This function allows you to select the level of noise reduction. The projector is set to the optimized level for each signal at the factory. - NEC NP-VE281X | Users Manual - Page 62
vertical distortion manually. (→ page 23) Using the Wall Color Correction [WALL COLOR] This function allows for quick adaptive color correction in applications where the screen material is not white. NOTE: • Selecting color options other than [OFF] will reduce brightness. • When the 3D mode is - NEC NP-VE281X | Users Manual - Page 63
zero or [ASPECT RATIO] setting is not [AUTO] or [4:3]. • The projector does not support optional extended characters for closed captioning. Selecting Menu Language [LANGUAGE] You can choose one of 27 languages for on-screen instructions. NOTE: Your setting will not be affected even when [RESET] is - NEC NP-VE281X | Users Manual - Page 64
a Color or Logo for Background [BACKGROUND] Use this feature to display a blue/black screen or logo when no signal is available. The default background is [LOGO]. TIP: The logo can be changed. For more information about how to change the logo, please consult your NEC or NEC-designated service - NEC NP-VE281X | Users Manual - Page 65
and holding the SOURCE button on the projector cabinet for about 10 seconds will change the setting to [OFF]. Selecting Communication Speed [COMMUNICATION SPEED] (VE280X/VE280/VE281X/VE281) This feature sets the baud rate of the PC Control port (D-Sub 9P). It supports data rates from 4800 to 38400 - NEC NP-VE281X | Users Manual - Page 66
[VE280X/VE280] [VE281X/VE281/VE282X/VE282] 5. projector at high altitudes or in low air pressure can shorten the life of components. • Your setting will not be affected even when [RESET] is done from the menu. Selecting [COLOR SYSTEM] This feature enables you to select video standards manually - NEC NP-VE281X | Users Manual - Page 67
input signal. When [WXGA MODE] is set to [ON], an XGA (1024 x 768) signal may not be recognized. In this case, Displaying the main menu - Switching sources - Pressing POWER ON or POWER OFF button Setting HDMI [HDMI SETTINGS] (VE281X/VE281 digital audio signal and select [AUDIO IN] to switch the AUDIO - NEC NP-VE281X | Users Manual - Page 68
emission reduction. • Your setting will not be affected even when [RESET] is done from the menu. Enabling Direct Power On [DIRECT POWER ON] Turns the projector on automatically when the power cord is inserted into an active power outlet. This eliminates the need to always use the POWER button on the - NEC NP-VE281X | Users Manual - Page 69
the computer signal from the COMPUTER IN connector every time the projector is turned on. HDMI (VE281X/VE281/VE282X/VE282 Displays the digital source from the HDMI IN connector every time the projector is turned on. VIDEO Displays the Video source from the VIDEO IN connector every time the - NEC NP-VE281X | Users Manual - Page 70
COMPUTER/HDMI] (VE281X/VE281/VE282X/VE282) [3D] This function switches the 3D mode between ON and OFF for each input. ON Turns on the 3D mode for the selected input. NOTE: To confirm that the supported 3D signal is accepted, use either way of the following: - Make sure that [3D] is displayed in the - NEC NP-VE281X | Users Manual - Page 71
HOURS USED] (H) [TOTAL CARBON SAVINGS] (kg-CO2) • The message to the effect that the lamp should be replaced will be displayed for one minute when the projector is turned on and when the POWER button on the projector or the remote control is pressed. To dismiss this message, press any button on the - NEC NP-VE281X | Users Manual - Page 72
FREQUENCY] [SYNC TYPE] [SYNC POLARITY] [SCAN TYPE] [VERSION] [FIRMWARE] Version [DATA] Version [SOURCE (2)] 5. Using On-Screen Menu [SIGNAL TYPE] [VIDEO TYPE] [BIT DEPTH] (VE281X/VE281/VE282X/VE282) [VIDEO LEVEL] (VE281X/VE281/VE282X/VE282) [3D SIGNAL] [OTHERS] [MODEL NO.] [SERIAL NUMBER] 63 - NEC NP-VE281X | Users Manual - Page 73
for all the signals to the factory preset. All items can be reset EXCEPT [LANGUAGE], [BACKGROUND], [COMMUNICATION SPEED], [STANDBY MODE], [FAN MODE], [LAMP HOURS USED] and [TOTAL CARBON SAVINGS]. NOTE: Elapsed time of the lamp use will not be affected even when [RESET] is done from the menu. 64 - NEC NP-VE281X | Users Manual - Page 74
describes the simple maintenance procedures you should follow to clean the cabinet and the lens, and replace the lamp. Cleaning the Cabinet and the Lens 1. Turn off the projector before cleaning. 2. Clean the cabinet periodically with a damp cloth. If heavily soiled, use a mild detergent. Never - NEC NP-VE281X | Users Manual - Page 75
in the cabinet will blink red and the message will be displayed. Even though the lamp may still be working, replace the lamp to maintain the optimal projector performance. To replace the lamp, contact your NEC dealer. The lamp is not user replaceable parts. CAUTION • If you continue to use the - NEC NP-VE281X | Users Manual - Page 76
Indicator Indicator Condition Off Blinking light Red Steady light Green Projector Condition Normal - Lamp has reached its end of life. Lamp Replace the lamp. replacement message will be displayed. [ECO MODE] is set to [ON] - Note Over-Temperature Protection If the temperature inside the - NEC NP-VE281X | Users Manual - Page 77
LAMP Indicator. (→ page 67) Cross color in RGB • Press the AUTO ADJ. button on the projector cabinet or the remote control. (→ page 25) mode • Adjust the computer image manually (→ page projector from external 59) equipment 3D picture is not display • See "Troubleshooting on viewing 3D images" on - NEC NP-VE281X | Users Manual - Page 78
setting, restart your Macintosh for the changes to take affect. For setting display modes other than those supported by your Macintosh and the projector, changing the DIP switch on a Mac adapter may bounce an image slightly or may display nothing. Should this happen, set the DIP switch to the 13 - NEC NP-VE281X | Users Manual - Page 79
/VE280/VE281/VE282 projector's performance. Optical Projection System Resolution*1 Lens VE280X VE281X VE282X Single DLP® chip (0.55", aspect 4:3) 1024 × 768 pixels (XGA) Manual zoom and focus F=2.41-2.55, f=21.8-24.0mm Lamp 200W AC (160W in ECO ON) Light Output *2 *3 2800 lumens ECO - NEC NP-VE281X | Users Manual - Page 80
than the projector's native resolution (VE280X/VE281X/VE282X: 1024 × 768 and VE280/VE281/VE282: 800 × 600) will be displayed with scaling technology. Mechanical Installation Orientation Dimensions Weight VE280X VE281X VE282X VE280 Desktop/Front, Desktop/Rear, Ceiling/Front, Ceiling/Rear 10 - NEC NP-VE281X | Users Manual - Page 81
Cabinet Dimensions 7. Appendix VE282X/VE282 VE281X/VE281 VE280X/VE280 247(9.7) 260(10.2) 75(3.0) 72.9 (2.9) 89.5 (3.5) Lens center Lens center 72 Unit: mm (inch) - NEC NP-VE281X | Users Manual - Page 82
7. Appendix Pin Assignments of D-Sub COMPUTER Input Connector Mini D-Sub 15 Pin Connector 11 12 13 14 15 6 7 8 9 10 1 23 45 Signal Level Video signal : 0.7Vp-p (Analog) Sync signal : TTL level Pin No. 1 2 3 4 5 6 7 8 9 10 11 12 13 14 15 RGB Signal (Analog) Red Green or Sync on Green Blue Ground - NEC NP-VE281X | Users Manual - Page 83
SVGA model (VE280/VE281/VE282) *2 Native resolution on XGA model (VE280X/VE281X/VE282X) *3 Reduced Blanking (RB) signal NOTE: • An image with higher or lower resolution than the projector's native resolution (VE280X/VE281X/VE282X: 1024 × 768 / VE280/ VE281/VE282: 800 x 600 ) will be displayed with - NEC NP-VE281X | Users Manual - Page 84
Connection PC Control Codes Function POWER ON POWER OFF INPUT SELECT COMPUTER INPUT SELECT HDMI (VE281X/VE281/VE282X/VE282) INPUT SELECT VIDEO PICTURE MUTE ON PICTURE MUTE OFF SOUND MUTE ON SOUND long cable runs it is recommended to set communication speed within projector menus to 9600 bps. 75 - NEC NP-VE281X | Users Manual - Page 85
service personnel, check the following list to be sure repairs are needed also by referring to the "Troubleshooting" section in your user's manual. This checklist below will help us solve your problem are supported by the projector. Image the projector's menu. Image shows flickering or color drift - NEC NP-VE281X | Users Manual - Page 86
Flashing light [ ] cycles Remote control model number: Projector PC Installation environment Screen size: inch Screen type: White matte Beads Polarization Wide angle High contrast Throw distance: feet/inch/m Orientation: Ceiling mount Desktop Power outlet connection: Connected - NEC NP-VE281X | Users Manual - Page 87
.com, click on support center/register product and submit your completed form online. Upon receipt, we will send a confirmation letter with all the details you will need to take advantage of fast, reliable warranty and service programs from the industry leader, NEC Display Solutions of America, Inc - NEC NP-VE281X | Users Manual - Page 88
© NEC Display Solutions, Ltd. 2012 7N951841
-
 1
1 -
 2
2 -
 3
3 -
 4
4 -
 5
5 -
 6
6 -
 7
7 -
8
-
9
-
10
-
11
-
12
-
13
-
14
-
15
-
16
-
17
-
18
-
19
-
20
-
21
-
22
-
23
-
24
-
25
-
26
-
27
-
28
-
29
-
30
-
31
-
32
-
33
-
34
-
35
-
36
-
37
-
38
-
39
-
40
-
41
-
42
-
43
-
44
-
45
-
46
-
47
-
48
-
49
-
50
-
51
-
52
-
53
-
54
-
55
-
56
-
57
-
58
-
59
-
60
-
61
-
62
-
63
-
64
-
65
-
66
-
67
-
68
-
69
-
70
-
71
-
72
-
73
-
74
-
75
-
76
-
77
-
78
-
79
-
80
-
81
-
82
-
83
-
84
-
85
-
86
-
87
-
88
 |
 |

Portable Projector
VE280X/VE281X/VE282X/
VE280/VE281/VE282
User’s Manual
The VE280X, VE282X, VE280 and VE282 are not distributed in North America.
Model No.:
NP-VE280X, NP-VE281X, NP-VE282X
NP-VE280, NP-VE281, NP-VE282