NEC NP2000 NP1000/2000 network setup guide
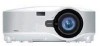
NEC NP2000 - XGA LCD Projector Manual
 |
UPC - 050927251979
View all NEC NP2000 manuals
Add to My Manuals
Save this manual to your list of manuals |
NEC NP2000 manual content summary:
- NEC NP2000 | NP1000/2000 network setup guide - Page 1
NEC Projector NP2000 / NP1000 Wired and Wireless Network Setup Guide SELECT LEFT LENS SHIFT RIGHT DOWN UP 3D REFORM AUTO ADJUST SOURCE ON/STAND BY PC POWSETRATLUASMP CARD 1. What You Can Do with User Supportware 3 2. Operating Environment 3. Connecting LAN Cable 1 2 3 4. Attaching LAN - NEC NP2000 | NP1000/2000 network setup guide - Page 2
you notice any questionable points, errors or omissions, please contact us. (4) Notwithstanding article (3), NEC will not be responsible for any claims on loss of profit or other matters deemed to result from using the Projector. (5) Guides with incorrect collating or missing pages will be replaced. - NEC NP2000 | NP1000/2000 network setup guide - Page 3
Cautions on Usage Cautions on Usage • A wireless LAN card is not meant for use with facilities or equipment involving the safeguard of human life, such as medical equipment, nuclear facilities or equipment, aeronautical or space equipment, transportation facilities or equipment, etc., or with - NEC NP2000 | NP1000/2000 network setup guide - Page 4
You Can Do with User Supportware 3 3 1-1. Image Express Utility 2.0 3 1-2. Desktop Control Utility 1.0 5 1-3. Ulead Photo Explorer 8.0 SE Basic 6 1-4. Viewer PPT Converter 3.0 7 1-5. PC Control Utility 3.0 7 2. Operating Environment 8 2-1. Supported Projector 8 2-2. Operating Environment - NEC NP2000 | NP1000/2000 network setup guide - Page 5
transmissions based on NEC's original compression algorithm 1 NEC's original compression algorithm allows high-quality images to be sent over the network at high speed, from your personal computer to the projector. What You Can Do with User Supportware 3 SELECT LEFT LENS SHIFT RIGHT DOWN - NEC NP2000 | NP1000/2000 network setup guide - Page 6
1. What You Can Do with User Supportware 3 G Projected images can be transferred and saved to personal computers. well as temporarily terminating communication with the projector. Mr. D, please start your presentation. Attendant A Manager SELECT LEFT LENS SHIFT RIGHT DOWN UP 3D REFORM AUTO - NEC NP2000 | NP1000/2000 network setup guide - Page 7
Can Do with User Supportware 3 1-2. Desktop Control Utility 1.0 Desktop Control Utility 1.0 is software that operates the desktop screen of a personal computer at a remote location from the projector by using a network. G A commercially available USB mouse is connected to the projector to operate - NEC NP2000 | NP1000/2000 network setup guide - Page 8
be easily created. G Ulead Photo Explorer 8.0 in the User Supportware 3 CD-ROM has functions that allow you to use the projector more conveniently, in addition to the functions that come with the software, for when an NEC projector is connected. Additional functions are listed below. For details of - NEC NP2000 | NP1000/2000 network setup guide - Page 9
(PPT Converter add-in is automatically registered to PowerPoint). 1-5. PC Control Utility 3.0 PC Control Utility 3.0 is software that allows you to operate the projector from the personal computer when the personal computer and the projector are connected with LAN (wired or wireless) or a serial - NEC NP2000 | NP1000/2000 network setup guide - Page 10
Environment 2. Operating Environment 2-1. Supported Projector User Supportware 3 supports the following NEC projector (as of February 2006) NP Series LT Series NP2000/NP1000 LT380/LT280 Reference Some of software can be used with projectors other than the above projectors. For details, refer to - NEC NP2000 | NP1000/2000 network setup guide - Page 11
to the help function of each software. Supported OS Supported hardware CPU Memory Network environment Resolution Screen Colors Windows 2000 Professional Service Pack 4 or later Windows XP Home Edition Service Pack 2 or later Windows XP Professional Service Pack 2 or later Windows XP Tablet PC - NEC NP2000 | NP1000/2000 network setup guide - Page 12
LAN Cable 3. Connecting LAN Cable Connect a LAN cable to the LAN port (RJ-45) of the projector when connecting the projector to wired LAN. After connecting LAN cable to the projector, set the required settings for the projector ( page 24). Server HUB, etc. LAN cable (commercially available) LAN 10 - NEC NP2000 | NP1000/2000 network setup guide - Page 13
wireless LAN card into the PC card slot on the rear panel of the projector. Important • The wireless LAN card must be inserted into the PC card inserted in the reverse direction with excessive force applied, the pins in the projector and the PC card slot may break. Be sure to insert the wireless - NEC NP2000 | NP1000/2000 network setup guide - Page 14
wireless LAN card from being ejected during use. The screw for the PC card lock is mounted under the PC card slot on the rear side of the projector. To attach the PC card lock to the projector, first remove the screw and use it. ᕡ SELECT ᕢ SELECT ᕣ SELECT Wireless LAN card PC card - NEC NP2000 | NP1000/2000 network setup guide - Page 15
5. Setting the LAN Setting of Projector 5. Setting the LAN Setting of Projector Reference For how to turn on/off the power to the projector and how to operate the buttons and remote control of the projector, refer to "User's Manual" included in the User's Manual CD-ROM. 5-1. Displaying On-Screen - NEC NP2000 | NP1000/2000 network setup guide - Page 16
5. Setting the LAN Setting of Projector 4 Press the button three times to highlight the "Installation" tab. 5 Press the SELECT ̄ button three times to highlight "LAN Mode", and press the button. The "LAN Mode" screen will be displayed. • To make setting of wireless LAN Proceed to "5-2. - NEC NP2000 | NP1000/2000 network setup guide - Page 17
5-2. Wireless LAN When inserting the wireless LAN card into the PC card slot of the projector, configure the LAN settings in the "PC Card" page of "LAN Mode" selected from On-Screen Menu. I Flow of Setting Step 1 Display "PC Card" page - NEC NP2000 | NP1000/2000 network setup guide - Page 18
. • "Profile 1" or "Profile 2" can be stored in the memory of the projector as the setting for LAN. • "Easy Connection" is a mode in which the Utility 2.0 in the User Supportware 3 CD-ROM is easily connected to wireless LAN. Note that "Easy Connection" does not support software other than Image - NEC NP2000 | NP1000/2000 network setup guide - Page 19
̄ button once to highlight the "IP Address" field and press the button. The software keyboard will be displayed. 5 Setting the LAN Setting of Projector Use the SELECT ̄̆̇̈ button to select a number to input, and press the The characters will be input. button. Repeat step above to - NEC NP2000 | NP1000/2000 network setup guide - Page 20
Set the IP address of the DNS server of the network to which the projector is connected. The method of inputting is the same as that of the " setting 1 8 Select "Advanced". Set "Network Type" and "WEP" (encryption) specific to wireless LAN. Use the SELECT ̄/̆ button to highlight "Advanced" on - NEC NP2000 | NP1000/2000 network setup guide - Page 21
not on the list, press the EXIT button. 5 Note To connect SSID for which WEP is set, the same setting must be made on the projector ( page 21). 10 Input or edit "SSID" (if necessary). SSID selected in "Site Survey" are automatically input. If the highlight is moved to the "SSID - NEC NP2000 | NP1000/2000 network setup guide - Page 22
11 Ad Hoc This is selected to perform peer-to-peer communication between the projector and a personal computer by using only wireless LAN. Example of connection when "Mode" is "Infrastructure" SELECT LEFT LENS SHIFT RIGHT DOWN UP 3D REFORM AUTO ADJUST SOURCE ON/STAND BY POWSETRATLUASMPPC - NEC NP2000 | NP1000/2000 network setup guide - Page 23
5. Setting the LAN Setting of Projector 13 Select "WEP" page (if necessary). Proceed to step 17 if WEP is not set. Use the SELECT ̄/̆ button to select the from "WEP", select which of the following encryption keys, "Key 1" to "Key 4", is to be used. Setting the LAN Setting of Projector 21 - NEC NP2000 | NP1000/2000 network setup guide - Page 24
5. Setting the LAN Setting of Projector 16 Input "Key 1" to "Key 4". If "64 bit", "128 bit", or "152 bit" is selected from "WEP", input an encryption key. Set the same encryption - NEC NP2000 | NP1000/2000 network setup guide - Page 25
5. Setting the LAN Setting of Projector 17 Finalize "Advanced". Use the SELECT ̄/̆ button to highlight [OK] and press the The "PC card" page will be to highlight [OK] and press the button. The contents of the setting will be stored in the memory of the projector. 5 Setting the LAN Setting of - NEC NP2000 | NP1000/2000 network setup guide - Page 26
5-3. Wired LAN When connecting a LAN cable to the LAN port of the projector, configure the LAN settings in the "Built-in" page of "LAN Mode" selected from On-Screen Menu. I Flow of setting Step 1 Display "Built-in" page - NEC NP2000 | NP1000/2000 network setup guide - Page 27
to "5-1. Displaying On-Screen Menu (LAN Mode)" ( page 13). 2 Select "Profiles". "Profile 1" or "Profile 2" can be stored in the memory of the projector as the setting of LAN. Press the SELECT ̄ button once to highlight the "Profiles" field and press the button. Use the SELECT ̄/̆ button to - NEC NP2000 | NP1000/2000 network setup guide - Page 28
projector, by using the wireless network setting function with Windows XP Service Pack 2 (SP2). Preparation: • Install a commercially available wireless LAN card driver to your personal computer, and complete setup of the wireless LAN card. For how to install the driver, refer to the User's Manual - NEC NP2000 | NP1000/2000 network setup guide - Page 29
6. Setting the LAN Setting of Personal Computer 3 Right-click the [Wireless Network Connection] icon and click [Property]. 3-1 Right-click 3-2 Click A property window for wireless network connections will be displayed. Setting the LAN Setting of Personal Computer 4 From the list of [This - NEC NP2000 | NP1000/2000 network setup guide - Page 30
" on page 26, set the personal computer as shown below. • Example of setting the IP address and subnet mask. IP Address Subnet Mask Projector ( page 26) 192.168.100.10 255.255.255.0 Personal computer(Screen Below) 192.168.100.20 255.255.255.0 5-1 Click 5-2 Input 6 Click [OK]. A property - NEC NP2000 | NP1000/2000 network setup guide - Page 31
and click [View Available Wireless Networks]. 9-1 Right-click 9-2 Click The "Wireless Network Connection" window is displayed. 10 From the list, select SSID of the projector to be connected and click [Connect]. 10-1 Click 10-2 Click The "Wireless Network Connection" window is displayed. 6 29 - NEC NP2000 | NP1000/2000 network setup guide - Page 32
for example, if you have the WEP setting on the projector side configured with "64bit" and have "NECVT" input key is not configured on the projector to be connected. Follow the (3)Select SSID of the projector under [Preferred Networks] and according to those for the projector. This Completes the Ad Hoc - NEC NP2000 | NP1000/2000 network setup guide - Page 33
help file that explains the functions and operation methods in detail. Also, "User's Guide" (PDF) explains the basic operation procedure of each software program carefully. 7-1. Displaying "User's Guide" (PDF) Important • User Supportware 3 CD-ROM does not contain Acrobat Reader or Adobe Reader. If - NEC NP2000 | NP1000/2000 network setup guide - Page 34
7. Refer to "User's Guide" and Help Reference If the above menu is not displayed, follow these steps. 1. Click [Start] of Windows. 2. Click [Run...]. 3. In the [Open:] field, enter the - NEC NP2000 | NP1000/2000 network setup guide - Page 35
instructions use operations under Windows XP as an example. • Before displaying Help, install each software onto your personal computer from the User Start Refer to "User's Guide" and Help All Programs NEC Projector User Supportware Desktop Control Utility 1.0 Desktop Control Utility 1.0 Help - NEC NP2000 | NP1000/2000 network setup guide - Page 36
7. Refer to "User's Guide" and Help I Displaying Ulead Photo Explorer 8.0 Help To display the Help the Ulead Photo Explorer 8.0 menu bar, select [Help] → [Ulead Photo Explorer Help] or [NEC Projector User Supportware Help]. I Help Screen Layout [Hide] button Shows/hides the left pane. [Back] button - NEC NP2000 | NP1000/2000 network setup guide - Page 37
MEMO 35 - NEC NP2000 | NP1000/2000 network setup guide - Page 38
MEMO 36 - NEC NP2000 | NP1000/2000 network setup guide - Page 39
or other countries. • Other manufacturer names and product names in this document are registered trademarks or trademarks of the respective companies. ©NEC Viewtechnology, Ltd. 2006 Printed in Japan First edition February 2006 Reproduction, modification, and other uses are prohibited without the - NEC NP2000 | NP1000/2000 network setup guide - Page 40
NP2000 / NP1000 Wired and Wireless Network Setup Guide NEC Projector User Supportware 3 I Image Express Utility 2.0 I Desktop Control Utility 1.0 I Ulead Photo Explorer 8.0 SE Basic I Viewer PPT Converter 3.0 I PC Control Utility 3.0 Printed on Recycled Paper 7N8P6581
-
 1
1 -
 2
2 -
 3
3 -
 4
4 -
 5
5 -
 6
6 -
 7
7 -
8
-
9
-
10
-
11
-
12
-
13
-
14
-
15
-
16
-
17
-
18
-
19
-
20
-
21
-
22
-
23
-
24
-
25
-
26
-
27
-
28
-
29
-
30
-
31
-
32
-
33
-
34
-
35
-
36
-
37
-
38
-
39
-
40
 |
 |

1
2
4
5
6
7
1.
What You Can Do with User
Supportware 3
2.
Operating Environment
4.
Attaching LAN Card
5. Setting the LAN Setting of
Projector
6.
Setting the LAN Setting of
Personal Computer ([Example]
Wireless LAN of Windows
XP:Ad Hoc connection)
7. Refer to “User’s Guide” and
Help
Install in the PC the software stored in the User Supportware 3 CD-ROM.
This manual describes the LAN settings to use the software programs included in
the supplied User Supportware 3 CD-ROM. For how to operate each software
program, refer to “User’s Guide” (PDF) on User Supportware 3 CD-ROM.
NP2000 / NP1000
Wired and Wireless Network Setup Guide
3
3.
Connecting LAN Cable
NEC Projector