Netgear UTM5-100NAS Installation Guide
Netgear UTM5-100NAS Manual
 |
View all Netgear UTM5-100NAS manuals
Add to My Manuals
Save this manual to your list of manuals |
Netgear UTM5-100NAS manual content summary:
- Netgear UTM5-100NAS | Installation Guide - Page 1
CD, and from the NETGEAR support site at http://support.netgear.com. Verify the Package Contents • ProSecure™ UTM appliance • AC power cable • Rubber feet (4) with adhesive backing • Rack-mount brackets (some models) • Installation guide • Resource CD • Service registration card with license keys - Netgear UTM5-100NAS | Installation Guide - Page 2
one of the following: • To view the reference manual, select Support > Documentation. • To view the product support page, select Support > Knowledge Base. Technical Support Visit http://support.netgear.com for product updates and web support. For the complete EU Declaration of Conformity, visit
-
 1
1 -
 2
2
 |
 |

Installation Guide
ProSecure™ Unified Threat Management (UTM) Appliance
Models UTM5, UTM10, UTM25, UTM50, and UTM150
Thank you for selecting NETGEAR products.
Follow the instructions in this installation guide to connect the UTM using a single
WAN interface, to use the Setup Wizard to configure the basic network and
scanning settings, and to register the UTM and activate its licenses.
The UTM models differ in the number of LAN and WAN ports that they provide. For
information about the different models and about how to configure other options
such as multiple WAN settings (not applicable to the UTM 5 and UTM10), the
firewall, VPN tunnels, and custom scanning, see the reference manual.
You can access the reference manual from the UTM’s web management interface,
through the resource CD, and from the NETGEAR support site at
.
Verify the Package Contents
•
ProSecure™ UTM appliance
•
AC power cable
•
Rubber feet (4) with adhesive backing
•
Rack-mount brackets (some models)
•
Installation guide
•
Resource CD
•
Service registration card with license keys (some models)
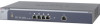
Connect the UTM
The front panel of the UTM contains ports and status LEDs; the back panel of the
UTM contains a console port, Factory Defaults reset button, cable lock receptacle,
and AC power connection.
The following figure shows the front panel of the UTM150. The front panels of other
models differ only in the number of LAN and WAN ports.
To connect the UTM:
1.
Connect a WAN port to a cable or DSL modem, satellite dish, wireless ISP
radio antenna, or other WAN device that has an active WAN connection.
2.
Connect a LAN port to a computer that is configured as a DHCP client.
3.
Turn on the UTM by connecting one end of the AC power cable to the AC
receptacle on the back panel of UTM and the other end to a power outlet. After
about 1 minute, verify the following:
•
Power LED
. The Power LED is solid green.
•
Test LED
. The amber Test LED is lit. The Test LED turns off when the
initialization process is completed, approximately 2 minutes after you have
turned on the UTM.
•
WAN LED
. The left LED of the connected WAN port is lit. If it is not, make
sure that the Ethernet cable is securely attached to the WAN device and the
WAN port, and that the WAN device is on.
•
LAN LED
. The left LED of the connected LAN port is on. If it is not, make
sure that the Ethernet cable from the computer to the UTM is securely
attached at both ends, and that the computer is on.
Note:
If any of these LEDs are not lit, or if the Test LED does not turn off, see
Chapter 12, “Troubleshoot and Use Online Support,” of the reference manual.
1.
Power LED (green)
2.
Test LED (amber)
3.
USB port
4.
LAN ports and LEDs
5.
DMZ LED for LAN port 4
6.
WAN ports and LEDs
1
5
4
3
6
2
Log In to the UTM
To log in to the UTM and access its web management interface:
1.
On the computer that is connected to
the UTM, enter
in
the address field of a browser. The
NETGEAR
Configuration Manager
Login screen displays in the browser.
2.
Enter
admin
for the user name and
password
for the password, and click
the
Login
button.
The web management interface
displays.
After 5 minutes of inactivity (the default
login time-out), you are automatically
logged out. You can change the login time-out by selecting
Users > Users
to
display the Users screen and modifying the admin user settings.
Use the Setup Wizard
The Setup Wizard guides you through 10 screens to configure the basic network
and scanning configuration of the UTM.
To access the Setup Wizard:
1.
Open the web management interface.
2.
Select
Wizards
.
3.
Select the
Setup
Wizard
radio button.
4.
Follow the Setup
Wizard to configure
the following settings:
•
LAN settings
•
WAN settings
•
System date and time, including NTP server configuration
•
Email and web services (that is, protocols) and ports to scan
•
Email security (antivirus settings) and scan exceptions based on size