NordicTrack Incline Trainer X9i Treadmill English Manual
NordicTrack Incline Trainer X9i Treadmill Manual
 |
View all NordicTrack Incline Trainer X9i Treadmill manuals
Add to My Manuals
Save this manual to your list of manuals |
NordicTrack Incline Trainer X9i Treadmill manual content summary:
- NordicTrack Incline Trainer X9i Treadmill | English Manual - Page 1
. CUSTOMER CARE For service at any time, go to www.nordictrackservice.com. Or call 1-800-TO-BE-FIT (1-800-862-3348) Mon.–-Fri. 6 a.m.–-6 p.m. MT Sat. 8 a.m.–-4 p.m. MT Please do not contact the store. CAUTION Read all precautions and instructions in this manual before using this equipment - NordicTrack Incline Trainer X9i Treadmill | English Manual - Page 2
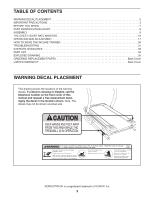
PLACEMENT 2 IMPORTANT PRECAUTIONS 3 BEFORE YOU BEGIN 7 PART IDENTIFICATION CHART 8 ASSEMBLY 9 THE CHEST HEART RATE MONITOR 16 OPERATION AND ADJUSTMENT 17 HOW TO MOVE THE INCLINE TRAINER 30 TROUBLESHOOTING 31 EXERCISE GUIDELINES 33 PART LIST 34 EXPLODED DRAWING 35 ORDERING REPLACEMENT - NordicTrack Incline Trainer X9i Treadmill | English Manual - Page 3
NORDICTRACK dealer, call the telephone number on the front cover of this manual, or see your local electronics store. 14. Failure to use a properly functioning surge suppressor could result in damage to the control system of the incline trainer. If the control system is damaged, the walking belt - NordicTrack Incline Trainer X9i Treadmill | English Manual - Page 4
cord immediately after use, before cleaning the incline trainer, and before performing the maintenance and adjustment procedures described in this manual. Never remove the motor hood unless instructed to do so by an authorized service representative. Servicing other than the procedures in this - NordicTrack Incline Trainer X9i Treadmill | English Manual - Page 5
5 - NordicTrack Incline Trainer X9i Treadmill | English Manual - Page 6
STANDARD SERVICE PLANS all 6 - NordicTrack Incline Trainer X9i Treadmill | English Manual - Page 7
selecting the revolutionary NORDICTRACK® INCLINE TRAINER X9i INTERACTIVE. The INCLINE TRAINER X9i INTERACTIVE offers a selection of features designed to make your workouts at home more enjoyable and effective. For your benet, read this manual carefully before using the incline trainer. If you have - NordicTrack Incline Trainer X9i Treadmill | English Manual - Page 8
assembly. The number in parentheses below each drawing is the key number of the part, from the PART LIST near the end of this manual. The number following the key number is the quantity used for assembly. Note: If a part is not in the hardware kit, check to see if it is preattached. Extra - NordicTrack Incline Trainer X9i Treadmill | English Manual - Page 9
on the exterior of the treadmill. This is normal. If there is an oily substance on the treadmill, wipe it off with a soft cloth and a mild, non-abrasive cleaner. •• To identify small parts, see page 8. •• access, call CUSTOMER CARE (see the front cover of this manual) and register your product. 9 - NordicTrack Incline Trainer X9i Treadmill | English Manual - Page 10
the power cord is unplugged. 2 Identify the right Upright (77), which has a wire tie in it. Hold the Upright near the right side of the incline trainer. See the inset drawing. Tie the wire tie in the right Upright (77) around the end of the Upright Wire (78). Then, pull the other - NordicTrack Incline Trainer X9i Treadmill | English Manual - Page 11
4. Set the Console (37) face down on a soft surface to avoid scraching the Console. Remove and 4 discard the four screws (A) from the Console A Base Back (89). Lift off the Console Base Back. 89 A 37 5. Have a second person hold the console assembly near the Uprights (77). Insert the console - NordicTrack Incline Trainer X9i Treadmill | English Manual - Page 12
tighten the two #8 x 1" Screws (102). Attach the left Upright (not shown) to the Console Crossbar (101) on the other side of the incline trainer as described above. 6 101 78 4 9 77 7. Tighten two #8 x 3/4" Screws (1) into the Console Base (87). Do not overtighten the 7 Screws. Identify the - NordicTrack Incline Trainer X9i Treadmill | English Manual - Page 13
8. Set the Right Handrail Assembly (93) onto the right Upright (77). Make sure that no wires are 8 pinched. Attach the Right Handrail Assembly (93) with two 3/8" x 5 1/2" Screws (5) and two 3/8" Star Washers (8). Note: Start the lower Screw first. 93 Then, connect the two "R" pulse wires. - NordicTrack Incline Trainer X9i Treadmill | English Manual - Page 14
8. Hold the Left Handrail Assembly (86) near the left Upright (77). Insert the pulse wire from the left handrail assembly into the hole in the top of the Upright and pull it out of the end of the Upright. Set the Left Handrail Assembly (86) onto the left Upright (77). Make sure that no wires are - NordicTrack Incline Trainer X9i Treadmill | English Manual - Page 15
is eliminated. 58 77 106 3 14 14 12. Make sure that all parts are properly tightened before you use the incline trainer. Keep the included hex keys in a secure place. One of the hex keys is used to adjust the walking belt (see page 32). To protect the floor or carpet from damage, place a mat - NordicTrack Incline Trainer X9i Treadmill | English Manual - Page 16
. Hand wash and air dry the chest strap. TROUBLESHOOTING If the heart rate monitor does not function properly, try the steps below. •• Make sure type. •• The heart rate monitor is designed to work with people who have normal heart rhythms. Heart rate reading problems may be caused by medical - NordicTrack Incline Trainer X9i Treadmill | English Manual - Page 17
OPERATION AND ADJUSTMENT HOW TO CONNECT THE POWER CORD Use a Surge Suppressor Your incline trainer, like other electronic equipment, can be damaged by sudden voltage changes in your home’'s power. Voltage surges, spikes, and noise interference can result from weather - NordicTrack Incline Trainer X9i Treadmill | English Manual - Page 18
a selection of onboard workouts, including at least eight calorie workouts, eight intensity workouts, eight speed workouts, eight incline workouts, and six iFit demo workouts. Each workout automatically controls the speed and incline of the incline trainer as it guides you through an effective - NordicTrack Incline Trainer X9i Treadmill | English Manual - Page 19
demo mode, designed to be used if the incline trainer is displayed in a store. If the belt to slow to a stop. Test the clip by carefully taking a few steps back- ward; if the key is not pulled from the console, adjust the screen, such as the displays in a workout (see step 5 on page 21). However - NordicTrack Incline Trainer X9i Treadmill | English Manual - Page 20
To prevent damage to the walking platform, wear clean athletic shoes while using the incline trainer. The first time you use the incline trainer, observe the alignment of the walking belt, and center the walking belt if necessary (see page 32). Note: For information about navigating in the browser - NordicTrack Incline Trainer X9i Treadmill | English Manual - Page 21
the red boxes on the screen. As you walk or run on the incline trainer, the screen can show the following workout information: •• The incline level of the incline trainer •• The time elapsed •• The time left (Note: The manual mode does not have a time left countdown.) •• The approximate number of - NordicTrack Incline Trainer X9i Treadmill | English Manual - Page 22
rate will be shown. For the most accurate heart rate reading, continue to hold the contacts for about 15 seconds. If desired, adjust walking belt increases and decreases. To pause the workout, touch one incline trainer’'s electrical components may wear prematurely. To measure your heart rate - NordicTrack Incline Trainer X9i Treadmill | English Manual - Page 23
if you manually change the speed or incline of the incline trainer during the workout, the number of calories you burn will be affected. 4. Monitor your progress. See step 5 on page 21. The screen can also show a prole of the speed and incline settings of the workout. 5. Measure your heart rate if - NordicTrack Incline Trainer X9i Treadmill | English Manual - Page 24
workout will function in the same way as the manual mode (see pages 21 and 22). The workout will continue until you reach the goal that you set. The walking belt will then slow to a stop, and a workout . See step 5 on page 21. 6. Measure your heart rate if desired. See step 6 on page 22. 7. Turn - NordicTrack Incline Trainer X9i Treadmill | English Manual - Page 25
login screen. 4. Select an iFit workout. During some workouts, the voice of a personal trainer will guide you through your workout. 6. Monitor your progress. See step the other runners are ahead of you or behind you. 7. Measure your heart rate if desired. See step 6 on page 22. 8. Turn on the fan if - NordicTrack Incline Trainer X9i Treadmill | English Manual - Page 26
The console features a display demo mode, designed to be used if the treadmill is displayed in a store. While the demo mode is turned on, the the back button on the screen. 9. Enable or disable street view. During some workouts, the screen may show a map. To enable or disable the street view - NordicTrack Incline Trainer X9i Treadmill | English Manual - Page 27
. For the best results, regularly check for firmware updates. Touch the Machine Info button to view information about your incline trainer. After you view the information, touch the back button on the screen. 6. Find keycodes. The Keycodes button is intended to be used by service technicians to - NordicTrack Incline Trainer X9i Treadmill | English Manual - Page 28
also need to know the password. If you are having problems connecting to an encrypted network, make sure that your password is correct. Note: Passwords speed. Note: If you have questions after following these instructions, go to support.iFit.com for assistance. 5. Exit the wireless network mode - NordicTrack Incline Trainer X9i Treadmill | English Manual - Page 29
the browser, the speed, incline, fan, and volume buttons will still function, but the workout buttons will not function. To , CD player, or other personal audio player. Then, adjust the volume level on your personal audio player or press the instructions, go to support.iFit.com for assistance. 29 - NordicTrack Incline Trainer X9i Treadmill | English Manual - Page 30
on the wheels. CAUTION: To decrease the possibility of injury or of damage to the incline trainer, do not lift the incline trainer by the plastic belly pan. Do not pull on the console. Carefully roll the incline trainer on the wheels to the desired location, and then lower it to the level position - NordicTrack Incline Trainer X9i Treadmill | English Manual - Page 31
TROUBLESHOOTING Most incline trainer problems can be solved by following the simple steps below. Find the symptom that applies, and follow the steps listed. If further assistance is needed, see the front cover of this manual. c. Remove the key from the console, and then reinsert it. d. If the - NordicTrack Incline Trainer X9i Treadmill | English Manual - Page 32
. Idler Roller Screws c. Your incline trainer features a walking belt coated with high-performance lubricant. IMPORTANT: Never apply silicone spray or other substances to the walking belt or the walking platform unless instructed to do so by an authorized service representative. Such substances may - NordicTrack Incline Trainer X9i Treadmill | English Manual - Page 33
You can use your heart rate as a guide to find the proper intensity level. The chart below shows recommended heart rates for fat burning and aerobic exercise, adjust the intensity of your exercise until your heart rate is near the highest number in your training zone. WORKOUT GUIDELINES Warming Up - NordicTrack Incline Trainer X9i Treadmill | English Manual - Page 34
Left Roller Cover 39 1 Right Roller Cover 40 1 Motor Belt 41 1 Magnet 42 1 Drive Roller/Pulley 43 2 Belt Guide 44 1 Walking Platform 45 1 Rear Cover 46 4 Incline Motor Bushing 47 1 Idler Roller 48 1 Walking Belt 49 1 Front Hood 50 1 Power Cord 51 1 Grommet 52 - NordicTrack Incline Trainer X9i Treadmill | English Manual - Page 35
EXPLODED DRAWING A 23 1 43 1 21 1 62 28 1 44 28 1 28 23 47 25 48 1 23 1 25 1 28 35 28 41 40 42 36 38 35 1 68 72 23 1 18 54 28 28 1 1 66 28 21 1 52 36 18 35 1 39 35 35 1 1 35 35 35 35 18 35 85 35 35 35 18 35 35 35 1 45 18 53 1 1 35 85 1 81 43 1 1 1 1 - NordicTrack Incline Trainer X9i Treadmill | English Manual - Page 36
36 49 1 61 55 20 7 26 56 22 33 31 75 107 1 29 26 22 69 31 13 71 70 30 13 15 13 30 13 30 13 73 74 79 58 73 73 32 46 60 74 46 79 26 73 26 7 33 26 7 33 13 59 13 13 7 33 107 1 32 46 65 63 46 26 64 1 1 1 Model No. NTL19010.4 R0213A EXPLODED DRAWING B - NordicTrack Incline Trainer X9i Treadmill | English Manual - Page 37
37 106 3 1 17 8 1 1 1 1 1 10 2 82 57 83 24 14 84 14 80 78 82 81 24 57 84 14 81 14 94 92 8 17 10 2 Model No. NTL19010.4 R0213A EXPLODED DRAWING C - NordicTrack Incline Trainer X9i Treadmill | English Manual - Page 38
EXPLODED DRAWING D Model No. NTL19010.4 R0213A 101 86 76 1 104 102 104 102 1 1 97 9 4 11 1 13 8 1 78 105 98 11 8 1 103 5 8 105 9 11 93 4 8 5 77 98 6 5 8 12 32 38 77 32 5 8 12 6 - NordicTrack Incline Trainer X9i Treadmill | English Manual - Page 39
EXPLODED DRAWING E 99 37 95 99 88 Model No. NTL19010.4 R0213A 1 1 1 89 96 100 96 100 100 100 19 87 1 16 1 34 1 1 16 16 1 16 34 1 16 16 16 16 1 90 91 1 39 67 1 1 - NordicTrack Incline Trainer X9i Treadmill | English Manual - Page 40
manual) •• the key number and description of the replacement part(s) (see the PART LIST and the EXPLODED DRAWING near the end of this manual) LIMITED WARRANTY IMPORTANT: To protect your fitness equipment with an extended service the USA, if all instructions in this manual are not followed, if
-
 1
1 -
 2
2 -
 3
3 -
 4
4 -
 5
5 -
 6
6 -
 7
7 -
8
-
9
-
10
-
11
-
12
-
13
-
14
-
15
-
16
-
17
-
18
-
19
-
20
-
21
-
22
-
23
-
24
-
25
-
26
-
27
-
28
-
29
-
30
-
31
-
32
-
33
-
34
-
35
-
36
-
37
-
38
-
39
-
40
 |
 |
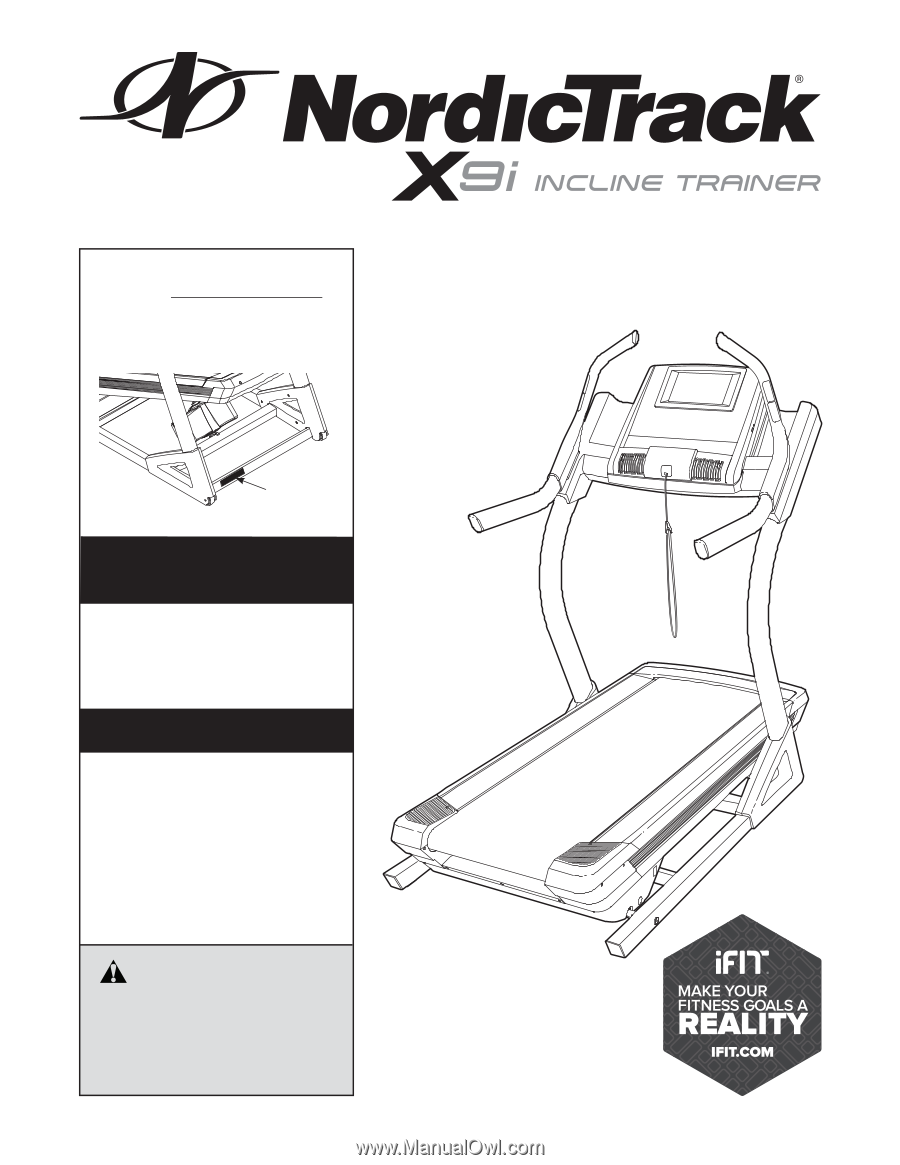
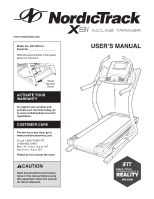
USER°S MANUAL
www.nordictrack.com
Model No. NTL19010.4
Serial No.
Write the serial number in the space
above for reference.
CAUTION
Read all precautions and instruc-
tions in this manual before using
this equipment. Save this manual
for future reference.
ACTIVATE YOUR
WARRANTY
To register your product and
activate your warranty today, go
to www.nordictrackservice.com/
registration.
CUSTOMER CARE
For service at any time, go to
www.nordictrackservice.com.
Or call 1-800-TO-BE-FIT
(1-800-862-3348)
Mon.°Fri. 6 a.m.°6 p.m. MT
Sat. 8 a.m.°4 p.m. MT
Please do not contact the store.
Serial
Number
Decal