Oki B6500dn Guide: User's, B6500 (English)
Oki B6500dn Manual
 |
View all Oki B6500dn manuals
Add to My Manuals
Save this manual to your list of manuals |
Oki B6500dn manual content summary:
- Oki B6500dn | Guide: User's, B6500 (English) - Page 1
59386901_cvr.jpg - Oki B6500dn | Guide: User's, B6500 (English) - Page 2
Information Copyright © 2007 by Oki Data. All Rights Reserved Document Information B6500 User's Guide P/N 59386901, Revision 2.0 March drivers and manuals are available from the web site: http://www.okiprintingsolutions.com Trademark Information Oki and Microline are registered trademarks of Oki - Oki B6500dn | Guide: User's, B6500 (English) - Page 3
, errors, omissions, or missing pages. Never attempt any procedure on the machine that is not specifically described in this manual. Unauthorized operation can cause faults or accidents. OKI is not liable for any problems resulting from unauthorized operation of the equipment. B6500 User's Guide - Oki B6500dn | Guide: User's, B6500 (English) - Page 4
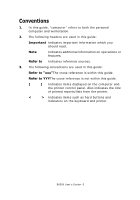
handy for a quick reference on using the printer. This guide is written with the assumption that you are familiar with the basic knowledge and way of operating your computer environment and the network environment. In this manual, safety instructions are described with the following symbol: Always - Oki B6500dn | Guide: User's, B6500 (English) - Page 5
-reference is not within this guide. [ ] Indicates items displayed on the computer and the printer control panel. Also indicates the title of printed reports/lists from the printer. < > Indicates items such as hard buttons and indicators on the keyboard and printer. B6500 User's Guide> 5 - Oki B6500dn | Guide: User's, B6500 (English) - Page 6
instruments This list is not inclusive and no liability is assumed for either its completeness or accuracy. In case of doubt, contact your legal counsel. B6500 User's Guide> 6 - Oki B6500dn | Guide: User's, B6500 (English) - Page 7
14 Switching On the Power 14 Switching Off the Power 14 Power Saver Modes 15 Cancelling/Checking Printing 15 Displaying Optional Accessory Configuration and Paper Tray Specified Time - Timed Job 29 Direct Printing of PDF Files 31 Printing via Electronic Mail - E-mail B6500 User's Guide> 7 - Oki B6500dn | Guide: User's, B6500 (English) - Page 8
92 Troubleshooting 94 When Paper Jams 94 When Problems Occur 98 When the Print Quality is Poor 104 Message List 108 Network Related Troubles 112 Mail Related Troubles 117 Daily Care 118 Replacing the Drum/Toner Cartridge 118 Printing Reports/Lists 121 Checking/Managing the Printer Status - Oki B6500dn | Guide: User's, B6500 (English) - Page 9
tray. Sets the 550 tray. Switches the power of the printer on and off. Pressing the switch to the position switches it on and pressing it to the position switches it off. Raise this when printing on paper larger than Letter/A4 size. For connecting the optional duplex unit. B6500 User's Guide - Oki B6500dn | Guide: User's, B6500 (English) - Page 10
printer to the network for use. 13 USB connector For connecting the USB cable. 14 Serial connector For connecting the serial cable. With Optional Accessories 12 3 4 765 No. 1 2 3 4 Name Description Offset catch tray (optional) Cover D (optional) Rear tray catch tray. Use this tray if - Oki B6500dn | Guide: User's, B6500 (English) - Page 11
this when replacing the drum/toner cartridge and removing jammed paper. Fixes the toner on the paper. Do not touch this when using the printer as it is hot. Transfers the toner image on the surface of the photosensitive drum to the paper. Open this when removing jammed paper. B6500 User's Guide> 11 - Oki B6500dn | Guide: User's, B6500 (English) - Page 12
map (2pages) will print with all the current printer settings. 3 indicator When the light is on, the printer is ready to receive data from the computer. 4 LCD display Displays the setting to move to the required menu, item and candidate value on the display. B6500 User's Guide> 12 - Oki B6500dn | Guide: User's, B6500 (English) - Page 13
Screen for configuring settings related to the printer. This screen appears when you press the button. The initial Menu screen displayed is as follows. Print Jobs Menu Refer to: • Items that can be set on the Menu screen: "Settings on the Control Panel" on page 46 B6500 User's Guide> 13 - Oki B6500dn | Guide: User's, B6500 (English) - Page 14
the memory of this printer will be deleted. 1. By checking the display on the control panel, confirm that the Online printer is not processing any data. "Online" or "Power Saver Mode" should be displayed. 2. Press the power switch to the position to switch the power off. B6500 User's Guide> 14 - Oki B6500dn | Guide: User's, B6500 (English) - Page 15
The printer automatically cancels its power save status once it receives data from the computer. Cancelling/Checking Printing Cancelling Printing To cancel printing, you can either cancel the print job at this printer or at the computer. Cancelling a Print Job at the Printer B6500 User's Guide> 15 - Oki B6500dn | Guide: User's, B6500 (English) - Page 16
of Print Data Checking in Windows Double-click the printer icon of Tray Settings When using this printer as a network printer and with SNMP protocol enabled, you can display on the printer driver, the optional accessory configuration and settings configured at the control panel B6500 User's Guide - Oki B6500dn | Guide: User's, B6500 (English) - Page 17
be used. 2. Click the [Device Options] tab. 3. Click [Get Information from Printer]. NOTE The properties of the printer can be displayed on the printer driver. 4. Click [OK]. The contents of the [Device Options] tab will be updated based on the data obtained from the printer. B6500 User's Guide> 17 - Oki B6500dn | Guide: User's, B6500 (English) - Page 18
the printer driver. Important: • If the paper tray information is not correct, change the settings on the [Set Up] tab of the printer driver before Feed Options include: Auto Resize, Covers, Auto Tray Change, Media Check, and Skip Blank Pages, Tray 1 Settings, and Media Type. **Finishing Mode - Oki B6500dn | Guide: User's, B6500 (English) - Page 19
features in the properties dialog box from the printer icon by selecting [Printers and Faxes] (or [Settings] > [Printers] depending on the OS). Printing on to load the envelopes, using COM-10 envelopes as an example, in trays 1 to 4. Important: • The reverse side of the envelope cannot be printed on - Oki B6500dn | Guide: User's, B6500 (English) - Page 20
according to the application software. Refer to the manual of each application software. 1. From the [File] menu, select [Print]. 2. Select this printer from the drop down list and click [Properties]. 3. Click the [Setup] tab. 4. Select the loaded paper tray from [Source] or click the [Media Type - Oki B6500dn | Guide: User's, B6500 (English) - Page 21
printer properties dialog box differs according to the application software. Refer to the manual guide, remove the transparencies from the output tray after about 20 sheets and then fan them to lower their temperatures. 1. From the [File] menu, select [Print]. 2. Select this printer as the printer - Oki B6500dn | Guide: User's, B6500 (English) - Page 22
on this printer are as follows: „ For tray 1 „ For trays 2 - 4 Long edge: 127 to 900 mm (5 to 35.4 in.) Long edge: 148 to 356 mm (5.8 to 14 in.) Loading Paper" (P. 40). To load long paper in tray 1, follow the procedure below: 1. Pull the paper tray out to its maximum. NOTE > Pull the extendable - Oki B6500dn | Guide: User's, B6500 (English) - Page 23
tray. 3. Push the paper tray completely into the printer. Setting Custom Paper Sizes Before printing, set the custom size on the printer driver machine failure. This is especially true if you configure a bigger size when using a narrow width paper. On the printer driver, size. B6500 User's Guide> 23 - Oki B6500dn | Guide: User's, B6500 (English) - Page 24
3. Click the [Setup] tab. 4. Select the appropriate tray from [Source]. 5. From [Paper Size], select the size of the original document. 6. From [Media Types], select the registered custom size, and then click [OK]. 7. Click [Print] in the [Print] dialog box to start printing. B6500 User's Guide> 24 - Oki B6500dn | Guide: User's, B6500 (English) - Page 25
hard disk may be damaged and erase important data saved in the hard disk. We recommend you back up your data. About Secure Print Secure Print is a feature it is printed. By storing frequently-used data in the printer, you can print the job from the printer control panel, without sending it from the - Oki B6500dn | Guide: User's, B6500 (English) - Page 26
print data stored in the printer by Secure Print. NOTE > You can also delete, without printing, secure print data stored in the printer. Refer to: "Print Jobs Menu" on page 51 1. Press the button. 2. Check that [Print Jobs Menu] is displayed and then press the < > button. B6500 User's Guide - Oki B6500dn | Guide: User's, B6500 (English) - Page 27
flash has been installed, you can use the proof print feature. Important: • We recommend you back up your data. About Proof Print Proof Print is a feature that allows you to store the print data of multiple copies in the hard disk or compact flash, print out only the first set to check - Oki B6500dn | Guide: User's, B6500 (English) - Page 28
as an example. NOTE > The way to display the printer properties dialog box differs according to the application software. Refer to the manual of your respective application software. 1. From the [File] the [Job Identification] group at [Job Pin]. Enter four numeric characters. B6500 User's Guide> 28 - Oki B6500dn | Guide: User's, B6500 (English) - Page 29
printing. At the Control Panel This section explains the procedure to print and delete data stored in the printer by Proof Print. Refer to: "Print Jobs Menu" on page 51 1. Press data in the printer beforehand and then print it out automatically at the specified time. Important: B6500 User's Guide> 29 - Oki B6500dn | Guide: User's, B6500 (English) - Page 30
back up your data. Registering Timed Job The procedure to configure Delayed Print is as follows. This section explains the procedure using WordPad on Windows XP as an example. The procedure is the same for other OS. 1. From the [File] menu, select [Print]. 2. Select this printer as the printer to be - Oki B6500dn | Guide: User's, B6500 (English) - Page 31
Adobe Acrobat 4 and Adobe Acrobat 5 (except one part of the features added by PS 1.4). NOTE > You may not be able to print some PDF files directly by the printer due to the way they were created. When this happens, open the PDF files and use the printer driver to print them. B6500 User's Guide> 31 - Oki B6500dn | Guide: User's, B6500 (English) - Page 32
the printer is connected to a network, enabling it to receive e-mails via TCP/IP communication, e-mails can be sent from the computer to this printer. Printing of e-mail contents and TIFF or PDF attachments can be done from this printer. This feature is known as E-mail Printing. B6500 User's Guide - Oki B6500dn | Guide: User's, B6500 (English) - Page 33
Important: • It is recommended that you back up your data. A = E-Mail B = Prints automatically B A B Environment Settings for E- Attachments That Can Be Sent The following files can be sent as an attachment. • PDF file created by Adobe Acrobat versions 4 & 5 (except one part of the features added by - Oki B6500dn | Guide: User's, B6500 (English) - Page 34
send e-mails from the computer to the printer using Outlook Express as an example. 1. Create mail contents using your mailing software and attach TIFF or PDF files if any. Important: • Only text be incurred every time this printer retrieves data regularly from the mail server. B6500 User's Guide> 34 - Oki B6500dn | Guide: User's, B6500 (English) - Page 35
printer. Using a common e-mail account shared with other users will result in errors. • When the internet connection speed is slow, it takes time to receive huge data such as image data where MTA support is set up in private segments, match the operating configuration. B6500 User's Guide> 35 - Oki B6500dn | Guide: User's, B6500 (English) - Page 36
(8.5 × 11"), Legal (8.5 × 13"), Legal (8.5 × 14") Others: A6*1, COM-10 Envelope*1, Monarch Envelope*1, DL Envelope*1, C5 Envelope*1 Custom*2 (76×127 216×900*3 mm) Statement WEIGHT LOADING CAPACITY 60 - 216 g/m2 (16 - 57.5 lb) 150 sheets (P paper) or 17. 5 mm or below B6500 User's Guide> 36 - Oki B6500dn | Guide: User's, B6500 (English) - Page 37
on the printer driver or loading paper into an unsuitable paper tray for printing may tray. • The printed image may fade due to moisture such as water, rain or vapor. For details, contact service. Standard Paper The following table shows the standard paper for this printer B6500 User's Guide> 37 - Oki B6500dn | Guide: User's, B6500 (English) - Page 38
The following types of paper can be used for printing on this printer. These types of paper are called special media. PAPER NAME PAPER TYPE stick together, remove the transparencies from the output tray after about 20 sheets, and then fan them to lower their temperature. B6500 User's Guide> 38 - Oki B6500dn | Guide: User's, B6500 (English) - Page 39
media, such as heavyweight not listed in the table, contact service. > For details on printing transparencies and envelopes, refer to transparencies (example: V556, V558, V302) • Paper exclusively for ink-jet printer use • Paper that is too thick or thin • Paper that has paper B6500 User's Guide> 39 - Oki B6500dn | Guide: User's, B6500 (English) - Page 40
. • Store the paper in a location not exposed to direct sunlight. Loading Paper Loading Paper in a Paper Tray Refer to: Paper type and size that can be loaded in paper tray: " Usable Paper" (P. 36) 1. Place the paper tray on a flat surface and remove the lid (if installed). B6500 User's Guide> 40 - Oki B6500dn | Guide: User's, B6500 (English) - Page 41
A4 size, slide the left and right lock tabs in the paper tray outwards to unlock them. 4. Hold the grip of the paper tray and pull its extendable part to the front until it reaches its maximum. 5. Squeeze the length guide and slide it to the desired paper size (1). Squeeze the right width - Oki B6500dn | Guide: User's, B6500 (English) - Page 42
page 36 • Setting paper size: "Setting Custom Paper Sizes" on page 43 • Setting paper type: "Setting Paper Types" on page 44 Automatic Tray Selection If you display the properties dialog box of the printer driver and select a paper type for [Specify Paper Type] and [Auto] for [Paper Source] on the - Oki B6500dn | Guide: User's, B6500 (English) - Page 43
Paper Type: Online Help for the printer driver Setting Custom Paper Sizes To print on custom size paper loaded in trays 1 to 4, you must set the printer will automatically detect the size and orientation of the loaded paper. 1. Press the button to display the Menu screen. B6500 User's Guide - Oki B6500dn | Guide: User's, B6500 (English) - Page 44
of paper loaded in trays 1 to 4. Toner may not fuse properly on the paper, resulting in dirty and poor quality printouts. • Changes in paper type settings on the printer driver are not reflected in this printer. Refer to: • Paper sizes that can be loaded: "Usable Paper" on page 36 B6500 User's Guide - Oki B6500dn | Guide: User's, B6500 (English) - Page 45
42 lb) 157 - 216 g/m2 (42 - 57.5 lb) - PAPER TYPE SET IN TRAY Plain (default) Recycled Thick 1 Thick 2 Transparency Setting on the Control Panel 1. Press the < . 3. Press the < > or < > button until [Tray X Media Type] is displayed (X = the tray number you wish to set). Then press the < > button - Oki B6500dn | Guide: User's, B6500 (English) - Page 46
and change the printer settings. Web access to the printer is also discussed. Control that allow you to view and change the printer settings. Name Description button with all the current printer settings. When the light is on, the printer is ready to receive data from the computer. Displays - Oki B6500dn | Guide: User's, B6500 (English) - Page 47
also displays menus, submenus, and printer settings when you are in the menu system. The display contains two lines of text, each with a maximum of sixteen characters. Current printer status Printing USB Port Receiving Data (USB, Net, LPD, etc.) PCL Language (PCL, PS, etc.) B6500 User's Guide> 47 - Oki B6500dn | Guide: User's, B6500 (English) - Page 48
the Control Panel Menus When you press the MENU button on the control panel, you enter the printer's menu system. At that point, the first line of the display lists the active menu. You • Network Menu • Sys Adjust Menu • Date/Time Menu • Maintenance Menu • Usage Menu B6500 User's Guide> 48 - Oki B6500dn | Guide: User's, B6500 (English) - Page 49
" on the first line of the display. 7. Press the Select button to print the list, or press the CANCEL button to exit the menu system. B6500 User's Guide> 49 - Oki B6500dn | Guide: User's, B6500 (English) - Page 50
Menu USB Menu Network Menu Sys Adjust Menu Date/Time Menu Maintenance Menu Usage Menu Flash Menu Disk Menu Comp FLASH Menu Job Accounting Spooling B6500 User's Guide> 50 - Oki B6500dn | Guide: User's, B6500 (English) - Page 51
"****" is displayed on the second line. NOTE The password is entered by you at the PC using the print driver, see "Print Confidential Document - Secure Print" on page 25. 4. To enter the first digit of your password the following table to access and change the system settings. B6500 User's Guide> 51 - Oki B6500dn | Guide: User's, B6500 (English) - Page 52
Submenu Default Setting Enter Password User Selected Available Settings User Selected Procedure for Changing Setting See Steps Above B6500 User's Guide> 52 - Oki B6500dn | Guide: User's, B6500 (English) - Page 53
print the displayed submenu. Use the procedures in the following table to access and change the printer information settings: Submenus Default Setting Print Menu Map This function allows you to print the menu Postscript fonts list. Press SELECT to print the FX Fonts list. B6500 User's Guide> 53 - Oki B6500dn | Guide: User's, B6500 (English) - Page 54
Submenus Default Setting Print Demo This function allows you to print a demo page. Print Error Log This function allows you to print the error log. Available Settings Procedure for Changing Setting Press SELECT to print a Demo Page. Press SELECT to print the Error Log. B6500 User's Guide> 54 - Oki B6500dn | Guide: User's, B6500 (English) - Page 55
Print Menu provides access to the print setup procedures. These settings are defaults for the printer. A print job can specify and use other settings. Use the following procedure to enter > buttons toggle between Long Edge and Short Edge. Press to save this setting. B6500 User's Guide> 55 - Oki B6500dn | Guide: User's, B6500 (English) - Page 56
allows you to set the print density. Toner Save OFF Mode This submenu allows you to set the printer to draft mode Available Settings Tray 1 Tray 2 Tray 3 Tray 4 On Off Procedure for Changing Setting to toggle between ON and OFF. Press to save this setting. B6500 User's Guide> 56 - Oki B6500dn | Guide: User's, B6500 (English) - Page 57
between Portrait and Landscape. Press to save this setting. Press < > or < > buttons to increase or decrease the setting. Press to save this setting. B6500 User's Guide> 57 - Oki B6500dn | Guide: User's, B6500 (English) - Page 58
Media Menu provides access to the paper tray settings. Use the following procedure to . Use the procedures in the following table to access and change the printer media settings: Submenus Default Setting Tray1 Auto- On Sense This submenu allows to save the selected size. B6500 User's Guide> 58 - Oki B6500dn | Guide: User's, B6500 (English) - Page 59
sense feature on or off. Tray2 Paper size This submenu allows you to set the media size. Tray 2 AutoSense must be off. Letter (US) else (A4) Tray2 Media Type This submenu allows you > or < > button to scroll through the available media types Press to set a type. B6500 User's Guide> 59 - Oki B6500dn | Guide: User's, B6500 (English) - Page 60
size auto sense feature on or off. Tray3 Papersize This submenu allows you to set the media size. Tray 3 AutoSense must be off. Letter (US) else (A4) Tray3 Media Type This submenu allows you to > button Off to toggle on or off. Press to save the selected size. B6500 User's Guide> 60 - Oki B6500dn | Guide: User's, B6500 (English) - Page 61
Setting Tray4 Papersize This submenu allows you to set the media size. Tray 4 AutoSense must be off. Letter (US) else (A4) Letter, Dimen Sets the paper length 11.00 in (279.4mm) 5.83 - 14.00 in (148 255.6mm) Press < > or < > buttons to select the Y dimension Press to set - Oki B6500dn | Guide: User's, B6500 (English) - Page 62
.4mm) Available Settings Procedure for Changing Setting 3.88 - 8.50 in (98.6 - 216mm) Press < > or < > button to select the X dimension Press to set dimension. 5.83 - 14.00 in (148 255.6mm) Press < > or < > button to select the Y dimension Press to set dimension - Oki B6500dn | Guide: User's, B6500 (English) - Page 63
Changing Setting Power Save 15 Time This submenu allows you to change the time (in minutes) when the printer enters the Power Saver Mode. 1 to 999 Press < > or < > buttons to select the < > buttons to scroll through the selections. Press to save the selection. B6500 User's Guide> 63 - Oki B6500dn | Guide: User's, B6500 (English) - Page 64
more data to process. 00020 Toner Low This submenu sets the printer to either stop or continue printing when it goes into a low toner Continue and Stop. Press to save this setting. On Off English and other supported languages Press < > or < > buttons to toggle between On and Off. Press - Oki B6500dn | Guide: User's, B6500 (English) - Page 65
the selections. Press to save the selection. 1.00 - 1008.00 Press < > or < > buttons to scroll through the selections. Press to save the selection. B6500 User's Guide> 65 - Oki B6500dn | Guide: User's, B6500 (English) - Page 66
. Press to save the selection. LF LF+CR Press < > or < > buttons to toggle between LF and LF+CR. Press to save the selection. B6500 User's Guide> 66 - Oki B6500dn | Guide: User's, B6500 (English) - Page 67
to scroll through the selections. Press to save the selection. Press < > or < > buttons to scroll through the selections. Press to save the selection. B6500 User's Guide> 67 - Oki B6500dn | Guide: User's, B6500 (English) - Page 68
to scroll through the selections. Press to save the selection. Press < > or < > buttons to scroll through the selections. Press to save the selection. B6500 User's Guide> 68 - Oki B6500dn | Guide: User's, B6500 (English) - Page 69
between Enable and Disable. Press to save the selection. Press < > or < > buttons to toggle between EASCII and RAW. Press to save the selection. B6500 User's Guide> 69 - Oki B6500dn | Guide: User's, B6500 (English) - Page 70
the Serial Menu settings: Submenus Serial Default Setting Enable Baud Rate 9600 Data Bits 8 Stop Bits 1 Available Settings Procedure for Changing Setting Enable Disable Press < > or < > 2 buttons to toggle between 1 and 2. Press to save the selection. B6500 User's Guide> 70 - Oki B6500dn | Guide: User's, B6500 (English) - Page 71
Default Setting None DTR Ready/ Off Busy DTR On1/Off1 Off DTR Error Off RTS Ready/ Off Busy RTS On1/Off1 Off RTS Error Off XON Ready/ On Busy Available Settings None Even Odd Off < > buttons to toggle between Off and On. Press to save the selection. B6500 User's Guide> 71 - Oki B6500dn | Guide: User's, B6500 (English) - Page 72
Submenus Default Setting XON On1/Off1 On XON Error Off DTR Polarity High RTS Polarity High Robust XON Off PS Protocol ASCII Available Settings Off save the selection. Press < > or < > buttons to toggle between ASCII and RAW. Press to save the selection. B6500 User's Guide> 72 - Oki B6500dn | Guide: User's, B6500 (English) - Page 73
between Enable and Disable. Press to save the selection. Press < > or < > buttons to toggle between ASCII and RAW. Press to save the selection. B6500 User's Guide> 73 - Oki B6500dn | Guide: User's, B6500 (English) - Page 74
Network Menu The Network Menu provides access to the printer network settings. Use the following procedure to enter the network menu: 1. Press to save the selection. Press < > or < > buttons to toggle between Automatic and Manual. Press to save the selection. B6500 User's Guide> 74 - Oki B6500dn | Guide: User's, B6500 (English) - Page 75
of numbers. When the last set of numbers is set, press to save the IP address. Execute Execute Press to initialize the NIC. B6500 User's Guide> 75 - Oki B6500dn | Guide: User's, B6500 (English) - Page 76
selections. Press to save the selection. ASCII ASCII RAW Press < > or < > buttons to toggle between ASCII and RAW. Press to save the selection. B6500 User's Guide> 76 - Oki B6500dn | Guide: User's, B6500 (English) - Page 77
Sys Adjust Menu The Sys Adjust Menu provides access to the tray adjustment settings. Use the following procedure to enter the Sys Adjust menu: 1. Press the MENU button on the press < > (decrease number) to move the image to the left. Press to save the selection. B6500 User's Guide> 77 - Oki B6500dn | Guide: User's, B6500 (English) - Page 78
number) to move the image to the down or press < > (decrease number) to move the image to the up. Press to save the selection. B6500 User's Guide> 78 - Oki B6500dn | Guide: User's, B6500 (English) - Page 79
selected position. Press the < > to select the digit and move to the next position Press after changing the last digit to save this setting. B6500 User's Guide> 79 - Oki B6500dn | Guide: User's, B6500 (English) - Page 80
Press after changing the last digit to save this setting. Press < > or < > to toggle between Enable and Disable. Press to save this setting. B6500 User's Guide> 80 - Oki B6500dn | Guide: User's, B6500 (English) - Page 81
Date/Time Menu The Date/Time Menu provides access to the printer time settings. Use the following procedure to enter the date/time menu: 1. Press the MENU button on the control Noon, 1 PM to 11 PM Press < > or < > to scroll through the hours. Press to set the hour. B6500 User's Guide> 81 - Oki B6500dn | Guide: User's, B6500 (English) - Page 82
through the offset selections. Press to set the offset hours. Press < > or < > to toggle between 0 and 30. Press to set the offset hours. B6500 User's Guide> 82 - Oki B6500dn | Guide: User's, B6500 (English) - Page 83
Maintenance Menu The Maintenance Menu provides access to the printer maintenance settings. Use the following procedure to enter the maintenance menu: 1. Press the MENU button on menu. Press < > or < > to toggle between enable and disable. Press to save the setting. B6500 User's Guide> 83 - Oki B6500dn | Guide: User's, B6500 (English) - Page 84
to the printer status. toner remaining. Press to display the paper supply level in tray 1. Press to display the paper supply level in tray 2. Press to display the paper supply level in tray 3. Press to display the paper supply level in tray 4. B6500 User's Guide - Oki B6500dn | Guide: User's, B6500 (English) - Page 85
Submenus Procedure for Changing Setting Data Security When set to ON, as data is deleted, the location where the data was stored, is overwritten by random data. When set to OFF, the data is deleted. Press < > > to scroll through the files. Press to delete the file. B6500 User's Guide> 85 - Oki B6500dn | Guide: User's, B6500 (English) - Page 86
directories. Press to print the FLASH summary. WARNING All files on the FLASH DIMM will be deleted if the Format FLASH function is selected. B6500 User's Guide> 86 - Oki B6500dn | Guide: User's, B6500 (English) - Page 87
Submenus Procedure for Changing Setting Data Security When set to ON, as data is deleted, the location where the data was stored, is overwritten by random data. When set to OFF, the data is deleted. Press < > > to scroll through the files. Press to delete the file. B6500 User's Guide> 87 - Oki B6500dn | Guide: User's, B6500 (English) - Page 88
directories. Press to print the Disk summary. WARNING All files on the hard disk will be deleted if the Format Disk function is selected B6500 User's Guide> 88 - Oki B6500dn | Guide: User's, B6500 (English) - Page 89
Submenus Procedure for Changing Setting Data Security When set to ON, as data is deleted, the location where the data was stored, is overwritten by random data. When set to OFF, the data is deleted. Press < to scroll through the files. Press to delete the file. B6500 User's Guide> 89 - Oki B6500dn | Guide: User's, B6500 (English) - Page 90
to print the Compact Flash summary. WARNING All files on the compact flash will be deleted if the Format Cmp Flash function is selected B6500 User's Guide> 90 - Oki B6500dn | Guide: User's, B6500 (English) - Page 91
the Job Accounting Summary Report. Press to reset the Job Accounting Information. This will delete all stored information related to jobs received by the printer. B6500 User's Guide> 91 - Oki B6500dn | Guide: User's, B6500 (English) - Page 92
< > to toggle between Yes and No. Press to save this setting. Press < > or < > to scroll through the settings. Press to save this setting. B6500 User's Guide> 92 - Oki B6500dn | Guide: User's, B6500 (English) - Page 93
. Press < > or < > to select the file. Press to delete the file. Press < > or < > to scroll through the settings. Press to save this setting. B6500 User's Guide> 93 - Oki B6500dn | Guide: User's, B6500 (English) - Page 94
, and contact your dealer or service. Following the message on the toner cartridge is displayed. Inside Cover A Follow the procedure below to remove any jammed paper when the control panel displays the following messages: "Paper Jam Open Cover A" or "Remove cartridge Clear jam" B6500 User's Guide - Oki B6500dn | Guide: User's, B6500 (English) - Page 95
paper jam. Always use the printer with the tray open. Inside Paper Tray Follow the procedure below to remove any jammed paper when messages are displayed. Pull out all trays. Clear jam and close Covers. Paper Trays Pull out the tray(s) and follow the procedure to remove paper. B6500 User's Guide> 95 - Oki B6500dn | Guide: User's, B6500 (English) - Page 96
completely back into the printer. 2. Open and close cover A. Doing this will clear the error message. Cover B Remove the rear tray when opening the back cover. Raise the lever as shown in the diagram and open the cover B (1). After opening cover B, open the cover of the fuser unit (2) and remove any - Oki B6500dn | Guide: User's, B6500 (English) - Page 97
Cover C Duplex unit Remove the rear tray when opening the back cover. Push up the lever shown in the diagram to open the cover. Cover D Offset catch tray B6500 User's Guide> 97 - Oki B6500dn | Guide: User's, B6500 (English) - Page 98
Occur Before treating the problem as a machine breakdown, refer to the following table and check the printer condition again. WARNING • Never open or remove machine covers that are secured with screws unless specifically instructed in the user guide. A high voltage component can cause electric - Oki B6500dn | Guide: User's, B6500 (English) - Page 99
the port status of the interface. Is the computer environment correctly set up? Check the computer environment, such as the printer driver. Is there an error message displayed on the control panel? Check the displayed message and rectify the error. " Message List" (P. 108) B6500 User's Guide> 99 - Oki B6500dn | Guide: User's, B6500 (English) - Page 100
rectify yourself has occurred. Record the displayed error message or error code, switch off the power, pull out the power plug from the outlet, and then contact service. Did you switch on the power of the computer after switching on the power to the printer? Pressing the button cancels the - Oki B6500dn | Guide: User's, B6500 (English) - Page 101
the printer driver. Top section of printed document is missing. Text is reduced. Online Help for the printer driver Are the paper tray guides set in the correct positions? Set the length guide and the right width guide in the correct positions. " Loading Paper in a Paper Tray" (P. 40) B6500 User - Oki B6500dn | Guide: User's, B6500 (English) - Page 102
. " Usable Paper" (P. 36) Is the paper tray set correctly? Push the paper tray completely into the printer. Is the printer placed on a flat location? Place the printer on a stable surface. Setup and Quick Reference Guide Safety Notes Are the paper tray guides set in the correct positions? Set the - Oki B6500dn | Guide: User's, B6500 (English) - Page 103
paper tray set correctly? Push the paper tray completely into the printer. Are there foreign objects inside the printer? Switch off the power and remove any foreign objects inside the printer. If the object cannot be removed unless the printer is disassembled, contact service. B6500 User's Guide - Oki B6500dn | Guide: User's, B6500 (English) - Page 104
are raised. Open cover B of this printer and push down the levers at both ends of the fuser unit. Black spots or streaks are printed. The drum/toner cartridge is defective or damaged. Replace with a new drum/toner cartridge. " Replacing the Drum/Toner Cartridge" (P. 118) B6500 User's Guide> 104 - Oki B6500dn | Guide: User's, B6500 (English) - Page 105
The whole piece of paper is printed black. " Usable Paper" (P. 36) The drum/toner cartridge is defective or damaged. Replace with a new drum/toner cartridge. " Replacing the Drum/Toner Cartridge" (P. 118) This may be due to breakdown of high voltage power. Contact service. B6500 User's Guide> 105 - Oki B6500dn | Guide: User's, B6500 (English) - Page 106
cartridge. Replace with a new drum/ toner cartridge. " Replacing the Drum/Toner Cartridge" (P. 118) The paper tray guides are not set in the correct positions. Set the length guide and the right width guide in the correct positions. " Loading Paper in a Paper Tray" (P. 40) B6500 User's Guide> 106 - Oki B6500dn | Guide: User's, B6500 (English) - Page 107
printer driver or the control panel is correctly set. " Setting Paper Types" (P. 44) The Draft Mode feature is turned on and the resolution is set at a low level on the printer driver. Change the settings on the [Detailed Settings] or [Graphics] tab of the printer driver. B6500 User's Guide> 107 - Oki B6500dn | Guide: User's, B6500 (English) - Page 108
Service Cancel Job Canceling Job Clock Not Set Close Duplexer Close Rear Cover Close Top Cover Code FLASH Error Command Format Completed Cover Open Condition/Reason/Action Format error Recovery message displayed when top cover is open. Defective Code Flash - user forced into Firmware Upgrade. Bad - Oki B6500dn | Guide: User's, B6500 (English) - Page 109
that paper needs to be put into Tray 3. A user prompt that paper needs to be put into Tray 4. Face Up Tray Failure. Displayed for Main Motor Failure. Used for error/warning when Maintenance is required (replace fuser/rollers/etc.) Paper jam detected inside the printer. B6500 User's Guide> 109 - Oki B6500dn | Guide: User's, B6500 (English) - Page 110
used to report Network Interface Communication Failure. Used for display of Network Interface error code (Net1: Error yy) NVRAM failure message. Optional face-down output tray (offset-capable) Error message displayed for Offset Tray Unit Failure. Error message displayed when optional output bin - Oki B6500dn | Guide: User's, B6500 (English) - Page 111
Message ROS Failure SELECT to Format Service Error Toner Low Toner Missing Toner Out Too Many Filters Tray 1 Missing Tray 2 Missing Tray 3 Missing Tray 4 Missing User FLASH User FLASH Error Waiting Warming Up Write Condition/Reason/Action Error message displayed for ROS failure. User prompt - Oki B6500dn | Guide: User's, B6500 (English) - Page 112
Using TCP/IP This section describes how to identify the cause and fix an error when a problem occurs in the TCP/IP environment. For the troubles that occur in other environments, refer to the Network Print Environment User Guide. When the printer is not printing This section explains how to fix the - Oki B6500dn | Guide: User's, B6500 (English) - Page 113
printer is switched off after a print instruction has been sent from a computer. Or the print instruction is sent to the printer which is switched off. Print instructions from multiple computers are sent to the printer free space available. Switch on the printer. None (Printing will be resumed - Oki B6500dn | Guide: User's, B6500 (English) - Page 114
of [LPD Spool] and compare it with the print data which was sent in the single print instruction. An irrecoverable error has occurred during printing. The transport protocol is different off and then on the printer. Select the same transport protocol as that of the computer. B6500 User's Guide> 114 - Oki B6500dn | Guide: User's, B6500 (English) - Page 115
for the web browser Wait for a while as instructed. If the problem persists, refresh the Web browser. If nothing happens, check if the printer is working properly. Are you using the supported OS and Web browser? Refer to "Checking/Managing the Printer Status on the Computer" on page 123 to check - Oki B6500dn | Guide: User's, B6500 (English) - Page 116
Symptom Clicking the [Submit] button prompts messages such as "no data" or "the server has returned invalid or unrecognizable response". Reason/Action Are the user name and password correct? Enter the correct user name and password. Switch off and then on the printer. B6500 User's Guide> 116 - Oki B6500dn | Guide: User's, B6500 (English) - Page 117
troubles when the mail notification services and E-mail Printing features are used. Symptom Reason/Action Cannot perform E-mail printing. During E-mail printing, the attached PDF file was not printed. During mail notification services, the printer network administrator. B6500 User's Guide> 117 - Oki B6500dn | Guide: User's, B6500 (English) - Page 118
Toner Cartridge The drum/toner cartridge includes the toner and the photosensitive drum. When it is about time to replace the drum/toner toner cartridge. When this message is displayed, replace the drum/toner cartridge. Ready to print Repl. Drum/Toner Replace Drum/ Toner toner drum/toner cartridge - Oki B6500dn | Guide: User's, B6500 (English) - Page 119
within 1 year after opening it. Replacing the Drum/Toner Cartridge 1. Remove any output paper and open cover A. NOTE > When the offset catch tray (optional) is installed, fold the tray first before opening cover A. Important: • Do not touch any parts inside the printer. B6500 User's Guide> 119 - Oki B6500dn | Guide: User's, B6500 (English) - Page 120
/toner cartridge by the grip and insert it into the slot inside the printer. Important: • Do not touch any parts inside the printer. • Ensure that the drum/toner cartridge is firmly set. • After opening cover A, remove any dust or stains inside the printer with a dry clean cloth. B6500 User's Guide - Oki B6500dn | Guide: User's, B6500 (English) - Page 121
Information Menu" on page 53 Types of Reports/Lists Other than print data from the computer, this printer has the feature to print the following reports/lists. REPORTS DESCRIPTION System Settings List Press Print Error Log Meter Report Press PCL Fonts List See: "Information Menu" on - Oki B6500dn | Guide: User's, B6500 (English) - Page 122
containing information about the selected storage device, including a list of all the current existing files and directories. Use the following procedure to enter the menu: B6500 User's Guide> 122 - Oki B6500dn | Guide: User's, B6500 (English) - Page 123
89 Checking/Managing the Printer Status on the Computer When the printer is installed in a TCP/IP environment, you can check printer status and configure settings using the remaining volume of consumables and paper loaded in this printer via the network. Settings for network This section explains - Oki B6500dn | Guide: User's, B6500 (English) - Page 124
® Windows® Me Operating System • Microsoft® Windows NT® Workstation 4.0 (Service Pack 4 or later) • Microsoft® Windows® 2000 Professional • Microsoft to bypass the proxy server and specify the printer's address directly. NOTE > Specifying the printer's address via the proxy server may slow down - Oki B6500dn | Guide: User's, B6500 (English) - Page 125
the Printer To use Printer Web Page, the IP address of this printer must be set and the printer web page [Web] enable under the [Network] menu. When [Printer Web of the web browser, enter the IP address or URL of the printer and then press the key. • Example of an IP address entry • Example - Oki B6500dn | Guide: User's, B6500 (English) - Page 126
the IP address for receiving print data is 129.249.110.* (* printer can send an e-mail with the following report to a specified e-mail address: completed print jobs from the computer, error history, list of rejected print jobs/ e-mails. This feature is known as Mail Notice Service. B6500 User's Guide - Oki B6500dn | Guide: User's, B6500 (English) - Page 127
the printers Web Server Notifies the status of print jobs (completed, cancelled or confirm) from the computer (set in driver). Off-line Consumable message Toner low / toner out Paper low / paper out Paper Jam Cover open Stacker error Mass storage error Recoverable error Service call required - Oki B6500dn | Guide: User's, B6500 (English) - Page 128
] on the taskbar, then select [Printers and Faxes]. 2. Click the icon of this printer, and then select [Properties] from the [File] menu. 3. Select the [Job Options] tab. 4. Check the [Email on completion] check box and enter an email address for notification [Email Address]. B6500 User's Guide> 128 - Oki B6500dn | Guide: User's, B6500 (English) - Page 129
until [Usage Menu] is displayed and then press the < > button. 3. Press the < > or < > button until [Page Count] is displayed. 4. After checking, press the button. B6500 User's Guide> 129 - Oki B6500dn | Guide: User's, B6500 (English) - Page 130
detergent may enter the printer through a gap and cause problems. Never use cleaning agents other than water or neutral detergent. Cleaning the Interior After clearing paper jams or replacing the drum/toner cartridge, inspect the inside of the printer before closing cover A. B6500 User's Guide> 130 - Oki B6500dn | Guide: User's, B6500 (English) - Page 131
wrapped around the heat roller, do not try to remove it bym yourself to avoid injuries or burns. Switch off the machine immediately, and contact service. • Remove any remaining pieces of paper. • Remove any dust or stains with a clean dry cloth. Cleaning the Feed Roll When feeding cannot be done - Oki B6500dn | Guide: User's, B6500 (English) - Page 132
The following procedure explains how to clean the feed roll set in the paper tray. Follow this procedure also when cleaning the feed rolls inside of the printer and the tray module. NOTE > The feed roll is a regular replacement part. 1. Pull the paper tray out of the printer. B6500 User's Guide> 132 - Oki B6500dn | Guide: User's, B6500 (English) - Page 133
diagram) down (1), widen the tab on the feed roll to loosen it (2) and then slowly remove the feed roll from the shaft of the paper tray (3). 3. Wipe the rubber parts with a wet but well-wrung soft cloth. 4. Turn the short tab of the feed roll to the right and slowly push - Oki B6500dn | Guide: User's, B6500 (English) - Page 134
printer. • The machine, without the optional accessories, paper trays, consumables and paper, weighs 18.8 kg. When moving the equipment, make sure that there are two or more persons carrying it. • When lifting the machine, be sure to observe the following points, failure : B6500 User's Guide> 134 - Oki B6500dn | Guide: User's, B6500 (English) - Page 135
drum/toner cartridge back into its original aluminium bag or wrap it with a thick cloth to prevent it from being exposed to strong light. 8. Close cover A securely. 9. Lift the printer and move it gently. If the printer is to be moved over a long distance, pack it inside a box. B6500 User's Guide - Oki B6500dn | Guide: User's, B6500 (English) - Page 136
16U:PC-775 2010Z:SERCROAT 1 9N:ISO L9 2009Z:GREEK-737 2008Z:ARABIC 864 8U:Roman 8 0N:ISO 8859-1 2N:ISO 8859-2 5N:ISO 8859-5 B6500 User's Guide> 136
-
 1
1 -
 2
2 -
 3
3 -
 4
4 -
 5
5 -
 6
6 -
 7
7 -
8
-
9
-
10
-
11
-
12
-
13
-
14
-
15
-
16
-
17
-
18
-
19
-
20
-
21
-
22
-
23
-
24
-
25
-
26
-
27
-
28
-
29
-
30
-
31
-
32
-
33
-
34
-
35
-
36
-
37
-
38
-
39
-
40
-
41
-
42
-
43
-
44
-
45
-
46
-
47
-
48
-
49
-
50
-
51
-
52
-
53
-
54
-
55
-
56
-
57
-
58
-
59
-
60
-
61
-
62
-
63
-
64
-
65
-
66
-
67
-
68
-
69
-
70
-
71
-
72
-
73
-
74
-
75
-
76
-
77
-
78
-
79
-
80
-
81
-
82
-
83
-
84
-
85
-
86
-
87
-
88
-
89
-
90
-
91
-
92
-
93
-
94
-
95
-
96
-
97
-
98
-
99
-
100
-
101
-
102
-
103
-
104
-
105
-
106
-
107
-
108
-
109
-
110
-
111
-
112
-
113
-
114
-
115
-
116
-
117
-
118
-
119
-
120
-
121
-
122
-
123
-
124
-
125
-
126
-
127
-
128
-
129
-
130
-
131
-
132
-
133
-
134
-
135
-
136
 |
 |

59386901_cvr.jpg