Oki CX1145MFP CX1145 MFP Operator Manual for Fax Function
Oki CX1145MFP Manual
 |
View all Oki CX1145MFP manuals
Add to My Manuals
Save this manual to your list of manuals |
Oki CX1145MFP manual content summary:
- Oki CX1145MFP | CX1145 MFP Operator Manual for Fax Function - Page 1
CX1145 MFP Operators Manual for Fax Function 59313901, Rev. 1.0 - Oki CX1145MFP | CX1145 MFP Operator Manual for Fax Function - Page 2
Transmission ...105 8. Onramp Gateway...107 9. Offramp Gateway...109 10. Save as File ...111 6. PRINTING LISTS AND REPORTS ...115 1. Manually Printing Lists & Reports 116 2. Automatically Printing Lists & Reports 120 • Automatically printing lists & reports 120 • Setting the lists and reports - Oki CX1145MFP | CX1145 MFP Operator Manual for Fax Function - Page 3
• Setting duplex printing ...163 • Setting the rotate sort (Alternation 166 6. Setting Recovery Transmission ...168 8. TROUBLESHOOTING ...171 1. When The Following Messages Appear 172 2. Transmission Trouble ...173 3. Reception Trouble...174 9. SPECIFICATIONS ...175 1. Main Specifications ...176 2 - Oki CX1145MFP | CX1145 MFP Operator Manual for Fax Function - Page 4
OKI fax unit GD-1201. This Operator's Manual describes the following: • How to use the Fax functions • How to perform a Fax communication • How to inspect this equipment and perform its maintenance • How to remedy Fax communication problems assets, or loss of data. Note: Indicates information to - Oki CX1145MFP | CX1145 MFP Operator Manual for Fax Function - Page 5
either an individual destination or a registered group of destinations). The Internet Fax can be used in combination with this multi-address transmission. • A3-Size Data Transmission and Recording A3/LD originals such as technical drawings can be transmitted without changing their size. The received - Oki CX1145MFP | CX1145 MFP Operator Manual for Fax Function - Page 6
to make a call or to receive a call. (See the oper- ator's manual of your telephone set for details.) • The originals stored in the memory might be deleted due to the power failure. Check the communication status. • If the data of originals stored in a memory has been deleted due to the power failure, - Oki CX1145MFP | CX1145 MFP Operator Manual for Fax Function - Page 7
- Oki CX1145MFP | CX1145 MFP Operator Manual for Fax Function - Page 8
1. BEFORE USING 1 1. Description of Each Component 8 • Main components...8 • Configuration of options ...9 • Control panel...10 • Touch panel...12 • Connecting cables...14 7 - Oki CX1145MFP | CX1145 MFP Operator Manual for Fax Function - Page 9
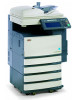
of Each Component Main components 1 OKI CX1145 MFP 1. Front cover 2. Drawers 3. Operator's Manual pocket (Back side) 4. Power switch 5. Automatic duplexer 6. Bypass tray 7. Paper size indicator 8. Original scale 9. Scanning area 10. Receiving tray 11. Color toner (Cyan/Magenta/Yellow) 12 - Oki CX1145MFP | CX1145 MFP Operator Manual for Fax Function - Page 10
Configuration of options 2 1 1 1. FAX Unit (GD-1201) This unit enables you to transmit and receive FAX data. 2. 2nd Line Board (GD-1260) This board enables the use of 2 lines. 9 - Oki CX1145MFP | CX1145 MFP Operator Manual for Fax Function - Page 11
FAX settings (including a default setting change.) See the User Functions Guide for the functions enabled by this button. 3. [TEMPLATE] button Use in the future. 5. [e-FILING] button Use this button to access saved image data. 6. [SCAN] button Use this button to use the scanning function. 7. [COPY - Oki CX1145MFP | CX1145 MFP Operator Manual for Fax Function - Page 12
in the department code or user information, otherwise the copier function cannot be used. For the department code or user management, see the User Functions Guide. 13. [ENERGY SAVER] button Use this button when you want to shut down the equipment or when you want the equipment to enter into the - Oki CX1145MFP | CX1145 MFP Operator Manual for Fax Function - Page 13
jam is blinking, see Chapter 9 "BLINKING GRAPHIC SYMBOLS" in the Operator's Manual for Basic Function to correct the error. 1 3 2 4 1. Message following information is shown here: • Equipment status • Operation instruction • Cautionary messages • Transmission resolution • Number of destinations - Oki CX1145MFP | CX1145 MFP Operator Manual for Fax Function - Page 14
Clearing and canceling function selected 1 When you press the selected button (highlighted or shaded) again, the function selected with this button is cleared. To quit (cancel) the setting, press the [CANCEL] button at the bottom of the touch panel (or the [ALL CLEAR] button on the address book - Oki CX1145MFP | CX1145 MFP Operator Manual for Fax Function - Page 15
the equipment is turned OFF before connecting the cables. 1 Do not connect this equipment and a telephone to a telephone connector in parallel. OKI CX1145 MFP 1 2 3 1. LINE2 2. LINE 3. TEL Connect a telephone line when the 2nd Line Board (optional) is installed. Connect a telephone line. Connect - Oki CX1145MFP | CX1145 MFP Operator Manual for Fax Function - Page 16
2. SENDING A FAX 2 1. Transmission Mode...16 2. Preparation for Transmission 18 3. About Originals ...19 • Original size/Original scanning range 19 • Setting originals...20 4. Setting the Transmission Conditions 23 • Variety of optional functions ...23 • Setting the transmission conditions 25 • - Oki CX1145MFP | CX1145 MFP Operator Manual for Fax Function - Page 17
the password to the document. • Mailbox Transmission You can have confidential, bulletin board and multi-address relay mail communication, transmission box with remote Faxes that support the ITU-T Mailbox functions. 16 2.SENDING A FAX - Oki CX1145MFP | CX1145 MFP Operator Manual for Fax Function - Page 18
the Fax communication network, you can combine 2 or more dialing operations (by address book and direct entry), input and send information such as service codes one after another. 2 • Batch Transmission The system will automatically send 2 or more reserved jobs to one remote Fax at a time. This - Oki CX1145MFP | CX1145 MFP Operator Manual for Fax Function - Page 19
send more than one Fax, entering the department code, user ID and password, etc. is necessary for each transmission. For these operations, see the Operator's Manual for Basic Functions. 18 2.SENDING A FAX - Oki CX1145MFP | CX1145 MFP Operator Manual for Fax Function - Page 20
3. About Originals Original size/Original scanning range Original size The following table shows the size and thickness of originals that can be transmitted via this system. Setting Position Original Type Maximum Original Size Number that Remarks Can be Set 2 Original Glass Sheets Three- - Oki CX1145MFP | CX1145 MFP Operator Manual for Fax Function - Page 21
3.About Originals (Cont.) Setting originals When setting originals on the glass Originals are sent in the order they are placed on the original glass in both memory TX and direct TX modes. 2 1 Raise the Original Cover (optional) or the Reversing Automatic Document Feeder (optional), and place - Oki CX1145MFP | CX1145 MFP Operator Manual for Fax Function - Page 22
Precautions for using the Reversing Automatic Document Feeder Do not use the following 1 to 8 type originals as they may misfeed or become damaged: 1: Badly wrinkled or folded originals; in particular, originals whose leading edge is curled may fail to be correctly fed. 2: Originals with carbon - Oki CX1145MFP | CX1145 MFP Operator Manual for Fax Function - Page 23
uppermost page is the first to be scanned and sent. 2 1 After aligning the edges of originals, place them with their face up and slide the guides to the width of the originals. • LT/A4 size originals are rotated 90 degrees so that they are sent as LT-R/A4-R originals. • If a mixture - Oki CX1145MFP | CX1145 MFP Operator Manual for Fax Function - Page 24
the image density according to the contrast of the original to be sent. AUTO, MANUAL (11 variations) * In the automatic exposure mode, the equipment automatically judges the contrast occur during Fax transmissions. Even when the transmitted data has been affected by noise during communication, this - Oki CX1145MFP | CX1145 MFP Operator Manual for Fax Function - Page 25
* To use this function, the remote Fax must be capable of setting an ITU-T compatible sub- address or password. For details, contact your nearest Service Center. • Subject, Body: Subject and body can be added when using the Internet Fax function. * When originals are placed on the original glass - Oki CX1145MFP | CX1145 MFP Operator Manual for Fax Function - Page 26
Setting the transmission conditions 1 Place the original(s). • P.20 "Setting originals" 2 Press the [FAX] button on the control panel. 2 3 Press the [ADDRESS] button to enter the address menu, and then press the [OPTION] button. 4 Press the desired buttons to set the transmission conditions, and - Oki CX1145MFP | CX1145 MFP Operator Manual for Fax Function - Page 27
4.Setting the Transmission Conditions (Cont.) 5 Specify the remote Fax and press the [START] button. 2 26 2.SENDING A FAX - Oki CX1145MFP | CX1145 MFP Operator Manual for Fax Function - Page 28
for the combination of LT format and A/B format) LT format: LD, LT, COMP, LG, LT-R A/B format: A3, A4, B4, B5, A4-R, FOLIO 2 1 Adjust the tray guide to the widest original size, and then align the original against the front side. 2 Press the [FAX] button on the control panel. 3 Press the [ADDRESS - Oki CX1145MFP | CX1145 MFP Operator Manual for Fax Function - Page 29
4.Setting the Transmission Conditions (Cont.) 5 Specify the remote Fax and press the [START] button. 2 28 2.SENDING A FAX - Oki CX1145MFP | CX1145 MFP Operator Manual for Fax Function - Page 30
Setting the scanning conditions for each page When you want to send multi-page originals by placing them on the original glass, you can change the fol- lowing scanning conditions for each page: Resolution Exposure Original mode Original size This function is convenient for newspapers and - Oki CX1145MFP | CX1145 MFP Operator Manual for Fax Function - Page 31
4.Setting the Transmission Conditions (Cont.) 8 Press the [START] button. • The second original is scanned. • If there is another original to be scanned, repeat steps 6 through 8. 2 Be sure to carry out the operations within 45 seconds after the "To continue place document on glass, and press - Oki CX1145MFP | CX1145 MFP Operator Manual for Fax Function - Page 32
5. Specifying the Remote Fax Direct entry with digital keys Direct entry is the method for specifying remote Fax numbers using the digital keys. 1 Place the original(s). • P.20 "Setting originals" 2 Press the [FAX] button on the control panel. 2 3 Key in the remote Fax number. 4 If you make a - Oki CX1145MFP | CX1145 MFP Operator Manual for Fax Function - Page 33
if frequently used destinations are registered in the address book. • Registering the address book, see the [User Functions Guide] or the [TopAccess Guide]. 2 1 Place the original(s). • P.20 "Setting originals" 2 Press the [FAX] button on the control panel. 3 Press the [ADDRESS] button - Oki CX1145MFP | CX1145 MFP Operator Manual for Fax Function - Page 34
. It is convenient if frequently used multiple destinations are entered into a group. • Creating Groups, see the [User Functions Guide] or the [TopAccess Guide]. 1 Place the original(s). • P.20 "Setting originals" 2 2 Press the [FAX] button on the control panel. 3 Press the [ADDRESS] button - Oki CX1145MFP | CX1145 MFP Operator Manual for Fax Function - Page 35
5.Specifying the Remote Fax (Cont.) Searching by ID number When selecting the remote Faxes registered in the address and group by searching by the ID number immediately displays the screen including the searched-for ID number. 1 Place the original(s). • P.20 "Setting originals" 2 2 Press the [FAX] - Oki CX1145MFP | CX1145 MFP Operator Manual for Fax Function - Page 36
5 Press the button for the remote Fax that you want to send to. • Each screen displays 8 destinations. To view destinations not displayed on the screen, press the [Prev] or [Next] button to switch the screens. 2 • To continue searching by ID number, press the [KNOWN ID] button. • To continue - Oki CX1145MFP | CX1145 MFP Operator Manual for Fax Function - Page 37
5.Specifying the Remote Fax (Cont.) Searching by address (Search address) When selecting the remote Faxes registered in the address book and group, pressing a letter button leads to display the remote Faxes whose names start with the letter and/or numbers, which makes it easy to choose the desired - Oki CX1145MFP | CX1145 MFP Operator Manual for Fax Function - Page 38
5 Enter the ideal button or number, and then press the [ENTER] button. 2 6 Press the [SEARCH] button. 37 - Oki CX1145MFP | CX1145 MFP Operator Manual for Fax Function - Page 39
5.Specifying the Remote Fax (Cont.) 7 Press the button for the remote Fax that you want to send to, and then press the [ENTER] button. • If the remote FAX to be selected is one, the direct transmission (On-hook Transmission) can be performed. • Each screen displays 8 destinations. To view - Oki CX1145MFP | CX1145 MFP Operator Manual for Fax Function - Page 40
to enter address menu, and then press the [SEARCH ADDRESS] button. • If the LDAP server has already been set, go to step 6. 4 Press the [DIR SERVICE] button. 39 - Oki CX1145MFP | CX1145 MFP Operator Manual for Fax Function - Page 41
5.Specifying the Remote Fax (Cont.) 5 Press the directory search name that you want to search, and then press the [ENTER] button 2 6 Search the remote Fax, and then send it. • Follow the procedure from step 4 in P.36 "Searching by address (Search address)". * Searching using the LDAP server is - Oki CX1145MFP | CX1145 MFP Operator Manual for Fax Function - Page 42
Multi-address transmission The multi-address transmission function allows you to send the same document to 2 or more remote Faxes in a single operation, which can be done by combining direct, address book and group entry. Com- bining with the Internet Fax function is also available. This - Oki CX1145MFP | CX1145 MFP Operator Manual for Fax Function - Page 43
5.Specifying the Remote Fax (Cont.) Confirming the destinations After specifying multiple destinations by using multi-address transmitting, you can confirm the addresses in the list by pressing the [DESTINATION] button. You can also delete the addresses by pressing the [DELETE] button. 2 1 Press - Oki CX1145MFP | CX1145 MFP Operator Manual for Fax Function - Page 44
6. Sending Originals Direct transmission In the direct transmission mode, the remote Fax is immediately dialed, and the originals are sent after a successful connection with the remote Fax that has been completed. • Users can check immediately if the original has been sent to the remote Fax. • - Oki CX1145MFP | CX1145 MFP Operator Manual for Fax Function - Page 45
6.Sending Originals (Cont.) 5 Specify the remote Fax. • Specifying by digital keys ( P.31 "Direct entry with digital keys") • Specifying by address book ( P.32 "Address book entry") 2 6 Press the [START] button. • The remote Fax is dialed immediately and communication is initiated. • Canceling - Oki CX1145MFP | CX1145 MFP Operator Manual for Fax Function - Page 46
Memory transmission In the memory transmission mode, originals are scanned at high speed and temporarily stored in memory before transmitting. • Up to 100 transmissions can be reserved. • Up to 1000 pages can be stored in 1 transmission. • You can specify two or more remote Faxes at one time. - Oki CX1145MFP | CX1145 MFP Operator Manual for Fax Function - Page 47
6.Sending Originals (Cont.) 5 Specify the remote Fax. • Specifying by digital keys ( P.31 "Direct entry with digital keys") • Specifying by address book ( P.32 "Address book entry") • Specifying by group ( P.33 "Group entry") • Specifying by multi-address transmission ( P.41 "Multi-address - Oki CX1145MFP | CX1145 MFP Operator Manual for Fax Function - Page 48
Other transmissions On-hook transmission In this mode, you can confirm the answering tone from the remote FAX without picking up the handset of the external telephone. When the other party receives the call as a telephone call, you can talk by picking up the handset of the external telephone. • - Oki CX1145MFP | CX1145 MFP Operator Manual for Fax Function - Page 49
6.Sending Originals (Cont.) Off-hook transmission This mode is available by picking up the handset of the external telephone to dial. When the other party receives the call as a telephone call, you can talk with him/her. • This operation is available when the Line 1 lamp is OFF. 2 • An external - Oki CX1145MFP | CX1145 MFP Operator Manual for Fax Function - Page 50
used even on pulse dial lines. 1 To receive a tone service, press the [#] button of the digital key to switch over to tone transmission. 2 • For details of services and how to receive Fax information ser- vices, contact your service provider. This function can be used when a user uses "Pulse - Oki CX1145MFP | CX1145 MFP Operator Manual for Fax Function - Page 51
2 50 2.SENDING A FAX - Oki CX1145MFP | CX1145 MFP Operator Manual for Fax Function - Page 52
3. RECEIVING A FAX 1. Reception Modes ...52 3 2. Reception Settings ...53 3. Relationship between Original and Paper 57 51 - Oki CX1145MFP | CX1145 MFP Operator Manual for Fax Function - Page 53
Manual Reception Faxes are received when the user confirms the call on the telephone, press the [MANUAL from being printed. After the trouble has been cleared, printing is toner • Mailbox Reception You can retrieve documents from mailbox hubs (confidential, bulletin board) that support - Oki CX1145MFP | CX1145 MFP Operator Manual for Fax Function - Page 54
the phone line is used exclusively for Faxing. The Fax automatically receives incoming originals. The reception mode of line 2 is "Auto reception". • MANUAL reception Set this mode when the Fax is connected to a line also used for voice telephone calls. 3 Setting of the reception mode 1 Press - Oki CX1145MFP | CX1145 MFP Operator Manual for Fax Function - Page 55
2.Reception Settings (Cont.) 3 Enter the administrator password (6 to 10 digits), and then press the [ENTER] button. • Ask your administrator for the administrator password. 3 4 Press the [FAX] button. 5 Press the [INITIAL SETUP] button. 54 3.RECEIVING A FAX - Oki CX1145MFP | CX1145 MFP Operator Manual for Fax Function - Page 56
6 Press the [AUTO] or [MANUAL] button to select the reception mode, and then press the [ENTER] button. 3 55 - Oki CX1145MFP | CX1145 MFP Operator Manual for Fax Function - Page 57
hear a tone (Fax signal), press the 3 [FAX] button on the control panel. 3 Press the [ADVANCED] button to enter the advanced menu, and then press the [MANUAL RECEIVE] button. 4 Make sure that "OFF HOOK RECEIVE" appears, press the [START] button and replace the handset. 56 3.RECEIVING A FAX - Oki CX1145MFP | CX1145 MFP Operator Manual for Fax Function - Page 58
receiving tray. 3 Drawers can be set for Fax only. See the [Operator's Manual for Basic Function]. • If a specified drawer is set for Fax as a Fax, ask your service technician. 5 mm 5 mm 5 mm 4 mm 5 mm 5 mm 4 mm 5 mm Setting RX printing during default setup The received data are printed on - Oki CX1145MFP | CX1145 MFP Operator Manual for Fax Function - Page 59
3.Relationship between Original and Paper (Cont.) Paper priority when there is no same size paper When RX reduction printing and discard printing are set to "ON", paper is selected according to the following priority: 1. Paper of the same size and same orientation as the received original 2. Paper - Oki CX1145MFP | CX1145 MFP Operator Manual for Fax Function - Page 60
A4 Reduced to 75% B5 B4 A3 The paper priority varies according to the RX reduction printing and discard printing settings. For details, contact your service technician. 59 - Oki CX1145MFP | CX1145 MFP Operator Manual for Fax Function - Page 61
3 60 3.RECEIVING A FAX - Oki CX1145MFP | CX1145 MFP Operator Manual for Fax Function - Page 62
4. CHECKING AND CANCELING THE COMMUNICATIONS 1. Checking Transmission Result 62 • Checking reserved transmissions ...62 • Checking communication status (log 64 • Address registration from send/receive log 66 2. Canceling Transmissions ...68 4 61 - Oki CX1145MFP | CX1145 MFP Operator Manual for Fax Function - Page 63
Wait: Communication is in the standby queue. Invalid: Under standby due to an invalid department code (N/W-Fax). For N/W-Fax function, see the [Network Fax Guide]. 4 jobs are listed on each screen (page). The job display for 100 jobs (25 pages) are available. 1 Press the [JOB STATUS] button on - Oki CX1145MFP | CX1145 MFP Operator Manual for Fax Function - Page 64
Releasing the department code error In the status column of "Fax/Internet FAX JOB" list, the job which is in "Invalid" status may appear. In this case, release the invalid job as follows. 1. Enter user information required to use the equipment from the control panel. 2. Select the file with the - Oki CX1145MFP | CX1145 MFP Operator Manual for Fax Function - Page 65
1.Checking Transmission Result (Cont.) Checking communication status (log) You can check the following information of the communication status (log) in the list on the touch panel. • File number 4 • Receiver or sender • Accepted date • Number of originals • Communication result OK: - Oki CX1145MFP | CX1145 MFP Operator Manual for Fax Function - Page 66
• If the desired file columns are not displayed, press the [Prev] or [Next] button to switch the screens. • To output the list with the transmission or reception result, press the [JOURNAL] button. ( P.116 "1.Manually Printing Lists & Reports") 4 65 - Oki CX1145MFP | CX1145 MFP Operator Manual for Fax Function - Page 67
FAX number which was dialed by direct entry using the digital keys, or which was searched for by the LDAP server • E-mail address which was manually entered, or which was searched for by the LDAP server * The following information can be registered from the Receive log: • Remote FAX number which was - Oki CX1145MFP | CX1145 MFP Operator Manual for Fax Function - Page 68
to register, and then enter the recipient's or sender's information. • See the [Operator's Manual for Basic Function] for entering letters. 4 • ID number is automatically numbered. • See the [User Functions Guide] for registering and correcting the address book. 5 Press the [ENTER] button. 67 - Oki CX1145MFP | CX1145 MFP Operator Manual for Fax Function - Page 69
, press the [JOB CANCEL]. • If you press the [JOB FINISH] button or do nothing for about 45 seconds after finishing the scanning, the scanned data of the original start to be transmitted. • To change the setting of the scanning conditions, press the [OPTION] button. ( P.29 "Setting the scanning - Oki CX1145MFP | CX1145 MFP Operator Manual for Fax Function - Page 70
scanning is paused. • To resume scanning, press the [START] button on the control panel. • When the [JOB FINISH] button is pressed, the scanned data of the original(s) start to be transmitted. • To change the setting of the scanning conditions, press the [OPTION] button. ( P.29 "Setting the scanning - Oki CX1145MFP | CX1145 MFP Operator Manual for Fax Function - Page 71
2.Canceling Transmissions (Cont.) Canceling reserved memory transmissions This function allows you to cancel reserved memory transmissions that are currently stored in the memory and waiting to be sent (including Delayed Transmission Reservation and Poling Transmission/Reception). 1 Press the [JOB - Oki CX1145MFP | CX1145 MFP Operator Manual for Fax Function - Page 72
Canceling transmissions (during memory transmission) 1 Press the [JOB STATUS] button on the control panel. 2 Press the [FAX] button. 3 Select the file that is currently being transmitted. • Check that the status column indicates "Line1" (transmitting via line 1) or "Line2" (transmitting via line - Oki CX1145MFP | CX1145 MFP Operator Manual for Fax Function - Page 73
2.Canceling Transmissions (Cont.) Canceling direct transmission (during scanning) 1 Press the [STOP] button during transmission (scanning). • The transmission (scanning) operation is stopped. Even if you cancel transmission in the direct TX mode, the part of the original that was scanned before - Oki CX1145MFP | CX1145 MFP Operator Manual for Fax Function - Page 74
5. ADVANCED FUNCTIONS 1. Transmitting 2-Sided Originals 74 2. Priority Transmission...76 3. Polling Communication ...77 4. Mailbox Communication...80 5. Chain Dial Communication 100 6. Delayed Transmission Reservation 102 7. Recovery Transmission...105 5 8. Onramp Gateway ...107 9. - Oki CX1145MFP | CX1145 MFP Operator Manual for Fax Function - Page 75
1. Transmitting 2-Sided Originals This function is used to scan and transmit 2-sided originals with the Reversing Automatic Document Feeder (optional). • Placing 2-sided A4/LT originals When you place a 2-sided original on the Reversing Automatic Document Feeder (optional), change the direction of - Oki CX1145MFP | CX1145 MFP Operator Manual for Fax Function - Page 76
4 Press the [ADVANCED] button to enter the advanced menu, and then press the [2-SIDED SCAN] button. 5 Press the [BOOK] or [TABLET] button depending on the bound position of the original(s), and then press the [ENTER] button. 5 6 Specify the remote Fax • Entering the Fax number ( P.31 "Direct entry - Oki CX1145MFP | CX1145 MFP Operator Manual for Fax Function - Page 77
2. Priority Transmission Priority Transmission allows you to perform a transmission prior to other reserved transmissions (including redial standby). • For this function, only a direct dialing method (with digital keys) and an address book entry method are available. • Only one remote Fax can be - Oki CX1145MFP | CX1145 MFP Operator Manual for Fax Function - Page 78
. The polling reservation is valid for only 1 transmission; the data of the original will be cleared once it has been transmitted receive the Fax. * Polling communication with a password can be used only with OKI Fax machines. Polling transmission 1 Place the original(s). • P.20 "Setting originals - Oki CX1145MFP | CX1145 MFP Operator Manual for Fax Function - Page 79
3.Polling Communication (Cont.) 6 Press the [START] button. • Scanning starts and the scanned data will be stored in a memory. • Canceling the polling transmission ( P.70 "Canceling reserved memory transmissions") 5 78 5.ADVANCED FUNCTIONS - Oki CX1145MFP | CX1145 MFP Operator Manual for Fax Function - Page 80
Polling reception There are 2 types of polling reception as follows: • Individual polling reception: Receiving a Fax from one sender • Multi-polling reception: Receiving a Fax from 2 or more senders in a single operation. This function can be used in combination with the direct dialing, address book - Oki CX1145MFP | CX1145 MFP Operator Manual for Fax Function - Page 81
for each box can be set for security protection. This equipment also supports the Inbound FAX routing by TSI function that designates a sender's fax TopAccess Guide. • Confidential mailbox: Once the data of an original is retrieved from this box, this data will be deleted. If a new data is input - Oki CX1145MFP | CX1145 MFP Operator Manual for Fax Function - Page 82
Setting up mailbox for confidential and bulletin board communication How to create a confidential mailbox or bulletin box mailbox on sender's side is explained here. 1 Press the [FAX] button on the control panel. 2 Press the [ADVANCED] button to enter the advanced menu, and then press the [ITU - Oki CX1145MFP | CX1145 MFP Operator Manual for Fax Function - Page 83
4.Mailbox Communication (Cont.) 5 Press the [BOX NUMBER] button to enter the next menu, key in the box number(s) (maximum 20 digits), and then press the [ENTER] button. • If you want to set up a password, press the [PASSWORD] button to enter the next menu, key in the password (maximum 20 digits) and - Oki CX1145MFP | CX1145 MFP Operator Manual for Fax Function - Page 84
Setting up relay mailbox How to create a relay mailbox on sender's side is explained here. 1 Press the [FAX] button on the control panel. 2 Press the [ADVANCED] button to enter the advanced menu, and then press the [ITU MAILBOX] button. 5 3 Press the [RELAY] button, and then press the [BOX SETUP] - Oki CX1145MFP | CX1145 MFP Operator Manual for Fax Function - Page 85
4.Mailbox Communication (Cont.) 5 Press the [BOX NUMBER] button to enter the next menu, key in the box number(s) (maximum 20 digits), and then press the [ENTER] button. • If you want to set up a password, press the [PASSWORD] button to enter the next menu, key in the password (maximum 20 digits) and - Oki CX1145MFP | CX1145 MFP Operator Manual for Fax Function - Page 86
8 If you want to send the relay destination transmission report, press the [YES] button. • If you press the [NO] button here, steps 9 and 10 are not necessary. • For the relay destination transmission report, see P.120 "2.Automatically Printing Lists & Reports". The default operation of the relay - Oki CX1145MFP | CX1145 MFP Operator Manual for Fax Function - Page 87
4.Mailbox Communication (Cont.) 11 Press the [ALWAYS] button to always print out the received Fax, or press the [ON ERROR] button to print it out only when the relay transmission has failed. 5 86 5.ADVANCED FUNCTIONS - Oki CX1145MFP | CX1145 MFP Operator Manual for Fax Function - Page 88
Deleting mailbox How to delete a mailbox no longer needed is explained here. 1 Press the [FAX] button on the control panel. 2 Press the [ADVANCED] button to enter the advanced menu, and then press the [ITU MAILBOX] button. 5 3 Press the [CONFIDENTIAL] (or [BULLETIN BD.] or [RELAY]) button, and then - Oki CX1145MFP | CX1145 MFP Operator Manual for Fax Function - Page 89
the [YES] button. • In case of deleting a confidential mailbox or a bulletin board mailbox, "Not allowed now" appears if the [YES] button is pressed while some data are still in these mailboxes. • If the box number keyed in is not correct, "No entry" appears. If the password keyed in is not correct - Oki CX1145MFP | CX1145 MFP Operator Manual for Fax Function - Page 90
Modifying relay mailbox How to modify the content of a relay mailbox is explained here. 1 Press the [FAX] button on the control panel. 2 Press the [ADVANCED] button to enter the advanced menu, and then press the [ITU MAILBOX] button. 5 3 Press the [RELAY] button, and then press the [MODIFY] button. - Oki CX1145MFP | CX1145 MFP Operator Manual for Fax Function - Page 91
4.Mailbox Communication (Cont.) 5 Press the [BOX NUMBER] button to enter the next menu, key in the box number(s) (maximum 20 digits), and then press the [ENTER] button. • If a password has been set, press the [PASSWORD] button to enter the next menu, key in the password (maximum 20 digits) and then - Oki CX1145MFP | CX1145 MFP Operator Manual for Fax Function - Page 92
9 If you want to send the relay destination transmission report, press the [YES] button. • If you press the [NO] button here, steps 10 and 11 are not necessary. • For the relay destination transmission report, see ( P.120 "2.Automatically Printing Lists & Reports"). 10 Specify the remote Fax to - Oki CX1145MFP | CX1145 MFP Operator Manual for Fax Function - Page 93
4.Mailbox Communication (Cont.) Printing Fax out of mailbox How to print a Fax out of a confidential mailbox or a bulletin board mailbox on the sender's side is explained here. 1 Press the [FAX] button on the control panel. 2 Press the [ADVANCED] button to enter the advanced menu, and then press the - Oki CX1145MFP | CX1145 MFP Operator Manual for Fax Function - Page 94
the next menu, key in the password (maximum 20 digits) and then press the [ENTER] button. 6 Press the [START] button. 5 • If there is no registered data or the box number keyed in is not correct, "No entry" appears. If the password keyed in is not correct, "Invalid number" appears. Key in - Oki CX1145MFP | CX1145 MFP Operator Manual for Fax Function - Page 95
If the password keyed in is not correct, "Invalid number" appears. Key in the correct box number or password. 9 Press the [START] button. • The original data is registered in the mailbox as it is scanned to memory. • When you cancel the registration, press the [STOP] button and then press the [JOB - Oki CX1145MFP | CX1145 MFP Operator Manual for Fax Function - Page 96
mailbox How to delete Fax data in a confidential mailbox or a bulletin board mailbox on the sender's side is explained here. 1 Press the [FAX] button on the control panel. 2 Press the [ADVANCED] - Oki CX1145MFP | CX1145 MFP Operator Manual for Fax Function - Page 97
correct, "Invalid number" appears. Key in the correct box number or password. Transmitting Fax to mailbox 5 How to transmit and register Fax data into mailbox on receiver's side (remote Fax) is explained here. 1 Place the original(s). • P.20 "Setting originals" 2 Press the [FAX] button on the - Oki CX1145MFP | CX1145 MFP Operator Manual for Fax Function - Page 98
enter the next menu, key in the password (maximum 20 digits) and then press the [ENTER] button. A password entry is necessary for the data transmission of a bulletin board mailbox. 8 Press the [ENTER] button. 9 Specify the remote Fax • Entering the Fax number ( P.31 "Direct entry with digital keys - Oki CX1145MFP | CX1145 MFP Operator Manual for Fax Function - Page 99
out of mailbox How to poll (retrieve) Fax data out of a confidential mailbox or a bulletin board mailbox on receiver's side (remote Fax) is explained here. 1 Press the [FAX] button on the control panel. 2 Press - Oki CX1145MFP | CX1145 MFP Operator Manual for Fax Function - Page 100
to enter the next menu, key in the password (maximum 20 digits) and then press the [ENTER] button. A password entry is necessary for the data polling out of a confidential mailbox. 5 6 Press the [ENTER] button. 7 Specify the remote Fax • Entering the Fax number ( P.31 "Direct entry with digital keys - Oki CX1145MFP | CX1145 MFP Operator Manual for Fax Function - Page 101
5. Chain Dial Communication This function is used when you want to combine several numbers to select remote Fax machines using long distance carriers and specialized access lines. You can combine sets of numbers (address book entry and direct entry) by first pressing the [CHAIN DIAL COMM.] button. - Oki CX1145MFP | CX1145 MFP Operator Manual for Fax Function - Page 102
6 Specify the number to be dialed next either from the address book or by direct dialing. • e.g. Press the [Italy 39] button in the address book as an international code, and then press the [Rome Office] button in the address book. 5 7 Press the [START] button. • The transmission will start in the - Oki CX1145MFP | CX1145 MFP Operator Manual for Fax Function - Page 103
6. Delayed Transmission Reservation This function is used when you want to transmit a Fax at a specified date and time. It is useful when you want to make use of off-peak discounts (e.g. nighttime) or you want to transmit a Fax to a country which has a time difference. • The acceptable range of - Oki CX1145MFP | CX1145 MFP Operator Manual for Fax Function - Page 104
a delayed transmission reservation and perform a memory transmission is explained here. 5 1 Press the [JOB STATUS] button on the control panel. 2 Press the [FAX] button. 3 Select the data to be released. • "Delayed" appears in the status field of the subject - Oki CX1145MFP | CX1145 MFP Operator Manual for Fax Function - Page 105
6.Delayed Transmission Reservation (Cont.) 4 Press the [RELEASE] button. • The reservation is canceled and the memory transmission is performed. • Canceling the delayed transmission reservation of which status is "Wait" ( P.70 "Canceling reserved memory transmissions") • Canceling delayed - Oki CX1145MFP | CX1145 MFP Operator Manual for Fax Function - Page 106
[FAX] button on the control panel. 2 Press the [ADVANCED] button to enter the advanced menu, and then press the [RECOVERY TX] button. 5 3 Select the data you want to retransmit. • You can change the Fax number only when the first transmission is performed by a direct dialing. Press the [BACK SPACE - Oki CX1145MFP | CX1145 MFP Operator Manual for Fax Function - Page 107
the [FAX] button on the control panel. 2 Press the [ADVANCED] button to enter the advanced menu, and then press the [RECOVERY TX] button. 5 3 Select the data you want to cancel. 4 Press the [JOB CANCEL] button. 5 Press the [YES] button. 106 5.ADVANCED FUNCTIONS - Oki CX1145MFP | CX1145 MFP Operator Manual for Fax Function - Page 108
through the relay station. ITU-T compatible G3 FAX 3. The facsimile is converted to an E-mail and forward to a mail server through the LAN. OKI CX1145 MFP Relay Box Mail Server 4. The E-mail is delivered through the Internet, and transfered to the end station. Mail Server Internet FAX machine - Oki CX1145MFP | CX1145 MFP Operator Manual for Fax Function - Page 109
mailbox, or how to delete the mailbox. To assign an E-mail address as a relay destination, see "Setup Flow for Onramp Gateway" of the Network Administration Guide. To assign Internet FAX as a relay destination, see "Setup Flow for Internet Fax" of the Network Administration - Oki CX1145MFP | CX1145 MFP Operator Manual for Fax Function - Page 110
an E-mail to this equipment through the Internet, and then it will be forwarded to a target Fax machine as a Fax data through a public telephone line. 2. The mail server (oki.com) retrieves the E-mail. NOTE: The mail server should be configured to retrieve the E-mail with the forwarding address of - Oki CX1145MFP | CX1145 MFP Operator Manual for Fax Function - Page 111
Guide for details. • Text data and TIFF format image data are the only file formats this equipment can receive. See the Scanning Guide for details. 5 Transmitting data the domain name (FQDN) of this equipment is "host1.oki.com", the Fax number is "1212121212", and the subaddress is "1234", - Oki CX1145MFP | CX1145 MFP Operator Manual for Fax Function - Page 112
location, you can access the files using Windows Explorer or My Network Places. * To save a Fax data into a client PC, the network administrator has to make some settings in advance. See the TopAccess Guide for details. * The hard disk of this equipment may break down in rare cases. Be sure to - Oki CX1145MFP | CX1145 MFP Operator Manual for Fax Function - Page 113
Manual for Basic Function. 5 5 Select the location where the data is saved. • [MFP LOCAL]: Select it when the data should be saved in the hard disk of this equipment. The data the menu. • [REMOTE 1] and [REMOTE 2]: Select them when the data should be saved in the hard disk of a client PC through a - Oki CX1145MFP | CX1145 MFP Operator Manual for Fax Function - Page 114
)" is selected, another folder with the file name entered in step 4 is automatically created and each page of the data is saved in this folder. The client PC can access the saved data by opening the shared folder in the hard disk of this equipment on the network. 5 7 Press the [ENTER] button - Oki CX1145MFP | CX1145 MFP Operator Manual for Fax Function - Page 115
5 114 5.ADVANCED FUNCTIONS - Oki CX1145MFP | CX1145 MFP Operator Manual for Fax Function - Page 116
6. PRINTING LISTS AND REPORTS 1. Manually Printing Lists & Reports 116 2. Automatically Printing Lists & Reports 120 • Automatically printing lists & reports 120 • Setting the lists and reports output 121 3. Lists/Reports Samples ...129 6 115 - Oki CX1145MFP | CX1145 MFP Operator Manual for Fax Function - Page 117
1. Manually Printing Lists & Reports You can print the following lists and reports. * Lists SID/PWD entered in the address book. To print out the list, see the [User Functions Guide]. • Group numbers information: 6 List of names and remote Faxes entered in a group. To print out the list, see - Oki CX1145MFP | CX1145 MFP Operator Manual for Fax Function - Page 118
2 Press the [LOG] button to enter the log menu, and then press the [SEND] or [RECEIVE] button. 3 Press the [JOURNAL] button. • The journals will be output. • If the [JOURNAL] button is pressed with a file selected, the journal of the selected file for one transmission is output. 6 117 - Oki CX1145MFP | CX1145 MFP Operator Manual for Fax Function - Page 119
1.Manually Printing Lists & Reports (Cont.) Error code table If an error occurs an error code not listed here, please repeat your communication. If this error recurs, please contact your service technician. Printing reservation list 1 Press the [JOB STATUS] button on the control panel. 2 Press the - Oki CX1145MFP | CX1145 MFP Operator Manual for Fax Function - Page 120
Printing ITU mailbox list 1 Press the [FAX] button on the control panel. 2 Press the [ADVANCED] button to enter the advanced menu, and then press the [ITU MAILBOX LIST] button. • The ITU mailbox list is output. 6 119 - Oki CX1145MFP | CX1145 MFP Operator Manual for Fax Function - Page 121
2. Automatically Printing Lists & Reports Automatically printing lists & reports Reports are automatically output if the conditions in the setting of the lists & reports output ( ting the lists and reports output") are satisfied. * Lists and reports are printed on LT/A4-size paper. If LT/A4-size - Oki CX1145MFP | CX1145 MFP Operator Manual for Fax Function - Page 122
Setting the lists and reports output Setting the (transmission/reception) journal output and its number • AUTO: ON, OFF Setting whether the transmission/reception journal should be output automatically. • Transmission journal: 40,120 Setting the number of communications on the transmission journal - Oki CX1145MFP | CX1145 MFP Operator Manual for Fax Function - Page 123
2.Automatically Printing Lists & Reports (Cont.) 4 Press the [LIST/REPORT] button. 5 Press the [REPORT SETTING] button. 6 6 Press the [JOURNAL] button. 122 6.PRINTING LISTS AND REPORTS - Oki CX1145MFP | CX1145 MFP Operator Manual for Fax Function - Page 124
7 Press the [ON] or [OFF] button. • The default setting is ON. 8 Select the desired number (either 40 or 120 communications). • The default setting is 40. 9 Press the [ENTER] button. 6 Setting the communication report output The following conditions of the communication report output can be set. - Oki CX1145MFP | CX1145 MFP Operator Manual for Fax Function - Page 125
2.Automatically Printing Lists & Reports (Cont.) 2 Press the [ADMIN] button and then press the [PASSWORD] button. 3 Enter the administrator password (6 to 10 digits), and then press the [ENTER] button. • Ask your administrator to the administrator password. 6 4 Press the [LIST/REPORT] button. 124 - Oki CX1145MFP | CX1145 MFP Operator Manual for Fax Function - Page 126
5 Press the [REPORT SETTING] button. 6 Press the [COMM. REPORT] button. 6 7 Press the desired buttons for each item. • If the button for the desired function is not shown, press the [Next] button to switch screens. • The icons highlighted in the screen below are the default settings. However, the [ - Oki CX1145MFP | CX1145 MFP Operator Manual for Fax Function - Page 127
2.Automatically Printing Lists & Reports (Cont.) 8 Press the [ENTER] button. Setting the reception list output • LOCAL: ON, OFF Setting whether the mailbox reception report should be printed when the original is stored in the local mailbox. • REMOTE: ON, OFF Setting whether the mailbox - Oki CX1145MFP | CX1145 MFP Operator Manual for Fax Function - Page 128
3 Enter the administrator password (6 to 10 digits), and then press the [ENTER] button. • Ask your administrator to the administrator password. 4 Press the [LIST/REPORT] button. 6 5 Press the [REPORT SETTING] button. 127 - Oki CX1145MFP | CX1145 MFP Operator Manual for Fax Function - Page 129
2.Automatically Printing Lists & Reports (Cont.) 6 Press the [RECEPTION LIST] button. 7 Press the desired buttons for each item. • The icons highlighted in the screen below are the default settings. However, the default setting for European versions is as follows: RELAY STATION: ON LOCAL: OFF REMOTE - Oki CX1145MFP | CX1145 MFP Operator Manual for Fax Function - Page 130
3. Lists/Reports Samples Transmission journal (Manually and automatically output) This is the list of the transmission-related information such as communication results and remote Fax numbers. • Output information for the last - Oki CX1145MFP | CX1145 MFP Operator Manual for Fax Function - Page 131
3.Lists/Reports Samples (Cont.) ROM version Terminal ID Sender's Fax number (Line2: Optional) Sender's Fax number (Line1) Journal (or list) outputting date and time TRANSMISSION JOURNAL XXXXXXXXXXX TIME FAX NO.1 FAX NO.2 NAME XXXX-XXX : 07-10-'05 17:55 : 2131234567 : 2131235678 : Aaabbb L.A. - Oki CX1145MFP | CX1145 MFP Operator Manual for Fax Function - Page 132
Reception journal (Manually and automatically output) This is the list of the reception-related information such as communication results and remote Fax numbers. • Output information for the last - Oki CX1145MFP | CX1145 MFP Operator Manual for Fax Function - Page 133
are standing by for transmission and recovery transmission. • The mark on the "TO" refers to a manually input telephone number. • The mark G on the "TO" refers to a pre-programmed group. 17:40 FUNCTION MULTI TX PGS TO 2 Cccddd CORPORATION DELAY TIME 132 6.PRINTING LISTS AND REPORTS - Oki CX1145MFP | CX1145 MFP Operator Manual for Fax Function - Page 134
Mailbox/relay box report (Manually output) This is the report of the current status of the mailboxes. MAILBOX/RELAY BOX REPORT TIME FAX NO.1 FAX NO.2 NAME : 07-10-'05 - Oki CX1145MFP | CX1145 MFP Operator Manual for Fax Function - Page 135
2nd TEL NUMBER is used for transmission. • The mark on the "TO" refers to a manually input the telephone number. • The (ITU MAILBOX: ) on the "FILE NO." refers to a mailbox. • The (STORED TIME: ) on the "END TIME" shows the data storing time of when the recovery transmis- sion has been set. • If an - Oki CX1145MFP | CX1145 MFP Operator Manual for Fax Function - Page 136
Transmission report (Automatically output) After direct transmission has ended, this report is output. • This will be output "ON ERROR" or "ALWAYS". ( P.123 "Setting the communication report output") • If an error occurs during direct transmission, the error code will be indicated on the "STATUS". ( - Oki CX1145MFP | CX1145 MFP Operator Manual for Fax Function - Page 137
when the 2nd TEL NUMBER is used for transmission. • The mark on the "FAX NUMBER" refers to a manually input telephone number. • The (STORED TIME: ) next to the "END TIME" shows the data storing time of when the recovery trans- mission has been set. MULTI TRANSMISSION REPORT TIME FAX NO.1 FAX NO - Oki CX1145MFP | CX1145 MFP Operator Manual for Fax Function - Page 138
is output. • This will be output "ON ERROR" or "ALWAYS". ( P.123 "Setting the communication report output") • The mark on the "FAX NUMBER" refers to a manually input telephone number. POLLING REPORT FILE NO. DATE START TIME END TIME SUCCESSFUL ADDRESS BOOK 001 : 014 : 07.10 18:02 : 07.10 18:17 - Oki CX1145MFP | CX1145 MFP Operator Manual for Fax Function - Page 139
3.Lists/Reports Samples (Cont.) Mailbox reception report (Automatically output) This report is output when an original is received in a confidential or bulletin board. MAILBOX RECEPTION REPORT FILE NO. DATE BOX NUMBER BOX TYPE DOCUMENT PAGES FROM : 016 : 07.10 18:22 : 12345 : CONFIDENTIAL : 1 ( - Oki CX1145MFP | CX1145 MFP Operator Manual for Fax Function - Page 140
output. • This will be output "ON ERROR" or "ALWAYS". ( P.123 "Setting the communication report output") • The mark on the "TO" refers to a manually input telephone number. RELAY TX ORIG. TERMINAL REPORT TIME FAX NO.1 FAX NO.2 NAME : 07-10-'05 18:22 : 2131234567 : 2131235678 : Aaabbb L.A. FILE - Oki CX1145MFP | CX1145 MFP Operator Manual for Fax Function - Page 141
3.Lists/Reports Samples (Cont.) Relay transmission relay station report (Automatically output) When this equipment is setup as a relay station, the report of the transmission to the relay destinations is output. A reduced image of the first page of the document transmitted is appended on the report - Oki CX1145MFP | CX1145 MFP Operator Manual for Fax Function - Page 142
:45 DOCUMENT PAGES : 3 FROM : 7141234567 START TIME : 07.10 14:45 END TIME : 07.10 14:46 RELAY BOX : 12345 SUCCESSFUL ADDRESS BOOK 005 XYZ CORPORATION 6 UNSUCCESSFUL ADDRESS BOOK 001 Cccddd ADMIN PAGES SENT 0 141 - Oki CX1145MFP | CX1145 MFP Operator Manual for Fax Function - Page 143
3.Lists/Reports Samples (Cont.) Power failure list (Automatically output) A list of the jobs which were erased will be output if there is something wrong with the contents of the image memory when the main power switch is turned ON after a power failure during Fax communication. POWER FAILURE LIST - Oki CX1145MFP | CX1145 MFP Operator Manual for Fax Function - Page 144
7. REGISTERING AND SETTING ITEMS 1. Setting the Initial Transmission Mode 144 2. Registering the Terminal ID 146 3. Setting the Reception Mode 151 4. 2nd Line Board (optional) Installation 154 5. Setting RX Printing...160 • Setting RX printing ...160 • Setting duplex printing...163 • Setting the - Oki CX1145MFP | CX1145 MFP Operator Manual for Fax Function - Page 145
original is sent with the initial setting values. • Resolution: STANDARD, FINE, U-FINE • MODE (Original mode) TEXT, TEXT/PHOTO, PHOTO • Exposure: AUTO, MANUAL (adjustable in 11 steps) • Transmission type: MEMORY TX, DIRECT TX • TTI recording (Setting is not available in all product markets): ON, OFF - Oki CX1145MFP | CX1145 MFP Operator Manual for Fax Function - Page 146
3 Press the desired buttons for each item. • The screen below shows the default setting. • Press the [Next] or [Prev] button to switch the screens as required. 4 Press the [ENTER] button. 7 145 - Oki CX1145MFP | CX1145 MFP Operator Manual for Fax Function - Page 147
2. Registering the Terminal ID If you register the ID name in advance, you can print sender information on the leading edge of originals that are transmitted and receiver information on the trailing edge of originals that are received. • Details to register: ID name (max. 20 characters) ID number ( - Oki CX1145MFP | CX1145 MFP Operator Manual for Fax Function - Page 148
1 Press the [USER FUNCTIONS] button on the control panel. 2 Press the [ADMIN] button and then the [PASSWORD] button. 3 Enter the administrator password (6 to 10 digits), and then press the [ENTER] button. • Ask your administrator for the administrator password. 7 4 Press the [FAX] button. 147 - Oki CX1145MFP | CX1145 MFP Operator Manual for Fax Function - Page 149
in the letter entry screen (up to 20 characters). When you have finished entering the letters, press the [ENTER] button. • Entering letters, see the [Operator's Manual for Basic Function]. 7 7 Press the [FAX NUMBER] button. 148 7.REGISTERING AND SETTING ITEMS - Oki CX1145MFP | CX1145 MFP Operator Manual for Fax Function - Page 150
8 Press either the [YES] or [NO] button for adding the international code. If you add the international code (your country/region code) in advance, you can let the remote Fax know your country/region when communicating overseas. Registration by adding international code in the terminal ID - Oki CX1145MFP | CX1145 MFP Operator Manual for Fax Function - Page 151
2.Registering the Terminal ID (Cont.) 11 Check the settings. If they are correct, press the [ENTER] button to complete entry. • To change the settings, press the [ID NAME], [FAX NUMBER] or [LINE2 NUMBER] button again. 7 150 7.REGISTERING AND SETTING ITEMS - Oki CX1145MFP | CX1145 MFP Operator Manual for Fax Function - Page 152
3. Setting the Reception Mode Set reception mode such as the volume settings and line-related items. • Reception mode AUTO, MANUAL • Monitor tone volume Adjustable 0-7 steps (0: tone OFF) The "monitor tone" refers to the line monitor tone when the [MONITOR/PAUSE] button is pressed. • Reception - Oki CX1145MFP | CX1145 MFP Operator Manual for Fax Function - Page 153
3.Setting the Reception Mode (Cont.) 4 Press the [FAX] button. 5 Press the [INITIAL SETUP] button. 7 6 Press the desired buttons for each item. • Press the [Prev] or [Next] button to switch the screens. • The screen below shows the default settings. • With the monitor tone volume, you can - Oki CX1145MFP | CX1145 MFP Operator Manual for Fax Function - Page 154
7 Press the [ENTER] button. • The registered items can be confirmed in the Administrator's Function List. To print the list, see the [User Functions Guide]. There is no second screen to display the dial types for the European version. 7 153 - Oki CX1145MFP | CX1145 MFP Operator Manual for Fax Function - Page 155
is selected on the LINE SELECT when you register remote Fax numbers into the address [Operator's Manual for Basic Function]). If you want the 2nd line to have priority in the initial setting, ask your service technician. The reception mode of line 2 is "Auto reception". Dial type setting 1 Press the - Oki CX1145MFP | CX1145 MFP Operator Manual for Fax Function - Page 156
4 Press the [FAX] button. 5 Press the [INITIAL SETUP] button. 6 Select either of the [DP] or [MF] buttons for the dial type (line 2) set- 7 ting • Press the [Next] or [Prev] button to switch the screens as required. • DP, MF. ( P.151 "3.Setting the Reception Mode") 7 Press the [ENTER] button. - Oki CX1145MFP | CX1145 MFP Operator Manual for Fax Function - Page 157
4.2nd Line Board (optional) Installation (Cont.) 2nd line setting When the optional 2nd line board is installed, its operation can be selected using the following procedure: • Transmission/Reception Both transmission and reception are available all the time. • Reception only (24 hours) The 2nd line - Oki CX1145MFP | CX1145 MFP Operator Manual for Fax Function - Page 158
4 Press the [FAX] button. 5 Press the [LINE-2 MODE] button. 7 157 - Oki CX1145MFP | CX1145 MFP Operator Manual for Fax Function - Page 159
4.2nd Line Board (optional) Installation (Cont.) Transmission and reception (TX/RX) 6 Press the [TX/RX] button. 7 Press the [ENTER] button. Reception only (24HR) 6 Press the [RX ONLY (24HR)] button. 7 7 Press the [ENTER] button. 158 7.REGISTERING AND SETTING ITEMS - Oki CX1145MFP | CX1145 MFP Operator Manual for Fax Function - Page 160
Reception only (TIMER) 6 Press the [RX ONLY (TIMER)] button. • Key in the START time and END time. • Press the [ ] or [ ] button to move the cursor. • Time is displayed in the 24-hour system. 7 Press the [ENTER] button. 7 159 - Oki CX1145MFP | CX1145 MFP Operator Manual for Fax Function - Page 161
paper printing area. * For the detail of DISCARD setting, contact your service technician. • RX reduction printing ON (default setting): If the received area. * Drawers can be set for received Fax printing only. See the [Operator's Manual for Basic Function]. Be sure to use LD, LG, LT, LT-R, A3, A4, - Oki CX1145MFP | CX1145 MFP Operator Manual for Fax Function - Page 162
3 Enter the administrator password (6 to 10 digits), and then press the [ENTER] button. • Ask your administrator for the administrator password. 4 Press the [FAX] button. 7 5 Press the [RX PRINT] button. 161 - Oki CX1145MFP | CX1145 MFP Operator Manual for Fax Function - Page 163
5.Setting RX Printing (Cont.) 6 Press the [ON] or [OFF] button of the [DISCARD] and/or [REDUCTION], and then the [ENTER] button. • The registered items can be confirmed in the Administrator's Function List. To print the list, see the [User Functions Guide]. 7 162 7.REGISTERING AND SETTING ITEMS - Oki CX1145MFP | CX1145 MFP Operator Manual for Fax Function - Page 164
Setting duplex printing This printer setting determines whether or not to print received Faxes on both sides of the paper available for Fax reception. • Duplex printing is available only if - Oki CX1145MFP | CX1145 MFP Operator Manual for Fax Function - Page 165
, and then press the [ENTER] button. • The registered items can be confirmed in the Administrator's Function List. To print the list, see the [User Functions Guide]. 164 7.REGISTERING AND SETTING ITEMS - Oki CX1145MFP | CX1145 MFP Operator Manual for Fax Function - Page 166
applied to the following two items. 1. Received fax documents which are relay-transmitted 2. Received fax documents which are sent to forward mailboxes See the TopAccess Guide for details. 7 165 - Oki CX1145MFP | CX1145 MFP Operator Manual for Fax Function - Page 167
5.Setting RX Printing (Cont.) Setting the rotate sort (Alternation) This printer setting determines whether or not to output each separate Fax job by rotated sort (90 degrees) alternately. * Rotate Sort is available only for LT/A4- - Oki CX1145MFP | CX1145 MFP Operator Manual for Fax Function - Page 168
5 Press the [RX PRINT] button. 6 Press the [ON] button for the rotate sort function, and then press the [ENTER] button. • The registered items can be confirmed in the Administrator's Function List. To print the list, see the [User Functions Guide]. 7 167 - Oki CX1145MFP | CX1145 MFP Operator Manual for Fax Function - Page 169
6. Setting Recovery Transmission Setting the document-holding-time for retaining a document in memory using the Recovery Transmission function. 1 Press the [USER FUNCTIONS] button on the control panel. 2 Press the [ADMIN] button and then the [PASSWORD] button. 3 Enter the administrator password (6 - Oki CX1145MFP | CX1145 MFP Operator Manual for Fax Function - Page 170
5 Press the [RECOVERY TX] button. 6 Change the document-stored time with the [ and press the [ENTER] button. • The document-holding time can be changed in 1 hour increments. 1H] or [24H ] button, 7 169 - Oki CX1145MFP | CX1145 MFP Operator Manual for Fax Function - Page 171
7 170 7.REGISTERING AND SETTING ITEMS - Oki CX1145MFP | CX1145 MFP Operator Manual for Fax Function - Page 172
8. TROUBLESHOOTING 1. When The Following Messages Appear 172 2. Transmission Trouble...173 3. Reception Trouble...174 8 171 - Oki CX1145MFP | CX1145 MFP Operator Manual for Fax Function - Page 173
appropriate remedy for the error. For details of messages not listed below, see the [Operator's Manual for Basic Functions]. Message Memory overflow Communication error Job reservation full Job memory full Sorry not number of digits dialed and register the numbers again. 8 172 8.TROUBLESHOOTING - Oki CX1145MFP | CX1145 MFP Operator Manual for Fax Function - Page 174
trouble sending documents. If you cannot rectify the problem with the points below, or the problem is not listed below, call service for assistance. Trouble with your system? operations are carried out nor- This system supports G3 communications but not G2 or G4 com- mally. munications. - Oki CX1145MFP | CX1145 MFP Operator Manual for Fax Function - Page 175
Check the following points if you are having trouble receiving documents.If you cannot rectify the problem with the points below, or the problem not listed below, call service for assistance. Trouble Check Point Originals cannot be received • Did you replace the handset before you pressed - Oki CX1145MFP | CX1145 MFP Operator Manual for Fax Function - Page 176
9. SPECIFICATIONS 1. Main Specifications ...176 9 175 - Oki CX1145MFP | CX1145 MFP Operator Manual for Fax Function - Page 177
technician. (Repair and replacement will be charged.) * Specifications and appearance are subject to change without notice in the interest of product improve- ment. * If trouble occurs, call service for assistance. 9 Options • 2nd line board - GD-1260NA (North America) 176 9.SPECIFICATIONS
-
 1
1 -
 2
2 -
 3
3 -
 4
4 -
 5
5 -
 6
6 -
 7
7 -
8
-
9
-
10
-
11
-
12
-
13
-
14
-
15
-
16
-
17
-
18
-
19
-
20
-
21
-
22
-
23
-
24
-
25
-
26
-
27
-
28
-
29
-
30
-
31
-
32
-
33
-
34
-
35
-
36
-
37
-
38
-
39
-
40
-
41
-
42
-
43
-
44
-
45
-
46
-
47
-
48
-
49
-
50
-
51
-
52
-
53
-
54
-
55
-
56
-
57
-
58
-
59
-
60
-
61
-
62
-
63
-
64
-
65
-
66
-
67
-
68
-
69
-
70
-
71
-
72
-
73
-
74
-
75
-
76
-
77
-
78
-
79
-
80
-
81
-
82
-
83
-
84
-
85
-
86
-
87
-
88
-
89
-
90
-
91
-
92
-
93
-
94
-
95
-
96
-
97
-
98
-
99
-
100
-
101
-
102
-
103
-
104
-
105
-
106
-
107
-
108
-
109
-
110
-
111
-
112
-
113
-
114
-
115
-
116
-
117
-
118
-
119
-
120
-
121
-
122
-
123
-
124
-
125
-
126
-
127
-
128
-
129
-
130
-
131
-
132
-
133
-
134
-
135
-
136
-
137
-
138
-
139
-
140
-
141
-
142
-
143
-
144
-
145
-
146
-
147
-
148
-
149
-
150
-
151
-
152
-
153
-
154
-
155
-
156
-
157
-
158
-
159
-
160
-
161
-
162
-
163
-
164
-
165
-
166
-
167
-
168
-
169
-
170
-
171
-
172
-
173
-
174
-
175
-
176
-
177
 |
 |

Operators Manual for Fax Function
CX1145 MFP
59313901, Rev. 1.0