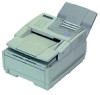
Oki OF5250 Quick Start Guide for the OKIFAX 5250
Oki OF5250 Manual
 |
View all Oki OF5250 manuals
Add to My Manuals
Save this manual to your list of manuals |
Oki OF5250 manual content summary:
- Oki OF5250 | Quick Start Guide for the OKIFAX 5250 - Page 1
CoOnvteernvtisew Control Panel 3 Faxing 4 Setting Up the Fax 4 Date and Time 4 Fax I.D 4 Loading the Document 5 Document Guidelines 5 Using Manual Feed 6 Changing Resolution 7 Changing Contrast 7 Send to Single Location / Keypad Dialing 7 One-Touch 7 Auto (Speed) Dial 8 Group Dial 8 - Oki OF5250 | Quick Start Guide for the OKIFAX 5250 - Page 2
you to visit our multilingual web site: http://www.okidata.com Okidata and OKIFAX are registered trademarks of Oki Electric Industry Company, Ltd. Okidata marques désposés de Oki Electric Industry Company, Ltd.; marca registrada, Oki Electric Industry Company, Ltd. ENERGY STAR is a registered - Oki OF5250 | Quick Start Guide for the OKIFAX 5250 - Page 3
Control Panel 1) Numeric Keypad 2) One Touch Keypad | Quick Reference E-3 - Oki OF5250 | Quick Start Guide for the OKIFAX 5250 - Page 4
FaOxvinegrview Setting Up the Fax Date and Time 1 Press Select Function. 2 Press 9/User Program. 3 Press 3. 4 Press YESᮤ. 5 Enter the new date and time using the numeric keypad. Press ᮣNO to advance the cursor to the next number. Use the 24-hour format. 6 When the time is set, press YESᮤ. 7 Press - Oki OF5250 | Quick Start Guide for the OKIFAX 5250 - Page 5
weight paper (20 lb.); 15 pages for light or heavy weight paper 2 Stack documents neatly and insert face down. Readjust the document guides. 1 Adjust document guides to the width of the document. 3 OKIFAX grips the documents and pulls the bottom page into the machine. | Quick Reference E-5 - Oki OF5250 | Quick Start Guide for the OKIFAX 5250 - Page 6
in the document feeder. 2 Press in on the front panel indents. 4 Adjust the paper guides. 3 Pull the manual paper feeder down. | E-6 OKIFAX 5250 5 Insert a sheet of paper face up. Adjust the guides again to ensure that the paper is straight. FSUENLECCTTION AUTO REC AUTO DIAL SEARCH REDIAL - Oki OF5250 | Quick Start Guide for the OKIFAX 5250 - Page 7
Changing Resolution Change resolution by pressing YESᮤ. The resolution (photo, extra fine, fine, or standard) is marked by an LED display just above the YESᮤ key. Changing Contrast Change contrast by pressing ᮣNO. The contrast (light, normal, or dark) is marked by an LED display just to the right of - Oki OF5250 | Quick Start Guide for the OKIFAX 5250 - Page 8
Auto (Speed) Dial Group Dial How to Program 1 Press Select Function. 2 Press 8/+/Location Program. 3 Press Auto Dial. 4 Using the numeric keypad, enter a 2-digit number (01-64) for the Auto Dial number you wish to program. 5 Enter the fax number. 6 Press Start. 7 Enter the Location ID (up to 16 - Oki OF5250 | Quick Start Guide for the OKIFAX 5250 - Page 9
report of your selections, press YESᮤ. If you want to make corrections, press ᮣNO and go back to step 4. You can redial a number manually at any time by pressing Redial. Switching Between Memory & Feeder Transmit Modes 1 Press Select Function. 2 Press 9/User Prog. 3 Press YESᮤ. 4 Enter 18 using - Oki OF5250 | Quick Start Guide for the OKIFAX 5250 - Page 10
Search Key Dialing Use the Search key to look through the alphabetical list of Location IDs programmed into your OKIFAX. 1 Press Search to begin the search. 2 Press Search again to look through the entire list of locations in alphabetical order, or 3 Locate the letter you want on the numeric keypad - Oki OF5250 | Quick Start Guide for the OKIFAX 5250 - Page 11
6 Press YESᮤ. 7 Using the numeric keypad, enter the transmission time. 8 Press YESᮤ. 9 Press YESᮤ to select faxing from memory. 10 Select a location: press a One Touch key, press Auto Dial and enter a two-digit Auto Dial number, press # plus a group number, or dial as you would on a normal telephone - Oki OF5250 | Quick Start Guide for the OKIFAX 5250 - Page 12
CoOpvyeirnvgiew Making Copies 1 Load the document in the document tray. 2 Press Copy. 3 If only one copy is required, wait and the machine will begin copying momentarily. To make multiple copies, enter the number of copies required using the numeric keypad. 4 Press Copy again to start copying. | - Oki OF5250 | Quick Start Guide for the OKIFAX 5250 - Page 13
Feeder 1 Load your documents. 2 Press in on the front panel indents. 4 Adjust the paper guides on the feeder. 3 Pull the manual paper feeder down. 5 Insert a sheet of paper face up. Adjust the guides again to ensure that the paper is straight. FSUENLECCTTION AUTO REC AUTO DIAL SEARCH REDIAL - Oki OF5250 | Quick Start Guide for the OKIFAX 5250 - Page 14
6 Press Copy (see the instructions above). If you are making more than one copy or copying a multipage document, insert additional sheets when the previous sheet is all the way through the machine. | E-14 OKIFAX 5250
-
 1
1 -
 2
2 -
 3
3 -
 4
4 -
 5
5 -
 6
6 -
 7
7 -
8
-
9
-
10
-
11
-
12
-
13
-
14
 |
 |

Overview
Quick Reference
|
E-1
Contents
Control Panel
...........................................................
3
Faxing
........................................................................
4
Setting Up the Fax
..........................................................
4
Date and Time
.................................................................
4
Fax I.D
. ............................................................................
4
Loading the Document
...................................................
5
Document Guidelines
.....................................................
5
Using Manual Feed
........................................................
6
Changing Resolution
.....................................................
7
Changing Contrast
.........................................................
7
Send to Single Location / Keypad Dialing
....................
7
One-Touch
......................................................................
7
Auto (Speed) Dial
...........................................................
8
Group Dial
......................................................................
8
Broadcasting
...................................................................
9
Redialing
........................................................................
9
Switching Between Memory & Feeder Transmit Modes .
9
Search Key Dialing
.......................................................
10
Delay Transmission
......................................................
10
Sending a Delayed Fax from the Document Feeder
.....
10
Sending a Delayed Fax from Memory
..........................
10
Canceling a Delayed Transmission
..............................
11
Confirmation Report
....................................................
11
Copying
...................................................................
12
Making Copies
.............................................................
12
Using Manual Paper Feeder
..........................................
13