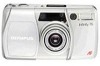
Olympus 120570 Instruction Manual
Olympus 120570 - Infinity 76 38-76MM Zoom 35MM Compact Camera Manual
 |
UPC - 050332151727
View all Olympus 120570 manuals
Add to My Manuals
Save this manual to your list of manuals |
Olympus 120570 manual content summary:
- Olympus 120570 | Instruction Manual - Page 1
INSTRUCTIONS - Olympus 120570 | Instruction Manual - Page 2
3 Before you begin Loading the batteries 6 Checking the batteries 7 Attaching the strap 8 Loading the film 9 Unloading the film 12 Simple point & shoot photography How to take pictures 14 Auto flash photography (1)Taking pictures in low light 20 (2)Taking backlit subjects 23 Advanced - Olympus 120570 | Instruction Manual - Page 3
purchasing the OLYMPUS Infinity Zoom 76. Please read this instruction manual carefully before using the camera. This camera will not operate unless the batteries are loaded and the power switch is set to ON. Before taking important pictures, it is recommended that you shoot a roll of film just to - Olympus 120570 | Instruction Manual - Page 4
LCD panel Light sensor Viewfinder Shutter release button Autofocus windows Steady grip Power switch 3 Description of controls Selftimer indicator Subject button Flash mode button Flash reflector Lens Strap eyelet Zoom buttons - Olympus 120570 | Instruction Manual - Page 5
Back cover Film window Tripod socket Viewfinder Battery compartment cover Back cover release Rewind button 4 - Olympus 120570 | Instruction Manual - Page 6
Viewfinder display Close-up correction marks Autofocus frame AF indicator (green) Flash indicator (orange) 5 LCD panel Selftimer Continuous mode Auto-zoom Pre-focus Battery check indicator Exposure counter Flash mode selection indicator Flash mode indicator - Olympus 120570 | Instruction Manual - Page 7
cover. Insert two 3V lithium batteries as shown and replace the cover. Use Panasonic CR123A, Duracell DL123A, or equivalent. * Do not mix different types of batteries or new and old batteries at the same time. * Remove batteries if you do not plan to use the camera for an extended period of time - Olympus 120570 | Instruction Manual - Page 8
indicator will be displayed for 12 seconds. When is displayed, batteries are OK. If flashes, batteries are low, have spares handy. If is displayed continuously, batteries should be replaced immediately. * When the battery power is low, the flash will take longer to recharge. * Before replacing - Olympus 120570 | Instruction Manual - Page 9
Attaching the strap 8 - Olympus 120570 | Instruction Manual - Page 10
toward the top of the camera. Insert the film cartridge into the camera. Always avoid direct sunlight when loading the film. Loading the film This camera is designed to use DX-coded 35mm film. DX coding, used by virtually all major film manufacturers, allows the camera to identify and set the - Olympus 120570 | Instruction Manual - Page 11
Make sure the film lies flat. Align the film leader with the red film loading indicator. Unless the film leader matches the film loading indicator, the film may not be loaded. * Do not touch the lens inside the body with your fingers or the film leader. 10 - Olympus 120570 | Instruction Manual - Page 12
advances to the first frame. Set the power switch to ON to make sure that the exposure counter shows "1". If film is improperly loaded, the LCD panel will display a blinking "E". In this case, open the back cover, and realign the film leader. Use the window in the camera back to check type of - Olympus 120570 | Instruction Manual - Page 13
Unloading the film The camera automatically rewinds If you want to rewind the film before the film when you reach the end of a the end of the roll, press the rewind roll. The exposure counter on the LCD button with the tip of a ballpoint pen. panel counts down as the film is Do not use any - Olympus 120570 | Instruction Manual - Page 14
possible until the rewound film cartridge is removed. "Rewinding completed" indicator When the power switch is OFF, there will be no indication on the LCD panel. When the power switch 13 is ON Open the back cover, and remove the film cartridge from the camera. Avoid direct sunlight when removing - Olympus 120570 | Instruction Manual - Page 15
. While looking through the viewfinder, aim the camera at your subject. How to take pictures When the power switch is ON, the LCD panel lights. The LCD panel goes out after 4 to 5 minutes to minimize battery drain. The lens will then zoom to the wide-angle position. After 4 hours - Olympus 120570 | Instruction Manual - Page 16
or wide-angle) The shutter release cannot be operated while zooming. Press the "T" (Telephoto) on the zoom button to zoom in. (The maximum focal length in the "T" position is 76mm.) Press the "W" (Wide-angle) on the zoom button to zoom out. (The minimum focal length in the "W" position is 38mm - Olympus 120570 | Instruction Manual - Page 17
Hold the camera correctly. It is particularly important to hold the camera steady when shooting at a longer focal length; use both hands for maximum stability. * Keep your fingers and the strap away from the lens and flash. 16 - Olympus 120570 | Instruction Manual - Page 18
center of the viewfinder. Press the shutter release button halfway to focus. When correct focus has been achieved, the autofocus indicator (green) will light up in the viewfinder. If the autofocus indicator is blinking, correct focus was not achieved. If this occurs, let go of the shutter release - Olympus 120570 | Instruction Manual - Page 19
smaller as you get nearer to the subject. At 0.6m(2ft), the subject should be positioned within the close-up correction marks. Picture frame at (infinity) Picture frame at 0.6m (2ft) Close-up correction marks Shooting range: from 0.6m(2ft) to - Olympus 120570 | Instruction Manual - Page 20
. When correct focus has been achieved (the autofocus indicator has lit up), press the shutter release button fully (gently, to minimize camera shake). As soon as the shutter is released, film will automatically advance to the next frame. The LCD exposure counter shows the next frame number. 19 - Olympus 120570 | Instruction Manual - Page 21
will fire automatically. The shutter release cannot be operated while the flash is still charging. It takes about 0.2-3.5 seconds after the film is advanced to recharge the flash (at normal temperatures with new batteries). Use the AUTO-S flash mode to prevent the red-eye phenomenon (P.35). 20 - Olympus 120570 | Instruction Manual - Page 22
From 0.6m(2ft) .to 1.6m(5.2ft), the flash strength is controlled automatically as shown. This soft flash mechanism prevents pictures from being overexposed. Soft flash: Overexposed (with conventional flash). Properly exposed (with soft flash). Maximum ISO100 Flash strength Distance 21 - Olympus 120570 | Instruction Manual - Page 23
latitude, compensating for over and underexposure more readily than other films. The flash working range shown below is optional for color negative film. Actual flash working range for other film type may vary. ISO WIDE(38mm) TELE(76mm) 100 0.6m - 4.1m(2ft - 13.4ft) 0.6m - 3m(2ft - 9.8ft - Olympus 120570 | Instruction Manual - Page 24
(2)Taking backlit subjects When the flash mode is set to AUTO or AUTO-S, the flash will fire automatically in backlit situations. 23 Confirm flash charge by pressing the shutter release button halfway. The flash indicator (orange) will light up in the viewfinder when the flash is charged. * If - Olympus 120570 | Instruction Manual - Page 25
of 0.6m(2ft). At 0.6m(2ft), position your subject within the area outlined by the closeup correction marks. * When the subject is close to the camera, use a tripod or other camera support to prevent the effects of camera shake. Focal length of 38mm at 0.6m(2ft). 24 - Olympus 120570 | Instruction Manual - Page 26
Focal length of 76mm at 0.6m(2ft). 25 Focus lock Using the focus lock, your subject will be in focus even if it is not in the center of the picture. - Olympus 120570 | Instruction Manual - Page 27
subject is not in the autofocus frame, use the focus lock. Otherwise the camera will focus on the background and the subject will not be in focus. When correct focus has been achieved, the autofocus indicator (green) will light up in the viewfinder. The focus and the exposure will be locked. 26 - Olympus 120570 | Instruction Manual - Page 28
While keeping the shutter release button pressed halfway, change the position of your subject in the viewfinder to achieve the desired composition. Press the shutter release button fully to take the picture. 27 - Olympus 120570 | Instruction Manual - Page 29
Selftimer Set the camera firmly in position. Press the SUBJECT button until is displayed on the LCD panel. Press the shutter release button halfway to focus. When correct focus has been achieved, the autofocus indicator (green) will light up in the viewfinder. 28 - Olympus 120570 | Instruction Manual - Page 30
release button fully to start the selftimer. The shutter will be released 12 seconds later. The selftimer indicator on the front of the camera will light up for the first 10 seconds, then blink rapidly for 2 seconds until the shutter is released. * During selftimer operation, the focus and exposure - Olympus 120570 | Instruction Manual - Page 31
per 1.7 seconds. (1 frame per approx. 4 seconds when the flash is fired.) Press the SUBJECT button until "C" is displayed on the LCD panel. The camera will shoot repeatedly as long as the shutter release button is pressed. Outside the shooting range (P. 18) the shutter will automatically stop. 30 - Olympus 120570 | Instruction Manual - Page 32
Auto-zoom mode Use auto-zoom mode to maintain a constant head and shoulders subject size within the frame, even though the distance to the subject may vary. Press the SUBJECT button until is displayed on the LCD panel. Press the shutter release button. The lens will automatically zoom and after - Olympus 120570 | Instruction Manual - Page 33
Auto-zoom mode working range: from 1.3m (4.3ft) to 2.6m (8.5ft). * Outside the ranges as shown, auto- zoom may not operate. * Even in the auto-zoom mode, the zoom button can be operated to override the automatic zoom setting. 32 - Olympus 120570 | Instruction Manual - Page 34
until "PRE FOCUS" is displayed on the LCD panel. Press the shutter release button halfway to focus on your subject. The autofocus indicator (green) will light up and you will hear a "click". 33 - Olympus 120570 | Instruction Manual - Page 35
Press the shutter release button fully. The shutter will be immediately released. By using this mode, the time lapse between when the shutter button is released and when the picture is actually taken is reduced. 34 - Olympus 120570 | Instruction Manual - Page 36
Press the FLASH button to set the mode to AUTO-S. will light on the LCD panel. AUTO-S flash photography Auto-S flash significantly reduces "red-eye" phenomenon (when a subject's eyes appear red) in flash portraits and group photos. Red-eye phenomenon is most likely to occur in very low - Olympus 120570 | Instruction Manual - Page 37
be cancelled when power is switched OFF. To cancel AUTO-S mode, press the FLASH button. AUTO-S flash mode working range: ISO WIDE(38mm) 100 0.6 - 4.1m (2 - 13.4ft) 200 0.6 - 5.8m (2 - 19ft) 400 0.6 - 8.2m (2 - 26.9ft) TELE(76mm) 0.6 - 3m (2 - 9.8ft) 0.6 - 4.2m (2 - 13.8ft) 0.6 - 6m (2 - 19.7ft - Olympus 120570 | Instruction Manual - Page 38
you don't want the flash to fire, such as for a night scene. 37 Press the FLASH button to set the flash mode to OFF. will light on the LCD panel. * In low lit conditions, the necessary shutter speed may be very slow (up to 2 seconds) to attain proper exposure. To prevent - Olympus 120570 | Instruction Manual - Page 39
FILL-IN flash In this mode, the flash always fires regardless of available light. Use this mode for daylight shooting in backlit conditions to compensate for backlighting which may make the subject appear too dark. By using the FILL-IN mode, the subject will be properly lit by the flash. 38 - Olympus 120570 | Instruction Manual - Page 40
Press the FLASH button to set the flash mode to FILL-IN. will light on the LCD panel. MULTI flash Use this mode, when you want to segment . Press the FLASH button to set the flash mode to MULTI. will light on the LCD panel. The flash will fire four times. The shutter speed is set to 1/6 sec. 39 - Olympus 120570 | Instruction Manual - Page 41
* Use this mode in low light. If you use it in bright conditions, your picture will be overexposed. * Use a tripod or other camera support to prevent the effects of camera shake. MULTI flash mode working range: ISO WIDE(38mm) 100 0.6 - 3.1m (2 - 10.2ft) 200 0.6 - 4.4m (2 - 14.4ft) 400 0.6 - 6. - Olympus 120570 | Instruction Manual - Page 42
flash photography Use slow-synchoro FILLIN flash to capture dimly lit backgrounds, such as the sky at dusk, while properly lighting the foreground with flash. 41 Press the FLASH button to set the flash mode to will light on the LCD panel. With the flash AUTO mode, only the subject can be taken. - Olympus 120570 | Instruction Manual - Page 43
scene in the background. * The necessary shutter speed may be very slow (up to 2 seconds) to attain proper exposure. To prevent blurred pictures resulting from camera shake, the camera should be set firmly in position (with a tripod for example). 42 - Olympus 120570 | Instruction Manual - Page 44
How to use the soft case (optional) Make sure to set the power switch to OFF before the camera is inserted into the case. 43 - Olympus 120570 | Instruction Manual - Page 45
use thinner, benzine or organic solvents to clean the camera. Do not touch the DX read-off contacts. Do not disassemble or expose batteries to excessive heat. Do not rotate the camera once it is mounted on a tripod. Use the tripod swivel to vary direction. Do not open the back cover while it is - Olympus 120570 | Instruction Manual - Page 46
camera to extreme heat (over 40°C/104°F), such as inside a car during the hot summer weather, or to extreme cold (below -10°C/14°F). 45 Do not leave the camera near magnetic fields, like on top of a TV set, or radio. In case of malfunction, take the camera to your nearest Olympus dealer or service - Olympus 120570 | Instruction Manual - Page 47
half of all your pictures with flash, two new 3V lithium batteries (DL 123A/CR123A) will allow you to take 30 or more rolls of film. If you do not use flash and zoom so often, the batteries will last much longer. Q: The camera does not operate. What should I do? A: (1)Make sure the power switch - Olympus 120570 | Instruction Manual - Page 48
Specifications Type: Full-automatic 35mm autofocus lens-shutter camera with built-in 38 - 76 zoom lens. Film format: 35mm standard DX coded film (24 x 36mm) Lens: Olympus lens 38 - 76mm F4.5 - 6.2, 7 elements in 7 groups. Shutter: Programmed electronic shutter. Focusing: Active type infrared - Olympus 120570 | Instruction Manual - Page 49
Flash working range (ISO 400 color negative film): Wide-angle: 0.6 - 8.2m (2ft - 26.9ft), Telephoto: 0.6m - 6m (2ft - 19.7ft) Flash modes: AUTO (Automatic flash activation in low light and backlight) Auto-S (Red-eye reducing, in low light and backlight) OFF (No flash) FILL-IN (Forced - Olympus 120570 | Instruction Manual - Page 50
LTD. San-Ei Building, 22-2. Nishi Shinjuku 1-chome, Shinjuku-ku, Tokyo, Japan Tel: 03-3340-2211 OLYMPUS CORPORATION Crossways Park, Woodbury, New York 11797-2087, U.S.A. Tel: 516-364-3000 OLYMPUS OPTICAL CO. (EUROPA) GMBH Postfach 104908, Wendenstrasse 14-16, 2000 Hamburg 1, Germany Tel: 040-23773
-
 1
1 -
 2
2 -
 3
3 -
 4
4 -
 5
5 -
 6
6 -
 7
7 -
8
-
9
-
10
-
11
-
12
-
13
-
14
-
15
-
16
-
17
-
18
-
19
-
20
-
21
-
22
-
23
-
24
-
25
-
26
-
27
-
28
-
29
-
30
-
31
-
32
-
33
-
34
-
35
-
36
-
37
-
38
-
39
-
40
-
41
-
42
-
43
-
44
-
45
-
46
-
47
-
48
-
49
-
50
 |
 |

INSTRUCTIONS