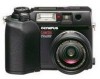
Olympus C3040 C-3040 Instruction Manual (5.4 MB)
Olympus C3040 - CAMEDIA Digital Camera Manual
 |
View all Olympus C3040 manuals
Add to My Manuals
Save this manual to your list of manuals |
Olympus C3040 manual content summary:
- Olympus C3040 | C-3040 Instruction Manual (5.4 MB) - Page 1
INSTRUCTIONS DIGITAL CAMERA Ⅲ Before using your camera, read this manual carefully to ensure correct use. Ⅲ We recommend that you take test shots to get accustomed to your camera before taking important photographs. 1.Getting Started P.27 2.Shooting and Playback Basics P.51 3.Focusing P.75 4. - Olympus C3040 | C-3040 Instruction Manual (5.4 MB) - Page 2
Thank you for purchasing an Olympus digital camera. Before you start to use your new camera, please read these instructions carefully to enjoy optimum performance and a longer service life. Keep this manual in a safe place for future reference. Legal and other notices •All contents of this - Olympus C3040 | C-3040 Instruction Manual (5.4 MB) - Page 3
Describes how to download your and movies to your computer. pictures P.195- Provides information on topics such as trou10. Miscellaneous bleshooting and cleaning the camera as P.207- well as the camera specifications. Conventions used in these instructions In these Instructions, the icons - Olympus C3040 | C-3040 Instruction Manual (5.4 MB) - Page 4
receiver is connected. Only the RS-232C serial cable or USB cable should be used to connect the camera to a personal computer (PC). Declaration of Conformity Model Number: C-3040Zoom Trade Name: OLYMPUS Responsible Party: Olympus America Inc. Address: 2 Corporate Center Drive, Melville, New - Olympus C3040 | C-3040 Instruction Manual (5.4 MB) - Page 5
ELECTRIC SHOCK DO NOT OPEN CAUTION: TO REDUCE THE RISK OF ELECTRIC SHOCK, DO NOT REMOVE COVER (OR BACK). NO USER-SERVICEABLE PARTS INSIDE. REFER SERVICING TO QUALIFIED OLYMPUS SERVICE PERSONNEL. The lightning flash with the arrowhead symbol, within an equilateral triangle, is intended to alert the - Olympus C3040 | C-3040 Instruction Manual (5.4 MB) - Page 6
your safety, and to avoid damaging the product, use only accessories recommended by Olympus. 7 Water and Moisture - Never use this product around water local power company. Refer to your operating instructions for information on using the product with batteries. 10 Grounding, Polarization - If this - Olympus C3040 | C-3040 Instruction Manual (5.4 MB) - Page 7
qualified service personnel: a) If liquid has been spilled, or any object has fallen into the product. b) If the product has been exposed to water. c) If the product does not operate normally while following operating instructions. Adjust only the controls described in the operating instructions as - Olympus C3040 | C-3040 Instruction Manual (5.4 MB) - Page 8
When using NiMH batteries, use only Olympus brand NiMH batteries and charger. 2 Never load batteries with their +/- terminals reversed. Never force batteries into the battery compartment. 3 To prevent causing battery leaks or damaging their terminals, carefully follow all instructions regarding the - Olympus C3040 | C-3040 Instruction Manual (5.4 MB) - Page 9
instructions 5 Never heat batteries or incinerate them. 6 Never attempt to connect a battery directly to a power outlet, or to a cigarette lighter in a vehicle. 7 If battery immediately. 7 Never attempt to modify the battery compartment on the camera, never insert anything (other than the recommended - Olympus C3040 | C-3040 Instruction Manual (5.4 MB) - Page 10
instructions CAUTION 1 Olympus NiMH batteries are intended for use only with Olympus digital cameras. Never use these batteries with any other device. 2 Never subject batteries to strong shocks or continuous vibration. 3 Never mix batteries (old and new batteries, charged and uncharged batteries - Olympus C3040 | C-3040 Instruction Manual (5.4 MB) - Page 11
instructions Handling the Camera , never aim the camera directly into the sun, or any other camera is accidentally dropped in water, or if liquid is spilled into the camera, stop using the camera, allow the camera to dry, and then remove the batteries. Contact the nearest Olympus authorized service - Olympus C3040 | C-3040 Instruction Manual (5.4 MB) - Page 12
or subject it to shock or strong vibration. • To avoid damaging its precision lens, never leave the camera pointing directly into the sun. • Before storing the camera for a long period, remove the batteries. Select a cool, dry location for storage to prevent condensation or mold from forming inside - Olympus C3040 | C-3040 Instruction Manual (5.4 MB) - Page 13
safety instructions CAUTION Selecting Batteries for Your Camera • This camera can use four AA NiMH batteries, four AA Alkaline batteries, four AA lithium batteries, four AA NiCd batteries, or two CR-V3 lithium battery packs. Use of Olympus brand batteries is strongly recommended. • Alkaline battery - Olympus C3040 | C-3040 Instruction Manual (5.4 MB) - Page 14
into the monitor and control panel has a limited service life. When the monitor gets dark or flickers, consult your nearest Olympus dealer. ● In places damage to the monitor. ● When a subject is viewed diagonally in the camera, the edges may appear zigzagged on the monitor. This is not a malfunction - Olympus C3040 | C-3040 Instruction Manual (5.4 MB) - Page 15
Camera 23 Viewfinder 24 Control Panel Display 25 Monitor Display 25 1 Getting Started 27 Attaching the strap and lens cap 28 Loading the batteries 29 Life of the lithium battery pack (Included 32 Using a domestic AC wall outlet 33 Inserting and removing SmartMedia cards 35 Inserting a card - Olympus C3040 | C-3040 Instruction Manual (5.4 MB) - Page 16
on and off 52 Checklist before shooting 54 Checking the remaining battery charge 54 Checking SmartMedia card status (Card check 55 Checking the available shots/time 56 Adjusting the viewfinder 58 Holding the camera 58 Pressing the shutter button 59 Shooting ...60 Taking still pictures - Olympus C3040 | C-3040 Instruction Manual (5.4 MB) - Page 17
111 [Other Types of Shots] Taking sequential shots (Sequence mode 113 Using the self-timer and remote control 115 Using the self-timer to take pictures 116 Using the remote control to take pictures 117 Using special effects (Function mode 118 Panorama mode 120 Selecting Audio Record mode - Olympus C3040 | C-3040 Instruction Manual (5.4 MB) - Page 18
160 Printing all the images on a card (All print order 162 Printing only selected images (Single print order 164 Printing some images enlarged (Trimmed print order 167 Resetting print reserve 169 8 Mode setup 171 MODE SETUP - Using function settings for easy camera operation 172 List of mode - Olympus C3040 | C-3040 Instruction Manual (5.4 MB) - Page 19
directly from a card 197 Connecting to a computer using the communication cable 198 Connecting via a USB cable 198 Connecting via a serial cable 201 Downloading images using CAMEDIA Master 204 Overview of the CAMEDIA Master functions 206 10 Miscellaneous 207 Troubleshooting 208 Camera - Olympus C3040 | C-3040 Instruction Manual (5.4 MB) - Page 20
a serial cable to connect the camera to a personal computer. - SmartMedia cards can be used as the recording media. s In addition to lithium battery packs, AA-size nickel-metal hydride (NiMH) can also be used. * Depending on your personal computer, it may be necessary to install a USB driver. ** It - Olympus C3040 | C-3040 Instruction Manual (5.4 MB) - Page 21
contents Camera Strap Remote control A/V cable USB cable Warranty and user registration card Lens cap Lens cap cord CR-V3 Lithium Battery Pack (2) Instructions and English Quick Start Guide Software CD's (including windows 98 USB driver installer software) Remote Control Instructions 21 - Olympus C3040 | C-3040 Instruction Manual (5.4 MB) - Page 22
Checking the package contents SmartMedia card (1) Static-free SmartMedia case SmartMedia labels (2) SmartMedia write-protect stickers (4) SmartMedia Instructions 22 - Olympus C3040 | C-3040 Instruction Manual (5.4 MB) - Page 23
Names of parts Camera Control panel (P.25) Zoom lever (P.72, 86, 140, 142) Flash (built-in) (P.73, 125) Self-timer/Remote control lamp (P.116, 117) Remote control receiver (P.117) Diopter adjustment dial (P.58) Strap eyelet (P.28) Connector cover Lens Microphone (P.122, 149) 5-pin external flash - Olympus C3040 | C-3040 Instruction Manual (5.4 MB) - Page 24
cover (P. 29) Bottom view (OK button / P.44) AEL (AE lock button / P.98) (Protect button / P.144) (Monitor button / P.63) Card access lamp (P. 61) (Menu button / P. 42) Battery compartment lock (P. 29) Viewfinder Tripod socket AF target mark (P. 60, 74) Orange lamp (P. 60, 73) Green lamp (P. 55 - Olympus C3040 | C-3040 Instruction Manual (5.4 MB) - Page 25
synchro (P. 131) Battery check (P. 54) Manual focus (P. 82) Flash mode (P. 73, 125) Macro mode (P. 84) Card error (P. 55, 216) White balance (P. 105) Spot Metering mode (P. 95) Sequence mode (P. 113) ISO indicator (P. 103) Exposure compensation (P. 92) Self-timer/ Remote control (P. 115) Auto - Olympus C3040 | C-3040 Instruction Manual (5.4 MB) - Page 26
26 - Olympus C3040 | C-3040 Instruction Manual (5.4 MB) - Page 27
OLYMPUS DIGITAL CAMERA Chapter 1Getting Started • This chapter describes the things you need to know before you can use your camera. These include the procedures for loading the batteries and SmartMedia card and for using the Mode dial and menu screens. - Olympus C3040 | C-3040 Instruction Manual (5.4 MB) - Page 28
. This could result in personal injury or damage to the camera. • Take care to attach the strap correctly as described above. If the strap is attached incorrectly in any way and the camera comes loose or is dropped as a result, Olympus accepts no liability whatsoever for any injury or damage that - Olympus C3040 | C-3040 Instruction Manual (5.4 MB) - Page 29
by the arrow on the cover. 4 Open the battery compart- 3 4 ment cover. 5 Load the batteries. q If you are using lithium battery packs, ensure that you load the battery packs in the correct direction, as shown in the figure at right. If you try to load a battery pack backwards, it will only go in - Olympus C3040 | C-3040 Instruction Manual (5.4 MB) - Page 30
and -) are as shown in the figure at right. 1 6 Close the battery compart- ment cover by pressing it down onto the batteries and sliding it in the opposite direction to the arrow on the cover. q Pressing on the edge of the battery compartment cover will make it more difficult to close. q The cover - Olympus C3040 | C-3040 Instruction Manual (5.4 MB) - Page 31
the type shown below must not be used. Where the external seal (insulating cover) is entirely removed (bare battery) or partially removed. Where the negative (-) terminal is flat and a part of the terminal is covered by the external seal (insulating cover). Where part of - Olympus C3040 | C-3040 Instruction Manual (5.4 MB) - Page 32
guide to the number of shots that can be taken and the available playback time using the CR-V3 lithium battery 1 pack supplied with the camera. However, note that the battery life can vary greatly depending on the battery the zoom function used in every shot, and full-time AF and digital zoom both - Olympus C3040 | C-3040 Instruction Manual (5.4 MB) - Page 33
Started A/S/M Loading the batteries Using a domestic AC wall outlet To connect your camera to an ordinary domestic AC wall outlet, you need the optional AC adapter. Use an AC adapter designed for the area where camera is used. Consult your nearest Olympus dealer or service center for details - Olympus C3040 | C-3040 Instruction Manual (5.4 MB) - Page 34
or disconnect the AC adapter with wet hands. • If the AC adapter cable is hot, smells scorched or is emitting smoke, unplug it immediately and contact your nearest Olympus service center. • Make sure that the camera is switched off before connecting or disconnect- ing the AC adapter. • When - Olympus C3040 | C-3040 Instruction Manual (5.4 MB) - Page 35
by the Olympus CAMEDIA Digital Camera to record your pictures in the same way as film in a conventional camera. 1 However, the images recorded on a SmartMedia card can be deleted or replaced and can also be transferred to a personal computer for editing. In these Instructions, SmartMedia cards are - Olympus C3040 | C-3040 Instruction Manual (5.4 MB) - Page 36
A/S/M Getting Started Inserting and removing SmartMedia cards Inserting a card 1 Check that the Mode dial 1 to "OFF". 2 Open the card cover. 3 Insert the card in the direc- tion shown in the figure. q Note the orientation of the card. If it is inserted incorrectly, it may become jammed. 4 - Olympus C3040 | C-3040 Instruction Manual (5.4 MB) - Page 37
A/S/M Inserting and removing SmartMedia cards Removing a card 1 Check that the Mode dial to "OFF". 2 Open the card cover. MODE DIAL 1 P OFF POWER/ 1 2 3 Push the card in. q The card pops out for easy removal. 4 Grasp the card and pull it out. 3 Card access lamp Push the card in to remove it - Olympus C3040 | C-3040 Instruction Manual (5.4 MB) - Page 38
set the date and time on the camera's internal clock. The date and time can then be imprinted on your shots. 1 1 Remove the lens cap. Getting Started ER/MODE 2 Set screen appears. 38 3 Monitor 5 7 11 12 CARD SETUP MODE SETUP SETUP A/S/M MODE AE LOCK [3/3] (This screen shows the still - Olympus C3040 | C-3040 Instruction Manual (5.4 MB) - Page 39
SETUP screen reappears. 12 Press the [OK] button repeatedly until the menu disappers. q The menu screen clears. q These settings are retained when you switch the camera off. 39 - Olympus C3040 | C-3040 Instruction Manual (5.4 MB) - Page 40
setting if the camera is Getting Started left without batteries for approximately 1 hour (based on Olympus test con- card contains no recorded images when the Mode dial is set to " ", the menu screen does not appear when you press the (Menu) button. • If you switch the camera off, the camera - Olympus C3040 | C-3040 Instruction Manual (5.4 MB) - Page 41
camera on in Still picture shooting mode. In "P" (Program mode), the camera Manual mode" from the Still picture shooting menu. (P.90-93) You can then select your own photography settings to achieve the desired effect. " " (Movie record mode) Setting the Mode dial to " " switches the camera - Olympus C3040 | C-3040 Instruction Manual (5.4 MB) - Page 42
Using the menus You can use the menus to access and select a wide range of camera settings. The menus are shown on the monitor and vary depending on the Mode dial setting. 1 Refer to the shooting menu and playback menu options (P. - Olympus C3040 | C-3040 Instruction Manual (5.4 MB) - Page 43
and subsequent menu pages 1 AF/MF AF DRIVE WB AUTO ISO AUTO O [1/3] AF/MF DRIVE AUTO WB 100 ISO 200 400 [1/3] Selection or Confirm SLOW DIGITAL ZOOM FUNCTION OFF OFF OFF OFF [2/3] q You can move from page 1/3 to page 3/3 by pressing on the Arrow pad. q To save the current settings and exit - Olympus C3040 | C-3040 Instruction Manual (5.4 MB) - Page 44
frame moves left and the selected setting is displayed on the right. q In a shooting mode (the Mode dial set to any setting other than " "), the camera is ready to shoot at this point. 7 Press the [OK] button. q The selected setting is saved and the menu screen is replaced by the normal - Olympus C3040 | C-3040 Instruction Manual (5.4 MB) - Page 45
switch the camera off, regardless of whether "ALL RESET" is set to "ON" or "OFF". • When the selected settings do not work: → You did not press the [OK] button after selecting the setting. Select the setting again and then press the [OK] button to confirm the selection. • If the card contains - Olympus C3040 | C-3040 Instruction Manual (5.4 MB) - Page 46
on this camera. Select (White Balance) ISO DIGITAL ZOOM FUNCTION Function Selects Autofocus or Manual Focus. Select this zoom digitally up to 5x. Allows special photography modes. (BLACK&WHITE, SEPIA, WHITE BOARD and BLACK BOARD.) Allows you to record voice comments on pictures you have shot. Card - Olympus C3040 | C-3040 Instruction Manual (5.4 MB) - Page 47
AF/MF Selects Autofocus or Manual Focus. Allows you to take pictures using the self-timer or remote control. WB (White Sets the white record sound when you are shooting a movie. CARD SETUP Initializes (formats) the card. MODE SETUP Sets the camera mode to suit the type of photography. - Olympus C3040 | C-3040 Instruction Manual (5.4 MB) - Page 48
time, file name, etc.). Adds recorded voice comments to pictures you have shot. Not available. Erases all the frames on a card or initializes (formats) the card. Sets the camera mode to suit the type of photography. See the List of mode settings on P.173. Default setting - OFF - - - - See P. 143 - Olympus C3040 | C-3040 Instruction Manual (5.4 MB) - Page 49
Allows you to edit a movie or create an index listing the - P. 150 1/1 movie details. CARD SETUP Erases all the frames on a card or initializes (formats) - the card. P. 155 P. 157 MODE SETUP Sets the camera mode to suit the type of photography. See the List of mode - P. 172 settings on - Olympus C3040 | C-3040 Instruction Manual (5.4 MB) - Page 50
1 50 - Olympus C3040 | C-3040 Instruction Manual (5.4 MB) - Page 51
OLYMPUS DIGITAL CAMERA Chapter SPhlaoyobtaincgk Banadsics • This chapter covers basic camera operation and describes how to use the camera for simple photography, how to display your pictures and movies, and how to erase images. Familiarize yourself with your camera by reading through 2this chapter - Olympus C3040 | C-3040 Instruction Manual (5.4 MB) - Page 52
the Mode dial to "A/S/M", "P", or " " sets the camera to a shooting mode. The lens extends out from the camera body and the remaining battery charge and number of storable pictures appear on the control panel. q When you set the Mode dial to " " , the camera switches on in playback mode and the - Olympus C3040 | C-3040 Instruction Manual (5.4 MB) - Page 53
the lens cap before you switch the camera on. • Never open the card cover, eject the card, remove the batteries, or unplug the AC adapter while the card access the control panel (sleep mode). Press the shutter button or zoom lever to switch the control panel display back on. Though the camera - Olympus C3040 | C-3040 Instruction Manual (5.4 MB) - Page 54
charge When you switch the camera on, the level of remaining battery charge is dis- played on the control panel. When the remaining battery charge is low, load new batteries. If you are using NiMH or Ni-Cd batteries, recharge the batteries. 2 Battery check lights (and turns off automatically - Olympus C3040 | C-3040 Instruction Manual (5.4 MB) - Page 55
shooting Checking SmartMedia card status (Card check) When the camera is switched on in a shooting mode, the camera automatically checks for a card. Control panel Viewfinder Displayed when there is no card in 2 the camera or when there is a card Card error fault. icon The Card error indicator on - Olympus C3040 | C-3040 Instruction Manual (5.4 MB) - Page 56
or "A/S/M", the number of storable pictures is displayed on the control panel. (When you switch the camera on with the Mode dial set to " ", the available still shots Recording mode TIFF SHQ HQ Number of pixels File Memory capacity (pictures without sound/pictures with sound) 8MB 16MB 32MB - Olympus C3040 | C-3040 Instruction Manual (5.4 MB) - Page 57
pixels 320 x 240 160 x 120 4MB 11 46 Memory capacity 8MB 16MB Over 32MB 23 46 75 93 186 control panel and monitor is the remaining time for which you can record data on the current card 0, the camera emits a warning beep, the green lamp beside the viewfinder blinks and the "CARD FULL" message - Olympus C3040 | C-3040 Instruction Manual (5.4 MB) - Page 58
Landscape position Portrait position Incorrect Keep your fingers away from the lens. • Do not apply excessive force to the lens. • Keep your fingers and the strap away from the lens and flash. • When holding the camera in the landscape position, hold the camera so that 58 the flash is at the top. - Olympus C3040 | C-3040 Instruction Manual (5.4 MB) - Page 59
. (P.78) 2 Press the shutter button the rest of the way down (press fully). q The camera takes the picture and emits a short double-beep. q The card access lamp blinks while the picture is being recorded onto the card. If the green lamp blinks To take a picture of a subject that is a distance of - Olympus C3040 | C-3040 Instruction Manual (5.4 MB) - Page 60
(P.88-91) 2 Compose the picture by looking through the viewfinder and using the zoom lever. (P.72) q Compose the shot so that the subject is in the center P.76. q If you have selected full-time AF (P.79), the camera constantly focuses even when the shutter button is not pressed down halfway, - Olympus C3040 | C-3040 Instruction Manual (5.4 MB) - Page 61
lamp blinks as the camera starts recording the picture onto the card. q The card access lamp blinks while the data is being recorded onto the card. q To check the but should last between 0.5 and 43 seconds.) q You can check the camera memory status by using the monitor to take pictures. (P.63) q You - Olympus C3040 | C-3040 Instruction Manual (5.4 MB) - Page 62
viewfinder may be different. In that case, use the monitor to take the picture. • Never open the card cover, eject the card, remove the batteries, or unplug the AC adapter while the card access lamp is blinking. This could not only prevent the recording of your current picture, but could also - Olympus C3040 | C-3040 Instruction Manual (5.4 MB) - Page 63
the same procedure as for the viewfinder. q The bottom of the memory gauge lights and the camera starts storing the image onto the card. q Unless the card is full, you can continue shooting pictures during image recording until the memory gauge is completely lit. q When you shoot 2 or more pictures - Olympus C3040 | C-3040 Instruction Manual (5.4 MB) - Page 64
or discard the picture you have just shot. Memory gauge Shooting and Playback Basics No shots 1 shot to write pictures to the card. • When the subject is at an angle to the camera, the edges of the image camera movement and makes shooting easier. Switching the monitor off also reduces battery - Olympus C3040 | C-3040 Instruction Manual (5.4 MB) - Page 65
, press the shutter button again. q The remaining seconds display on the monitor shows the available shooting time. q The bottom of the memory gauge on the monitor lights and the camera starts recording the movie to the card. q Once you have been shooting for more than 1 second, the center of the - Olympus C3040 | C-3040 Instruction Manual (5.4 MB) - Page 66
briefly to allow the camera to refocus. To keep the camera focused all the time during shooting, set sound 5 record mode to "OFF". (P.124) 5 When the card access lamp starts blinking, recording of the card has begun. q Even if the gauge displays available memory, you cannot shoot the - Olympus C3040 | C-3040 Instruction Manual (5.4 MB) - Page 67
playback) 2 You can use the Arrow pad to view other pictures stored on the card. : Displays the next picture. : Displays the previous picture. : Jumps back 10 icon. (P.69) ER/MODE A/S/M 2 P OFF POW 1 Battery check Record mode HQ 12.23.,00 21:56 6453 Date Time Frame number DIAL 67 - Olympus C3040 | C-3040 Instruction Manual (5.4 MB) - Page 68
view your pictures, you can rotate pictures that were taken with the camera on its side so that they are easier to see. (P.145) • The camera cannot display pictures with file or folder names not automatically assigned by the camera itself. (P.191) • When you turn it on, the monitor flashes briefly - Olympus C3040 | C-3040 Instruction Manual (5.4 MB) - Page 69
to select "START". q To cancel movie playback, press the (Menu) button. 5 Press the [OK] button. q The card access lamp blinks and the movie starts playing when the camera has finished reading it from the card. To pause the movie... Press the [OK] button during playback. Press it again to resume - Olympus C3040 | C-3040 Instruction Manual (5.4 MB) - Page 70
Checking and erasing photographed images You can use the Arrow pad to 5 advance the movie frame by frame once playback has fin- ished or while the movie is paused. : Displays the start of the 2 movie. : Displays the end of the movie. Shooting and Playback Basics : Advances the movie by - Olympus C3040 | C-3040 Instruction Manual (5.4 MB) - Page 71
mode (P.140) and Close-up playback mode (P.142). 2 13 4 Monitor YES NO YES OK OFF OWER/MOD NO • Take great care never to open the card cover, eject the card, remove the batteries or unplug the AC adapter while a picture is being erased. This could destroy the data stored on the - Olympus C3040 | C-3040 Instruction Manual (5.4 MB) - Page 72
You can use the camera's 3× zoom for telephoto or wide-angle shots. If "DIGITAL ZOOM" is set to "ON" in the shooting menu (P.85), you can zoom in to even higher magnifications. P A/S/M 2 To enlarge the subject in the shot (telephoto) Turn the lever toward T. Shooting and Playback Basics To - Olympus C3040 | C-3040 Instruction Manual (5.4 MB) - Page 73
low-light and backlit conditions. See P.126 for information on the other flash modes. The default flash mode is "AUTO". 2 DIAL P A/S/M 1 1 Check that the control panel does not show the , or icon. ER/MODE A/S/M P OFF POW 23 q If any of these modes is shown, use the (Flash mode) button to - Olympus C3040 | C-3040 Instruction Manual (5.4 MB) - Page 74
be used in Sequence mode. (P.113) • Unless you select "OFF" in the "ALL RESET" setting (P.175), this setting will be cancelled when you switch the camera off. 74 - Olympus C3040 | C-3040 Instruction Manual (5.4 MB) - Page 75
OLYMPUS DIGITAL CAMERA Chapter 3Focusing • This chapter describes how to use some of the camera features, such as focusing and zooming, that are essential to taking effective shots. - Olympus C3040 | C-3040 Instruction Manual (5.4 MB) - Page 76
to focus automatically and the green lamp blinks. In situations 4 and 5, the camera will not focus even though the green lamp lights and the shutter releases. When this happens, use the procedure described below or use Manual focus. (P.82) 1 Subjects with little or no contrast 3 • Lock the focus on - Olympus C3040 | C-3040 Instruction Manual (5.4 MB) - Page 77
closer to the subject. (This is particularly pronounced when the zoom is set to telephoto.) Viewfinder Picture frame 3 Picture frame for as the monitor shows the actual area photographed. • Note that the camera uses battery power faster when the monitor is used. Working range Macro mode Normal mode - Olympus C3040 | C-3040 Instruction Manual (5.4 MB) - Page 78
Focusing on off-center subjects (Focus lock) If your main subject is not within the AF target mark when you compose your shot, use the procedure below to focus. This is called focus lock. P A/S/M 1 Position your main subject 3 inside the AF target marks, and press the shutter button down - Olympus C3040 | C-3040 Instruction Manual (5.4 MB) - Page 79
) Full-time AF is a mode in which the camera repeatedly focuses on the object in front of the camera lens even when the shutter button is not being pressed. This -TIME AF" and then press . 24 A/S/M P OFF POW 3 1 P F2.0 1/800 CARD SETUP MODE SETUP SETUP 0.0 A/S/M MODE AE LOCK [3/3] 79 - Olympus C3040 | C-3040 Instruction Manual (5.4 MB) - Page 80
to the MODE SETUP screen. 7 Press the [OK] button repeatedly until the menu disappears. AF MODE FULL-TIME AF REC VIEW OFF ON [3/4] • The camera uses battery charge faster when full-time AF is selected. • Full-time AF only operates when the monitor is switched on. Be sure that the monitor is - Olympus C3040 | C-3040 Instruction Manual (5.4 MB) - Page 81
for focusing on the subject. NORMAL : In this mode, the camera looks at almost the entire screen and automatically selects the subject to . 5 Press or to select "NORMAL" or "SPOT". 367 1 P F2.0 1/800 CARD SETUP MODE SETUP SETUP 0.0 A/S/M MODE AE LOCK [3/3] 6 Press the [OK] button to - Olympus C3040 | C-3040 Instruction Manual (5.4 MB) - Page 82
and the shooting distance selection screen is displayed. 3 Press to select "MF". q " MF " appears on the control panel and a distance indicator with a movable cursor appears on the monitor. q To cancel manual focus, press on the Arrow pad to select "AF". When " MF " is no longer displayed, press - Olympus C3040 | C-3040 Instruction Manual (5.4 MB) - Page 83
setting is saved and "MF" appears in red on the screen. q To cancel manual focusing, repeat steps 1 and 2 . When the AF/MF selection screen appears, be cancelled when you switch the camera off. • The distance indicator on the monitor is only intended as a guide. The actual distance may vary - Olympus C3040 | C-3040 Instruction Manual (5.4 MB) - Page 84
camera is set to telephoto (at the T setting), you can shoot at distances of as little as 7.9" so that a business card " " (Macro mode) appears on the control panel. q To cancel Macro mode, press 31.5" ER/MODE 1 A/S/M P OFF POW 2 Control panel Macro mode • Using the flash in Macro mode - Olympus C3040 | C-3040 Instruction Manual (5.4 MB) - Page 85
Focusing Zooming in further (Digital Zoom mode) The camera's digital zoom function provides an additional 5× magnification over and above the optical zoom (for 640 × 480 resolution). The optical and digital zooms used together deliver a combined maximum magnification equivalent to 15x. DIAL P - Olympus C3040 | C-3040 Instruction Manual (5.4 MB) - Page 86
1x to 4.0x 1x to 5.0x • Unless you select "OFF" in the "ALL RESET" setting (P.175), this setting will be cancelled when you switch the camera off. • If you switch the monitor off, Digital Zoom mode is cancelled and the image scale reverts to normal (100%). • The quality of images shot using the - Olympus C3040 | C-3040 Instruction Manual (5.4 MB) - Page 87
OLYMPUS DIGITAL CAMERA Chapter 4Custom Photography • This chapter describes how to select camera settings such as the field of view, brightness, exposure, color tones and quality so that you achieve the desired result. Read the instructions for each of the settings so that you can get the results - Olympus C3040 | C-3040 Instruction Manual (5.4 MB) - Page 88
aperture, in Shutter Priority mode you can set the shutter speed, and in Manual mode you can set both. DE DIAL OFF POWER/MO P A/S/M 1 Press setting is saved and you exit the menu screen. 34 1 P F2.0 1/800 CARD SETUP MODE SETUP A A/S/M MODE S AE LOCK M [3/3] 0.0 • When you camera off. 88 - Olympus C3040 | C-3040 Instruction Manual (5.4 MB) - Page 89
Controlling the depth of field (Aperture Priority mode) This mode allows you to set the aperture yourself. The camera automatically selects the correct shutter speed. By changing the aperture setting, you can change the appearance of the background. DE DIAL OFF POWER/MO A/S/M 2 A/S/M P 1 In - Olympus C3040 | C-3040 Instruction Manual (5.4 MB) - Page 90
" " is displayed, increase the shutter speed. • Unless you select "OFF" in the "ALL RESET" setting (P.175), this setting will be cancelled when you switch the camera off. 90 - Olympus C3040 | C-3040 Instruction Manual (5.4 MB) - Page 91
P 1 In the menu screen, set the "A/S/M MODE" setting to "M" (Manual mode). q Use the menu screen to select the shooting mode. See P.88 between the exposure calculated from the selected aperture and shutter speed and the camera's correct exposure. The difference is shown in a range from -3.0 EV - Olympus C3040 | C-3040 Instruction Manual (5.4 MB) - Page 92
. q When you select a setting other than "0", appears on the control panel. ER/MODE 2 A/S/M P OFF POW 1 Exposure compensation P F2 RESET" setting (P.175), this setting will be cancelled when you switch the camera off. • While exposure compensation changes the brightness of the image on the - Olympus C3040 | C-3040 Instruction Manual (5.4 MB) - Page 93
A/S/M 1 Press the (Menu) button. q The menu screen appears. q If you select "A/S/M", set the camera to Aperture Priority mode or Shutter Priority mode. (P.88) 234 A/S/M P OFF POW ER/MODE 4 DIAL 2 press . 1 P F2.0 1/800 0.0 AF/MF DRIVE WB AF ISO BKT 1.0 3 [1/3] Control panel Auto Bracket 93 - Olympus C3040 | C-3040 Instruction Manual (5.4 MB) - Page 94
mode. • Auto bracket cannot be used in the TIFF quality mode. • If there is insufficient buffer space available for the selected number of shots, the camera cannot take the next shot. • Flash cannot be used. • Unless you select "OFF" in the "ALL RESET" setting (P.175), this setting will be cancelled - Olympus C3040 | C-3040 Instruction Manual (5.4 MB) - Page 95
In Spot Metering mode, the camera measures the brightness of the subject. The camera provides two light metering modes: Digital ESP metering and spot metering. The camera's default light metering mode is Digital ESP. In Digital ESP light metering mode, the camera measures the light at the center - Olympus C3040 | C-3040 Instruction Manual (5.4 MB) - Page 96
appears on the control panel. q To cancel Spot Metering mode, press the 4 (Spot/Macro) button repeatedly until the icon on the control panel disappears. 2 Take the shot. ER/MODE 1 A/S/M P OFF POW 2 Control panel DIAL Custom Photography - Olympus C3040 | C-3040 Instruction Manual (5.4 MB) - Page 97
button until " " (Macro + Spot Metering mode) appears on the control panel. q To cancel Macro + Spot Metering mode, press the ( button repeatedly until the icons on the control panel disappear. 2 Take the shot. ER/MODE 1 A/S/M P OFF POW 24 Control panel DIAL Macro + Spot Metering mode - Olympus C3040 | C-3040 Instruction Manual (5.4 MB) - Page 98
button. If you select "SINGLE", the camera applies the AE lock. If you select "MULTI", the camera switches to multi-metering mode. If you setting is saved and you exit the menu screen. 34 1 P F2.0 1/800 CARD SETUP MODE SETUP OFF A/S/M MODE SINGLE AE LOCK MULTI [3/3] 0.0 • Unless you select - Olympus C3040 | C-3040 Instruction Manual (5.4 MB) - Page 99
with the exposure locked (AE lock) Pressing the [OK] button locks the exposure for the camera's current image. You can use this feature when you want to set the exposure for one retained after you take the shot (AE Memory): Press . " MEMO " is displayed. Compose the shot you want to take. 99 - Olympus C3040 | C-3040 Instruction Manual (5.4 MB) - Page 100
halfway. 23 • AE lock can also be used in Spot Metering mode. AE lock is released when... The AE lock is released and the AE memory is cleared in the following situations: - When you press . - When you change the Mode dial setting. - When you press the (Spot/Macro) button to change - Olympus C3040 | C-3040 Instruction Manual (5.4 MB) - Page 101
q The monitor switches on and a light-metering bar appears indicating that the camera is in multi-metering mode. (P.102) q You can repeat this step to multi-metering exposure set- tings are retained after you take the shot (AE Memory): Press . " MEMO " is displayed. 2 Position the AF target mark - Olympus C3040 | C-3040 Instruction Manual (5.4 MB) - Page 102
the average value for the measured points. P F2.0 1/800 0.0 ence between the average value and the measurement for the subject at which the camera is currently pointed. When you press the shutter button down halfway, the measurement is locked and this mark Measurements for the points at which - Olympus C3040 | C-3040 Instruction Manual (5.4 MB) - Page 103
400 (four times the sensitivity). When you select AUTO, the camera automatically selects the best ISO setting for the subject. Of the the [OK] button. q If you select a setting other than AUTO, "ISO" appears on the control panel. q In "A/S/M" mode, you can select "100", "200" or "400". q You can - Olympus C3040 | C-3040 Instruction Manual (5.4 MB) - Page 104
on the film speeds used in conventional photography and are only intended as a guide. • If you select "AUTO" and then set the Mode dial to "A/S/M", the ISO value is set to 100. • When you select "AUTO", the camera automatically selects a higher ISO setting if you take a shot in low-light conditions - Olympus C3040 | C-3040 Instruction Manual (5.4 MB) - Page 105
color tone (Preset White Balance) When the camera's automatic settings do not give the desired : " " : Daylight " " : Overcast " " : Tungsten light " " : Fluorescent q "WB" appears on the control panel. q You can still take pictures at this point. 234 A/S/M P OFF POW ER/MODE 4 4 1 P F2.0 - Olympus C3040 | C-3040 Instruction Manual (5.4 MB) - Page 106
some special types of light source. • Unless you select "OFF" in the "ALL RESET" setting (P.175), this setting will be cancelled when you switch the camera off. • Always view your shot on the monitor to check the color tones. 106 - Olympus C3040 | C-3040 Instruction Manual (5.4 MB) - Page 107
balance settings give the desired result, you can use this procedure to store the light source you are using as the camera's reference white color. The camera then uses the stored reference light source to adjust the overall color balance. P A/S/M 1 Press the (Menu) button. q The menu screen - Olympus C3040 | C-3040 Instruction Manual (5.4 MB) - Page 108
AUTO setting for normal shots. • Unless you select "OFF" in the "ALL RESET" setting (P.175), this setting will 108 be cancelled when you switch the camera off. - Olympus C3040 | C-3040 Instruction Manual (5.4 MB) - Page 109
the [OK] button. q The MODE SETUP screen appears. 4 Press or to select " WB " and then press to select "SETUP". 35 1 P F2.0 1/800 CARD SETUP MODE SETUP SETUP 0.0 5 Press the [OK] button. A/S/M MODE AE LOCK [3/3] (This screen shows the still photography menu.) ALL RESET WB SHARPNESS - Olympus C3040 | C-3040 Instruction Manual (5.4 MB) - Page 110
. 6 78 WB RED BLUE standard setting • Use the standard setting (no correction) for normal shots. • The selected setting is retained until changed, even when the camera is switched off. 110 - Olympus C3040 | C-3040 Instruction Manual (5.4 MB) - Page 111
then press the [OK] button. q The Recording mode appears on the control panel. q For still picture shooting, you can specify the resolution for q The setting is saved and you 34 1 P F2.0 1/800 CARD SETUP TIFF MODE SETUP SHQ HQ A/S/M MODE SQ1 AE LOCK SQ2 [3/3] 0.0 (This screen shows - Olympus C3040 | C-3040 Instruction Manual (5.4 MB) - Page 112
160 × 120 15 Custom Photography • Unless you select "OFF" in the "ALL RESET" setting (P.175), this setting will be cancelled when you switch the camera off. • Lower compression ratios give higher quality enlarged images. Note also that recording and display times are longer for the SHQ and TIFF - Olympus C3040 | C-3040 Instruction Manual (5.4 MB) - Page 113
button. Sequential shooting stops when you release the shutter button. The camera can take sequential shots at up to 3.3 frames per second. shooting) and then press the [OK] button. q The " " appears on the control panel. q When you select " " (seque ntial shooting), the focus, brightness ( - Olympus C3040 | C-3040 Instruction Manual (5.4 MB) - Page 114
switch from Sequence mode to another mode after taking sequential shots, you cannot take another picture until the camera finishes recording the sequential shots onto the card. • To prevent camera shake, the slowest available shutter speed in Sequence mode is 1/30 sec. Dimly lit subjects may appear - Olympus C3040 | C-3040 Instruction Manual (5.4 MB) - Page 115
Photography Using the self-timer and remote control You can also take pictures using the camera's self-timer function or the remote control. These features are particularly useful for commemorative shots. In these modes, use a tripod to keep the camera steady. DIAL P A/S/M 1 Press the (Menu - Olympus C3040 | C-3040 Instruction Manual (5.4 MB) - Page 116
P A/S/M 1 When you press the shutter button, the self-timer/remote control lamp on the front of the camera lights for 10 sec- 4 onds. It then flashes for a further 2 seconds before the shutter releases. Self-timer/remote control lamp 1 Custom Photography 2 To stop the self-timer once it - Olympus C3040 | C-3040 Instruction Manual (5.4 MB) - Page 117
, move closer to the camera and press remote control receiver Self-timer/remote control lamp it again. (Radio wave interfer- ence can prevent the lamp from flashing. If this occurs, change the channel as direct- ed in the instructions for the remote control.) • See P.146 for information - Olympus C3040 | C-3040 Instruction Manual (5.4 MB) - Page 118
Using special effects (Function mode) The camera features special effects functions that allow you to take black in Function mode. 23 A/S/M P OFF POW 34 1 P F2.0 1/800 SLOW OFF DIGITAL ZOOM BLACK&WHITE FUNCTION SEPIA 0.0 WHITE BOARD BLACK BOARD [2/3] (This screen shows the still - Olympus C3040 | C-3040 Instruction Manual (5.4 MB) - Page 119
using exposure compensation. (P.92) • Unless you select "OFF" in the "ALL RESET" setting (P.175), this setting will be cancelled when you switch the camera off. • When you set the Mode dial to " ", the "WHITE BOARD" and "BLACK BOARD" options are deactivated. • You cannot set the white balance - Olympus C3040 | C-3040 Instruction Manual (5.4 MB) - Page 120
Olympus standard SmartMedia cards include a Panorama mode function that makes it simple to take panorama shots. You can use the CAMEDIA Master software as the direction for linking the shots. q The linking direction is dis- played. 345 A/S/M P OFF POW 42 1 P F2.0 SLOW DIGITAL ZOOM FUNCTION 1/ - Olympus C3040 | C-3040 Instruction Manual (5.4 MB) - Page 121
to normal shooting mode. 7 4 6 • Panorama mode is available only when an Olympus brand standard SmartMedia card is used. • The camera itself cannot create composite panorama images. You must use the CAMEDIA Master software. • The focus, exposure and white balance are set in the first picture - Olympus C3040 | C-3040 Instruction Manual (5.4 MB) - Page 122
" and then press . A/S/M P OFF POW 5 3 Press or to select "ON" and then press the [OK] button. q The sound record (microphone) icon appears on the control panel. q You can still take pictures at this point. 4 Press the [OK] button. q The setting is saved and you exit the menu screen. 34 1 P F2 - Olympus C3040 | C-3040 Instruction Manual (5.4 MB) - Page 123
recorded after a picture is taken is actually recorded onto the card before the image is recorded. After you take the picture, check that the icons are displayed on the control panel and monitor and point the camera's microphone (P.24) in the direction of the sound you want to record. • The sound - Olympus C3040 | C-3040 Instruction Manual (5.4 MB) - Page 124
longer movies with the same card capacity. /MODE DIA P OFF CARD SETUP MODE SETUP ON 0.0 [2/2] • If movie sound recording is set to "ON", zooming can only be performed digitally . Set movie sound recording to "OFF" to take pictures using the optical zoom - Olympus C3040 | C-3040 Instruction Manual (5.4 MB) - Page 125
OLYMPUS DIGITAL CAMERA Chapter 5Using Flash • This chapter describes how to take pictures using flash. These descriptions cover the use of both built-in flash and external flash units. - Olympus C3040 | C-3040 Instruction Manual (5.4 MB) - Page 126
. See P.73 for information on using flash to take pictures. If you select a setting other than Auto-Flash, the flash mode is displayed on the control panel. ➠➠➠ Using Flash The flash modes change in the cycle shown below each time you press the (flash mode) button. 5 Flash mode Function and - Olympus C3040 | C-3040 Instruction Manual (5.4 MB) - Page 127
"red-eye" effect. In this mode, the camera fires 10 rapid pre-flashes to reduce the severity this mode is identical to Auto-Flash mode. Control panel Red-eye reduction flash mode • The shutter the shutter button. Take care to hold the camera steady during this time. • The effectiveness of - Olympus C3040 | C-3040 Instruction Manual (5.4 MB) - Page 128
can also be used to correct the adverse effects of backlighting or by artificial lighting. Control panel 5 Forced Flash mode Using Flash • Ensure that your subject is within the to shoot evening or night scenes. Control panel Flash Off mode • This mode uses slower shutter speeds and a tripod should - Olympus C3040 | C-3040 Instruction Manual (5.4 MB) - Page 129
2 Use or on the Arrow pad to select " " and then press . 3 Press or to set the amount of flash intensity control and then press the [OK] button. q The " " appears on the control panel. q The size of the correction increases in 1/3-EV steps each time you press and decreases in 1/3-EV steps each - Olympus C3040 | C-3040 Instruction Manual (5.4 MB) - Page 130
Using Flash Setting the flash brightness (Flash intensity control) 4 Press the [OK] button. q The setting is saved and you for both flashes at the same time. • If the FL-40 external flash is set to "MANUAL" and is used in conjunction with the built-in flash, only the intensity of the built-in - Olympus C3040 | C-3040 Instruction Manual (5.4 MB) - Page 131
shutter opens. If you use this setting to photograph a moving car, the final shot will show the headlights moving ahead of the car in the direction the car is moving (1st-curtain effect). 5 The " 2" setting fires the flash just before the shutter closes. If you use this setting to photograph - Olympus C3040 | C-3040 Instruction Manual (5.4 MB) - Page 132
. 5 4 Press the [OK] button. q The setting is saved and you exit the menu screen. 3 A/S/M P OFF POW 34 P F2.0 1/800 SLOW OFF DIGITAL ZOOM SLOW 1 FUNCTION SLOW 2 0.0 DIAL Using Flash [2/3] Control panel Slow Synchro mode • When you use the FL-40 external flash, the external flash is - Olympus C3040 | C-3040 Instruction Manual (5.4 MB) - Page 133
, it automatically detects the camera's 5 flash mode and exposure settings and can be controlled by the camera in the same way as camera's tripod socket and use the dedicated bracket cable to connect the flash bracket to the 5-Pin external flash socket on the camera. q Refer also to the instructions - Olympus C3040 | C-3040 Instruction Manual (5.4 MB) - Page 134
Mode dial to "A/S/M", the monitor switches on. 4 Switch the external flash on. q The external flash mode is set to "TTL-AUTO". 5 5 Select the camera's flash mode. q The available flash modes are "Auto-Flash","Red-Eye Reduction Flash", "Forced Flash" and "Flash Off". See P.126 for more information on - Olympus C3040 | C-3040 Instruction Manual (5.4 MB) - Page 135
the built-in flash does not fire to avoid depleting the camera's batteries. P A/S/M 1 Mount the FL-40 external flash on the dedicated flash bracket. Then fasten it to the camera's tripod socket and use the dedicated bracket cable to connect the flash bracket to the 5-Pin external flash socket - Olympus C3040 | C-3040 Instruction Manual (5.4 MB) - Page 136
can also use the optional dedicated flash bracket FL-BK01 and bracket cable FL-CB01 to mount a different external flash on the camera. For information on the requirements for compatible external flash units, see "Supported different flash units" on P.138. A/S/M 1 Mount the external flash on the - Olympus C3040 | C-3040 Instruction Manual (5.4 MB) - Page 137
additional communica- tions functions, and do not use the accessories provided with such flash units. Such equipment, if used, could not only fail to function normally, but may also cause damage to the camera's circuitry. • It is recommended that you use the Olympus FL-40 external flash with this - Olympus C3040 | C-3040 Instruction Manual (5.4 MB) - Page 138
camera do not apply to external flash photography.) (3) The flash must cover the field of view for the equivalent of a 35 mm lens or larger lens in 35 mm photography. However, in close-up pho- tography with the lens zoomed , and do not use the accessories provided with such flash units. Such equipment - Olympus C3040 | C-3040 Instruction Manual (5.4 MB) - Page 139
OLYMPUS DIGITAL CAMERA Chapter 6Displaying, editing and erasing your pictures • This chapter describes how to display, edit and erase pictures you have shot. - Olympus C3040 | C-3040 Instruction Manual (5.4 MB) - Page 140
A/S/M P P Displaying, editing and erasing your pictures 1 Turn the zoom lever to "W". q After 1 second, multiple pic- tures, including the current screen. 1234 1235 1236 1237 1238 1239 1240 1241 1242 4 Turn the zoom lever to "T" to view the currently selected pic- ture in single-frame - Olympus C3040 | C-3040 Instruction Manual (5.4 MB) - Page 141
9 or 16) By turning the zoom lever towards "W" in playback mode, [OK] button to display the MODE SETUP screen. P F2.0 1/800 CARD SETUP MODE SETUP SETUP 0.0 4 Press or to select " " and then • If there are no pictures recorded on the SmartMedia card, the menu screen does not appear when you - Olympus C3040 | C-3040 Instruction Manual (5.4 MB) - Page 142
Selecting the enlarged section Press the Arrow pad ( , , and ) scrolls around the enlarged image and direction arrows ( , , of the screen. and ) appear on each edge Selecting another image to enlarge Turn the zoom lever to "W" to revert to the current image in normal display mode (1x). You can - Olympus C3040 | C-3040 Instruction Manual (5.4 MB) - Page 143
playback) This mode allows you to automatically display successive pictures recorded on a card one after the other in the same way as a slide show. 1 for an extended period, plug the camera into a domestic AC wall outlet. If you run the camera on bat- teries, automatic playback automatically ends - Olympus C3040 | C-3040 Instruction Manual (5.4 MB) - Page 144
"Formatting" on P.157.) • Protection cannot be set or removed for images on a card protected by a write-protect sticker. • You cannot set or remove image protection while you are displaying pictures on a TV. • Protection settings are retained until changed, even when the camera is switched off. 144 - Olympus C3040 | C-3040 Instruction Manual (5.4 MB) - Page 145
and sounds you have recorded on a TV using the AV cable supplied with the camera. Check that the camera and TV are both switched off before you connect the AV cable. 1 Plug one end of the AV cable into the A/V output jack (black) on the camera. Then plug the other end into the VIDEO IN (yellow - Olympus C3040 | C-3040 Instruction Manual (5.4 MB) - Page 146
its side. OK 6 • Movie images cannot be rotated. ,00.12.23 21:56 10 [Using the remote control] To use the remote control, ensure that the remote control is pointed at the remote control receiver on the camera. Use the +/- button to select pictures and the W button to play back an index. You can - Olympus C3040 | C-3040 Instruction Manual (5.4 MB) - Page 147
Displaying image information During picture display, you can also display the photography information for your pictures (camera settings, date and time, file name, etc.) on the monitor. This information is displayed for 5 seconds. A/S/M P P E DIAL 1 Use the Arrow pad to display a picture. 134 - Olympus C3040 | C-3040 Instruction Manual (5.4 MB) - Page 148
mode Resolution Aperture/Shutter speed/ Exposure compensation White balance Displaying image information for movies 6 Battery check Movie picture HQ SIZE: 320 240 Sound record Protect Record mode Resolution Date/time (P.175), this setting will be cancelled when you switch the camera off. 148 - Olympus C3040 | C-3040 Instruction Manual (5.4 MB) - Page 149
INFO FUNCTION START [1/2] Displaying, editing and erasing your pictures • Ensure that the camera is no more than 3.3 ft from the source of the sound. The sound of more than 3.3 ft. • Sound cannot be recorded on a card protected by a write-protect sticker. • You may not be able to record the - Olympus C3040 | C-3040 Instruction Manual (5.4 MB) - Page 150
You can create an index that shows you at a glance the content of movies you have shot. The created indexes can then be saved on a SmartMedia card as still images. Created indexes can contain only 9 frames. Created index images are saved in a different recording mode from that used during shooting - Olympus C3040 | C-3040 Instruction Manual (5.4 MB) - Page 151
Editing recorded movies (FUNCTION) Displaying, editing and erasing your pictures 5 Use and to select the first frame for the index display from the movie frames shot. When you have confirmed the selec- tion, press the [OK] button. q Pressing on the Arrow pad displays the first frame and - Olympus C3040 | C-3040 Instruction Manual (5.4 MB) - Page 152
6 Displaying, editing and erasing your pictures • Created indexes can contain only 9 frames. • Indexes cannot be created on the following types of card: • Protected cards • Cards for which a warning is displayed indicating that there is insufficient free space when a shooting mode is selected. 152 - Olympus C3040 | C-3040 Instruction Manual (5.4 MB) - Page 153
the 4 5 Arrow pad to select "FUNCTION" and then 6 8 2 press . 4 Use or to select "MOVIE EDIT" and then press the [OK] button. MOVIE PLAY INFO FUNCTION CARD SETUP MODE SETUP MOVIE INDEX MOVIE EDIT [1/1] Displaying, editing and erasing your pictures 153 - Olympus C3040 | C-3040 Instruction Manual (5.4 MB) - Page 154
ENTER OK Displaying, editing and erasing your pictures • The "NEW" option cannot be used when a warning has been displayed in a shooting mode indicating that the card is full. • Protected images cannot be overwritten. • You cannot edit movies recorded on protected - Olympus C3040 | C-3040 Instruction Manual (5.4 MB) - Page 155
use this function to erase protected images or images stored on cards protected by a write-protect sticker. To erase these images, ) button. q The menu screen appears. 2 Use or on the Arrow pad to select "CARD SETUP" and then press . 3 Press or to select " " and then press the [OK] button. - Olympus C3040 | C-3040 Instruction Manual (5.4 MB) - Page 156
is displayed. q Protected images (P.144) are not erased. If the card 6 includes protected images, the last protected image is displayed when erasing ends . • Take particular care not to open the card cover, eject the card, remove the batteries or unplug the AC adapter while images are being - Olympus C3040 | C-3040 Instruction Manual (5.4 MB) - Page 157
that the equipment you are using can store data on that card. The use of Olympus pre-formatted cards is recommended. Different cards or cards that have been formatted on a computer or other device must be initialized on your camera before you can use them. DIAL Displaying, editing and erasing your - Olympus C3040 | C-3040 Instruction Manual (5.4 MB) - Page 158
you use a non-Olympus brand commercially available card or card that has been formatted on a personal computer or other device, it may not be recognized by the camera. In this case, the card should be initialized (formatted) on the camera before use. • You cannot initialize a card that is protected - Olympus C3040 | C-3040 Instruction Manual (5.4 MB) - Page 159
DIGITAL CAMERA Chapter 7Print settings • Follow the instructions in this chapter to print out recorded images. • The camera also allows you to specify print orders so that your pictures can be printed automatically by stores that provide DPOF (Digital Print Order Format) system print services - Olympus C3040 | C-3040 Instruction Manual (5.4 MB) - Page 160
For more information, refer to the user manual for your printer. Print settings 3. You can also transfer your pictures directly to a personal computer. You can do this by using the camera's USB functions, or by using a FlashPath or card adapter. Once you have downloaded your pictures to a computer - Olympus C3040 | C-3040 Instruction Manual (5.4 MB) - Page 161
card contains files with DPOF orders set on another device, using this camera to specify new orders may erase the previous orders. • Even if the "PICTURE ERROR You cannot connect the camera directly to printers that support direct printing, such as the Olympus P-300U digital printer, to print images - Olympus C3040 | C-3040 Instruction Manual (5.4 MB) - Page 162
) Use the procedure below to record an instruction that prints all the pictures stored on a card. You can use this print order to have the specified number of copies of all the pictures automatically printed by a printer or photo lab that supports the DPOF system. E DIAL A/S/M P P Print settings - Olympus C3040 | C-3040 Instruction Manual (5.4 MB) - Page 163
protected by a write-protect sticker. - Print orders cannot be set for images marked with the " " icon. Print settings • The DPOF settings are saved on the card until changed, even when the camera is switched off. • If you print on the P-330N, orders for only the first 999 images recorded on the - Olympus C3040 | C-3040 Instruction Manual (5.4 MB) - Page 164
instruction that prints only selected pictures stored on a card. You can use this print order to have the specified number of copies of the selected pictures automatically printed by a printer or photo lab that supports trimmed printing by turning the zoom lever to "T". (P.167) CANCEL SET OK 164 - Olympus C3040 | C-3040 Instruction Manual (5.4 MB) - Page 165
the previous picture. : Displays the next picture. : Jumps back 10 pictures. : Jumps forward 10 pictures. q You can select index display mode by turning the zoom lever to "W". 12.23.'00 21:56 6453 CANCEL SET OK : Moves to the previous frame. : Moves to the next frame. 1234 1235 1236 - Olympus C3040 | C-3040 Instruction Manual (5.4 MB) - Page 166
13 12 : 5 : DATE TIME NO : YES NO CANCEL SET OK : 5 : DATE TIME NO : YES NO CANCEL SET OK • The DPOF settings are saved on the card until changed, even when the camera is switched off. • If you print on the P-330N, orders for only the first 999 images recorded on the - Olympus C3040 | C-3040 Instruction Manual (5.4 MB) - Page 167
a portion of a picture. A/S/M P P Print settings 1 In the card order screen, select single print ordering and press the [OK] button. (P. Jumps back 10 pictures. 1578 : Jumps forward 10 pictures. 3 Turn the zoom lever to "T". q The trimming mode screen x5 HQ appears and the selected cursor - Olympus C3040 | C-3040 Instruction Manual (5.4 MB) - Page 168
pad to move the cursor up and down, and and to move the cursor left and right. q Turning the zoom lever to "W" moves the cursor towards the top-left corner. Turning the zoom lever to "T" moves the cur- sor towards the bottom-right corner. q If you want to reposition the top 7 left - Olympus C3040 | C-3040 Instruction Manual (5.4 MB) - Page 169
print order status con- firmation screen is displayed. q If no print orders have been set for the pictures on the current card, the print order setting can- cellation screen is not dis- 2 played. 3 7 3 Press or on the Arrow pad to select "RESET" and then press the [OK] - Olympus C3040 | C-3040 Instruction Manual (5.4 MB) - Page 170
170 - Olympus C3040 | C-3040 Instruction Manual (5.4 MB) - Page 171
OLYMPUS DIGITAL CAMERA Chapter 8Mode setup • The mode setup options are accessed from the respective menu screens. The options available in the Still picture shooting menu, Movie record menu and Playback menu are different. - Olympus C3040 | C-3040 Instruction Manual (5.4 MB) - Page 172
selecting the units of length displayed in the screens, and selecting the camera's operating beep tones. 24 1 Press the (Menu) button. q Press or to select the desired setting and then P F2.0 1/800 0.0 press . CARD SETUP 8 q Either the current setting or "SETUP" will appear on the screen. - Olympus C3040 | C-3040 Instruction Manual (5.4 MB) - Page 173
AF MODE Sets the system used for focusing in Autofocus mode. NORMAL P.81 O FULL-TIME AF Allows you to specify that the camera repeatedly focuses without the shutter button OFF P.79 being pressed down halfway. * "P" (A/S/M is the same as "P") denotes Still picture shooting mode, " " denotes - Olympus C3040 | C-3040 Instruction Manual (5.4 MB) - Page 174
MODE SETUP - Using function settings for easy camera operation Displayed mode* P OO Setting REC VIEW O O FILE the image appears. Sets the recording method used for file names recorded on the SmartMedia card. Sets the monitor brightness. ON RESET -...x...+ P.185 P.191 P.193 Sets the date - Olympus C3040 | C-3040 Instruction Manual (5.4 MB) - Page 175
"ON" and then press the [OK] button. q If you select "ON", the camera settings revert to their default values when you switch the camera off. q If you select "OFF", the camera settings are retained when you switch the camera off. 4 Press the [OK] button repeatedly until the menu disappears. ER/MODE - Olympus C3040 | C-3040 Instruction Manual (5.4 MB) - Page 176
the camera off, along with the default settings. Setting Default setting See FLASH AUTO P.126 / (Macro/Metering mode) OFF P.84,95 ZOOM 35 P.105, 107 ISO AUTO P.103 (Flash intensity control) ±0 P.129 (Slow Syncro) 8 DIGITAL ZOOM OFF P.131 OFF P.85 Mode setup Function mode - Olympus C3040 | C-3040 Instruction Manual (5.4 MB) - Page 177
settings while you are taking pictures, those changes are discarded and the settings specified here are restored next time you switch the camera on. DIAL ER/MODE P A/S/M 1 Display the MODE SETUP screen. q Perform steps 1-3 in "Using the MODE SETUP menu screen". (P.172) 2345 A/S/M P OFF POW - Olympus C3040 | C-3040 Instruction Manual (5.4 MB) - Page 178
Selecting the settings when the camera is switched on (Custom settings) 5 WB "AUTO ISO "AUTO", "100", "200", "400" To ±2 EV in 1/3 EV increments "OFF", " 1", " 2" DIGITAL ZOOM "OFF", "ON" FUNCTION "OFF", "BLACK&WHITE", "SEPIA", "WHITE BOARD", BLACK BOARD" STILL "OFF", "ON" STILL " - Olympus C3040 | C-3040 Instruction Manual (5.4 MB) - Page 179
. [1/4] (This screen shows the still photography menu.) ALL RESET WB + - SHARPNESS CONTRAST NOHRAMRDAL NORMAL SOFT [1/4] • The selected setting is retained until changed, even when the camera is switched off. 179 - Olympus C3040 | C-3040 Instruction Manual (5.4 MB) - Page 180
screen shows the still picture shooting menu.) ALL RESET WB SHARPNESS CONTRAST HIGH NORMAL LOW [1/4] • The selected setting is retained until changed, even when the camera is switched off. 180 - Olympus C3040 | C-3040 Instruction Manual (5.4 MB) - Page 181
until the menu disappears. 1600X1200 1280X 960 1024X 768 640X 480 Mode setup • The selected setting is retained until changed, even when the camera is switched off. • Note that selecting a high resolution for recorded images increases the time required to display the images and reduces the - Olympus C3040 | C-3040 Instruction Manual (5.4 MB) - Page 182
resolution and quality for pictures recorded in SQ1 or SQ2 quality mode. Selecting "NORMAL" allows you to save more pictures on a card. Selecting "HIGH" lessens the graininess characteristic of compressed JPEG images. DIAL ER/MODE P A/S/M 1 Display the MODE SETUP screen. q Perform steps 1-3 in - Olympus C3040 | C-3040 Instruction Manual (5.4 MB) - Page 183
1600 x 1200 1280 x 960 1024 x 768 640 x 480 File format JPEG 8 Mode setup • The selected setting is retained until changed, even when the camera is switched off. • Note that selecting a high resolution for recorded images increases the time required to display the images and reduces the number - Olympus C3040 | C-3040 Instruction Manual (5.4 MB) - Page 184
tone volume (Beep) Use the procedure below to set the volume of the beeps used by the camera as audible warnings and to specify whether or not warnings are sounded. DIAL ER/MODE P A/S/M 1 HIGH [3/4] • The selected setting is retained until changed, even when the camera is switched off. 184 - Olympus C3040 | C-3040 Instruction Manual (5.4 MB) - Page 185
you to specify whether the picture you have just taken is displayed while it is being recorded on the SmartMedia card. DIAL P A/S/M 1 Display the MODE SETUP screen. q Perform steps 1-3 in "Using the MODE The selected setting is retained until changed, even when the camera is switched off. 185 - Olympus C3040 | C-3040 Instruction Manual (5.4 MB) - Page 186
displays the picture you have just taken before it is saved to the card and allows you to select whether to save the image or erase it. content. q If there are multiple images in buffer memory, you can use the Arrow pad to select images, the zoom lever to enlarge images, and index dis- play - Olympus C3040 | C-3040 Instruction Manual (5.4 MB) - Page 187
) 2 Turn the zoom lever to "T" to memory, that image is displayed next. q If sound record is switched on in Still picture Shooting mode, sound record begins after you opt to save the picture and press the [OK] but- ton. When sound record ends, the camera starts recording the image onto the card - Olympus C3040 | C-3040 Instruction Manual (5.4 MB) - Page 188
. The CHECK confirmation screen then reappears. 6 q If you switch the camera off while an image is still displayed on the CHECK screen image, the CARD SETUP", and "MODE SETUP". • Never remove the card or replace the batteries while you are using the CHECK option as the data in the buffer memory - Olympus C3040 | C-3040 Instruction Manual (5.4 MB) - Page 189
after shooting (CHECK) When you use Auto Bracket If you use Auto Bracket to take a picture, the index display changes depending on whether the buffer memory contains any images shot in normal shooting mode. q If Auto Bracket is used, the displayed index includes all the images shot. 1235 1236 1237 - Olympus C3040 | C-3040 Instruction Manual (5.4 MB) - Page 190
Saving/erasing images right after shooting (CHECK) 1000 1001 1002 1003 OK 1004 When Auto Bracket is set to 5 frames. q Images shot using Auto Bracket are displayed in the sequence shown in the figure at right. 8 Brightest + Compensation Normal - Compensation Darkest OK Mode setup • When - Olympus C3040 | C-3040 Instruction Manual (5.4 MB) - Page 191
managed so that file names are not duplicated when you download pictures to your personal computer. Images are recorded using cards, the folder and file names are reset. (Example) Folder No.102 File No. 0005 Change cards Folder No.100 File No. 0001 q AUTO When you change the cards, the camera - Olympus C3040 | C-3040 Instruction Manual (5.4 MB) - Page 192
you change cards. q If you select "AUTO", the folder Mode setup name from the previous card is card. In this way, file names are not duplicated when you take pictures using multiple cards insert a card that contains a file name numbered higher than the last file name on the previous card, file - Olympus C3040 | C-3040 Instruction Manual (5.4 MB) - Page 193
the [OK] button. m/ft [4/4] 5 Press the [OK] button repeatedly until the menu disappears. Mode setup • The selected setting is retained until changed, even when the camera is switched off. 193 - Olympus C3040 | C-3040 Instruction Manual (5.4 MB) - Page 194
Changing the distance display units (m/ft setting) When you are using Manual Focus mode, you can choose whether the focal distance displayed on the monitor is shown menu.) FILE NAME m/ft m ft [4/4] • The selected setting is retained until changed, even when the camera is switched off. 194 - Olympus C3040 | C-3040 Instruction Manual (5.4 MB) - Page 195
OLYMPUS DIGITAL CAMERA Chapter 9Downloading Images to a Computer • This chapter describes how to download your pictures to your personal computer. This chapter also introduces the downloading and image processing functions offered by the CAMEDIA Master software. - Olympus C3040 | C-3040 Instruction Manual (5.4 MB) - Page 196
Serial cable (*2) CAMEDIA Master Downloading Images to a Computer *1: • The USB driver is included on the CAMEDIA Master 2.5 CD-ROM. The latest version USB driver can also be downloaded from the Olympus web site. • To use the communications functions with Mac OS 8.6, USB MASS Storage Support - Olympus C3040 | C-3040 Instruction Manual (5.4 MB) - Page 197
upgraded versions of USB MASS Storage Support will work on Macintosh system software. Downloading pictures directly from a card By using a card adapter, you can transfer images to a personal computer without connecting the camera to the computer. Contact your Olympus Customer Support Center for - Olympus C3040 | C-3040 Instruction Manual (5.4 MB) - Page 198
guide (contained on the Software CD) on installing the driver. - If you are using an Apple Macintosh computer running Mac OS 8.6, check that you are running USB MASS Storage Support version 1.3.5. 1 Open the connector cover 1 on the camera. 2 Insert the plug marked A on the USB cable - Olympus C3040 | C-3040 Instruction Manual (5.4 MB) - Page 199
To avoid computer malfunctions, always use the procedures below when removing cards. (If any malfunction occurs, you must reconnect the USB cable or reboot your computer.) q Windows 1 Check that the card access lamp on the camera is no longer lit. 2 In the "My Computer" window, select the disk - Olympus C3040 | C-3040 Instruction Manual (5.4 MB) - Page 200
the [OK] button. (4) Disconnect the USB cable. Downloading Images to a Computer • Do not switch the camera off or change the camera mode while it is connected to a computer as this will cause a malfunction. • The camera will not switch to Sleep mode (battery save mode) or automatically switch off - Olympus C3040 | C-3040 Instruction Manual (5.4 MB) - Page 201
, 800 x 600 pixels or more (32000 of colors or better recommended) Downloading Images to a Computer • A sound card and microphone are required for audio playback and recording. QuickTime 4.0 must be installed to support movie playback. Refer to the CAMEDIA Master online manual for details. 201 - Olympus C3040 | C-3040 Instruction Manual (5.4 MB) - Page 202
installed on your computer before you connect the camera to the computer. Refer to the CAMEDIA Master online manual for information on installing CAMEDIA Master. 1 Check that the computer and camera are both switched off. 2 Plug the special serial cable into the port labeled "COM1", "COM2", etc on - Olympus C3040 | C-3040 Instruction Manual (5.4 MB) - Page 203
a computer using the communication cable 3 Remove the camera lens cap. 4 Plug the serial cable into the serial connector (RS-232C) on the camera. 4 5 Switch on the computer. 6 Set the camera's Mode dial to " ". 7 Launch CAMEDIA Master. serial connector (RS-232C) 9 Downloading Images to a Computer - Olympus C3040 | C-3040 Instruction Manual (5.4 MB) - Page 204
cable. 1 Launch CAMEDIA Master. 2 Click the "My Camera" icon. q If the camera is connected to your computer via a USB cable, or if you want to view images stored on a card in 9 another device (such as a card adapter or USB card reader/writer), click the remov- able disk icon. Downloading - Olympus C3040 | C-3040 Instruction Manual (5.4 MB) - Page 205
downloaded from the camera to the computer. 9 q The "Camera(C)" option is only valid for cameras connected via a serial cable. • Images downloaded to your computer can be viewed using the enclosed CAMEDIA Master software. You can also view the images using any graphics software that supports - Olympus C3040 | C-3040 Instruction Manual (5.4 MB) - Page 206
contrast, color balance, sharpness, etc.). q Camera-linked functions [Panorama Stitching]: Uses images shot in Panorama mode using a standard Olympus SmartMedia card to create composite panorama images. q Printing In addition to printing single images, CAMEDIA Master can also imprint the date and - Olympus C3040 | C-3040 Instruction Manual (5.4 MB) - Page 207
OLYMPUS DIGITAL CAMERA Chapter 10Miscellaneous - Olympus C3040 | C-3040 Instruction Manual (5.4 MB) - Page 208
you were taking pictures or recording images onto the SmartMedia card. ySymbols disappear from the viewfinder/monitor or the control panel. On the control panel, the battery remaining icon will blink. uThe memory gauge indicates that the memory is full. qRelease the shutter button and wait until - Olympus C3040 | C-3040 Instruction Manual (5.4 MB) - Page 209
Troubleshooting Problem: The camera does not take a picture when I press the shutter button. Cause Solution See iThere is a write-protect sticker on iInsert a new card in the camera. P.35 the card, or there is no card in the camera. oThe Mode dial is set to " ". oSet the Mode dial to "P", - Olympus C3040 | C-3040 Instruction Manual (5.4 MB) - Page 210
the card. rThe camera is connected to a TV. qSet the Mode dial to " ". wThe "NO PICTURE" message appears on the monitor. Take a picture and then display the shot. eRefer to the Error Code chart. rThe monitor is switched off while the camera is connected to a TV. P.140 P.60 P.216 P.145 10 Problem - Olympus C3040 | C-3040 Instruction Manual (5.4 MB) - Page 211
that the cable is connected correctly. wSet the Mode dial to " ". eLoad new batteries or use the optional AC adapter. rCheck whether the camera is cor- rectly recognized by the computer, as laid out in the USB driver (or CAMEDIA Master) installation guide. tUse the system software on the computer - Olympus C3040 | C-3040 Instruction Manual (5.4 MB) - Page 212
through the viewfinder, not while standing in front of the camera. Alternatively, use the remote control. yUse the correct focal distance for the manual focus shot. P.58,59 P.60,78 P.214 P.84 P.60, 115 P.82 Miscellaneous 10 Problem: The picture is too bright. Cause Solution See qThe flash - Olympus C3040 | C-3040 Instruction Manual (5.4 MB) - Page 213
Troubleshooting Problem: The picture is too dark. Cause Solution See qThe 109 10 Miscellaneous Problem: Part of the picture is obscured. Cause Solution See qThe lens was partly obscured by a finger or the strap. wYou were too close to the subject. qHold the camera correctly, taking - Olympus C3040 | C-3040 Instruction Manual (5.4 MB) - Page 214
dust and then wipe the lens carefully with lens cleaning paper. Replace the lens cap when storing the camera. SmartMedia card . . . .Wipe gently with a soft, dry cloth. • Never use harsh detergents such as benzene or alcohol to clean the camera. • Always remove the batteries and disconnect the AC - Olympus C3040 | C-3040 Instruction Manual (5.4 MB) - Page 215
PC card adapter To PC card slot TV MO drive TV AC adapter SmartMedia reader/writer Personal computer Digital camera Remote control Conversion lens adapter Wide-angle conversion lens Telephoto conversion lens Macro conversion lens External Flash Flash Bracket Bracket Cable Miscellaneous - Olympus C3040 | C-3040 Instruction Manual (5.4 MB) - Page 216
codes The Camedia uses a variety of error codes to display warnings when problems arise. (The code displayed on the control panel blinks.) Control panel display Monitor display Meaning Response CARD COVER OPEN The card cover Insert a card and close is open. the cover. NO CARD No card is - Olympus C3040 | C-3040 Instruction Manual (5.4 MB) - Page 217
Error codes Control panel display Monitor display Meaning Response (Formatting The card is not screen) formatted. Format the card. NO PICTURE There are no pictures on the card, so there is nothing to display. Insert a card that contains images. CARD FULL There is no free space on the - Olympus C3040 | C-3040 Instruction Manual (5.4 MB) - Page 218
items q Photo Printers For Olympus Digital Cameras q AC Adapter q Camera Case q Standard SmartMedia cards (8/16/32/64 MB) q FL-40 external flash q Flash bracket q Bracket cable q Floppy Disk Adapter q PC Card Adapter q NiMH Batteries q NiMH Battery Charger q USB SmartMedia Reader/Writer q PC - Olympus C3040 | C-3040 Instruction Manual (5.4 MB) - Page 219
, Tungsten Light, Fluorescent) Lens: Olympus lens 7.1 to 21.3 mm, F/1.8 to F/2.6, 10 elements in 7 groups (equivalent to 35- 105 mm on a 35 mm camera) Light metering: Spot metering or Digital ESP metering using the image pickup element Exposure control (photography modes): Program Auto - Olympus C3040 | C-3040 Instruction Manual (5.4 MB) - Page 220
Number of storable pic- tures, Card error, Flash mode, Flash intensity control, Battery check, Sequence mode, Exposure compensation, Spot Metering mode, White balance, ISO setting, Self- 10 timer/Remote control, Macro mode, Slow synchro, Auto bracket, Card writing, Manual focus, Sound record - Olympus C3040 | C-3040 Instruction Manual (5.4 MB) - Page 221
or 4 AA-size NiMH, Ni-Cd, alkaline or lithium batteries. Do not use manganese batteries. AC adapter (optional) 4.3" x 3.0" x 2.7" (109.5 x 76.4 x 69.6 mm) (excluding attachments) 307 g (excluding batteries and SmartMedia card) Specifications are subject to change without any notice or obligation on - Olympus C3040 | C-3040 Instruction Manual (5.4 MB) - Page 222
the lens into electrical signals. On this camera, light digital cameras. By recording which images are to be printed and the number of copies of each image on the card on which the images are saved, the user can automatically have the desired images printed by a printer or print lab that supports - Olympus C3040 | C-3040 Instruction Manual (5.4 MB) - Page 223
) shot using this camera are recorded onto the SmartMedia card in JPEG format when the Record mode is set to SHQ, HQ or SQ. By downloading these images to a personal computer, users can edit them using graphics application software or view the images using an Internet web browser. M (Manual) Mode - Olympus C3040 | C-3040 Instruction Manual (5.4 MB) - Page 224
mode 89 Digital ESP metering 95 Aperture setting 89 Digital zoom 85 Attaching the camera strap Downloading pictures directly from a card ...197 Automatic playback 143 DPOF 160 Available shots/time 56 Drive 93, 113, 115 Miscellaneous B Backlighting 74 Batteries 29 Buffer memory - Olympus C3040 | C-3040 Instruction Manual (5.4 MB) - Page 225
memory 192 File name settings 191 1st-curtain effect 131 Flash intensity control 150 M m/ft setting 194 Macro mode 84 Manual focus 82 Manual mode 91 Menus Movie playback menu 49 Movie record One-frame erase 71 Inserting/Removing SmartMedia cards ...35 P ISO settings 103 Miscellaneous - Olympus C3040 | C-3040 Instruction Manual (5.4 MB) - Page 226
settings 111 USB connection 198 Quick Reference White balance ..107 Using a domestic AC wall outlet ....33 Quick View 67 Using external flash 135 R REC VIEW 185 Using the zoom 72 V Red-eye reduction flash 127 Voice comments 122 Remaining charge 54 W Remote control ..........115, 117 - Olympus C3040 | C-3040 Instruction Manual (5.4 MB) - Page 227
227 - Olympus C3040 | C-3040 Instruction Manual (5.4 MB) - Page 228
, U.S.A. Tel. 631-844-5000 (Customer support) Tel. 1-888-553-4448 http://www.olympus.com OLYMPUS OPTICAL CO. (EUROPA) GMBH. (Premises/Goods , 20034 Hamburg, Germany. http://www.olympus-europa.com Serial number / Numéro de série / Número de serie Digital camera CD-ROM Printed in Japan 1AG6P1P0887-
-
 1
1 -
 2
2 -
 3
3 -
 4
4 -
 5
5 -
 6
6 -
 7
7 -
8
-
9
-
10
-
11
-
12
-
13
-
14
-
15
-
16
-
17
-
18
-
19
-
20
-
21
-
22
-
23
-
24
-
25
-
26
-
27
-
28
-
29
-
30
-
31
-
32
-
33
-
34
-
35
-
36
-
37
-
38
-
39
-
40
-
41
-
42
-
43
-
44
-
45
-
46
-
47
-
48
-
49
-
50
-
51
-
52
-
53
-
54
-
55
-
56
-
57
-
58
-
59
-
60
-
61
-
62
-
63
-
64
-
65
-
66
-
67
-
68
-
69
-
70
-
71
-
72
-
73
-
74
-
75
-
76
-
77
-
78
-
79
-
80
-
81
-
82
-
83
-
84
-
85
-
86
-
87
-
88
-
89
-
90
-
91
-
92
-
93
-
94
-
95
-
96
-
97
-
98
-
99
-
100
-
101
-
102
-
103
-
104
-
105
-
106
-
107
-
108
-
109
-
110
-
111
-
112
-
113
-
114
-
115
-
116
-
117
-
118
-
119
-
120
-
121
-
122
-
123
-
124
-
125
-
126
-
127
-
128
-
129
-
130
-
131
-
132
-
133
-
134
-
135
-
136
-
137
-
138
-
139
-
140
-
141
-
142
-
143
-
144
-
145
-
146
-
147
-
148
-
149
-
150
-
151
-
152
-
153
-
154
-
155
-
156
-
157
-
158
-
159
-
160
-
161
-
162
-
163
-
164
-
165
-
166
-
167
-
168
-
169
-
170
-
171
-
172
-
173
-
174
-
175
-
176
-
177
-
178
-
179
-
180
-
181
-
182
-
183
-
184
-
185
-
186
-
187
-
188
-
189
-
190
-
191
-
192
-
193
-
194
-
195
-
196
-
197
-
198
-
199
-
200
-
201
-
202
-
203
-
204
-
205
-
206
-
207
-
208
-
209
-
210
-
211
-
212
-
213
-
214
-
215
-
216
-
217
-
218
-
219
-
220
-
221
-
222
-
223
-
224
-
225
-
226
-
227
-
228
 |
 |

±
Before using your camera, read this
manual carefully to ensure correct
use.
±
We recommend that you take test
shots to get accustomed to your
camera before taking important
photographs.
INSTRUCTIONS
DIGITAL CAMERA
6.
Displaying, editing and
erasing your pictures
9.
Downloading Images to a
Computer
1.Getting Started
2.
Shooting and Playback Basics
3.Focusing
4.Custom Photography
5.Using Flash
7.Print settings
8.Mode setup
10.Miscellaneous
P.27
P.51
P.75
P.87
P.125
P.139
P.159
P.171
P.195
P.207