Panasonic AW-HS50 How-To Output Picture in Picture with the HS50
Panasonic AW-HS50 Manual
 |
View all Panasonic AW-HS50 manuals
Add to My Manuals
Save this manual to your list of manuals |
Panasonic AW-HS50 manual content summary:
- Panasonic AW-HS50 | How-To Output Picture in Picture with the HS50 - Page 1
button to release the PinP material selection mode(PinP button goes off). ④ Press PinP ON button - (Fig.1-E) to combine the PinP image. (Figure 1: AW-HS50 Control Panel) (D) (C) (A) (E) (B) (PinP settings) Changing the shape, position and size of the PinP image to be combined is enabled as well as - Panasonic AW-HS50 | How-To Output Picture in Picture with the HS50 - Page 2
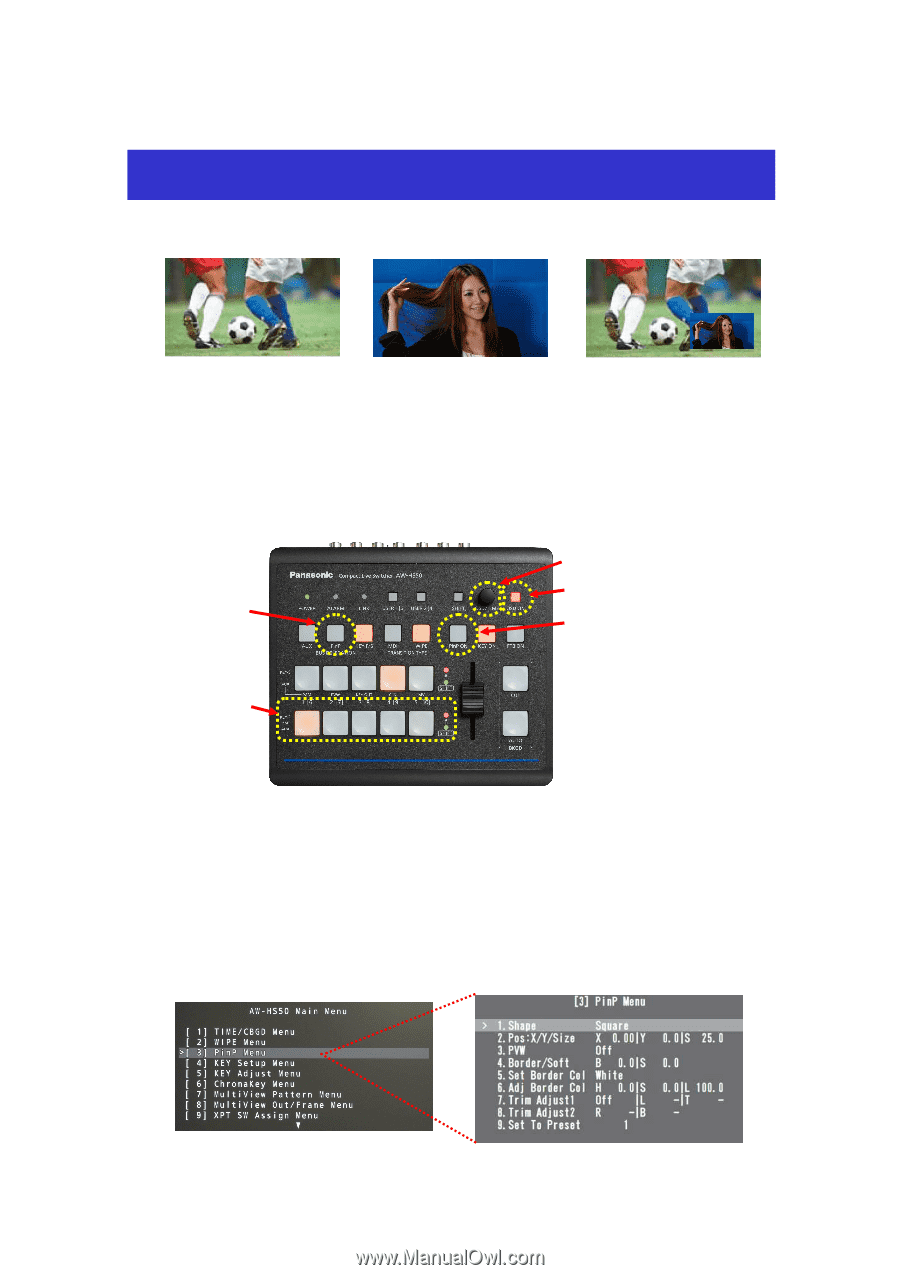
(Figure 3: AW-HS50 Menu Display Screen) 1. Setting for shape of PinP image to be combined 2. Adjustment of center position and size of PinP image X luminance (L) of color that has been set for border * For the details, please see pp. 18 - 19 of Operating Instructions .
-
 1
1 -
 2
2
 |
 |
★
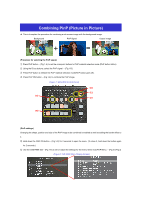
This is to explain the procedure for combining a sub screen image with the background image.
(Procedure for selecting the PinP signal)
①
Press PinP button – (Fig.1-A) to set the crosspoint buttons to PinP material selection mode (PinP button blinks).
②
Using the B bus buttons, select the PinP signal. – (Fig.1-B)
③
Press PinP button to release the PinP material selection mode(PinP button goes off).
④
Press PinP ON button – (Fig.1-E) to combine the PinP image.
(PinP settings)
Changing the shape, position and size of the PinP image to be combined is enabled as well as adding the border effect to
it.
⑤
Hold down the OSD ON button – (Fig.1-C) for 2 seconds to open the menu. (To close it, hold down the button again
for 2 seconds.)
⑥
Use the OSD/TIME dial – (Fig.1-D) to set or adjust the settings for the menu items in [3] PinP Menu. – (Fig.2 & Fig.3)
=
+
Combining PinP (Picture in Picture)
(Figure 1: AW-HS50 Control Panel)
(
A
)
(
B
)
(
C
)
(
D
)
(
E
)
Background
PinP Signal
Output Image
(Figure 2: AW-HS50 Menu Display Screen)