Pfaff expression 2034 Owner's Manual
Pfaff expression 2034 Manual
 |
View all Pfaff expression 2034 manuals
Add to My Manuals
Save this manual to your list of manuals |
Pfaff expression 2034 manual content summary:
- Pfaff expression 2034 | Owner's Manual - Page 1
Instruction manual $ PFRFF'\. £4 1• pcM a - Pfaff expression 2034 | Owner's Manual - Page 2
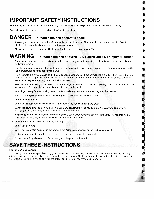
area, such as threading needle, changing needle threading bobbin, or changing presser foot etc. • Always unplug the sewing machine from the electrical outlet when removing covers, lubricating, or when makirn any other user servicing adjustments mentioned in the instruction manual. • Never drop or - Pfaff expression 2034 | Owner's Manual - Page 3
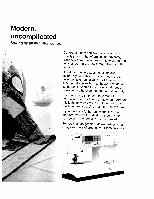
thick and thin for you. It features the very latest in design and technology, and this instruction book is just as uncomplicated as your PFAFF sewing machine, It applies both to the 2046 model and to the 2034. Should there be any difference in operation we have pointed that out separately. If you - Pfaff expression 2034 | Owner's Manual - Page 4
-63 Decorative sewing, general notes 84 Decorative stitches, Quilt Expression 2046 10 Decorative stitches, Expression 2034 11 E Elastic utility stitches Electrical connection Eyelet embroidery Eyelets 56-60, 65 19 93 61 F Feed dog, lowering 34 Felling foot 100 Foot control, connecting - Pfaff expression 2034 | Owner's Manual - Page 5
dual feed) Twin needle Twin needle, threading U Utility stitches, Quilt Expression 2046 Utility stitches, Expression 2034 V Voltage switch 29 Window, adjusting the contrast z 21 Zippers, sewing in 59 41 1/4 inch quilt and patchwork foot 66 7/9 hole foot 103 Introduction 42 116, 117 36 67 - Pfaff expression 2034 | Owner's Manual - Page 6
Utility stitches Expression 2034 I Ei - Pfaff expression 2034 | Owner's Manual - Page 7
Expression 2034 Il . 4=31 II 14 15 16 17 18 20 21 22 23 24 ách t4o 14 Decorative elastic stitch 15 Quilting, applique or pinstitching ; For joining overlapped seams on bulky fabrics such as leathers and terry cloth. For handlook quilt and sewing with elastic thread in - Pfaff expression 2034 | Owner's Manual - Page 8
-o-oi o-4 'II1IiIlI''I1iiilII'' C.,, Ii ill I -4 '1h1 ,IIIlIIII,,jIlI ci, -4 l hi' C..) -4 iii Bi'iIi ii ci, -4 IllhIII'nI!IIIIII1 ci, CD qiiiq• I a) I I 'II1'' Ihhhiiii r\.) ,hhhiI I' ' a) a) C..) HIHlI - DHIIlHljlHi a) 0 C.,, ar\.)) " a) 1 iiiiiiMIll 111111 a) - Pfaff expression 2034 | Owner's Manual - Page 9
CD C - - o cD 1111111 I III!! hIll! LT1 C) 0 D -' a) - o C i'h fII (A) (a r') a) 1< CD Cl) 111H II U) " - 0j r\.) Iliflhllill I p_r1 "O[2 C) (a CD Cl) mx c) °?i V CD Cl) Cl) (.3, I I I'l r%) 0 CA) 'I'' hiiljIiiIlI C) (.A) .. 3 (A) \ç/\/ CD III111111111111 - Pfaff expression 2034 | Owner's Manual - Page 10
sewing" button t 12 Connection socket "foot control" 13 Master switch 39 "Pattern mirror" button/ "Lock" button 40 Take-up lever I 14 m+ button 41 Thread guide button "Elastic stitch" 48 Sewing bulb (max. 5 W) 49 Thread cutter 50 Thread take-up 51 Presser foot lifter 52 Needle holder with - Pfaff expression 2034 | Owner's Manual - Page 11
91- uonoes iuouuoei - Pfaff expression 2034 | Owner's Manual - Page 12
rinicai section Parts of the sewing machine t (model 2034) t 1 -1+ button A (stitch width/pattern width controls) 27 Slide for lowering the feed dog 28 Base plate F 2 -1+ button B (stitch length/pattern length 29 Removable accessory tray F controls) 30 Presser foot holder with presser - Pfaff expression 2034 | Owner's Manual - Page 13
IeL.HIflccu ,eLILIn 5 expression 2034 tL 6 4 33 JmuuIuuIIIIuIlujJI,IIliA 20- 21- 22- [-18 J17 23- 24-\--25/ 10 29 1/ 28 40 41 50E/. 48 - PFAFF J ,s,Dz1 47. AE expression 2034 JUflUøUUIU.U1UU11UU1H411fW I AA I 17 - Pfaff expression 2034 | Owner's Manual - Page 14
section w Carrying case Place the enclosed lead cord, the foot control and instruction book into the compartment of the carrying case. Lid Open the folding lid (44) upwards. PFAFF rtH < h+4tIO flflfl UU: __\ '- The stitches of the sewing machine are illustrated on the inside of the lid. The - Pfaff expression 2034 | Owner's Manual - Page 15
pressing the foot control. The foot control type ATK 0070 has to be used for this sewing machine. 120 220V2 / --*- Master switch When the master switch (13) is switched on (switch function I) the sewing lamp lights up and program No. 1 is indicated in the Expression window. The sewing machine is - Pfaff expression 2034 | Owner's Manual - Page 16
the lid upwards and towards you. Arranging the accessories The standard accessories are marked with numbers. Arrange the parts in the respective compartments of the accessory tray. I I 'U A I t iT Accessories 2034/2046 (see also pages 96-97) 20 I I I S I 4. &Uaa4 arnas at.4 Ta a sa - Pfaff expression 2034 | Owner's Manual - Page 17
replacing the tray, make sure it is flush with the free arm of the sewing machine. :ae aa ; 843 652 882 872 652 692 702 713 723 732 2 812 822 832 842 652 86 87 88 A'Z2 A-Z Preparing the machine for bobbin winding Place an empty bobbin so that the black pin of the bobbin - Pfaff expression 2034 | Owner's Manual - Page 18
the bobbin from the spool pin Place the sewing thread on the spool holder. To obtain frut movement of the thread and hold the thread spool firmly, fit I spool cap of the right size for the thread spool. Threading Place the thread into guide A from the front and pull it counterclockwise through - Pfaff expression 2034 | Owner's Manual - Page 19
Winding from the second spool holder Insert the second spool holder in the hole provided. Threading Thread as shown on page 22. Switch on the master switch Hold the end of the thread firmly and press the foot control. As soon as the bobbin is full, the winding action will be stopped automatically - Pfaff expression 2034 | Owner's Manual - Page 20
bobbin case out of the machine. Release the latch and take the empty bobbin out of the bobbin case. EEEmE Thread tension For the best sewing work; Bobbin thread is visible on the top side of the fabric: The needle thread tension is too tight The thread tension must be corrected. Top thread - Pfaff expression 2034 | Owner's Manual - Page 21
spring B until it rests in the opening (see arrow). Check: When you pull the thread, the bobbin must turn clockwise. -c Inserting the bobbin case Lift latch E and push the bobbin case fully onto pin C of the sewing hook. Opening D of the bobbin case must face upwards. Check: Pull the bobbin - Pfaff expression 2034 | Owner's Manual - Page 22
presser foot lifter (51). Place the thread on the + $. iwa 2o 30i2 40 Ba 6a 7ra 8o9wu spool holder and fit a spool cap of the right size. 21a 22i 23i 24i 25i 26i Quitt4!, 27o 012 j3 III PAFF 2046 Using both hands, pull the thread into thread guide A from the front. Place the thread from - Pfaff expression 2034 | Owner's Manual - Page 23
needle easier and quicker. use the PFAFF Integrated Needle threader. Lower the presser foot. Press the threader down with the handle. Threader hook R swivels through the needle eye. Place the thread over hook 0 and under the thread hook R and hold the end of the thread taut. Reduce the pressure so - Pfaff expression 2034 | Owner's Manual - Page 24
the end of the needle thread, press the foot control so the needle moves down and up. Pull the needle thread to draw up the bobbin thread. I I 5 V 1 S Bobbin thread Close the bobbin door (46) and pull the thread under the presser foot to the left Thread cutter Pull the thread from the back to - Pfaff expression 2034 | Owner's Manual - Page 25
the presser foot holder. •pFAFF Check: Please check that the presser toot is properly attached by raising the presser foot lifter. Setting the needle thread tension Set the required amount of the needle thread tension (35) using the markings on the tension dial. The normal setting for sewing is - Pfaff expression 2034 | Owner's Manual - Page 26
machine is fully threaded. Raise the presser toot lifter (51) to the top position. Pull the needle thread underneath the presser foot and upward through the right-hand threader slot (34). Place the thread - Guide the thread to the right under thread guide C. Wind the beginning of the thread several - Pfaff expression 2034 | Owner's Manual - Page 27
of the needle must face to the rear. Lower the presser foot and insert the needle, pushing it up as far A as it will go. Hold the needle and tighten the needle screw (52) firmly. Threading the twin needle: Replace the sewing needle with a twin needle. Insert the second spool holder and place - Pfaff expression 2034 | Owner's Manual - Page 28
The IDT (Integrated Dual Feed) For sewing any fabric precisely PFAFF provides the ideal solution: the Integrated Dual Feed, IDT system. As on industrial machines, the IDT feeds the fabric from the top and bottom at the same time The material is fed precisely. On light fabrics such as silk or rayon - Pfaff expression 2034 | Owner's Manual - Page 29
secuon I Engaging the IDT Important: For all work with the Dual Feed IDT, use presser feet with the center back cut-out. Raise the presser foot. Press the IDT (31) down until it engages. Disengaging the lOT Hold the Dual Feed with two fingers at the ribbed ankle. Press the IDT - Pfaff expression 2034 | Owner's Manual - Page 30
inica section w Lowering the teed dog t For certain sewing work such as tree-motion quilting or darning and when the machine must be cleaned, the feed dog has to be lowered. Raise the presser foot before lowering the feed dog. Push slide A to the left. To engage the feed dog move the slide to - Pfaff expression 2034 | Owner's Manual - Page 31
the Expression window 36 Stitch selection 36 Bobbin thread monitor (model 2046) 37 Altering pattern sizes 37 Altering the stitch width/needle position 38 4ltering the pattern th/stitch length 38, 39 A1ring the pattern tenØVstitch density 39 Sa1ate 40 jnfobutton/reverse sewing button - Pfaff expression 2034 | Owner's Manual - Page 32
Adjusting the contrast on the Expression window The contrast setting in the window may be changed for different lighting situations. This setting can be are in the last stitch, No. 88, (No 61 in the case of model 2034) and continue to scroll you will return to stitch No. 0. 2. With the direct - Pfaff expression 2034 | Owner's Manual - Page 33
the bobbin is nearing its end [2 ¼ yd (2 m)-3 1/4 yd (3 m)], or there is no thread on the bobbin, the bobbin symbol appears in the window. The symbol disappears after a full bobbin is inserted and you start to sew again. Altering stitches Adjust the length, width, balance, density or needle position - Pfaff expression 2034 | Owner's Manual - Page 34
needle positions. Press -1+ button A to move the needle to left or right of center. S Altering the pattern width, e.g. Stitch 75 (Stitch 56 on model 2034) For decorative stitches, the overall width of the pattern is shown in the window. When entered, stitch 75 comes up in a standard width and - Pfaff expression 2034 | Owner's Manual - Page 35
'9" 9 '9" I Sewing functions Altering the stitch length The stitch length of a stitch can be altered using +1button B. Altering the pattern length The pattern length of decorative stitches - Pfaff expression 2034 | Owner's Manual - Page 36
with a '0 after it in the bottom right-hand corner of the Expression window. This symbol indicates that the balance can be altered on this stitch setting is '0". With -1+ button C you can change the reverse feed of the machine from -9 to (+)9. In the minus range the stitches are sewn shorter, and - Pfaff expression 2034 | Owner's Manual - Page 37
This button has several functions: when pressed, will reverse sew 9 • for permanent reverse press this button before starting to sew, the machine sews in reverse until you press the button again (2046) manual finish of a buttonhole (see page 72) programming the buttonhole determines the length - Pfaff expression 2034 | Owner's Manual - Page 38
the Expression window. With these buttons you can choose between 'tie-off" at the beginning and/or the end of a stitch, set "needle up/down", "sew slow" and "pattern mirror". Tie-oft button (36) When you press this button before starting to sew, the symbol appears in the window. Once the machine - Pfaff expression 2034 | Owner's Manual - Page 39
functions "Lock" button "Pattern mirror" button: (39) 4t You can safeguard your sewing machine against the unintentional selection of another sewing program or another pattern sequence by means of the "lock" button. Switching on the "lock" button: Press the button until the locking symbol appears - Pfaff expression 2034 | Owner's Manual - Page 40
position or the width of a stitch, the twin needle warning will appear in the window. This symbol indicates that a twin needle cannot be used to sew the stitch at the currently set width. I t t Reduce the pattern width until the warning symbol disappears. The stitch may now be sewn with a twin - Pfaff expression 2034 | Owner's Manual - Page 41
I sewing runcuons Formation of the stitches The stitch formation varies. Some patterns are in width. Note: Do not use a twin needle to sew patterns that are formed from one side! Do not use a twin needle if this symbol in the window lights up (see page 44). Patterns that are formed from the - Pfaff expression 2034 | Owner's Manual - Page 42
I 3 I 4 I 4 I S 4 I 4 4 I a 4 4 4 4 4 4 4 4 4 4 4 4 I a - Pfaff expression 2034 | Owner's Manual - Page 43
Stitch Sequences Stitch sequences 48 Buttons for the stitch sequence 49 Storing stitches 49, 50 Deleting from the stitch sequence 50 Inserting into the stitch sequence 51 Deleting a stitch sequence 51 Deleting all M-memories 52 Changing a stitch within a sequence 52 "Pattern start" - Pfaff expression 2034 | Owner's Manual - Page 44
14). Once you have entered the stitch sequence, can start to sew immediately. All stitches that you have been sewn are automatically the machine's memory even stored and remain after you switch off in the machine. Tip: In order to sew a stitch sequence once, press the tie-ott button (36) when - Pfaff expression 2034 | Owner's Manual - Page 45
9 99 "'9 mcn sequiiu Inserting a stitch into the stitch sequence If you wish to insert a stitch into a sequence, scroll using the cursor buttons to the desired position in the sequence. The cursor .. must be in front of the pattern where the stitch is to be inserted (the position of the tip of the - Pfaff expression 2034 | Owner's Manual - Page 46
. e 'A" Tip: Use the "needle up/down" button to easily pivot at collar points. e I Sewing in zippers - 1 There are directions different included ways to sew in zippers. Follow the with your pattern for best results. tFpwioattehfortieelteerltatnhshicartsenliehelgosrehref1tsdytr3tf - Pfaff expression 2034 | Owner's Manual - Page 47
_, LIIIL s_w Basting stitch - 10 With stitch 10 you can baste a garment before trying it on. When you press the foot control, the machine will sew one stitch at a time. Press the foot control again for each stitch. • Lower the teed dog and disengage the IDT. • Place the fabric under the presser - Pfaff expression 2034 | Owner's Manual - Page 48
L P beyond the fold. The wrong side of your project should .,Li p now be facing up. • Place the fabric under the presser foot so that the fold runs along edge guide B. • When the needle swings into the told it should catch a small amount of fabric, If the stitches are visible on the right - Pfaff expression 2034 | Owner's Manual - Page 49
. S I Stretch triple zigzag stitch - 15 (17/2034) The stretch triple zigzag stitch produces a highly elastic and decorative seam. threads on denim. • Fold up a hem the correct width. • Topstitch the hem from the right side, or thread the top with decorative thread and sew. Tip: Lower needle thread - Pfaff expression 2034 | Owner's Manual - Page 50
4 to add elastic to pajamas. skirts and sportswear. • To create a waistband, finish the top edge of the garment. • Cut elastic to comfortably fit around waist. • Sew the ends of the elastic together. • Divide the garment edge and elastic into quarters. Stretch the elastic to fit the fabric - Pfaff expression 2034 | Owner's Manual - Page 51
holes, tears and damaged areas. If the area is only slightly damaged, sew over it with several rows of stitching until it is well covered. For the excess fabric close to the stitching on the back side of your repair. Sewing-on patches - 4 The best way to repair larger holes is to patch the - Pfaff expression 2034 | Owner's Manual - Page 52
- 19 (21/ 2034) If you wish to sew a fabric that frays easily, select stitch 19 (21/2034). With this stitch an additional edge thread protects the fabric edge against further fraying. Pullover stitch -20 (22/2034) Used together with the knit-edge foot (special accessories), this stitch can be - Pfaff expression 2034 | Owner's Manual - Page 53
to make sure the needle also enters the right hole of the button. • Continue sewing on the button. The machine will complete the program for you. Sewing on buttons with shanks - 0 • Attach the presser foot. • Leave the feed dogs lowered. Place a toothpick between the holes of the button and - Pfaff expression 2034 | Owner's Manual - Page 54
strengthening damaged areas of fabric and repairing tears. • Stitch over the damaged area at the requred length. I • Press the reverse button; the machine finishes sewing I the darning program and the darning length is saved. The saved darning length can now be repeated as often as I needed - Pfaff expression 2034 | Owner's Manual - Page 55
foot together. Insert the pin of the darning foot as far as it will go into the hole of the presser foot holder. The "C-shaped" guide dog. * Draw up the bobbin thread and hold the threads when you start sewing. • Repair the damaged arealhole by guiding the fabric evenly forwards and backwards. - Pfaff expression 2034 | Owner's Manual - Page 56
elastic threads - 17 (19/2034> Gathering with elastic thread is particularly suitable for visible, elastic gathering seams such as blouse sleeves. waist seams or necklines. • Mark the first gathering row on the fabric. Sew a few stitches until the needle is in the middle of the presser foot. Turn - Pfaff expression 2034 | Owner's Manual - Page 57
on the bottom of the guide is inserted in the small hole at the front of the needle plate. Cross hem stitch - 18 (20/2034) This highly elastic stitch any excess hem fabric up to the stitching. Light-knit mending stitch - 21 (Model 2046) The light-knit mending stitch is a stretchy covering stitch. - Pfaff expression 2034 | Owner's Manual - Page 58
secure. • Turn the handwheel towards you until the needle is at its lowest point. Raise the presser foot and slide the fabric into the scroll of the hemmer. fr • Lower the presser foot and while sewing, guide the fabric edge evenly into the hemmer. When roll-hemming, make sure the raw edge of the - Pfaff expression 2034 | Owner's Manual - Page 59
and press the seam allowance to the left. • While sewing, make sure the fabric runs under the presser foot at half of the foot width, and the blind hem swings over the folded edge. Tip: Add a colored pearl cotton thread on the folded edge as you sew the shell tuck. This creates a pretty contrast and - Pfaff expression 2034 | Owner's Manual - Page 60
p p p - Pfaff expression 2034 | Owner's Manual - Page 61
Buttonholes General notes on buttonholes Inserting the buttonhole guide Inserting the buttonhole foot Types of button holes Fully automatic buttonhole Semi-automatic buttonhole! manual finish Manual buttonhole Buttonholes with gimp thread Tips for a perfect buttonhole 70 70 70 71 72 72-73 74 75 76 - Pfaff expression 2034 | Owner's Manual - Page 62
as velvet, plush, knitted fabrics and heavy knits. Your Expression offers you three ways of sewing a buttonhole: fully automatically • semi-automatically • manual Inserting the sensormatic buttonhole guide: Push the metal part of the buttonhole guide into the slot (between the two arrows) on the - Pfaff expression 2034 | Owner's Manual - Page 63
Linen buttonhole No. 9 for blouses, shirts, dresses, etc. 2) Stretch buttonhole No. 87 (No 60 on the model 2034) for stretch fabrics 3) Keyhole buttonhole No. 88 (No 61 on the model 2034) for jackets, coats and pants (trousers) 4) Round buttonhole No. 86 (only on model 2046) I for ladies' outer - Pfaff expression 2034 | Owner's Manual - Page 64
density (-1+ button C). Sew as many buttonholes as you wish. Your Expression will I continue to sew the same size buttonhole Expression window, after you have touched reverse. This indicates a manual finish of the buttonhole is desired. Before the left side of the buttonhole ends, the machine - Pfaff expression 2034 | Owner's Manual - Page 65
9 Buttonholes The second bartack will be sewn and complete the buttonhole. The word auto" appears in the window. 11111 All remaining buttonholes will now be sewn automatically. Note: If the length or stitch density of a programrned buttonhole is changed, the programming is cance/led. - Pfaff expression 2034 | Owner's Manual - Page 66
has been programmed Press the "reverse sewing" button one time after you have stitched the first bartack. The word "man" appears in the window. This indicates a manual finish of the buttonhole is desired. Before the left side of the buttonhole ends, the machine will slow down. When the left - Pfaff expression 2034 | Owner's Manual - Page 67
, front of the buttonhole foot. Pass the thread ends under the foot and pull up into the right and left guides on the clamp at the back of the presser foot. Guide the gimp thread along the foot at the side. Sew the right-hand seam of the buttonhole. After the machine sews the first few stitches of - Pfaff expression 2034 | Owner's Manual - Page 68
• A wider, less dense buttonhole is recommended on heavy fabrics. Use presser foot No. 1 for buttonholes that are to be sewn very close to a stable and durable if a gimp thread is inserted while sewing (see "Keyhole buttonhole with gimp thread"). • Linen buttonholes are particularly dense - Pfaff expression 2034 | Owner's Manual - Page 69
Quilting Patchwork and quilting 78 Piecing the quilt top 78 Quilt piecing 79 Stitch-in-the-Ditch 79 Antique Quilt Stitches 80 Tying the Quilt 81 Free Motion Stippling 81 Quilt Appliques 82 - Pfaff expression 2034 | Owner's Manual - Page 70
your Pfaff Expression. A quilt quilting foot. Sew the pieces together following the design instructions to piece the quilt top. The seam allowance of quilts Expression, e.g. with stitch 27 (11/2034) using monofilament thread on top and regular or decorative thread in the bobbin. When the quilting - Pfaff expression 2034 | Owner's Manual - Page 71
mm). Your Expression is perfect for piecing quilts. Set up your Expression with a Sew the pieces together as required by the block chosen. These squares will then be sewn together and will form the top of the quilt. Tip: Use the ¼ 'foot (820211-096) as an easy guide for your quilting. Set your 2034 - Pfaff expression 2034 | Owner's Manual - Page 72
accomplished faster and -9 t I easier with the Pfaff Antique quilt stitches. • Use invisible (monofilament) thread in the needle. Use I a contrast or matching polyester or cotton thread in the bobbin. I • Set the needle thread tension to 7-9. • When you sew the stitch on the three layers of - Pfaff expression 2034 | Owner's Manual - Page 73
together, but it also adds texture and interest to your quilt. Set your Expression for stippling with a Straight Stitch (1). Attach the darning foot. Lower the feed dog and set up your machine in the darning position. Prepare your quilt as explained in the Stitch-in-the-Ditch method. Practice - Pfaff expression 2034 | Owner's Manual - Page 74
the applique to the block before the quilt is put together. I Set your Quilt Expression with stitch 3, stitch length 0.5. I stitch width 4-6 mm, presser foot 2. Adhere the applique piece to the block. Place stabilizer I behind the block and applique. Sew around the applique with the satin - Pfaff expression 2034 | Owner's Manual - Page 75
Decorative sewing! Specialty techniques Genert tes pn decorattewing 4 4Ib$tq*ttem widtMendor c*dboØers a4 bdrs ombined borders using twin needle 85 Free-motion monograms 86 Free- - Pfaff expression 2034 | Owner's Manual - Page 76
General notes on decorative sewing To enhance your own home textiles or garments your Expression offers you a wide variety of fancy and decorative stitches. Create a greater variety of embellishments by combining different patterns, colors and sizes. Use specialty decorative threads to enhance the - Pfaff expression 2034 | Owner's Manual - Page 77
combining different decorative stitches. Rayon embroidery threads give shiny, smooth stitching results and come in many colors and weights. Place stabilizer under fabric. Mark the center of your fabric with a fabric marking pen! pencil. Sew stitch 69 (model 2034 stitch 50); stitch width 6 mm along - Pfaff expression 2034 | Owner's Manual - Page 78
with a fabric marker to the area to be embroidered. Attach the darning foot and bring it into the darning position (see page 63). Lower the Knot the threads on the back of your project and remove the stabilizers. The remaining water-soluble stabilizer will dissolve in water. TIP: Sewing at a - Pfaff expression 2034 | Owner's Manual - Page 79
[Decorative sewing/Specia[tytechniqu Free-motion embroidery These striking embroidery designs can easily be sewn with your Expression. Set your Expression as for free-motion monograms. Draw the outline of the embroideries on fabric where you want to stitch them. Follow the instructions and tips for - Pfaff expression 2034 | Owner's Manual - Page 80
great effects by adjusting the size of a wide zigzag stitch. Manual change/ Regular pattern • Place stabilizer under fabric. • Set needle thread tension to 3. Select the zigzag stitch needle position (stitch 11/2046, 12/2034). Pressing the I. 4 Pattern mirror button" (39) will change the - Pfaff expression 2034 | Owner's Manual - Page 81
Manual change/Irregular pattern • Place stabilizer under fabric. • Set needle thread tension to 3. Select zigzag stitch 11/2046, 12/2034 for motifs with a right or left needle position or zigzag stitch 3 for motifs with a center needle I position. ,d Set stitch length to 0.2 - 0.3 mm. I • - Pfaff expression 2034 | Owner's Manual - Page 82
the classic linen buttonhole. I • Select stitch No. 11/2046. 12/2034. • Press the tie-off button three times. A Sew the first side of the buttonhole to the desired length. I • When sewing the bartacks, make sure that you sew three zigzag stitches at full length. This guarantees that a gap - Pfaff expression 2034 | Owner's Manual - Page 83
You can make a perfect densely stitched seam with the applique foot (special accessories). The special cutout on the sole allows the and iron securely. Stitch around all appliqués with appliqué stitch (No. 28/2046, 15/2034) or with a narrow, satin-stitch zigzag, stitch width 2 - 4 mm, stitch length - Pfaff expression 2034 | Owner's Manual - Page 84
2034 and 2046 with astonishing ease and speed. With cross-stitch No. 22 (2046) or No 23 (2046/2034 Sew slowly. • Use foot No. 2. • Place stabilizer under the fabric. • You can embroider on Aida cloth as used for hand cross-stitching. The length and width of the cross-stitches of your Expression - Pfaff expression 2034 | Owner's Manual - Page 85
the pin A ) of the eyelet plate. The fabric must fit snugly around the pin. • Remove the presser foot. • Place the presser foot lifter in the darning position. • Pull up the bobbin thread and hold it for the first few stitches. • Stitch around the cut with zigzag pattern No. 3. While doing - Pfaff expression 2034 | Owner's Manual - Page 86
is only used for very light fabrics - size 80.) Hemstitching is most successful on woven natural fabrics from which single threads can be easily pulled. Embroidery and darning thread, particularly cotton, are very I suitable. With the hemstitches on your Expression, various techniques can be - Pfaff expression 2034 | Owner's Manual - Page 87
accessory table 98-99 Felling Foot/Appliqué Foot 100 "ck Foot 101 Cording Foot/Gathering Foot 102 Knit-Edge Foot/Ruffler Attachment 103 1/4 inch Quilting Foot 104 Free-motion Quilt Foot/ Bias Binder 105 Pintuck Foot with Decorative Stitch Guide 106 Non-stick Maxi-stitch Embroidery - Pfaff expression 2034 | Owner's Manual - Page 88
normal accessories) Standard Presser Foot with IDT 820250-096 Fancy Stitch Foot with IDT 820253-096 Fancy Stitch Foot 820278-096 Blindhem/Overlock Foot 820256-096 96 Zipper Foot with IDT 820248-096 I Buttonhole Foot I 820295-096 L I Darning Foot 820243-096 I - Rolled Hem Foot 3 mm 820249-096 - Pfaff expression 2034 | Owner's Manual - Page 89
_______ Accessories ana neeai Edge Guide/Quilting Guide 820251-096 Buttonhole Guide 820294-096 Bulb Remover/Needle Plate Changer 820292-096 L17 I Second spool holder Seam ripper Brush Oil 93-033 063-44/000 99-053 016-91/000 93- - Pfaff expression 2034 | Owner's Manual - Page 90
stick Foot with IDT Non-stick Decorative Stitch Foot Non-stick Maxi-stitch Embroidery Foot Circular Embroidery Guide 820234-096 820273-096 820274-096 820220-096 820221 -096 820249-096 820216-096 820240-096 820239-096 820277-096 820246-096 For top-stitching seams, quilting and sewing very light and - Pfaff expression 2034 | Owner's Manual - Page 91
-096 820222-096 820217-096 F we motion Quilt Foot Finger Guard Quilting Guide 820242-096 820236-096 820279-096 Sewing work For sewing together two edges of fabrics with a hemstitch seam effect For quilting and patchwork jobs For quilting and patchwork jobs For embroidering areas between pintucks - Pfaff expression 2034 | Owner's Manual - Page 92
ply by about 3/8 "to 5/8(1 - 1.5 cm). • Place this overlapping edge over the tongue of the felling foot. The fabric must be placed fully under the presser foot. • Sew along the folded edge with a straight stitch. • Sfoevellepirnasgrtaifttoceohtet,hdTe ahfleaobnhrgiecmthaneisdetdufegrenede - Pfaff expression 2034 | Owner's Manual - Page 93
center front of the needle plate. • Replace the needle plate. The notch between the needle plate and the sewing machine provides space for the gimp thread while sewing. Feed the gimp thread under the work support so that it does not become knotted during sewing. • Gently pull the fabric taut while - Pfaff expression 2034 | Owner's Manual - Page 94
with a thread of a the top through the toot cutout. • Hold the top fabric slightly taut while sewing. The harder you pull, the greater the gathering effect you achieve. • Be sure to guide the fabric edges evenly through the foot. different color Stitch 11/2046 Stitch length: 0.4 - 0.6 12/2034 - Pfaff expression 2034 | Owner's Manual - Page 95
easily with the knit edge foot. In order to obtain a perfect seam on knit fabrics (e.g. shoulder seams), we recommend sewing over a wool thread, pulled slightly taut into the buy the ruffler from your PFAFF dealer, full operating instructions are included. Stitch 1 Stitch length: 3 Tension: 3-5 103 - Pfaff expression 2034 | Owner's Manual - Page 96
fabric layers In traditional quilting the three layers of fabric are joined with small hand stitches. This hand-stitched look can be accomplished faster and easier with the sewing machine (stitch 27/2046 11/2034). • Use invisible (monofilament) thread in the needle. Use a contrast or complementary - Pfaff expression 2034 | Owner's Manual - Page 97
Accessones ana rieeua,s Free-motion Quilt Foot The tree-motion quilt foot in combination with the straight stitch is of your well quilt suited for free-motion quilting. The three layers are guided manually during free-motion quilting. The faster you sew, the more consistent and uniform your - Pfaff expression 2034 | Owner's Manual - Page 98
the pintucks. Attach the pintuck foot with guide. The foot can be attached with the guide pointing to the left or the right. Insert a twin needle (2.0 or 2.5 mm space between needles). Thread the two needles (see page 31). Set the needle thread tension tight (4 5) and sew one pintuck (see also page - Pfaff expression 2034 | Owner's Manual - Page 99
your cord or ribbon through the wire loop/guide at the front of the foot. Feed it down through the hole in the center of the foot and guide under the foot and to the back. • Attach the couching/braiding foot to the machine. Select a stitch and decorative thread of your choice and stitch over the - Pfaff expression 2034 | Owner's Manual - Page 100
is secured with the screw on the presser foot holder. Stabilize your fabric. • Place the center marked point of your fabric directly below the rubber point of the embroidery guide. • Select the desired decorative stitch and begin sewing. • Change the radius with every new circle by loosening the - Pfaff expression 2034 | Owner's Manual - Page 101
row. For circles you must work from the outsicie inwards. • When using heavier threads. you should select a slightly longer stitch length. Always sew a test seam first. When you have finished, pull the work carefully from the machine by holding the last loops, If you pull too quickly, you will pull - Pfaff expression 2034 | Owner's Manual - Page 102
Size: 60-130 - - ____________ Light ball point Universal needle for synthetics left twist groove Light ball point, long eye Hemstitching point Acute round point Light ball point Medium heavy linen, blue jeans and light canvas. Leather, suede. calf synthetic thread, metallic thread Effective - Pfaff expression 2034 | Owner's Manual - Page 103
3.0 mm 4.0 mm normal pintucks normal pintucks wide pintucks extra wide pintucks topstitch hem for knits Fancy patterns with twin needles Before sewing the desired decorative stitches, check whether the needles can penetrate freely by turning the handwheel. In this way, needle breakage is avoided - Pfaff expression 2034 | Owner's Manual - Page 104
I I I I - Pfaff expression 2034 | Owner's Manual - Page 105
Iv I Maintenance Changing the needle plate Cleaning and oiling Changing the light bulb Sewing pro1ems and their solutions 114 114 115 116-117 - Pfaff expression 2034 | Owner's Manual - Page 106
L Removal Raise (lamp up on the presser changer) as foot. Position the needle plate changer shown and press the needle the hook shown above. The machine otherwise requires no maintenance and must not be oiled at any other points. • Clean and oil the sewing machine every 10- 15 hours of - Pfaff expression 2034 | Owner's Manual - Page 107
• Switch off the main switch. Disconnect the lead cord and the foot control plug from the machine. • Remove the accessory tray. The light bulb is located inside the sewing machine near the needle threader. Bulb removal Push the bulb remover, as shown in the figure, up as far as it will go. Now turn - Pfaff expression 2034 | Owner's Manual - Page 108
Sewing problems and their solutions p ProbnVCause The machine skips stitches The needle is not properly inserted. Wrong needle is in use. Needle is bent or blunt. The machine is not properly threaded. Needle is too small for thread. Push needle fully upwards. Flat side facing the back. Use needle - Pfaff expression 2034 | Owner's Manual - Page 109
i.'..a ,...... Problem/Cause The machine does not machine is running with difficulty I late are thread remnants in the hook ways. Remove the threads when the machine is cleaned or is transported (display is illegible or dark) Switch off the machine on completion of the sewing operation and - Pfaff expression 2034 | Owner's Manual - Page 110
Weight Nominal voltage (reversible) Power consumption Sewing lamp Sewing speed Stitching width Stitching length Presser foot lift Max. presser foot height Needle system Package contents Sewing machine Carrying case Foot control Lead cord Accessories Instruction manual 408 x 290 x 187 mm 8.3 kg 120
-
 1
1 -
 2
2 -
 3
3 -
 4
4 -
 5
5 -
 6
6 -
 7
7 -
8
-
9
-
10
-
11
-
12
-
13
-
14
-
15
-
16
-
17
-
18
-
19
-
20
-
21
-
22
-
23
-
24
-
25
-
26
-
27
-
28
-
29
-
30
-
31
-
32
-
33
-
34
-
35
-
36
-
37
-
38
-
39
-
40
-
41
-
42
-
43
-
44
-
45
-
46
-
47
-
48
-
49
-
50
-
51
-
52
-
53
-
54
-
55
-
56
-
57
-
58
-
59
-
60
-
61
-
62
-
63
-
64
-
65
-
66
-
67
-
68
-
69
-
70
-
71
-
72
-
73
-
74
-
75
-
76
-
77
-
78
-
79
-
80
-
81
-
82
-
83
-
84
-
85
-
86
-
87
-
88
-
89
-
90
-
91
-
92
-
93
-
94
-
95
-
96
-
97
-
98
-
99
-
100
-
101
-
102
-
103
-
104
-
105
-
106
-
107
-
108
-
109
-
110
 |
 |
Instruction
$
PFRFF’\.
£4
1•
pcM
a
manual