Philips 1280X User manual
Philips 1280X Manual
 |
View all Philips 1280X manuals
Add to My Manuals
Save this manual to your list of manuals |
Philips 1280X manual content summary:
- Philips 1280X | User manual - Page 1
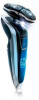
1290X 1280X 1280XCC 1260X 1250X 1250XCC Rechargeable Cordless Tripleheader Razor Register your product and get support at www.philips.com/norelco (Model 1290X Shown) - Philips 1280X | User manual - Page 2
1290X/1280X/1280XCC/1260X/1250X/1250XCC 2 ENGLISH 4 Congratulations on your purchase and welcome to Philips Norelco! To fully benefit from the support that Philips Norelco offers, register your product at www.philips.com/norelco - Philips 1280X | User manual - Page 3
as described in this manual. Do not use attachments or a cleaning solution not recommended by Philips Electronics North America Corporation. System/charging stand. SAVE THESE INSTRUCTIONS IMPORTANT: The power plug contains a transformer. Do not cut off the power plug to replace it with another plug, - Philips 1280X | User manual - Page 4
must be postmarked no later than 45 days from the date of purchase. Philips Norelco reserves the right to verify the purchase price of the razor and limit refunds not -24 Travel Lock 24-25 Cleaning 25-37 Replacing the Shaving Unit 38 Maintenance 38-39 Storage 39 Assistance 40 Battery Removal 40 - Philips 1280X | User manual - Page 5
• Shows remaining power level in batteries (1260X/ 1250X/1250XCC) or actual remaining shaving minutes (1290X/1280X/1280XCC) • Battery Charge, Full & Low Indicators Cleaning Indicator Model 1250X Model 1250XCC Blocked Shaving Heads Indicator Replacement Shaving Unit Indicator Travel Lock ENGLISH - Philips 1280X | User manual - Page 6
10 ENGLISH 11 Features Jet Clean System (1280XCC/1250XCC) Razor Holder Cleaning Indicator Light Drying Indicator Light ON/OFF Button Cleaning Program Selector Button (1280XCC) Cleaning Solution Canister Release Buttons Cleaning Solution Low Indicator Light Removable Cleaning Solution - Philips 1280X | User manual - Page 7
0 to 60. MINUTES LEFT ENGLISH 13 -Quick charge: When the razor contains enough energy for one shave, the display shows 5 minutes in white. C Models 1260X, 1250X and 1250XCC -As soon as you connect the power cord to an electrical outlet, the bottom charging light blinks, then the second charging - Philips 1280X | User manual - Page 8
. NOTE:The displays of models 1260X, 1250X and 1250XCC look different, but work the same way. C ◗ Replacement Shaving Unit Indicator MINUTES LEFT Every heads you will guarantee yourself optimal shaving performance. C ◗ Blocked Shaving Heads Indicator If the display shows a blinking replacement - Philips 1280X | User manual - Page 9
100-240V AC to less than 24V DC. Travel Lock (1280X, 1280XCC, 1260X, 1250X and 1250XCC) The razor is equipped with a travel lock function. You the razor with you when traveling. See 'Travel Lock' section for instructions on how to use this function. Charging ◗ Charging, recharging or storing - Philips 1280X | User manual - Page 10
1290X, 1280X and 1280XCC) or the bottom charging light blinks orange (models 1260X, 1250X and 1250XCC). ◗ Do not charge razor in a pouch. Charging in the Jet Clean System when the protective razor head cap is placed on the razor. C 3 Place the razor head side down in the razor holder with the - Philips 1280X | User manual - Page 11
of up to 60 minutes (models 1290X, 1280X, 1280XCC and 1260X) or 50 minutes (models 1250X and 1250XCC). Recharging 1 Recharging requires Use your new razor exclusively for 3 weeks to fully enjoy the closeness of a Philips Norelco shave. ◗ At first you may not get as close a shave as you this manual. - Philips 1280X | User manual - Page 12
blades can lift and cut whiskers. Gently press razor to skin so the floating heads can follow the contours of your face. DO NOT press too hard.Too much the on/off button once to switch on the razor. 5 Move the shaving heads in circular movements over your skin. NOTE: Rinse the razor under the tap - Philips 1280X | User manual - Page 13
Press the trimmer slide backwards to retract the trimmer. Put the Protective Razor Head Cap on the razor. 2 The travel lock has now been activated. 1 Press the ON/OFF button for 3 seconds. Travel Lock (1280X, 1280XCC, 1260X, 1250X and 1250XCC) If you are going to store the razor for a longer - Philips 1280X | User manual - Page 14
clean, remove or replace shaving unit C 3 Using your thumb and forefinger, grasp the while motor is on. sides of the shaving head near the center ◗ Do not apply pressure to shaving head combs. of the shaving unit and pull each individual Do not touch razor heads with hard objects shaving - Philips 1280X | User manual - Page 15
direct sunlight. ◗ Remove the protective razor head cap from the razor before charging or for its intended household use as described in this manual. 1 Place the Jet Clean System on a flat lines located inside the canister. NOTE: ONLY USE PHILIPS NORELCO JET CLEAN SOLUTION (MODEL HQ200) WITH THE - Philips 1280X | User manual - Page 16
, level surface. Fill the canister with cleaning solution (see 'Preparing Jet Clean System For Use'). ENGLISH 31 C 3 Remove protective razor head cap from razor. C 4 Place the razor head side down in the razor holder with the display facing the front of the Jet Clean System. C 5 Press the razor - Philips 1280X | User manual - Page 17
32 ENGLISH C 8 The cleaning light starts to blink and the razor is automatically lowered into the cleaning solution. The razor stops charging while it is being cleaned. ◗ The cleaning cycle takes 4 to 6 minutes. For model 1280XCC only, the intensive program takes approximately 35 minutes. ◗ During - Philips 1280X | User manual - Page 18
you pull it off the razor. C 3 Using your thumb and forefinger, grasp the sides of the shaving head near the center of the shaving unit and pull each individual shaving head open. 1 C 4 Press the retainer release tab (1) until the retainer opens (2). 2 C 5 Remove the cutter from the comb. Do - Philips 1280X | User manual - Page 19
36 ENGLISH C 2 12 Insert the notch of the shaving unit into the slot in the top of the razor (1).Then press the shaving unit down (2) to attach it 1 to the razor.You will hear a 'click'. Cleaning the Trimmer Clean the trimmer after each use. 1 Press the trimmer slide forward to slide out - Philips 1280X | User manual - Page 20
or worn razor heads with model RQ12 Philips Norelco razor heads only. ◗ The individual shaving heads (cutters and combs) are NOT replaceable. Only the one-piece shaving unit can be replaced. Replacement Razor Head Assembly Indication C ◗ The replacement head indicator symbol starts MINUTES - Philips 1280X | User manual - Page 21
RQ12 - For maximum razor performance, replace your Philips Norelco razor heads once a year. ◗ Shaving Head Cleaning Spray HQ110 - Philips Norelco Shaving Head Cleaning Spray ◗ Cleaning Solution HQ200 - Philips Norelco Jet Clean Solution, 10 fl. oz. /300 ml. ◗ Philips Norelco Razor Accessories may be - Philips 1280X | User manual - Page 22
America Corporation warrants each new Philips Norelco Product, Models 1290X/1280X/1280XCC/1260X/1250X/1250XCC (except cutters and combs) against defects in materials or workmanship for a period of two years from the date of purchase, and agrees to repair or replace any defective product without
-
 1
1 -
 2
2 -
 3
3 -
 4
4 -
 5
5 -
 6
6 -
 7
7 -
8
-
9
-
10
-
11
-
12
-
13
-
14
-
15
-
16
-
17
-
18
-
19
-
20
-
21
-
22
 |
 |

1290X
1280X
1280XCC
1260X
1250X
1250XCC
Rechargeable Cordless
Tripleheader Razor
Register your product and get support at
www.philips.com/norelco
(Model 1290X Shown)